

There is something magical about the moment your friends gather around the kitchen island, wine glasses in hand, as the golden afternoon light spills across the counter. We’ve all felt that frantic rush of trying to time five different dishes to be hot at once, but lately, I’ve found a better way to host. The ‘viral food board’ isn’t just about cheese and crackers anymore; it’s about creating a communal, effortless feast that lets the host actually enjoy the party.
Imagine a massive wooden board overflowing with zesty spring chicken, bowls of glossy pasta, and vibrant salads that look like a Dutch still-life painting. It’s an invitation to linger, to pick, and to savor every bite without the formality of a seated dinner. This trend has completely transformed the way I entertain, turning a simple meal into a shared sensory experience that people talk about for weeks.
How to cook spring chicken?

Why we love this
This spring chicken is the ultimate centerpiece for a communal board, offering a skin so golden and crisp it crackles under the knife, revealing meat that is incredibly tender and infused with the bright, zesty aroma of Meyer lemons and fresh thyme. As it roasts, the scent of garlic and melted butter fills the house, creating a warm, inviting atmosphere that promises a soul-warming meal. The contrast between the salty, herb-rubbed skin and the succulent, juice-filled interior makes every bite a celebration of the new season’s freshness.
Ingredients
- 1 whole organic chicken (approx. 4 lbs)
- 4 tablespoons unsalted butter, softened
- 2 tablespoons fresh thyme, chopped
- 1 large Meyer lemon, sliced into rounds
- 6 cloves of garlic, smashed
- Kosher salt and freshly cracked black pepper
- 2 tablespoons extra virgin olive oil
How to make it
- Begin by preheating your oven to 425°F (218°C). A high temperature is crucial for rendering the fat and achieving that signature shatteringly crisp skin.
- Spatchcock the chicken by using kitchen shears to remove the backbone; press down firmly on the breastbone until it cracks and the chicken lies flat. This technique ensures even cooking and maximum skin exposure to the heat.
- Pat the skin completely dry with paper towels. Any moisture left on the skin will steam rather than crisp, so be thorough.
- In a small bowl, mash together the softened butter, chopped thyme, salt, and pepper. Carefully lift the skin over the breast and thighs and rub half of the herb butter directly onto the meat. Rub the remaining butter and olive oil over the exterior of the skin.
- Place the lemon rounds and smashed garlic cloves on a rimmed baking sheet, and lay the chicken directly on top of them. This creates a natural roasting rack and infuses the underside with citrus aromatics.
- Roast for 45-55 minutes. You are looking for an internal temperature of 165°F (74°C) in the thickest part of the thigh. The skin should be a deep mahogany gold.
- Let the chicken rest for at least 15 minutes before carving. This allows the juices to redistribute, ensuring the meat stays moist when it hits the board.
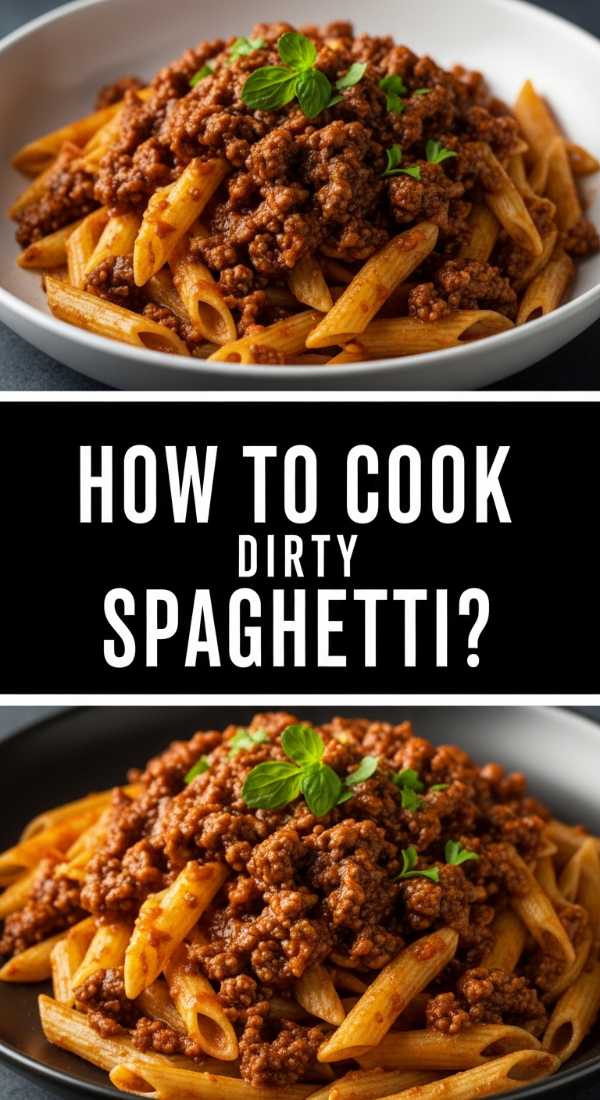
How to cook dirty spaghetti?
Why we love this
Dirty spaghetti is the rebellious, flavor-packed cousin of your standard marinara, boasting a deep, umami-rich profile that comes from browning the noodles and incorporating savory elements like chicken livers or finely ground sausage. The texture is a revelation—slightly chewy with crispy edges where the pasta has kissed the hot pan, all coated in a glossy, dark sauce that smells of toasted garlic and caramelized onions. It’s a rustic, comforting dish that feels grounded and sophisticated all at once, perfect for guests who crave something bold and unexpected.
Ingredients
- 1 lb spaghetti noodles
- 1/2 lb ground spicy Italian sausage or finely minced chicken livers
- 4 tablespoons butter
- 4 cloves garlic, minced
- 1 teaspoon red pepper flakes
- 1/2 cup grated Pecorino Romano
- Fresh parsley for garnish
- Reserved pasta water
How to make it
- Boil a large pot of heavily salted water. Cook the spaghetti until it is just shy of al dente—about 2 minutes less than the package instructions. Do not discard the water; it contains the starch needed for the sauce.
- While the pasta boils, heat a large cast-iron skillet over medium-high heat. Add the sausage (or livers) and cook until deeply browned and slightly crispy. Remove the meat but leave the rendered fat in the pan.
- Add the butter to the skillet and let it foam. Once the foam subsides and the butter begins to smell nutty, add the minced garlic and red pepper flakes, sautéing for only 30 seconds to avoid burning the garlic.
- Transfer the undercooked spaghetti directly from the water into the skillet using tongs. Increase the heat to high.
- Allow the pasta to sit undisturbed for about 60 seconds so it can sear and develop “dirty” brown spots. Toss and repeat.
- Pour in 1 cup of the reserved pasta water and the cooked meat. Stir vigorously as the water evaporates and emulsifies with the butter and fat to create a glossy, dark coating.
- Remove from heat, shower with Pecorino Romano, and toss until creamy. Serve immediately with a sprinkle of fresh parsley.
How to make summer salad?

Why we love this
A true summer salad should feel like a cool breeze on a humid July evening, featuring the crunch of snap peas, the sweetness of sun-ripened peaches, and the creamy indulgence of torn burrata. The aroma is dominated by fresh mint and basil, which provide a cooling sensation that perfectly balances the tangy acidity of a white balsamic vinaigrette. Every forkful offers a symphony of textures—from the juicy fruit to the silky cheese—making it a refreshing palate cleanser that brings a vibrant pop of color to your food board.
Ingredients
- 2 cups baby arugula
- 2 ripe peaches, sliced into wedges
- 1 ball of fresh burrata cheese
- 1/4 cup toasted pistachios
- Fresh mint and basil leaves
- 3 tablespoons extra virgin olive oil
- 1 tablespoon white balsamic vinegar
- Flaky sea salt
How to make it
- In a small jar, whisk together the olive oil and white balsamic vinegar with a pinch of salt until fully emulsified. This light dressing won’t overpower the delicate fruit.
- Lay the baby arugula as a base on a wide, shallow platter. This allows for better distribution of toppings compared to a deep bowl.
- Nestle the peach wedges into the greens. If the peaches are very firm, you can quickly sear them on a grill pan for 1 minute per side to caramelize their sugars.
- Place the burrata ball in the center and gently tear it open with two forks, allowing the creamy stracciatella center to ooze out over the peaches.
- Scatter the toasted pistachios over the top for a necessary salty crunch.
- Tear the mint and basil by hand rather than chopping with a knife; this prevents the herbs from bruising and turning black.
- Drizzle the dressing over the entire salad just seconds before serving to prevent the arugula from wilting. Finish with a generous sprinkle of flaky sea salt.
How to make spring pasta?

Why we love this
Spring pasta is a celebration of greenery, featuring a light, velvety sauce that coats delicate shapes like orecchiette or fusilli without weighing them down. The scent is herbaceous and bright, thanks to a heavy hand of lemon zest and the sweet, earthy aroma of blanched peas and tender asparagus tips. It feels like a garden on a plate, with a silky mouthfeel that comes from a perfect emulsion of pasta water, high-quality olive oil, and a touch of goat cheese that adds a sophisticated tang.
Ingredients
- 1 lb orecchiette pasta
- 1 cup frozen or fresh sweet peas
- 1 bunch thin asparagus, cut into 1-inch pieces
- 4 oz soft goat cheese
- Zest and juice of 1 lemon
- 1/4 cup fresh dill, chopped
- 2 tablespoons pine nuts, toasted
How to make it
- Cook the pasta in a large pot of boiling salted water. During the last 3 minutes of cooking time, add the asparagus pieces and peas directly into the boiling pasta water. This blanches the vegetables perfectly without needing a second pot.
- Before draining, reserve 1.5 cups of the starchy pasta water. Drain the pasta and vegetables.
- In the same warm pot (off the heat), crumble in the goat cheese and add the lemon juice and half of the reserved pasta water. Whisk until a smooth, thin paste forms.
- Add the pasta and vegetables back into the pot. Turn the heat to low and toss gently.
- Gradually add more pasta water as needed while stirring. The goat cheese will melt into the water, creating a light, creamy sauce that clings to the “ears” of the orecchiette.
- Fold in the lemon zest and fresh dill. The residual heat will release the oils in the zest, making the dish incredibly fragrant.
- Plate the pasta and top with toasted pine nuts for a buttery finish and a bit of textural contrast.
How to bake strawberry pie?

Why we love this
There is nothing quite like the smell of a strawberry pie cooling on a windowsill, its golden-brown lattice crust bubbling with thick, ruby-red juices that smell like pure summer. The crust is incredibly flaky and buttery, providing a savory counterpoint to the jammy, concentrated sweetness of the roasted strawberries inside. Each slice is a balance of textures—the snap of the pastry and the soft, yielding fruit—best enjoyed warm with a melting scoop of vanilla bean ice cream that swirls into the fruit juices.
Ingredients
- 2 1/2 cups all-purpose flour
- 1 cup cold unsalted butter, cubed
- 1 teaspoon salt
- 1/4 to 1/2 cup ice water
- 5 cups fresh strawberries, hulled and halved
- 3/4 cup granulated sugar
- 1/4 cup cornstarch
- 1 tablespoon lemon juice
- 1 egg (for egg wash)
How to make it
- Make the crust by pulsing flour, salt, and cold butter in a food processor until it resembles coarse crumbs. Gradually add ice water until the dough just holds together. Divide into two discs, wrap in plastic, and chill for at least 1 hour.
- Preheat your oven to 400°F (200°C). Chilling the dough and then hitting it with high heat is the secret to a flaky crust.
- In a large bowl, toss the strawberries with sugar, cornstarch, and lemon juice. Let them sit for 15 minutes to macerate; the cornstarch is vital here to thicken the juices so the pie isn’t runny.
- Roll out the first disc of dough and line a 9-inch pie plate. Fill with the strawberry mixture.
- Roll out the second disc and cut into strips to create a lattice top. Weaving the strips allows steam to escape, which keeps the bottom crust from getting soggy.
- Crimp the edges tightly. Brush the lattice with a beaten egg and sprinkle with a little extra sugar for a sparkling, professional finish.
- Bake for 45-55 minutes. If the edges brown too quickly, cover them with foil. The pie is done when the fruit filling is bubbling thick bubbles in the center.
- Crucially, let the pie cool for at least 3 hours before slicing. This allows the starch to set the filling into a sliceable consistency.
How to make rotel dip?

Why we love this
Rotel dip is the ultimate nostalgic crowd-pleaser, a molten pool of creamy, cheesy goodness spiked with the mild heat of green chilies and savory tomatoes. The texture is irresistibly smooth and thick, perfect for clinging to a salty tortilla chip, while the aroma of melted cheese and spiced meat draws everyone to the board instantly. It’s the kind of dish that disappears in minutes, offering a satisfying, salty-spicy kick that anchors the more delicate items on your spread with its bold, unapologetic heartiness.
Ingredients
- 1 lb Velveeta or high-quality melting cheese, cubed
- 1 can (10 oz) Ro-Tel Diced Tomatoes and Green Chilies, undrained
- 1 lb ground beef or breakfast sausage
- 1 teaspoon cumin
- 1/2 teaspoon garlic powder
- Fresh cilantro for garnish
How to make it
- In a medium skillet over medium-high heat, brown the ground beef or sausage until no pink remains. Use a wooden spoon to break the meat into very small crumbles to ensure even distribution in the dip.
- Drain the excess grease thoroughly. Grease can prevent the cheese from emulsifying properly, leading to a grainy texture.
- Turn the heat down to low. Add the cubed cheese and the entire can of Ro-Tel (including the juices).
- Stir continuously with a heat-resistant spatula. Using low heat is essential; if the cheese gets too hot too fast, it will separate and become oily.
- Add the cumin and garlic powder to enhance the savory depth of the canned tomatoes.
- Once the mixture is completely smooth and bubbling gently, transfer it to a small slow cooker on the “warm” setting or a heavy ceramic bowl.
- Garnish with fresh cilantro just before placing it on your board to provide a burst of color and freshness against the rich cheese.
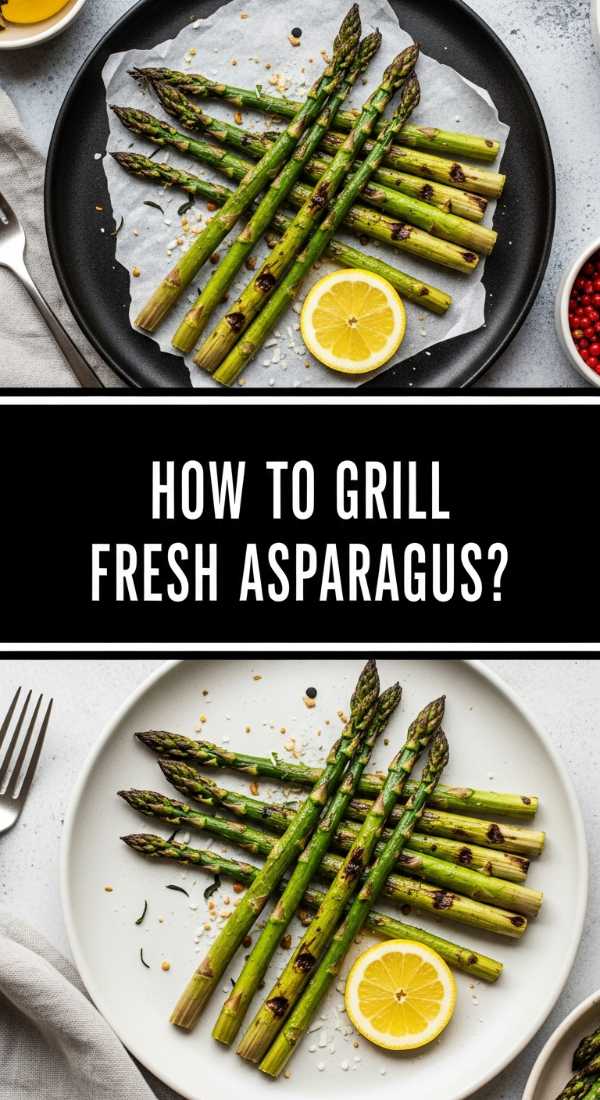
How to grill fresh asparagus?
Why we love this
Grilled asparagus takes a simple vegetable and transforms it into a smoky, char-flecked delicacy that retains a satisfying, crisp-tender snap. The high heat of the grill caramelizes the natural sugars in the stalks, creating a complex flavor profile that is elevated by a finishing drizzle of lemon and a shower of salty parmesan. The aroma of charring wood or charcoal mixed with the earthy scent of the greens is the quintessential smell of outdoor cooking, making these spears an elegant and essential addition to any summer board.
Ingredients
- 1 lb fresh asparagus, woody ends trimmed
- 2 tablespoons olive oil
- 1/2 teaspoon kosher salt
- 1/4 teaspoon black pepper
- 1/2 lemon (for squeezing)
- Optional: Shaved parmesan cheese
How to make it
- Preheat your grill to medium-high heat (about 400°F). Ensure the grates are clean and lightly oiled to prevent sticking.
- Prepare the asparagus by snapping off the woody bottom inch of each spear. They will naturally break at the point where the stalk becomes tender.
- Toss the spears in a bowl with olive oil, salt, and pepper. Make sure each spear is evenly coated; the oil acts as a heat conductor for even charring.
- Place the asparagus across the grill grates perpendicularly so they don’t fall through.
- Grill for 3-5 minutes, rolling the spears occasionally with tongs. You are looking for distinct grill marks and a vibrant green color that has just started to soften.
- Check for doneness by piercing the thickest part of a spear with a fork; it should go in with just a little resistance. Avoid overcooking, as asparagus can become mushy very quickly.
- Remove from the grill and immediately squeeze fresh lemon juice over the hot spears. The heat will help the lemon juice penetrate the vegetable. Top with parmesan shavings if desired.
How to make pea salad?

Why we love this
Pea salad is a masterclass in contrasting textures—the pop of sweet, chilled peas, the crunch of red onion, and the crispy saltiness of bacon bits all held together by a tangy, creamy dressing. It has a nostalgic, potluck-style charm that feels both humble and incredibly satisfying, with the sharp bite of cheddar cheese cubes providing a creamy richness in every mouthful. The scent is fresh and clean, making it a perfect side dish to cut through the heavier grilled meats on your food board.
Ingredients
- 4 cups frozen peas, thawed and drained
- 1/2 cup red onion, finely diced
- 1 cup sharp cheddar cheese, cut into small cubes
- 6 slices bacon, cooked and crumbled
- 1/2 cup mayonnaise
- 1/4 cup sour cream
- 1 tablespoon apple cider vinegar
- 1 teaspoon sugar
- Salt and pepper to taste
How to make it
- Ensure your peas are completely thawed and, most importantly, patted dry. Any residual water will thin out the dressing and make the salad soggy.
- In a small bowl, whisk together the mayonnaise, sour cream, apple cider vinegar, and sugar. This combination provides a balance of richness, tang, and a hint of sweetness that complements the peas.
- In a large mixing bowl, combine the dried peas, diced red onion, and cheddar cheese cubes.
- Fold in the dressing gently using a rubber spatula until everything is evenly coated.
- Add the crumbled bacon last. If you add it too early and let the salad sit, the bacon will lose its crunch.
- Season with salt and plenty of black pepper. The peas and cheese are salty, so taste before adding more salt.
- Refrigerate for at least 1 hour before serving. This chilling time is vital for the flavors to meld and for the dressing to thicken slightly.
How to make dandelion tea?

Why we love this
Dandelion tea is a grounding, earthy brew that offers a gentle bitterness reminiscent of chicory or light coffee, making it a sophisticated palate cleanser after a rich meal. The aroma is toasted and floral, with a deep golden hue that looks beautiful when served in clear glass mugs on your board. It’s a drink that connects you to the land, turning what many consider a weed into a healthful, detoxifying tonic that feels incredibly intentional and artisanal when served with a wedge of lemon or a drop of local honey.
Ingredients
- 1 cup fresh dandelion roots (cleaned and chopped) or 2 tablespoons dried dandelion root
- 2 cups filtered water
- 1 cinnamon stick (optional)
- Honey or lemon to taste
How to make it
- If using fresh roots, harvest them from an area free of pesticides. Scrub them thoroughly under cold water to remove all dirt.
- Finely chop the roots and spread them on a baking sheet. Roast them in a 300°F (150°C) oven for 30-40 minutes until they are dark brown and smell nutty. This roasting step is what transforms the bitter root into a tea with coffee-like depth.
- Place the roasted roots (or dried roots) into a small saucepan with 2 cups of water and a cinnamon stick.
- Bring the water to a boil, then immediately reduce the heat to low. Simmer for about 10-15 minutes. This decoction method extracts the maximum flavor and nutrients from the tough roots.
- Remove from heat and let it steep for another 5 minutes to settle the fine particles.
- Strain the tea through a fine-mesh sieve or a coffee filter into a teapot or mugs.
- Serve hot with a teaspoon of honey to balance the natural bitterness, or pour over ice for a refreshing herbal summer drink.
How to marinate grilled chicken?

Why we love this
A properly marinated grilled chicken is a revelation of flavor, featuring a deeply seasoned exterior that gives way to meat so juicy it practically melts. The marinade—a blend of bright citrus, pungent garlic, and earthy herbs—not only infuses the chicken with flavor but also acts as a tenderizer, ensuring that even the leanest breast meat stays moist over the high heat of the flames. The smell of the marinade hitting the hot grates creates an intoxicating cloud of caramelized sugar and charred herbs that defines the experience of summer grilling.
Ingredients
- 1.5 lbs chicken thighs or breasts
- 1/4 cup extra virgin olive oil
- 1/4 cup soy sauce (for umami)
- Juice of 2 limes
- 4 cloves garlic, minced
- 1 tablespoon honey
- 1 teaspoon smoked paprika
- 1/2 teaspoon cumin
How to make it
- In a gallon-sized resealable bag or a shallow glass dish, combine the olive oil, soy sauce, lime juice, garlic, honey, and spices. Whisk until the honey is fully dissolved.
- Use a fork to prick the surface of the chicken multiple times. This creates pathways for the marinade to penetrate deep into the muscle fibers rather than just sitting on the surface.
- Place the chicken in the marinade, ensuring every piece is fully submerged. Seal the bag, pressing out as much air as possible to maximize surface contact.
- Refrigerate for at least 2 hours, but no longer than 8 hours. Because of the lime juice (acid), marinating for too long can actually start to “cook” the chicken and turn the texture mushy.
- Remove the chicken from the fridge 20 minutes before grilling to take the chill off; this ensures the meat cooks evenly throughout.
- Preheat your grill to medium-high. Scrape the grates clean.
- Grill the chicken for 6-7 minutes per side. Do not move the chicken once it hits the grill; let it develop a proper sear so it releases naturally from the grates. The honey in the marinade will caramelize quickly, so watch for flare-ups.
- Internal temperature should reach 165°F (74°C). Rest for 10 minutes before slicing to keep the moisture locked in.
The Magic of the Shared Board
Building a food board is more than just a culinary trend; it’s a lifestyle shift toward slower, more meaningful gatherings. By preparing these diverse dishes—from the smoky grilled chicken to the sweet strawberry pie—and laying them out for guests to explore at their own pace, you remove the barriers of a traditional meal. It’s about the laughter shared over a bowl of pea salad and the communal joy of breaking bread together. So, clear your table, grab your largest platter, and let the food be the bridge to your next great memory.
Frequently Asked Questions
- Can I make these dishes ahead of time? Yes! The pea salad and dandelion tea actually benefit from being made in advance. The chicken and pasta are best served fresh, but you can prep all the ingredients hours before your guests arrive.
- How do I keep the food board looking fresh? Use small bowls for wetter items like the Rotel dip and summer salad to prevent juices from running. Add fresh herb garnishes right at the end to provide a pop of green.
- What if I have guests with dietary restrictions? The beauty of a board is its modularity. Keep the cheese and bacon on the side for salads, or offer a gluten-free pasta option in a separate corner of the spread.