
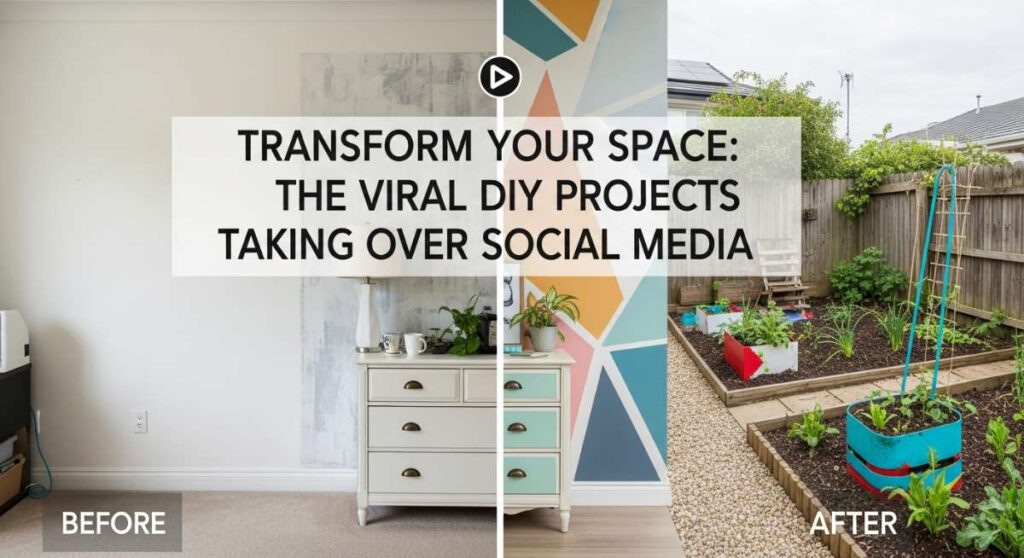
Transform Your Space: The Viral DIY Projects Taking Over Social Media
Have you ever scrolled through your feed and felt that sudden, magnetic pull toward a beautiful home transformation? There is something incredibly soul-satisfying about taking a space that feels ‘just fine’ and turning it into a sanctuary that reflects your personality. It’s not just about the aesthetics; it’s about the feeling of peace when you walk through the door and the quiet pride of knowing you created that magic with your own two hands.
Lately, my social media has been exploding with DIY projects that are surprisingly approachable yet look like they belong in a high-end design magazine. Whether you’re looking to boost your curb appeal or create a cozy retreat in your backyard, these viral trends are all about intentional living. Today, I’m sharing my favorite picks that will help you fall in love with your home all over again, one project at a time.
How to Transform Your Curb Appeal for an Instant Home Glow Up
Why we love this
There is nothing quite like the sensory experience of arriving at a home that feels truly loved. Imagine the crisp, clean scent of freshly laid dark mulch contrasting against vibrant green lawn edges, and the smooth, tactile finish of a freshly painted front door in a bold, welcoming hue. When the sunlight hits the new brass hardware and the solar lanterns cast a warm, flickering glow along the walkway, it creates an inviting atmosphere that beckons you inside. It’s a complete sensory reset that makes every homecoming feel like a special occasion.
Essential Elements:
- High-quality exterior paint in a statement color
- New modern house numbers and door hardware
- Premium dark wood mulch or cedar chips
- Steel or stone garden edging
- Pathway lighting (Solar or Low-voltage)
- A power washer
How to make it
- Deep Clean: Begin by power washing your driveway, walkway, and the exterior of your home. Use a wide-angle nozzle to avoid damaging wood or siding, focusing on removing years of built-up grime and mildew until the surfaces look bright and new.
- The Front Door Refresh: Sand down your front door to remove imperfections. Apply a high-quality exterior primer followed by two coats of a weather-resistant semi-gloss paint. Choose a color that pops, like deep navy, sage green, or classic black, ensuring you allow 4 hours of drying time between coats.
- Hardware Upgrade: Replace dated, tarnished locks and handles with sleek, modern matte black or brushed brass hardware. Ensure the new plates cover any old screw holes for a seamless, professional look.
- Edging and Mulching: Use a spade or a mechanical edger to create a sharp, 3-inch deep trench between your lawn and garden beds. Fill the beds with a 2-to-3-inch layer of premium mulch, which suppresses weeds and provides a rich, dark backdrop for your plants.
- Lighting Installation: Space solar pathway lights evenly along your main walkway, about 4 feet apart. Aim for a staggered pattern to create depth and eliminate shadows, providing a safe and magical glow for evening arrivals.
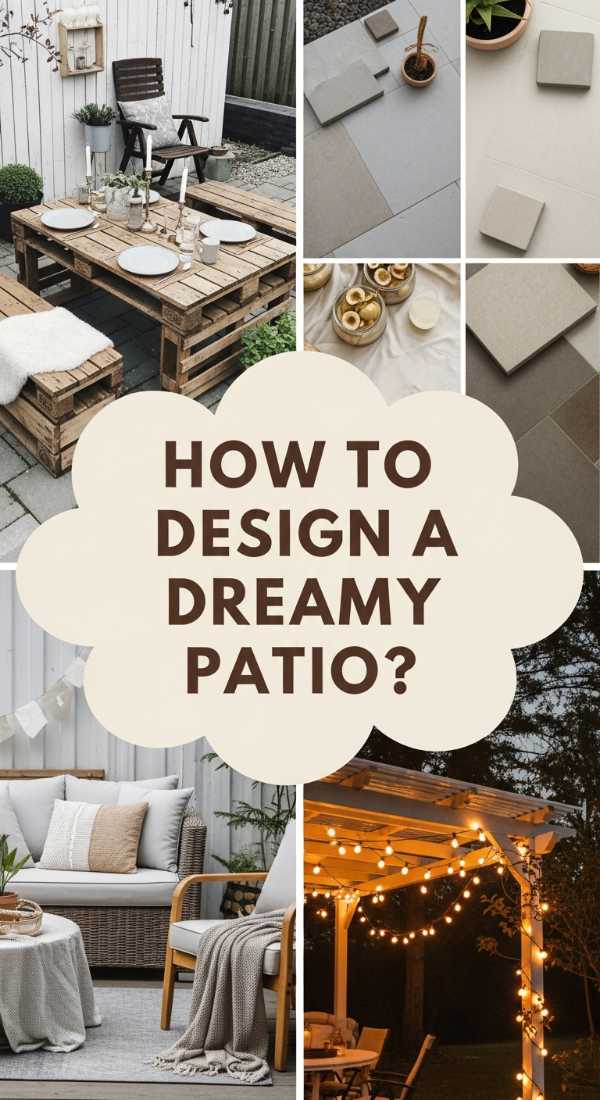
How to Design a Dreamy Patio for Peaceful Outdoor Living
Why we love this
A well-designed patio is more than just an outdoor space; it’s an emotional escape that mimics the luxury of a Mediterranean resort. Picture yourself sinking into plush, weather-resistant cushions while the gentle hum of a nearby water feature provides a soothing soundtrack to your evening. The air is filled with the faint, sweet aroma of jasmine or lavender, and the soft flicker of overhead string lights creates a golden canopy that feels intimate and safe. It’s the perfect spot for morning coffee or late-night conversations under the stars.
Essential Elements:
- Outdoor area rug with a bold geometric or natural weave
- Comfortable sectional seating or Adirondack chairs
- Weatherproof throw pillows and blankets
- Festoon or Edison-style string lights
- Large ceramic planters in varying heights
- A propane or wood-burning fire pit
How to make it
- Define the Zone: Lay down a large outdoor rug to anchor the space. This visually separates the patio from the rest of the yard and adds a soft texture underfoot that makes the area feel like an outdoor living room.
- Structural Seating: Arrange your main seating pieces facing a central focal point, like a fire pit or a beautiful view. Leave at least 18 inches of space between furniture for comfortable traffic flow.
- Layering Textiles: Add comfort with high-denier polyester pillows. Choose a mix of patterns and solid colors to create visual interest. Keep a basket of rolled-up outdoor blankets nearby for chilly evenings.
- Ambient Lighting: String Edison bulbs across the space using shepherd’s hooks or by attaching them to the eaves of the house. Ensure the lights have a slight swag for a relaxed, casual aesthetic, and use a dimmer switch if possible to control the mood.
- Greenery and Privacy: Place large planters filled with tall grasses or evergreens around the perimeter. This not only adds lush color but also acts as a natural privacy screen from neighbors.
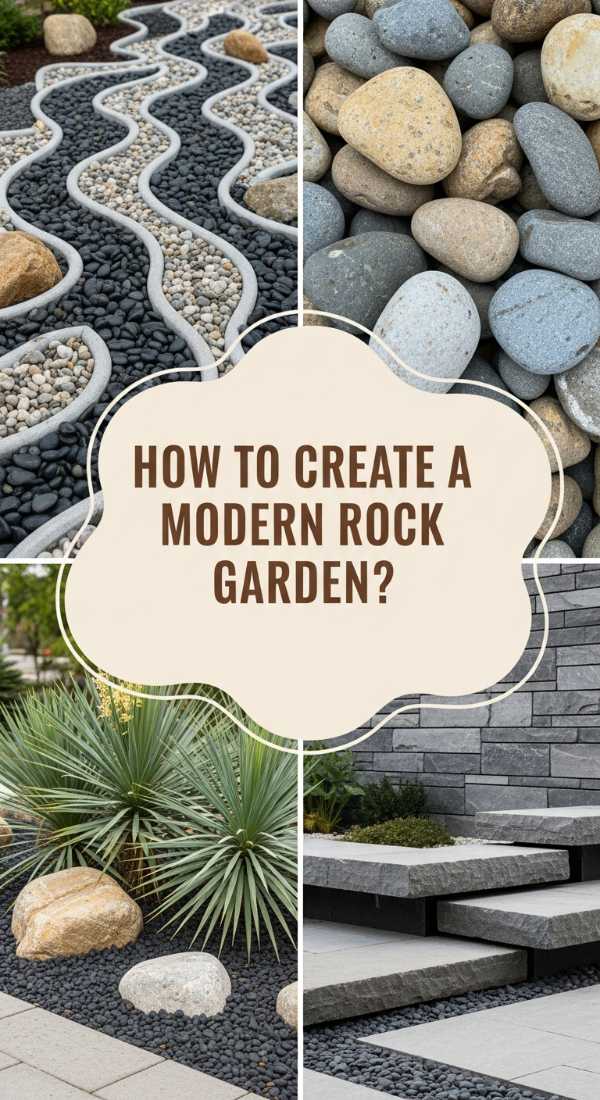
How to Create a Modern Rock Garden for Low Maintenance Elegance
Why we love this
There is a profound sense of Zen that comes from the minimalist beauty of a rock garden. The visual rhythm of smooth river stones paired with the architectural sharp lines of slate creates a canvas that feels both grounded and sophisticated. You can almost feel the coolness of the stones and hear the crunch of gravel underfoot, providing a tactile connection to the earth. It’s a sanctuary of stillness where the lack of clutter allows the mind to rest, punctuated only by the occasional pop of a hardy succulent or a burst of ornamental grass.
Essential Elements:
- Heavy-duty landscape fabric
- Galvanized steel landscape edging
- Variety of stones (River rock, pea gravel, and large boulders)
- Drought-tolerant plants (Agave, Blue Fescue, or Sedum)
- Landscape pins
How to make it
- Ground Prep: Clear the area of all weeds and grass. Level the soil using a hard rake to ensure a flat foundation, which prevents stones from shifting unevenly over time.
- Fabric Barrier: Lay down professional-grade landscape fabric across the entire area, overlapping the seams by at least 6 inches. Secure it firmly with landscape pins every 12 inches to prevent weeds from poking through.
- Install Edging: Secure galvanized steel edging around the perimeter. This keeps the stones contained and prevents them from migrating into the lawn or walkways.
- Strategic Planting: Cut ‘X’ shapes into the fabric where you want your plants to go. Dig small holes, plant your succulents or grasses, and tuck the fabric back around the base of the plant.
- Layering Stones: Distribute your base layer of gravel or river rock, aiming for a depth of 2 to 3 inches. Finish the look by placing 3-5 large ‘anchor’ boulders in asymmetrical clusters of odd numbers to mimic a natural mountain landscape.
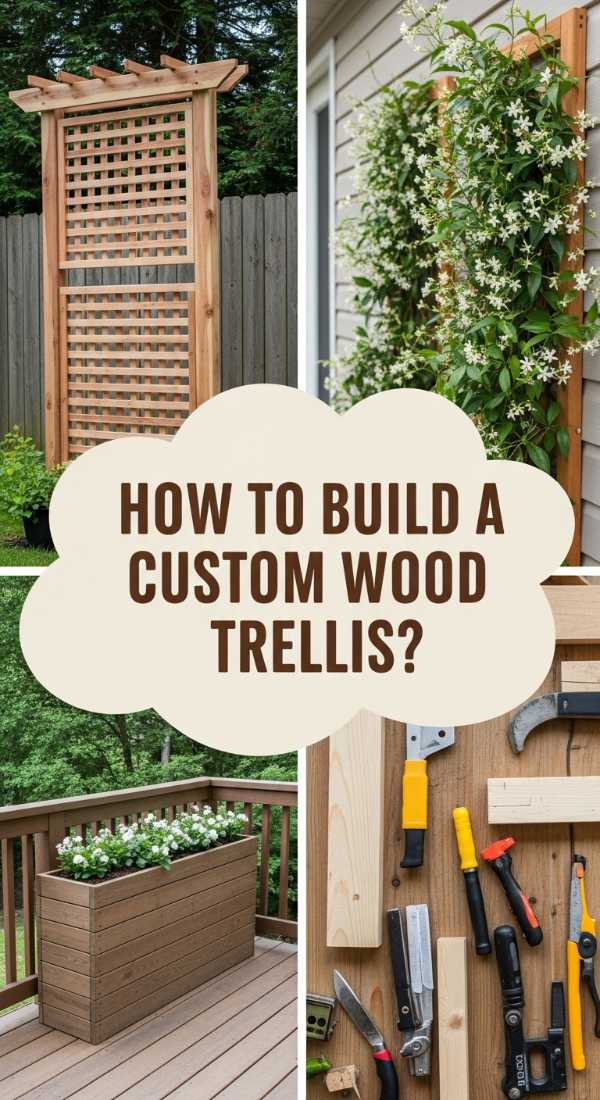
How to Build a Custom Wood Trellis for Lush Climbing Vines
Why we love this
A trellis brings a vertical dimension to the garden that feels like a living work of art. Imagine the delicate tendrils of clematis or star jasmine winding their way upward, their green leaves contrasting beautifully against the warm, honey-toned cedar wood. The scent of blooming flowers at eye level is intoxicating, and the way the shadows of the lattice play across the ground as the sun moves is mesmerizing. It transforms a flat wall into a lush, three-dimensional tapestry that changes with the seasons.
Essential Elements:
- Pressure-treated or cedar 2×2 and 1×2 lumber
- Exterior-grade wood screws
- Wood stain or sealant
- Electric drill and miter saw
- Climbing plants (Wisteria, Honeysuckle, or Climbing Roses)
How to make it
- Frame Construction: Cut two 2×2 boards to your desired height (usually 6-7 feet). Lay them parallel on a flat surface, spaced about 24 inches apart.
- Lattice Work: Cut 1×2 boards into horizontal slats. Attach them across the 2×2 frame using wood screws, spacing them 8 to 10 inches apart for a modern, open look. If you prefer a traditional diamond pattern, install slats at a 45-degree angle.
- Finish and Protect: Sand the wood to remove splinters. Apply a coat of exterior wood stain or a clear UV-protector to prevent the wood from graying and rotting in the elements.
- Mounting: Attach the trellis to a fence or wall using spacers. These spacers are crucial; they create a 2-inch gap between the trellis and the wall, allowing air to circulate and providing room for vines to wrap around the slats.
- Planting and Training: Plant your vine at the base of the trellis. Gently weave the main stems through the lower slats and secure them loosely with garden twine to encourage the plant to grow upward.
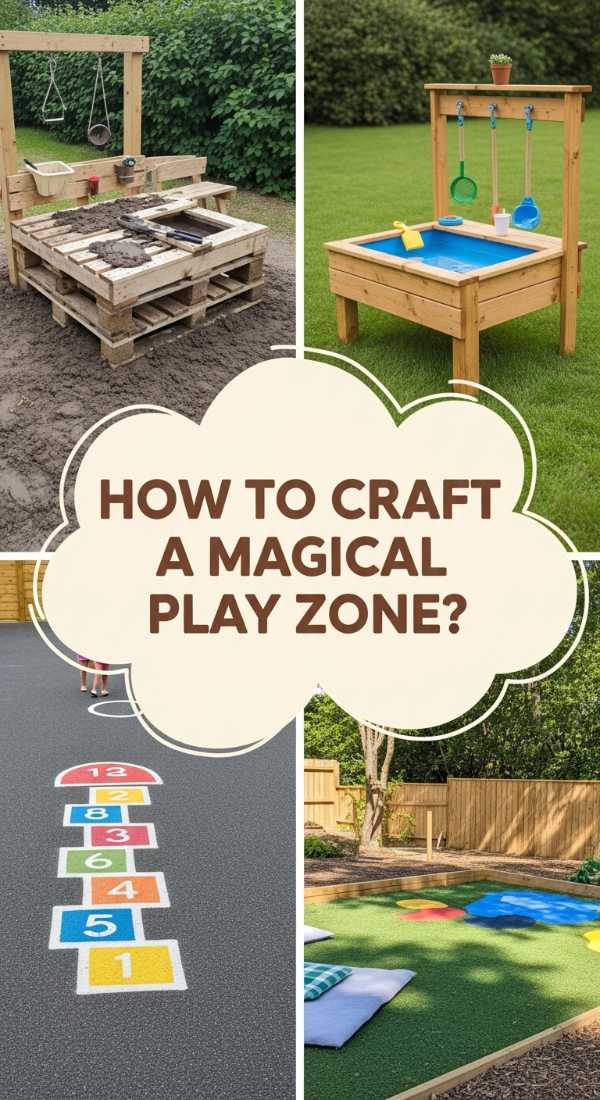
How to Craft a Magical Play Zone for Creative Outdoor Fun

Why we love this
A magical play zone is a portal back to the wonder of childhood, designed to spark the imagination and get little hands busy. Think of the soft, earthy feel of a cedar-chip floor under bare feet and the whimsical sight of colorful bunting fluttering in the breeze. The air is filled with giggles and the woody scent of a DIY mud kitchen, where “mud pies” are decorated with fallen petals and smooth pebbles. It’s a dedicated space where the digital world disappears, replaced by the tactile joy of outdoor discovery and creative roleplay.
Essential Elements:
- Cedar wood chips or rubber mulch for safety surfacing
- Recycled wooden pallets or a small playhouse frame
- Outdoor chalkboard paint
- Stainless steel bowls and old kitchen utensils
- Weatherproof bunting and solar fairy lights
How to make it
- Safety First: Excavate a 4-inch deep area for the play zone. Fill it with certified playground-grade cedar chips to provide a soft landing surface that drains well after rain.
- The Mud Kitchen: Build a simple counter using recycled pallets. Sink two stainless steel bowls into the top to serve as “sinks.” Add hooks on the side for spoons and spatulas, creating a functional and rustic culinary station.
- Art Station: Paint a piece of plywood with three coats of outdoor-rated chalkboard paint. Mount it at child-height on a fence or the side of the playhouse to encourage vertical drawing and fine motor skills.
- Interactive Elements: Install a “sensory bin” filled with smooth river stones or sand. Add a small pulley system with a bucket to teach basic physics through play.
- Finishing Touches: String solar fairy lights around the perimeter and hang colorful fabric bunting. This defines the space as a “special zone” and makes it look like a storybook setting.
How to Style a Backyard Pool Oasis for Tropical Vacation Vibes

Why we love this
When you style a pool oasis, you aren’t just decorating; you’re curating an atmosphere of total relaxation and luxury. Imagine the shimmering turquoise water reflecting the bright green of oversized palm fronds, and the feeling of a soft, cotton Turkish towel against your skin. The air smells like coconut sunblock and fresh citrus, while the sound of water gently lapping against the tile creates a rhythmic, hypnotic calm. It’s the ultimate staycation where every detail, from the fringe on the umbrellas to the chill of a glass of iced tea, makes you feel like you’ve been transported to a five-star resort.
Essential Elements:
- Striped or fringed patio umbrellas
- Teak or resin chaise lounges
- Oversized tropical plants (Bird of Paradise or Hibiscus)
- Outdoor speakers
- High-quality Turkish cotton towels
- A stylish outdoor rolling bar cart
How to make it
- Symmetry in Seating: Arrange chaise lounges in pairs along the long side of the pool. Use consistent colors for cushions to create a clean, high-end hotel aesthetic.
- Lush Layering: Group large potted palms at the corners of the pool deck. The height of the plants provides shade and creates a “jungle-chic” vibe that masks nearby fences or structures.
- The Refreshment Station: Set up a rolling bar cart stocked with acrylic glassware, a galvanized ice bucket, and infused water. This keeps guests hydrated without the need to drip water through the house.
- Shade Solutions: Place large umbrellas between pairs of lounges. Ensure the bases are heavy (at least 50 lbs) to prevent tipping during wind gusts. Choose umbrellas with tilt functions to block the sun as it moves.
- Nighttime Ambiance: Place floating LED pool lights in the water and add uplighting to the base of your tropical plants. This creates a dramatic, layered lighting effect that makes the pool area stunning after dark.
How to Achieve an Organized Pantry for Total Kitchen Peace
Why we love this
An organized pantry is a gift you give to your future self every single day. There is a deep, quiet satisfaction in opening a door to see uniform glass jars filled with colorful grains, the clean lines of hand-written labels, and the orderly stacks of woven baskets. You can smell the faint, pleasant aroma of dried herbs and toasted nuts, and the tactile click of an airtight lid sealing shut provides a small hit of dopamine. It turns the chaotic chore of cooking into a streamlined, peaceful ritual where everything you need is exactly where it should be.
Essential Elements:
- Glass or BPA-free plastic airtight canisters
- Woven or wire baskets for bulk items
- A label maker or vinyl stickers
- Tiered shelf risers for canned goods
- A lazy Susan for oils and vinegars
How to make it
- The Great Purge: Empty the entire pantry. Check expiration dates and donate items you know you won’t use. Clean the shelves thoroughly with a microfiber cloth and a mild degreaser.
- Decanting: Pour dry goods like flour, pasta, and cereal into airtight canisters. This not only looks better but keeps food fresh for much longer. Use a funnel to prevent spills and ensure a clean transfer.
- Categorization: Group items by use. Place baking supplies on one shelf, breakfast items on another, and snacks at eye level for kids. Use baskets to contain “clutter” items like chip bags or onion sacks.
- The Labeling Ritual: Label every container and basket. Use a consistent font and style for a professional look. For canisters, consider adding the expiration date to the bottom of the jar on a small piece of painter’s tape.
- Maximizing Space: Use tiered risers for cans so you can see what’s in the back. Place a lazy Susan in the corner to make oils and spices easily accessible without having to dig through rows of bottles.
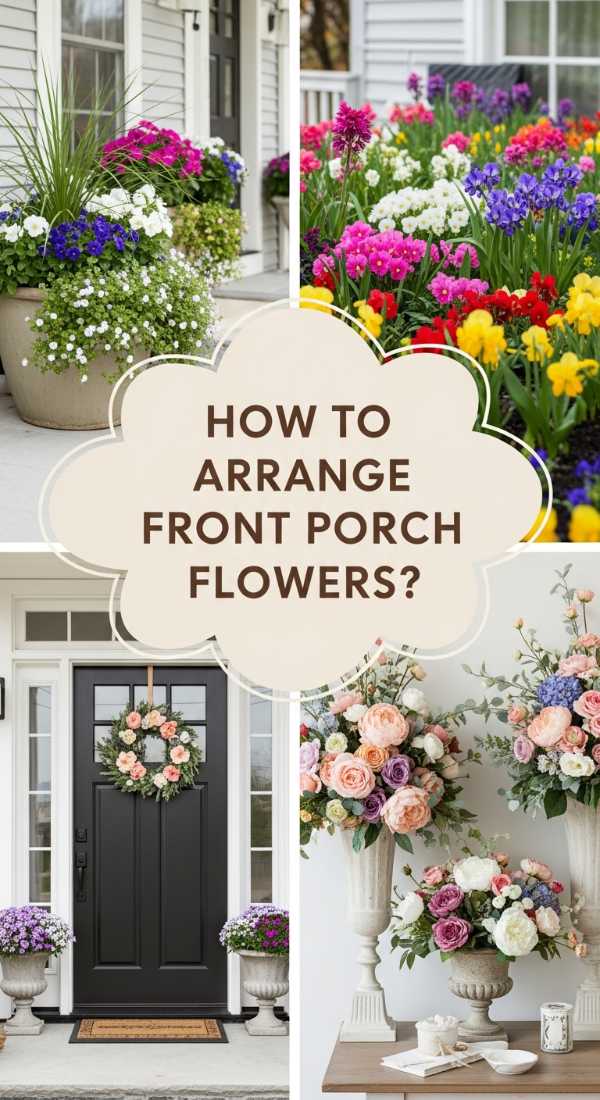
How to Arrange Front Porch Flowers for a Welcoming Entryway
Why we love this
Front porch flowers are the “smile” of your home’s exterior. The visual impact of overflowing blooms in shades of magenta, butter-yellow, and deep violet is instantly uplifting to anyone who passes by. You can catch the light, sweet fragrance of petunias on the breeze, and the soft, velvet texture of dusty miller leaves adds a sophisticated touch. It’s a dynamic, living decoration that celebrates the changing seasons and makes your entryway feel vibrant, cared for, and full of life.
Essential Elements:
- A variety of planters in different sizes and textures
- The “Thriller, Filler, Spiller” plant combo
- High-quality potting mix with slow-release fertilizer
- A watering can with a rose head for gentle flow
How to make it
- Select the Right Pots: Choose a large central pot and two smaller ones to create a cluster. Ensure they all have drainage holes to prevent root rot.
- The Thriller: In the center of the largest pot, plant a tall, eye-catching plant like a Canna Lily or a Fountain Grass. This provides the vertical height and drama.
- The Filler: Surround the Thriller with mounding plants like Geraniums or Lantana. These should be bushy and colorful, filling the middle space of the container.
- The Spiller: Plant trailing flowers like Sweet Potato Vine or Lobelia around the edges. These will grow over the sides, softening the edges of the pot and creating a lush, overflowing look.
- Consistent Care: Water the pots daily, especially in summer, as containers dry out faster than the ground. Deadhead (remove) spent blooms once a week to encourage the plant to produce new flowers all season long.
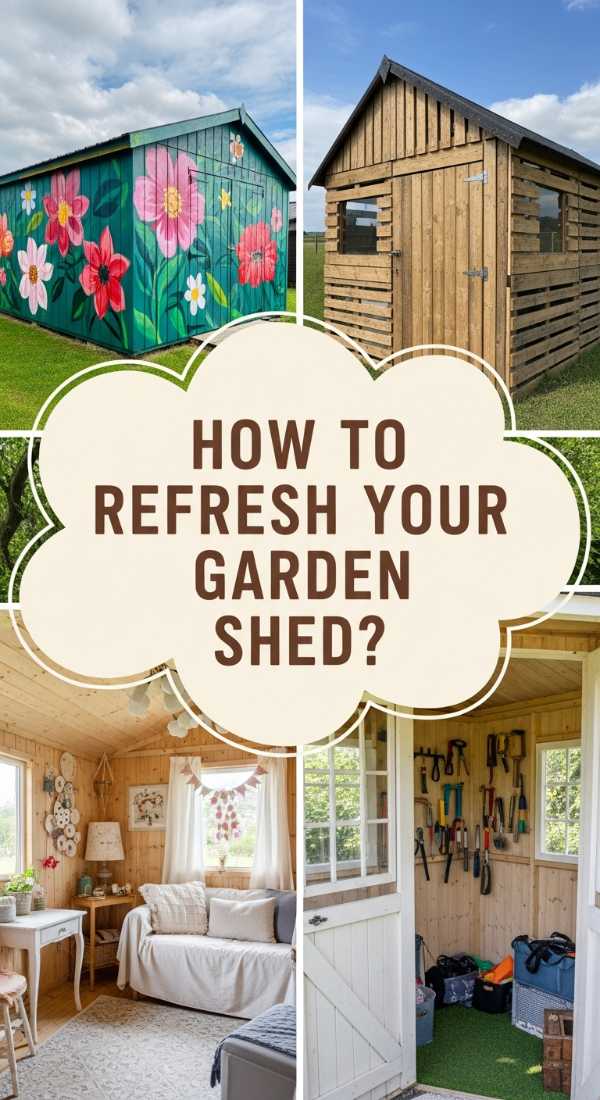
How to Refresh Your Garden Shed for a Chic Backyard Studio

Why we love this
Turning a dusty garden shed into a chic studio is like discovering a secret room you never knew you had. It’s the smell of fresh linen and cedar wood, the sight of sunlight streaming through a small window onto a clean workspace, and the feeling of total creative isolation. Whether it’s an art studio, a potting room, or a reading nook, it becomes a sanctuary where the outside world fades away. It’s a space that honors your hobbies and gives your creativity a dedicated home amidst the greenery of your garden.
Essential Elements:
- Light-colored interior paint (White or soft cream)
- Peel-and-stick flooring or a durable indoor/outdoor rug
- Wall-mounted shelving and pegboards
- A sturdy workbench or desk
- Battery-powered or solar LED puck lights
How to make it
- Clear and Seal: Remove all old garden tools. Patch any holes in the walls with wood filler and seal the window frames with caulk to keep out drafts and pests.
- Paint for Light: Paint the interior walls and ceiling a bright, reflective white. Sheds are often dark, and this simple step will make the small space feel significantly larger and more inviting.
- Flooring Upgrade: Lay down peel-and-stick vinyl tiles in a wood-plank or slate pattern. They are easy to clean and instantly make the shed feel like an actual room rather than a storage unit.
- Smart Storage: Install a pegboard over the workbench. This allows you to hang tools or art supplies vertically, keeping your work surface clear and organized.
- Personal Styling: Add a comfortable chair, a few hardy indoor plants like Snake Plants, and a small rug. Use battery-operated puck lights for tasks and string lights for a cozy evening glow.
How to Revive a Nostalgic Teen Bedroom for Retro Aesthetic Vibes
[IMAGE_10]
Why we love this
The retro revival trend is all about warmth, personality, and a touch of rebellious fun. Picture a room bathed in the soft, neon glow of a pink sign, the tactile richness of a velvet mustard-yellow throw, and the nostalgic crackle of a vinyl record playing in the corner. It’s a space that feels curated yet lived-in, where vintage textures meet modern comfort. This aesthetic celebrates self-expression and creates a cozy, moody atmosphere that is perfect for late-night studying or just hanging out with friends.
Essential Elements:
- Neon LED wall signs
- Macramé wall hangings or woven tapestries
- Retro-style record player
- Velvet floor pillows and textured bedding
- Gallery wall frames for vintage posters
How to make it
- The Feature Wall: Choose one wall to paint a deep, moody color or apply a retro-patterned removable wallpaper (think large florals or 70s arches). This acts as the anchor for the entire room’s vibe.
- Lighting Layers: Avoid harsh overhead lights. Instead, use a combination of a neon sign, a lava lamp, and warm-toned LED floor lamps. This creates the “vibey” atmosphere characteristic of the retro aesthetic.
- Textile Mixing: Layer different textures on the bed. Pair a chunky knit blanket with velvet pillows and linen sheets. This adds depth and makes the room feel incredibly cozy.
- Gallery Wall: Curate a mix of vintage-style posters, vinyl record covers, and personal photos. Use mismatched frames for a collected, eclectic look that feels authentic rather than mass-produced.
- Nostalgic Tech: Incorporate a dedicated corner for a record player or a vintage gaming console. This provides a functional hobby area that doubles as a major design element.
Conclusion
Transforming your home doesn’t require a massive budget or a professional crew; it just takes a little inspiration and the willingness to get your hands dirty. These viral projects are proof that with a few thoughtful changes, you can create a space that feels curated, intentional, and deeply personal. So, grab your tools, pick a project that speaks to you, and start creating the home of your dreams. Your future, more relaxed self will thank you!