
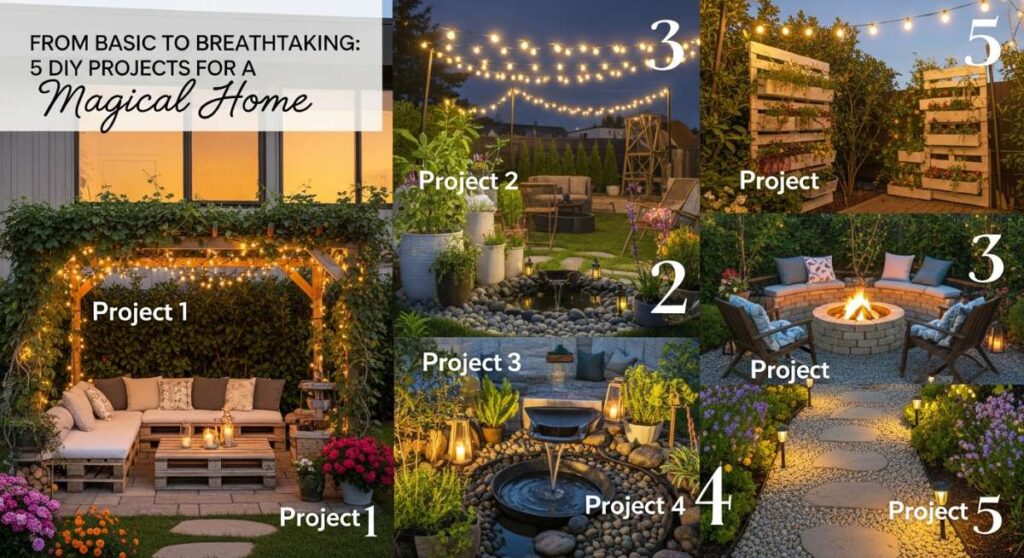
Have you ever sat on your back porch with a morning coffee, looking at the weathered wood and the patchy grass, and felt like your home was just missing that spark? We all have those corners of our sanctuary that feel a bit ‘unfinished’ or ‘basic,’ but I truly believe that your home should be a reflection of your soul—a place of magic, rest, and inspiration. You don’t need a massive renovation budget or a team of contractors to turn your space into a breathtaking retreat; all you need is a little bit of dirt under your fingernails and the willingness to dream big.
Today, I’m sharing five of my favorite viral DIY projects that take your home from standard to stunning. From the way the light hits a newly stenciled patio to the sweet, earthy aroma of a fresh flower bed, these projects are designed to engage all your senses and make you fall in love with your living space all over again. Let’s roll up our sleeves and start creating that dreamy backyard oasis you’ve been pinning for years!
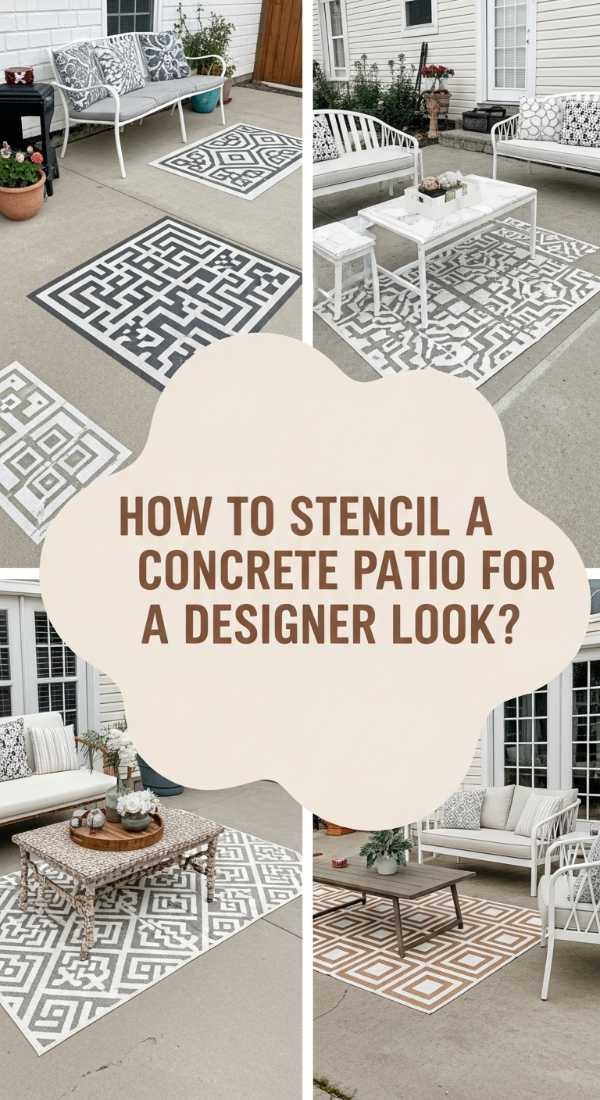
How to Stencil a Concrete Patio for a Designer Look

Why we love this
There is something truly transformative about walking onto a patio that feels like a Mediterranean terrace rather than a slab of cold gray concrete. When you apply a stencil, you aren’t just adding paint; you’re adding a layer of sophisticated texture and visual rhythm that draws the eye and invites you to linger. Imagine the cool, smooth feel of the painted finish under your bare feet on a warm July evening, surrounded by the soft glow of string lights reflecting off the intricate patterns. It creates a high-end designer aesthetic that feels expensive and intentional, making your outdoor area the ultimate spot for sunset cocktails and quiet reflection.
Essential Elements:
- Large-scale patio stencil
- Outdoor porch and patio floor paint (two contrasting colors)
- Small foam rollers and painter’s tape
- Long-handled paint roller
- Heavy-duty concrete cleaner and stiff brush
- Concrete sealer (matte or satin finish)
How to make it
- Deep Clean: Begin by power washing or scrubbing your concrete with a heavy-duty cleaner to remove all oils and dirt. If the concrete is not perfectly clean, the paint will peel within a season.
- Base Coat: Apply your primary base color using a long-handled roller. Use a high-quality outdoor floor paint and apply two even coats, allowing at least 4-6 hours of drying time between them.
- Stencil Placement: Start in the most visible corner. Secure your stencil with painter’s tape to ensure it doesn’t shift. Use a level to make sure your first row is perfectly straight, as any tilt will be magnified across the whole patio.
- The Dry Brush Technique: This is the most critical step. Dip your foam roller in the accent paint and then roll most of it off onto a piece of cardboard until the roller is nearly dry. Apply light pressure over the stencil—too much paint will cause bleeding under the edges.
- Repeat and Align: Carefully lift the stencil and align it with the registration marks on the pattern. Repeat the process across the entire surface, cleaning the stencil every few rows to prevent paint buildup.
- Seal for Longevity: Once the paint has cured for 24 hours, apply two coats of clear concrete sealer. This protects your hard work from UV rays and foot traffic, giving it that professional, designer sheen.
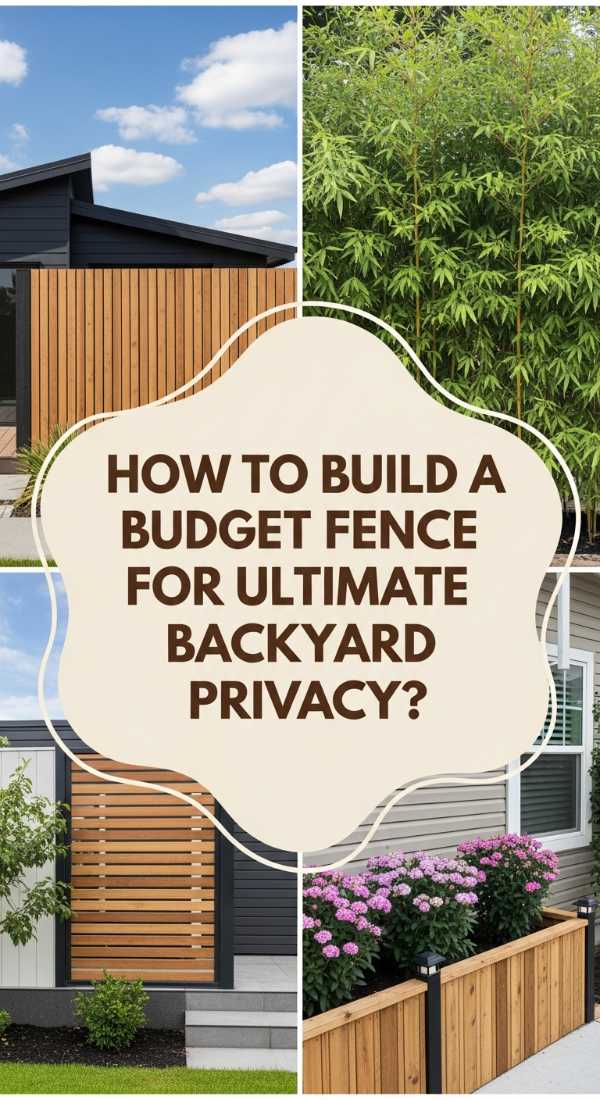
How to Build a Budget Fence for Ultimate Backyard Privacy
Why we love this
True magic in a home often comes from the feeling of being in your own private world, shielded from the hustle and bustle of the outside neighborhood. A budget-friendly privacy fence provides more than just a boundary; it creates a cozy, enclosed sanctuary where the air feels stiller and the birdsong sounds clearer. We love the rustic, woody aroma of fresh-cut cedar or pine pickets as they soak up the afternoon sun, providing a textured backdrop for your climbing vines and fairy lights. It’s the framework for your outdoor memories, offering a sense of security and a warm, organic aesthetic that grounds the entire yard.
Essential Elements:
- Pressure-treated 4×4 posts
- Horizontal 2×4 stringers
- Vertical fence pickets (cedar or pine)
- Fast-setting concrete mix
- Galvanized wood screws
- Post-hole digger and level
How to make it
- Layout and Marking: Use stakes and a string line to mark the exact perimeter of your fence. Space your post locations exactly 6 or 8 feet apart to ensure your horizontal stringers fit perfectly without excessive waste.
- Digging Deep: Use a post-hole digger to create holes at least 24 to 30 inches deep. In colder climates, you must get below the frost line to prevent the fence from heaving in the winter.
- Setting the Posts: Place your 4×4 posts in the holes, using a level to ensure they are perfectly vertical (plumb) on all sides. Pour fast-setting concrete into the hole, add water according to the bag instructions, and hold the post steady for a few minutes while it sets.
- Installing Stringers: Attach three rows of horizontal 2×4 stringers between the posts—one near the top, one in the middle, and one near the bottom. Use a drill to drive galvanized screws at an angle into the posts (toenailing).
- Attaching Pickets: Start at one end and nail your vertical pickets to the stringers. Use a spacer (like a scrap piece of wood) between pickets if you want a tiny gap for airflow, or butt them tight for total privacy.
- Finish and Protect: Sand down any rough edges and apply a high-quality exterior stain or clear water-proofer to prevent the wood from graying and warping over time.
How to Design a Rock River Bed for Superior Yard Drainage
Why we love this
There is a rhythmic, natural beauty to a dry creek bed that brings a sense of zen to any landscape. Beyond its practical use for managing rainwater, a rock river bed introduces wonderful geological textures—smooth river stones, jagged slate, and silvery pebbles—that glisten beautifully after a storm. We love the way it mimics the flow of nature, providing a visual path for the eye to follow through the garden. The tactile experience of the stones, combined with the way they perfectly accent lush green ferns or bright hostas, creates a landscape that feels both curated and wild, turning a drainage problem into a stunning focal point.
Essential Elements:
- Large river rocks and medium-sized cobbles
- Pea gravel or small stones for filler
- Heavy-duty landscape fabric
- Garden shovel and metal rake
- Edging material (optional)
- A few large ‘anchor’ boulders
How to make it
- Mapping the Flow: Identify the natural path water takes through your yard. Use a garden hose to layout a winding, S-shaped path that looks more natural than a straight line.
- Excavation: Dig a trench along your marked path, roughly 6 to 12 inches deep. Make the center of the trench the deepest point and slope the sides upward to create a shallow ‘U’ shape.
- Lining the Bed: Lay down heavy-duty landscape fabric to prevent weeds from growing through your rocks. Secure the edges with landscape staples to keep the fabric from shifting during heavy rains.
- Placing Anchor Boulders: Place your largest boulders first at the ‘bends’ of your river. This makes the creek look like it was forced to move around these rocks over centuries, creating an authentic look.
- Layering the Stones: Fill the bottom of the trench with medium-sized river rocks. Use smaller pea gravel to fill in the gaps between the larger stones. This creates a varied texture that mimics a real stream bed.
- Finishing the Edges: Tuck the edges of the fabric under the rocks and plant moisture-loving perennials like Siberian Iris or Creeping Jenny along the banks to soften the transition to the rest of your yard.
How to Construct a Cheap Grill Station for Outdoor Entertaining
Why we love this
Nothing says ‘magical home’ like the aroma of charred hickory and grilled vegetables wafting through the air during a backyard get-together. A dedicated grill station elevates your outdoor cooking from a chore to a culinary experience, providing a sturdy, organized workspace that makes entertaining a breeze. We love the rugged, industrial feel of the wood frame paired with a smooth, cool countertop where you can prep your ingredients. It becomes the heartbeat of the backyard—a place where friends gather with cold drinks, leaning against the counter while the sun sets, making every weeknight dinner feel like a special occasion.
Essential Elements:
- Standard 2×4 lumber for the frame
- Cedar planks for exterior cladding
- Countertop material (concrete pavers or butcher block)
- Exterior-grade wood glue and screws
- Hooks for grilling utensils
- Weather-resistant wood stain
How to make it
- The Base Frame: Build two rectangular frames out of 2x4s to serve as the top and bottom of your station. Connect them with four vertical 2×4 legs. The standard height for a comfortable prep station is about 36 inches.
- Reinforcement: Add cross-braces to the sides and back of the frame to prevent wobbling. This is crucial if you are using a heavy countertop like concrete or stone.
- Adding Shelves: Cut 2x4s or plywood to fit within the lower frame to create a shelf for storing charcoal, propane, or grilling accessories.
- Exterior Siding: Cover the 2×4 frame with cedar planks or fence pickets for a beautiful, finished look. Use a miter saw to ensure your corners are clean and flush.
- Installing the Top: Place your concrete pavers or pre-sealed wood top onto the frame. Secure it with construction adhesive to ensure it doesn’t move while you are prepping food.
- Finishing Touches: Sand the wood thoroughly to prevent splinters. Apply an exterior-grade stain or sealant. Finally, screw in stainless steel hooks on the side to hold your tongs, brushes, and towels.
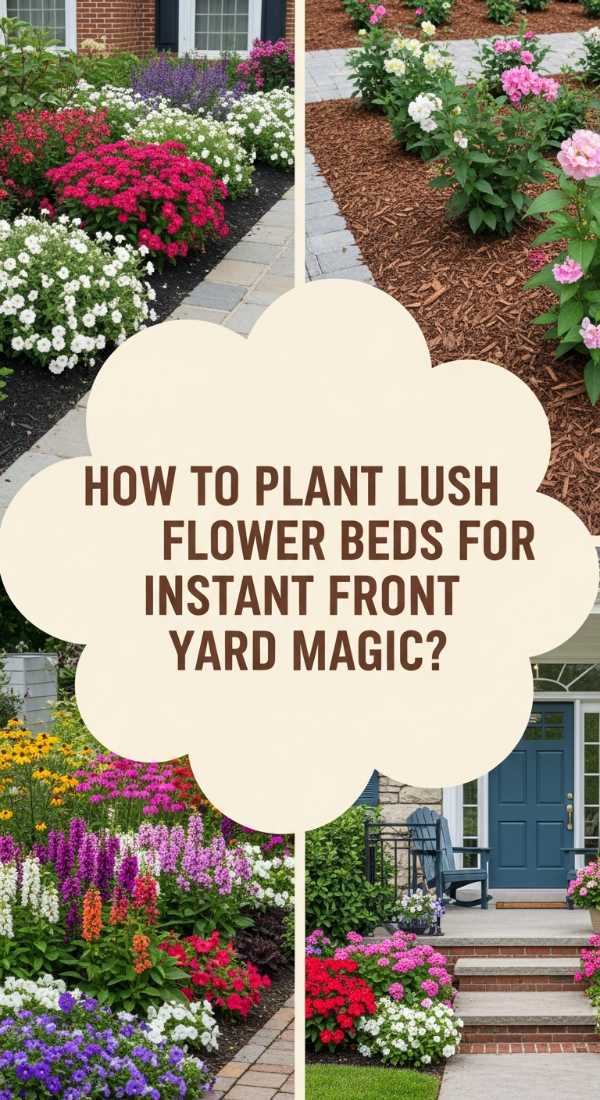
How to Plant Lush Flower Beds for Instant Front Yard Magic
Why we love this
Walking up to a home framed by vibrant, swaying blooms is like receiving a warm hug every time you arrive. Lush flower beds add an immediate ‘wow’ factor, filling the air with the sweet, intoxicating scent of jasmine or lavender and bringing your garden to life with the hum of happy pollinators. We love the soft, velvety texture of the petals contrasted against the dark, damp richness of fresh mulch. It’s a sensory explosion of color—deep purples, bright yellows, and soft pinks—that provides a seasonal rhythm to your life, reminding you to slow down and appreciate the simple beauty of growth and renewal.
Essential Elements:
- Selection of perennials (for yearly return) and annuals (for instant pop)
- High-quality garden soil and organic compost
- Natural wood mulch (dark brown or black)
- Hand trowel and garden spade
- Slow-release fertilizer
How to make it
- Defining the Edge: Use a shovel or a garden edger to cut a clean, crisp line between your grass and your new bed. A curved, organic line usually looks more ‘breathtaking’ and professional than a rigid straight one.
- Soil Preparation: Turn over the existing soil and mix in a generous amount of compost and fresh garden soil. This provides the nutrients and drainage your plants need to thrive.
- The Layout Rule: Before digging, place your potted plants in the bed to see how they look. Put the tallest plants (like Delphiniums or ornamental grasses) in the back, medium plants in the middle, and low, creeping plants (like Alyssum) at the very front.
- Proper Planting: Dig a hole twice as wide as the plant’s root ball. Gently tease the roots if they are circling the pot, place the plant in the hole at the same depth it was in the pot, and firm the soil around it.
- Hydration and Nutrition: Water the plants immediately after planting to settle the soil. Sprinkle a bit of slow-release fertilizer around the base of each plant to give them a head start.
- Mulching: Apply a 2-3 inch layer of mulch over the entire bed. This keeps the roots cool, retains moisture, and provides that dark, finished look that makes the colors of your flowers truly pop.
Conclusion
Creating a breathtaking home isn’t about how much money you spend; it’s about the intention and love you pour into your surroundings. Whether you’re stenciling a pattern onto your patio or digging a new home for a rosebush, these DIY projects are more than just home improvements—they are steps toward building a life that feels as good as it looks. I hope these ideas inspire you to step outside this weekend and start your own transformation. Remember, the magic is in the details, and your dream home is just one project away!