

Have you ever found yourself scrolling through your favorite social media feed late at night, eyes wide at a stunning home transformation, wondering how on earth someone turned a dated space into a sanctuary? We’ve all been there, trapped in that loop of ‘before and after’ videos that make home improvement look like magic. But the real secret isn’t a professional crew or a bottomless bank account; it’s the courage to pick up a paintbrush or a drill and say, ‘I can do that.’ There is a profound, soulful satisfaction in looking at a corner of your home and knowing your own hands created that beauty.
In this guide, we are diving deep into the viral DIYs that have been taking over our feeds and hearts. These projects are more than just aesthetic upgrades; they are about reclaiming our spaces and infusing them with personality and warmth. Whether you are looking to boost your curb appeal or create a cozy backyard oasis for summer evenings, these step-by-step makeovers will turn your home into the highlight of the neighborhood. Let’s roll up our sleeves and turn those saved pins into reality!
How to Modernize a Vintage Ranch Exterior for Incredible Curb Appeal
Why we love this
There is something incredibly nostalgic about a classic ranch-style home, but many are stuck in a mid-century time warp of beige brick and overgrown shrubbery. We love this makeover because it respects the low-profile architecture while introducing high-contrast elements that feel fresh and sophisticated. Imagine the crisp scent of fresh exterior paint mingling with the earthy aroma of new cedar accents. The visual weight of black window frames against a creamy white facade creates a rhythmic balance that draws the eye, making the entire property feel more expansive, welcoming, and undeniably expensive without the premium price tag.
Essential Elements:
- High-quality exterior masonry paint (Matte finish)
- Modern black house numbers and hardware
- Cedar planks for shutters or porch columns
- Minimalist outdoor sconces
- Fresh mulch and sculptural foundation plants
How to make it
- Begin by power washing the entire exterior to remove decades of dust, grime, and loose paint. Use a medium-pressure setting to avoid damaging the brick or siding.
- Mask off windows, doors, and trim with professional-grade painter’s tape and plastic sheeting. This prep phase is critical for a clean, modern look; use a caulk gun to fill any gaps around trim for a seamless finish.
- Apply a high-bond masonry primer if you are painting brick. Once dry, apply two coats of exterior latex paint using an airless sprayer for even coverage, ensuring you back-roll with a thick-nap roller to push paint into the crevices of the brick.
- Construct or install cedar shutters. Sand the wood to a 150-grit smoothness and apply a UV-resistant clear coat to preserve the warm, honey-toned grain against the new paint.
- Swap out old, dated light fixtures for oversized black lanterns or sleek LED sconces. Ensure they are mounted at eye level to maximize the ‘glow’ effect during twilight hours.
- Finish by installing vertical house numbers and refreshing the landscaping with dark mulch for a high-contrast ground cover.
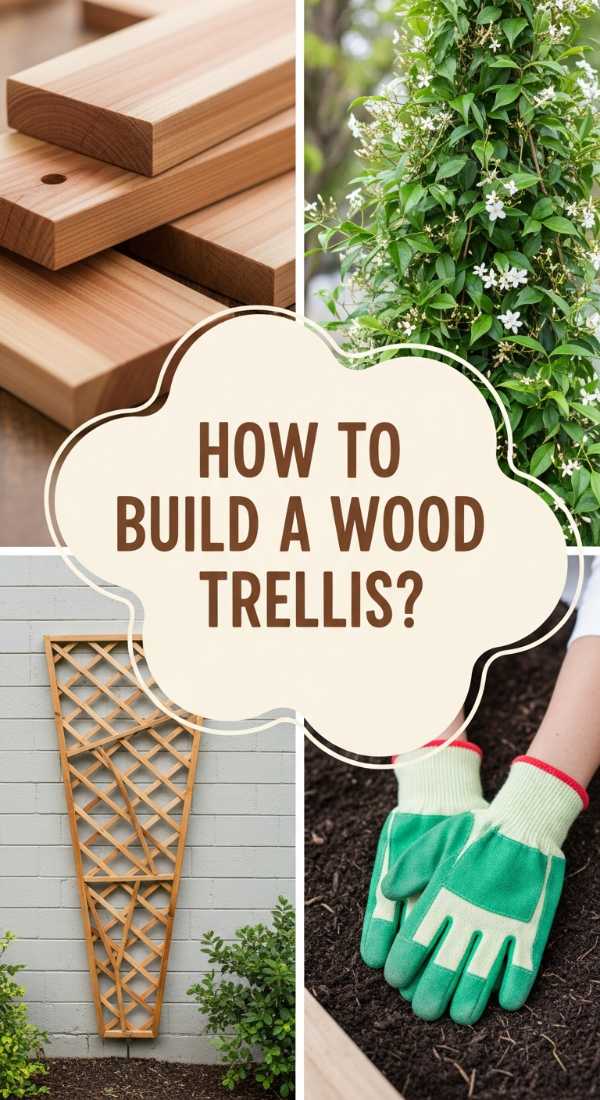
How to Build a Wood Trellis for a Lush Garden Oasis

Why we love this
A wood trellis is the architectural ‘jewelry’ of a garden, providing the structure needed for nature to perform its most beautiful dance. We love this project because it transforms a flat, uninteresting wall into a vertical tapestry of green and floral scent. There is nothing quite like the tactile roughness of cedar against the delicate, waxy leaves of climbing jasmine or the velvet petals of a climbing rose. As the sun sets, the shadows cast by the geometric lattice create a calming, rhythmic pattern on the ground, making your garden feel like a secluded, ancient courtyard hidden away from the busy world.
Essential Elements:
- Pressure-treated or cedar 2×2 and 1×2 boards
- Galvanized wood screws
- Outdoor wood stain or sealant
- Wall spacers (to allow air circulation)
- Climbing plants (Star Jasmine, Clematis, or Climbing Roses)
How to make it
- Determine the dimensions of your trellis based on the wall space. Lay out your vertical 2×2 support beams on a flat surface, spacing them roughly 12 to 18 inches apart.
- Cut your horizontal 1×2 slats to the desired width. For a modern ‘slat’ look, space them 2 inches apart; for a traditional ‘diamond’ look, cross them at 45-degree angles.
- Pre-drill holes at every intersection to prevent the wood from splitting. This is a pro-tip for cedar, which is beautiful but brittle. Use 1.5-inch galvanized screws to secure the pieces.
- Sand all edges to remove splinters and apply two coats of a weather-resistant stain. A deep ‘ebony’ or ‘walnut’ stain looks incredible against green foliage.
- Mount the trellis to your wall using 1-inch spacers or ‘standoffs.’ This gap is vital because it prevents moisture from being trapped against your siding and allows the plants to wrap their tendrils around the back of the wood.
- Plant your climbers at the base, gently weaving the initial stems through the lower slats to encourage vertical growth.
How to Design Rock Landscaping for a Low Maintenance Front Yard
Why we love this
Rock landscaping is the ultimate marriage of form and function, offering a clean, ‘scandi-desert’ aesthetic that stays pristine all year round. We love the sensory contrast here: the smooth, cool touch of river rocks against the spiky, structural texture of ornamental grasses and succulents. There’s a distinct, satisfying crunch underfoot and a beautiful visual stillness that rock gardens provide. When it rains, the stones darken and glisten, revealing deep grays, blues, and tans that bring a grounded, earthy energy to your home’s entrance, all while saving you from the endless cycle of mowing and weeding.
Essential Elements:
- Heavy-duty landscape fabric
- Steel or poly edging
- Variety of stones (River rock, pea gravel, or crushed granite)
- Large ‘feature’ boulders for height
- Drought-tolerant plants (Agave, Lavender, Blue Fescue)
How to make it
- Mark out your garden beds using a garden hose to create natural, flowing curves. Excavate the top 2-3 inches of soil and grass from the area to ensure a level base.
- Install your edging along the perimeter. Hammer in the stakes every 2 feet to ensure the line stays crisp and prevents the rocks from migrating into the lawn over time.
- Lay down professional-grade landscape fabric. Do not skip this; the fabric must be pinned down with U-shaped staples. Overlap the seams by 6 inches to prevent stubborn weeds from pushing through.
- Cut ‘X’ shapes into the fabric where you wish to place your plants. Dig your holes, enrich the soil with compost, and plant your greenery before adding the rocks.
- Arrange your large feature boulders first. Bury the bottom 1/3 of the boulder in the ground so it looks like a natural outcropping rather than a rock just sitting on the surface.
- Pour your smaller stones around the plants and boulders, raking them to a depth of at least 2 inches to ensure complete coverage of the fabric.
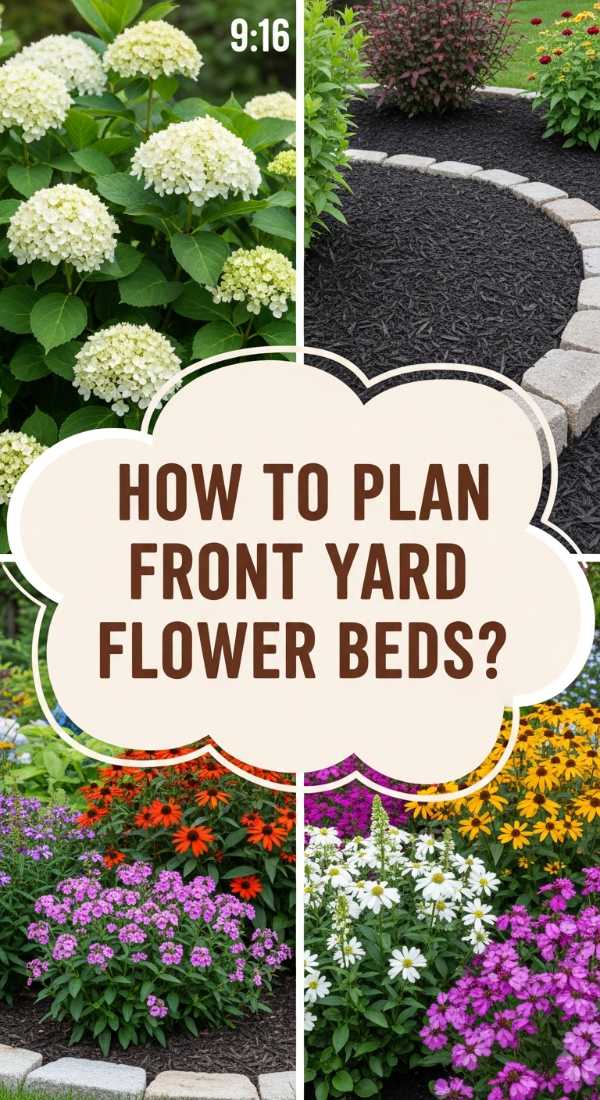
How to Plan Front Yard Flower Beds for Constant Seasonal Color
Why we love this
There is no greater joy than walking out your front door and being greeted by a symphony of colors and the sweet, heavy perfume of blooming perennials. We love a well-planned flower bed because it acts as a living calendar, marking the transition of seasons with shifting hues. From the buttery yellows of spring daffodils to the fiery oranges of autumn mums, a layered garden bed provides a sensory feast. The soft rustle of leaves and the sight of butterflies darting between blooms create an emotional ‘hug’ for anyone visiting your home, turning a simple yard into a vibrant, living ecosystem.
Essential Elements:
- A mix of perennials (return every year) and annuals (one-season pops)
- Organic compost and mulch
- Garden spade and hand trowel
- Slow-release fertilizer
- Planting plan (Tall in back, short in front)
How to make it
- Identify your sun exposure (Full sun vs. Part shade). This determines your entire plant list; putting a sun-loving Peony in the deep shade is a recipe for disappointment.
- Sketch a layout. Use the ‘thriller, filler, spiller’ method on a larger scale. Place tall shrubs like Hydrangeas in the back, mounding plants like Coneflowers in the middle, and creeping Phlox at the very edge.
- Amend your soil. Most front yards have compacted soil; mix in 3 inches of organic compost to ensure your plants have the nutrients and drainage they need to thrive.
- Install your plants during the cool morning hours. Tease the roots gently if they are ‘root-bound’ in their nursery pots to encourage them to spread into their new home.
- Apply a 2-inch layer of cedar mulch around the base of the plants, keeping the mulch away from the actual stems/trunks to prevent rot.
- Deadhead (remove) spent blooms regularly throughout the summer. This visual cue tells the plant to keep producing new flowers rather than focusing on seed production.
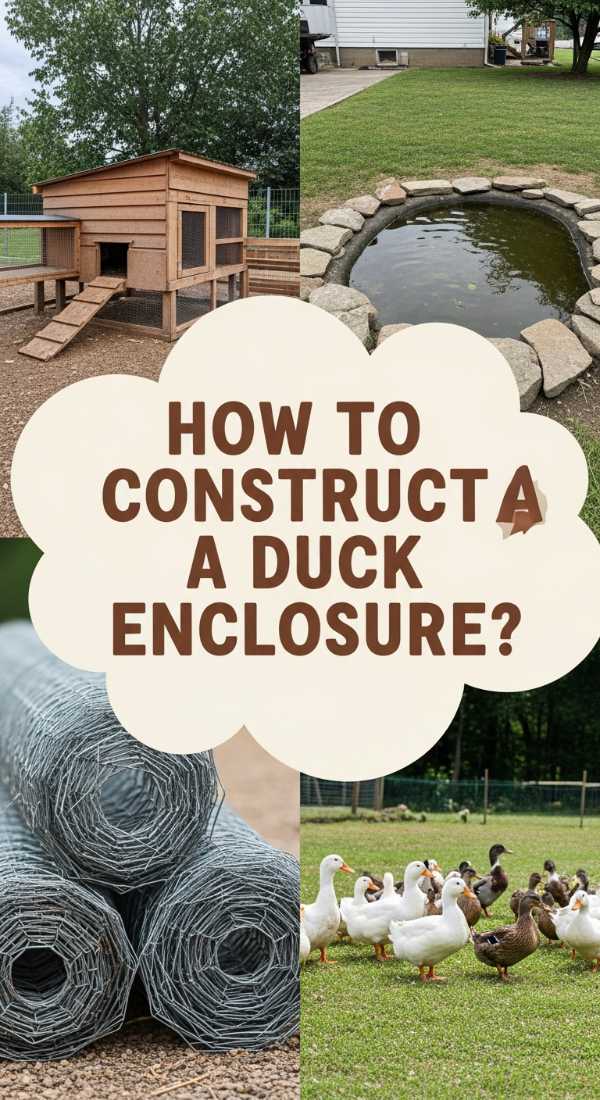
How to Construct a Duck Enclosure for a Happy Homestead
Why we love this
Homesteading has gone viral for a reason: the deep connection to our food and the charming presence of animals like ducks. We love this enclosure because it combines rustic charm with high-security functionality. Imagine the soft, rhythmic ‘quacking’ as you approach with treats, and the sight of your ducks splashing in a clean basin. The smell of fresh pine shavings inside a cozy cedar coop and the sturdy feel of hardware cloth provide a sense of peace, knowing your feathered friends are safe and happy. It’s a project that brings a touch of the countryside to any backyard, no matter the size.
Essential Elements:
- Pressure-treated 2×4 framing
- 1/2 inch hardware cloth (NOT chicken wire, which predators can break)
- Plywood for the coop walls
- Corrugated roofing panels
- Deep bedding (Pine shavings or straw)
How to make it
- Build the frame of the ‘run’ first. Create a rectangular footprint using 2x4s, ensuring the structure is at least 3-4 feet high so you can easily clean it.
- Attach the hardware cloth to the outside of the frame using a heavy-duty staple gun. Bury the bottom 6 inches of the mesh in a trench or create a ‘skirt’ on the ground to prevent foxes or raccoons from digging under.
- Construct the sleeping coop. Unlike chickens, ducks don’t need roosting bars, but they do need a draft-free space. Ensure the floor is plywood covered with a waterproof liner for easy cleaning.
- Install a wide ramp. Ducks are not as agile as chickens, so the incline into the coop should be gentle and have small wooden cleats for traction.
- Add a predator-proof latch to the door—carabiner clips or two-step locks are best.
- Include a dedicated space for a water basin or a small ‘kiddie pool.’ Ducks need to submerge their heads to clean their bills, so prioritize easy drainage for this area.
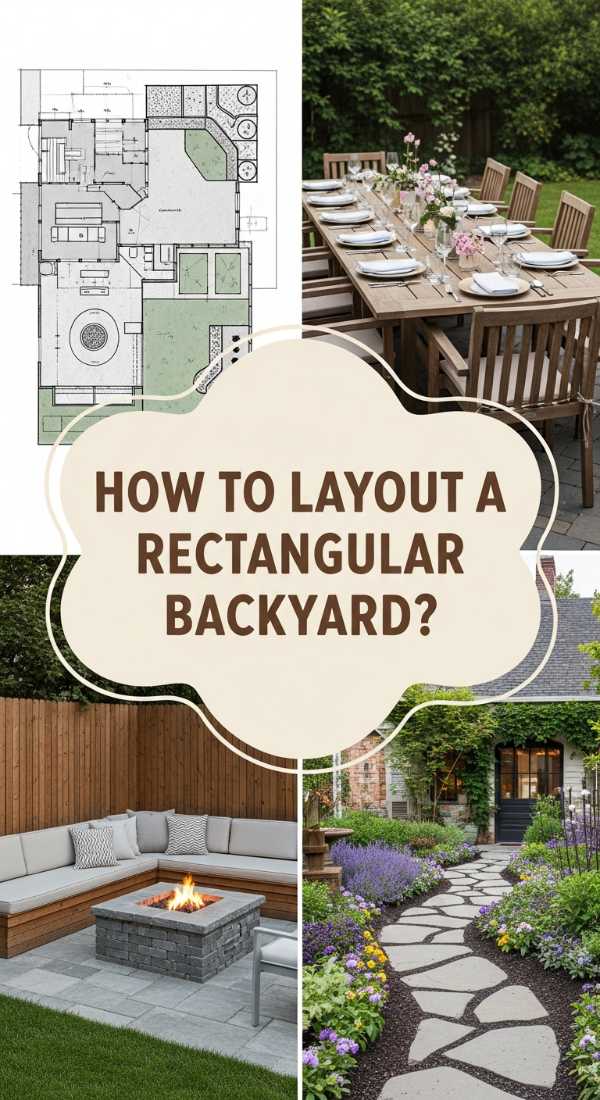
How to Organize a Rectangular Backyard for Flow and Function
Why we love this
The standard rectangular backyard can often feel like a boring ‘hallway’ of grass, but with smart zoning, it becomes a multi-room outdoor suite. We love this approach because it uses visual lines to create ‘destinations.’ You move from the tactile warmth of a dining area to the soft, cool expanse of a play zone, and finally to the smoky, flickering light of a fire pit at the back. It’s about creating a narrative for your outdoor life, where every square inch has a purpose and the transition between areas feels natural, inviting, and expertly designed.
Essential Elements:
- Outdoor rugs to define ‘rooms’
- Planter boxes for vertical screening
- Paver paths or stepping stones
- String lighting for ambiance
- Zoned furniture sets (Dining vs. Lounging)
How to make it
- Divide your yard into thirds. The area closest to the house should be the ‘extension’ of the indoors (dining or BBQ). The middle is for activity (lawn or garden), and the back is for ‘escape’ (fire pit or hammock).
- Create a ‘spine’ path. Use large slate pavers or a gravel walkway to connect these zones. A straight path emphasizes length, while a winding path makes the yard feel wider.
- Use ‘vertical breaks.’ Install tall planters or a small trellis between the dining and play areas. This creates a sense of discovery as you move through the space.
- Place your largest furniture piece (like an outdoor sectional) against the longest wall or fence to maximize the open ground in the center.
- Hang string lights in a ‘zigzag’ pattern across the entire length. This draws the eye upward and connects the different zones under a single ‘ceiling’ of light.
- Add consistent pops of color—like matching cushions or flower types—across all three zones to create a cohesive visual thread.
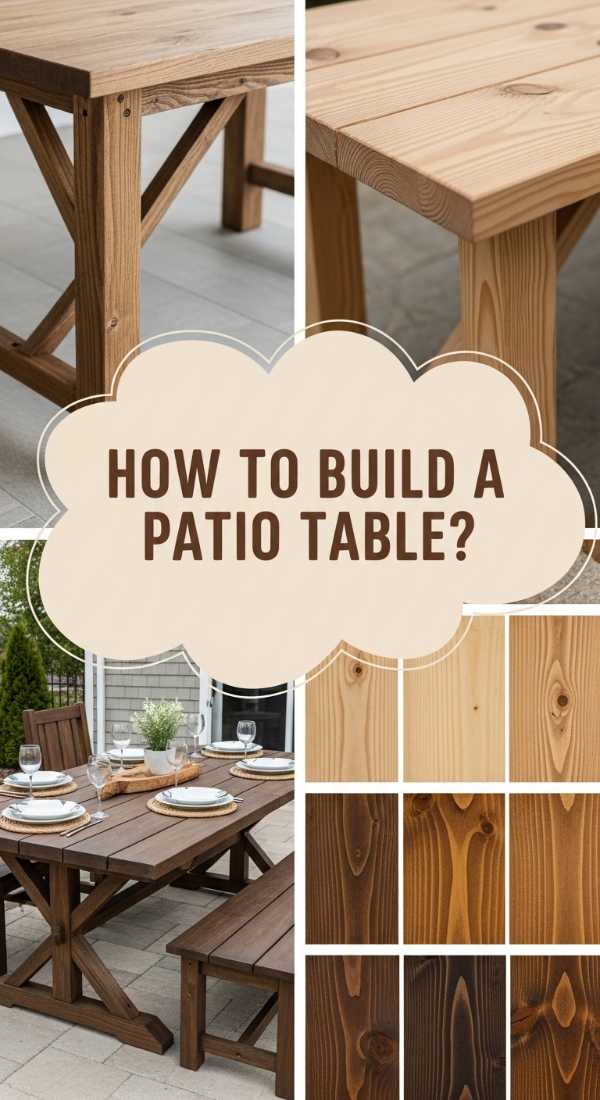
How to Build a Patio Table for Memorable Outdoor Dining
Why we love this
A handmade patio table is the heart of every summer memory—the place where chilled wine is poured and laughter echoes late into the night. We love the robust, sturdy feel of a chunky farmhouse-style table made of solid wood. The scent of cedar or redwood under the heat of the sun is intoxicating, and the smooth, sanded surface is the perfect canvas for linen runners and ceramic plates. Building it yourself means you can customize the height and width to perfectly fit your space, creating a bespoke centerpiece that will weather beautifully over time, gaining character with every season.
Essential Elements:
- 4×4 posts for legs
- 2×6 boards for the tabletop and apron
- Pocket hole jig and screws (Kreg Jig)
- Exterior-grade wood glue
- Outdoor polyurethane or teak oil
How to make it
- Cut your 4×4 legs to 29 inches. This is the standard height for comfortable dining. Ensure all cuts are perfectly square using a miter saw.
- Build the ‘apron’ (the frame under the tabletop). Use 2×6 boards and a pocket hole jig to join them to the legs. Apply wood glue to every joint before screwing for maximum stability against the elements.
- Assemble the tabletop. Lay out your 2×6 boards and join them using pocket holes on the underside. Tip: Leave a 1/8-inch gap between the boards to allow for wood expansion and rain drainage.
- Secure the tabletop to the base using ‘Z-clips’ or pocket holes from the apron. Do not glue the top to the base; the wood needs to move as the humidity changes.
- Sand the entire table, starting with 80-grit and finishing with 220-grit for a buttery-smooth finish. Focus especially on the corners where people will be leaning.
- Apply three coats of a high-quality outdoor sealant. If using cedar, a clear oil will bring out the natural reds; if using pine, a ‘Dark Walnut’ stain provides a classic look.
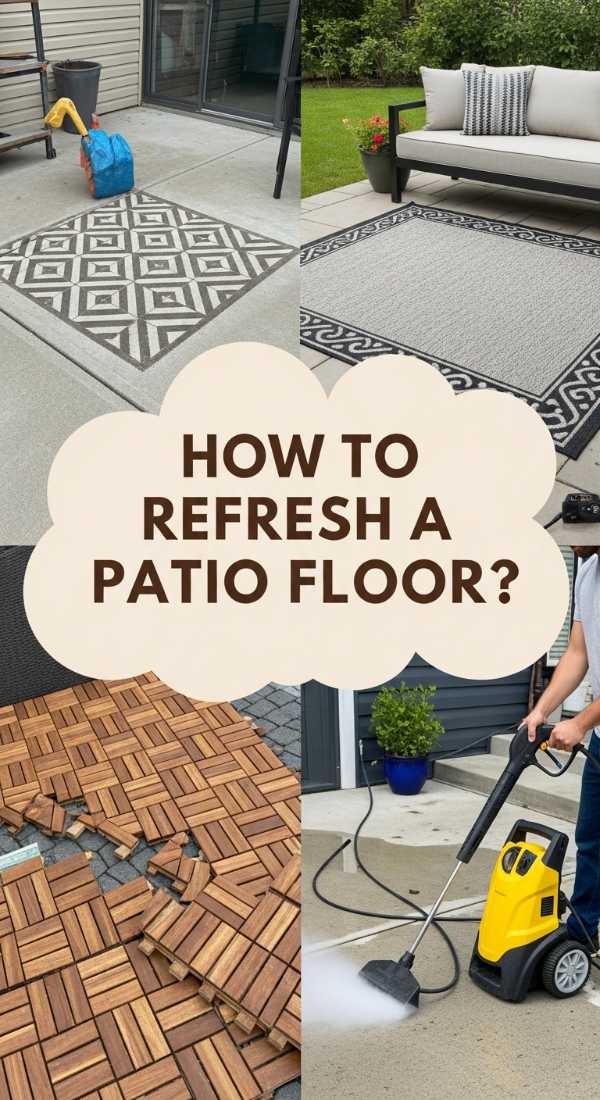
How to Refresh a Patio Floor for a Luxury Look on a Budget

Why we love this
There is nothing quite like the ‘wow’ factor of a transformed patio floor. Moving from cracked, stained concrete to a high-end patterned tile look (using only paint!) is pure DIY magic. We love the way a fresh floor anchors an outdoor room, making it feel like a true extension of your interior design. The cool sensation of the painted surface under bare feet and the crisp, geometric precision of a stencil create an atmosphere of luxury. It’s a project that completely changes the light in a backyard, reflecting the sun and making the whole area feel bright, clean, and intentional.
Essential Elements:
- Concrete cleaner and degreaser
- Concrete primer and ‘Porch & Floor’ paint
- Large scale floor stencil
- Small foam rollers
- Painter’s tape
How to make it
- The secret is in the prep. Scrub the concrete with a heavy-duty degreaser and a stiff brush. If the concrete is very smooth, use a muriatic acid etch to open the ‘pores’ so the paint can stick.
- Apply a base coat of exterior floor paint in your lighter color (usually a white or light gray). Use a long-handled roller and apply two even coats, allowing 24 hours to dry between them.
- Secure your stencil in the starting corner using painter’s tape. Use a ‘dry brush’ or ‘dry roller’ technique—this means putting paint on the roller and then rolling most of it off onto a paper towel before touching the floor. This prevents ‘bleed’ under the stencil.
- Work in a grid pattern. Check your alignment every few rows to ensure the pattern isn’t drifting.
- Once the pattern is dry, apply two coats of a clear, anti-slip concrete sealer. This protects your hard work from foot traffic and UV fading.
- Wait at least 72 hours before moving heavy furniture back onto the surface to ensure the paint has fully cured.
How to Style a Retro Teen Room for Ultimate Nostalgia

Why we love this
Retro design is making a massive comeback because it celebrates personality over perfection. We love this style because it’s a sensory explosion: the fuzzy texture of a shag rug, the neon glow of a ‘vibe’ sign, and the tactile click of a vinyl record player. It creates a space that feels like a time capsule—warm, safe, and wildly creative. For a teen, this isn’t just a bedroom; it’s a sanctuary for self-expression, filled with the saturated colors of the 70s and 80s that make every morning feel like a scene from a classic movie.
Essential Elements:
- Checkered or shag area rug
- Neon wall signage
- Retro-inspired posters or ‘gallery wall’
- Record player and vinyl storage
- Vintage furniture (Thrifted side tables or chairs)
How to make it
- Start with a ‘hero’ color palette. Think mustard yellow, avocado green, and burnt orange, or go ‘vaporwave’ with pink and teal. Paint one accent wall or the entire room for a bold foundation.
- Incorporate lighting layers. Replace the ‘big light’ with a lava lamp, a neon sign, and a floor lamp with a warm Edison bulb. The goal is a soft, moody glow rather than harsh overhead light.
- Create a ‘listening station.’ Even if they stream music, a record player provides a physical connection to art. Use a vintage crate to store albums and display ‘now playing’ covers on a ledge.
- Mix textures. Pair a corduroy bean bag chair with a smooth, plastic ‘tulip’ side table. This contrast is the hallmark of retro design.
- Build a curated gallery wall. Mix modern prints with old magazine clippings, vinyl records, and Polaroid photos. Use mismatched frames for an authentic, found-over-time feel.
- Add a pop of the iconic ‘checkerboard’ pattern—either through a rug, a throw blanket, or even painted on a small piece of furniture.
How to Arrange Solar Lights for a Magical Garden Path
[IMAGE_10]
Why we love this
Lighting is the ‘final touch’ that turns a simple garden into a fairy-tale wonderland. We love solar lights because they are effortless and eco-friendly, charging by day to provide a soft, golden guide by night. There is something truly magical about watching the garden slowly wake up as the sun sets, with small pools of light illuminating the textures of the plants and the path. The gentle, amber glow (aim for 3000k color temperature) creates an inviting trail that whispers for you to take a midnight stroll, making your outdoor space usable and enchanting long after dark.
Essential Elements:
- Warm-toned solar path lights (Stake style)
- Solar spotlights for trees
- Solar string lights for fences
- A mallet (to ease stakes into hard ground)
How to make it
- Choose ‘warm white’ LEDs. Cool white lights can look blue and clinical; warm white mimics the cozy glow of a candle or incandescent bulb.
- Avoid the ‘runway’ look. Instead of placing lights in two perfectly straight lines, stagger them on either side of the path. This creates a more natural, rhythmic flow that leads the eye forward.
- Focus on ‘up-lighting.’ Place a few solar spotlights at the base of your most beautiful trees or architectural features. This adds depth to the yard and prevents the back of the garden from feeling like a ‘black hole.’
- Check the sun exposure for each stake. Ensure the solar panels aren’t hidden under low-hanging leaves, or they won’t have enough juice to stay lit through the night.
- Install the stakes by first making a pilot hole with a screwdriver if your soil is hard. Never hammer the top of the light itself, as you’ll crack the solar cell.
- Wipe the solar panels with a damp cloth once a month. Dust and pollen can significantly reduce their charging efficiency.
Wrapping Up Your Home Transformation
Transforming your home is a journey of a thousand small projects. From the first brushstroke on a vintage ranch to the final solar light placed in the garden, every effort you put into your space pays off in the way it makes you feel. These viral DIYs are more than just trends—they are blueprints for a more beautiful, functional, and personal life. We hope these guides inspire you to pick up your tools and start creating. Remember, the best ‘after’ photo is the one where you can see yourself finally enjoying the home you’ve always dreamed of!