
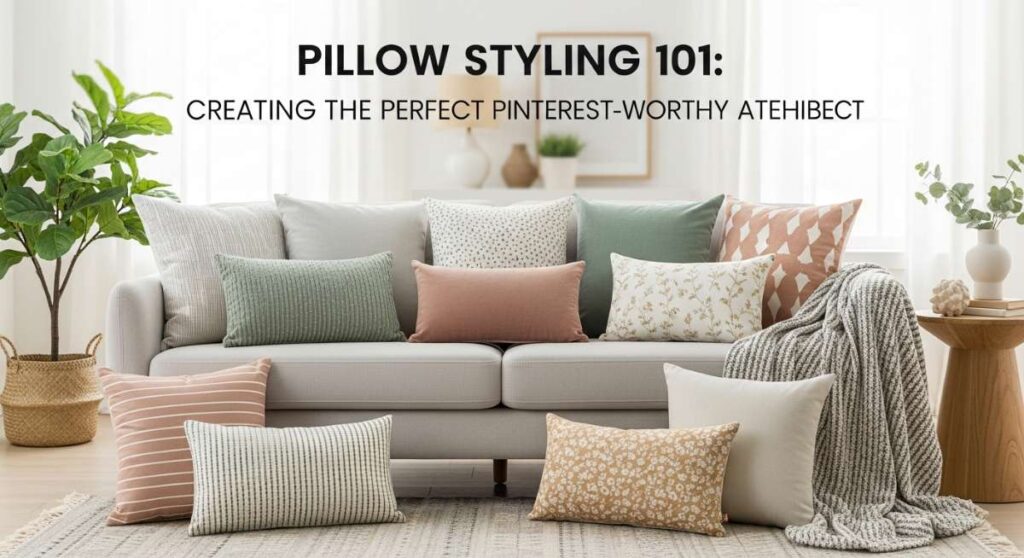
Have you ever walked into a room and felt an instant sense of calm, like the space was whispering a gentle welcome just for you? For years, I struggled to make my home feel like those glossy magazine spreads, wondering why my couch always looked a bit… flat. It wasn’t until I discovered the transformative power of pillow styling that everything clicked. Pillows are more than just cushions; they are the soul of your furniture, the ‘jewelry’ of your room that adds layers of texture, warmth, and personality.
Today, we’re diving deep into the art of the aesthetic pillow arrangement. Whether you’re dreaming of a minimalist sanctuary or a vibrant maximalist haven, the right combination of fabrics and fills can elevate your space from basic to breathtaking. Grab a cup of coffee, settle into your favorite chair, and let’s explore how to create that Pinterest-worthy magic right in your own home.
How to Master Throw Pillow Combinations for a Designer Living Room
Why we love this
There is something incredibly satisfying about a perfectly curated living room sofa that balances structure with softness. We love this approach because it uses high-contrast textures—think buttery velvet against raw, slubby linen—to create a visual rhythm that feels professional yet lived-in. The aroma of a fresh candle nearby enhances the tactile experience of sinking into a well-proportioned set of pillows that offer both lumbar support and cloud-like softness under your elbows.
Essential Elements:
- Two 22-inch solid base pillows
- Two 20-inch patterned pillows
- One 18-inch textured accent pillow
- High-quality down or down-alternative inserts
- Coordinating color palette (3-4 tones)
How to make it
- Phase 1: The Foundation. Start by placing your largest 22-inch pillows in the far corners of the sofa. Use a ‘karate chop’ motion in the center top to create a crisp, designer V-shape. Ensure the inserts are 2 inches larger than the covers for a ‘plump’ visual cue of high-end quality.
- Phase 2: Layering Patterns. Layer your 20-inch patterned pillows directly in front of the base layer, offsetting them slightly toward the center. Check for ‘visual heat’—if the patterns are too busy, cool them down by ensuring at least one pattern is a larger scale than the other.
- Phase 3: The Focal Point. Place your 18-inch textured pillow (like a bouclé or lumbar shape) in the dead center or slightly to one side. Timing is key here; step back and assess the balance for 30 seconds to ensure the colors flow naturally across the seating area.
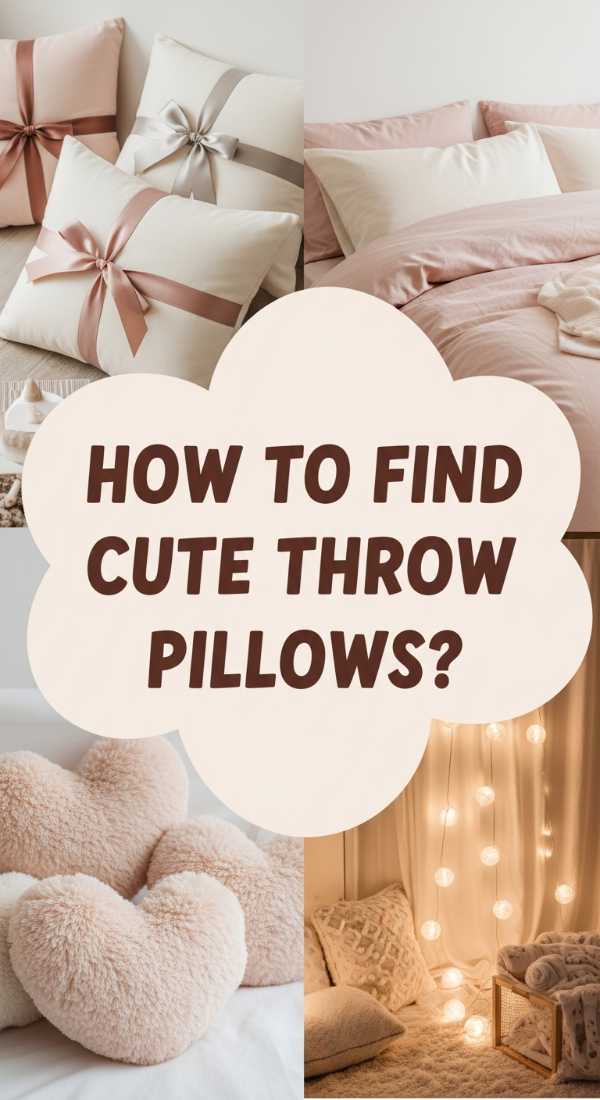
How to Curate Cute Throw Pillows for a Dreamy Aesthetic Bedroom
Why we love this
This style is all about creating a romantic, ethereal escape from the world. We love the way soft pastels and ruffled edges catch the morning light, creating a sanctuary that smells of lavender and fresh laundry. The feeling is one of total weightlessness; when you lean back against a stack of curated pillows, the stress of the day simply melts away into a sea of silk and soft cotton.
Essential Elements:
- Oversized Euro shams (2-3 depending on bed size)
- Standard pillows with decorative cases
- Small round or heart-shaped aesthetic pillows
- Faux fur or chunky knit textures
- Soft lighting or fairy lights nearby
How to make it
- Phase 1: The Backdrop. Prop your Euro shams against the headboard. These act as your ‘crust,’ providing the sturdy base for the softer elements. Ensure they are pulled taut to avoid unsightly wrinkles that ruin the ‘doneness’ of the look.
- Phase 2: The Soft Middle. Place your sleeping pillows in front, followed by your decorative standard shams. Use a light hand; the goal is a fluffy, effortless stack rather than a rigid line.
- Phase 3: The Personality Pop. Add your uniquely shaped ‘cute’ pillows at the very front. The visual cue for success is a sense of whimsy—if it looks too symmetrical, move the heart-shaped pillow slightly off-center to achieve that ‘dreamy’ bedroom aesthetic.
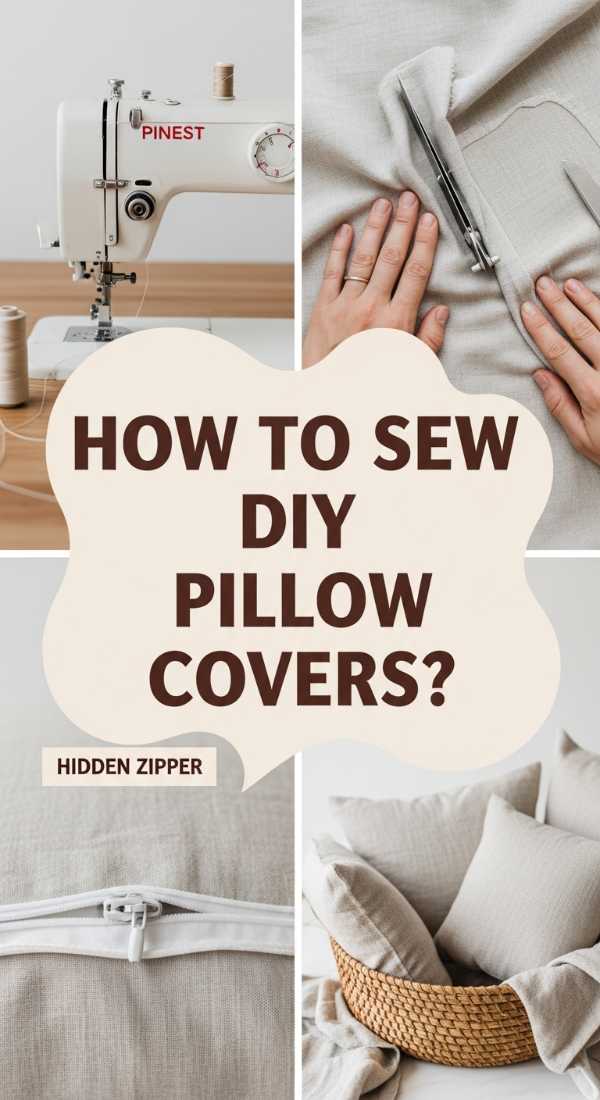
How to Craft DIY Pillow Covers for a Custom Home Makeover
Why we love this
DIY covers bring an unmatched sense of pride and a scent of ‘new project’ excitement to your home. We love this because it allows for total creative freedom—you aren’t limited by what’s in the store. The feeling of running your hands over a fabric you chose and a seam you stitched yourself is incredibly rewarding, adding a layer of personal history to your home decor.
Essential Elements:
- Heavyweight upholstery fabric or vintage textiles
- Fabric shears and a sewing machine
- Coordinating thread
- Envelope closure pattern or zipper tape
- Measuring tape and fabric chalk
How to make it
- Phase 1: Fabric Preparation. Pre-wash your fabric to prevent shrinkage later. Iron the material on a medium heat level until perfectly flat; this ensures your cuts are precise and your final ‘cook’ is professional.
- Phase 2: The Cut. Measure your pillow insert and add 1 inch for seam allowance. Cut one front piece and two back pieces (for an envelope closure). The visual cue for a good cut is perfectly straight edges that align when stacked.
- Phase 3: Assembly. Pin the fabric right sides together. Sew with a 1/2 inch seam allowance, backstitching at the start and end for durability. Turn right side out and use a knitting needle to poke out the corners for a sharp, high-end finish.
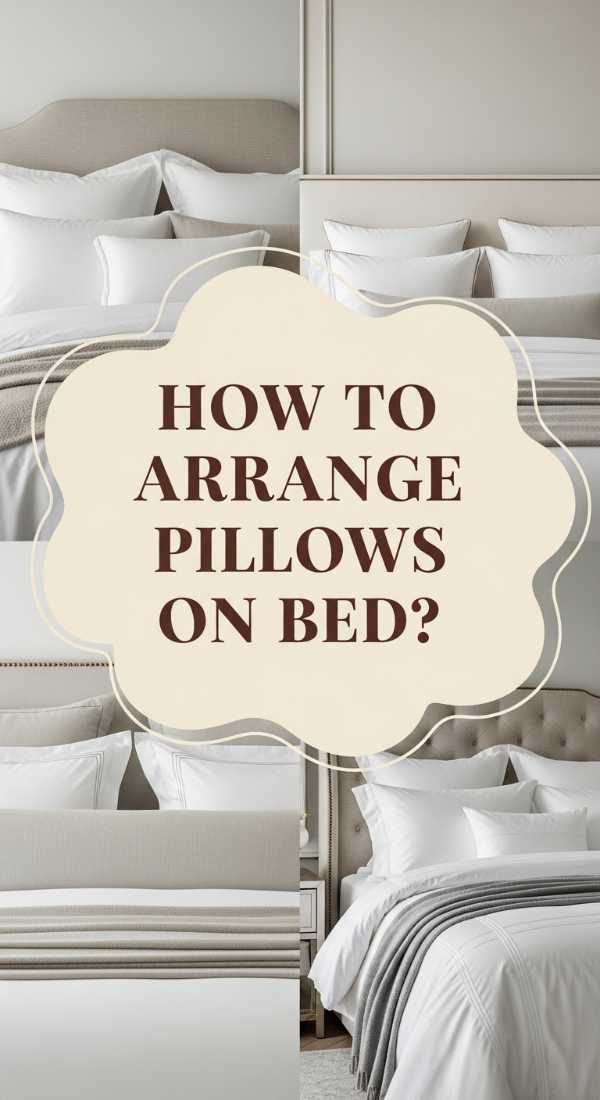
How to Arrange Decorative Pillows on Bed for a Luxury Hotel Feel
Why we love this
There is nothing quite like the crisp, starched feeling of a five-star hotel bed. This styling method brings that expensive, pampered sensation into your everyday life. We love the way the symmetry provides a sense of order and the aroma of high-quality cotton percale makes the whole room feel cleaner and more expensive. It’s about the ‘bite’ of the fabric—cool, smooth, and perfectly placed.
Essential Elements:
- White Euro shams with piping
- King or Queen size sleeping pillows
- Bolster pillow for neck support
- Heavyweight linen duvet cover
- Starch spray for crispness
How to make it
- Phase 1: The Symmetrical Base. Stand two Euro shams vertically against the headboard. Spray lightly with starch and iron while standing to achieve that ‘standing tall’ visual cue common in luxury hotels.
- Phase 2: Layered Depth. Place your sleeping pillows flat in front, then lean your decorative shams against them at a 45-degree angle. This creates ‘depth of field’ in your bedding design.
- Phase 3: The Signature Bolster. Place a long bolster pillow across the center front. The ‘doneness’ indicator here is a perfectly centered alignment with the foot of the bed, creating a clean line for the eye to follow.
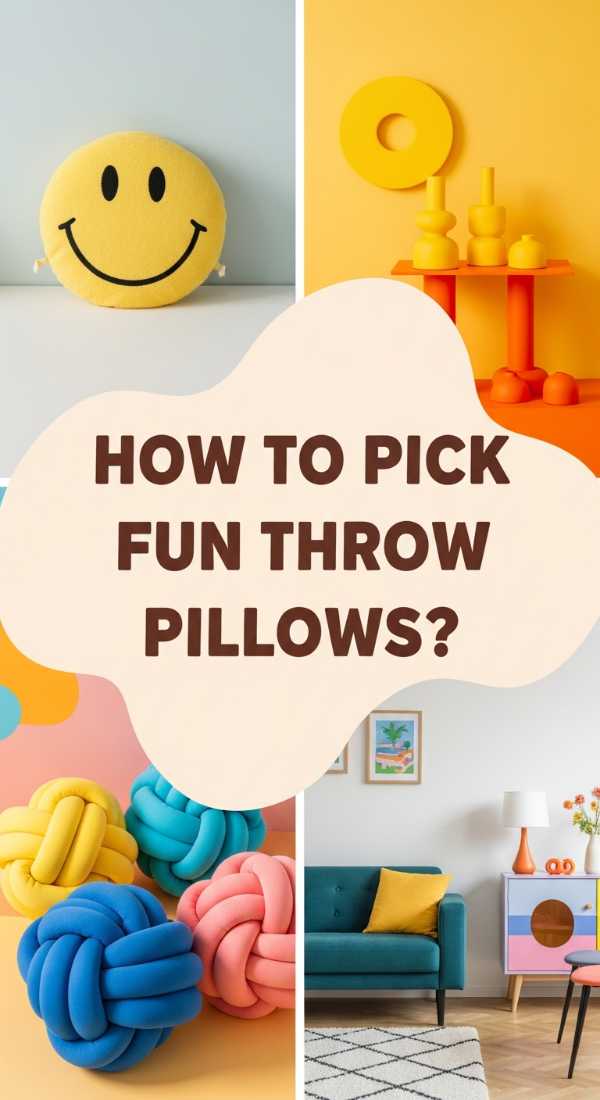
How to Choose Fun Throw Pillows for a Pop of Personality
Why we love this
Interiors should never be too serious, and we love this approach for its ability to spark conversation and joy. A ‘fun’ pillow acts like a spice in a recipe—too much is overwhelming, but just enough changes the whole flavor. The feeling is energetic and playful, often featuring bold embroidery or unexpected shapes that reflect your unique sense of humor and style.
Essential Elements:
- Novelty shaped pillows (fruit, animals, or objects)
- Bold graphic prints
- Bright, saturated colors
- Embroidered quotes or motifs
- A neutral sofa to act as the canvas
How to make it
- Phase 1: The Palette Check. Choose one ‘fun’ pillow as your hero piece. Ensure its primary color appears elsewhere in the room (like in a rug or art) to give the ‘flavor’ consistency across the space.
- Phase 2: The Pairing. Surround the fun pillow with two solid, neutral cushions. This prevents the look from becoming cluttered and allows the personality piece to truly ‘simmer’ and stand out.
- Phase 3: Position for Impact. Place the fun pillow in a slightly tilted position on a side chair or the corner of a sofa. The visual cue is a sense of intentional ‘accidental’ placement that feels lived-in rather than staged.
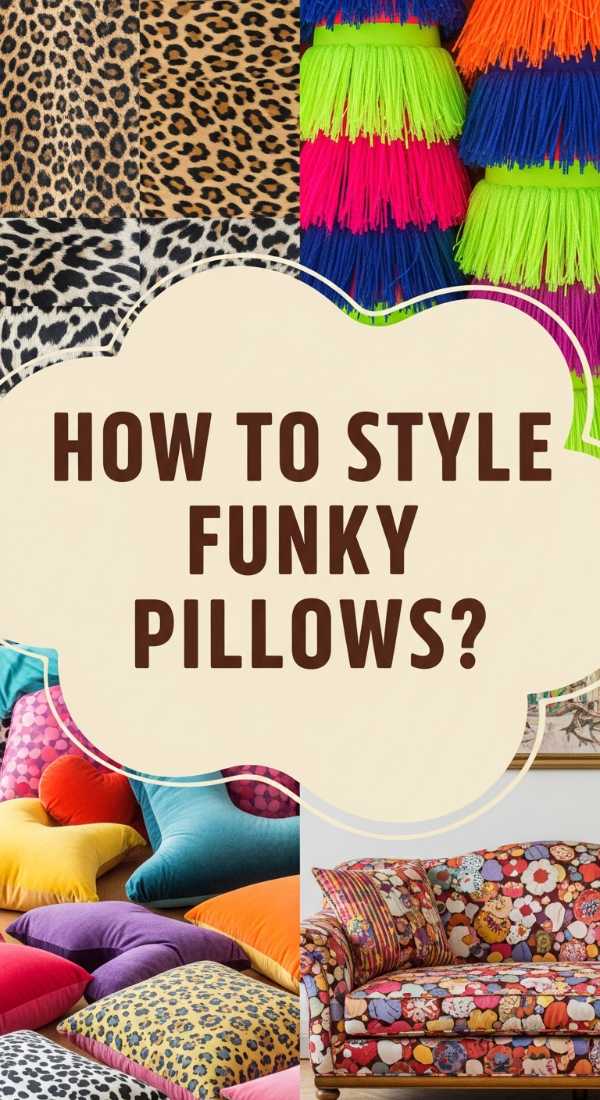
How to Style Funky Throw Pillows for a Maximalist Home Vibe
Why we love this
Maximalism is a feast for the senses, and we love the ‘more is more’ philosophy when it comes to funky pillows. This style smells of incense and old books; it feels rich, heavy, and full of history. The mix of fringe, tassels, and clashing patterns creates a cozy nest that feels incredibly curated and artistic, like a gallery you can actually nap in.
Essential Elements:
- Tassels and fringe embellishments
- Clashing patterns (floral meets geometric)
- Velvet, silk, and wool textures mixed together
- Mismatched sizes and shapes
- Deep, jewel-toned colors
How to make it
- Phase 1: Color Saturation. Choose a base color (like emerald green or navy) and select 5-7 pillows in various patterns that all share that ‘undertone.’ This creates a cohesive ‘reduction’ of style rather than chaotic mess.
- Phase 2: Texture Layering. Layer a fringed pillow next to a smooth silk one. The contrast in ‘mouthfeel’ (tactile sensation) is what makes maximalism work. Ensure no two adjacent pillows have the same texture.
- Phase 3: The Overflow. Fill the entire length of the sofa. The visual cue for ‘doneness’ in maximalism is when the furniture itself almost disappears under a mountain of beautiful, funky textiles.
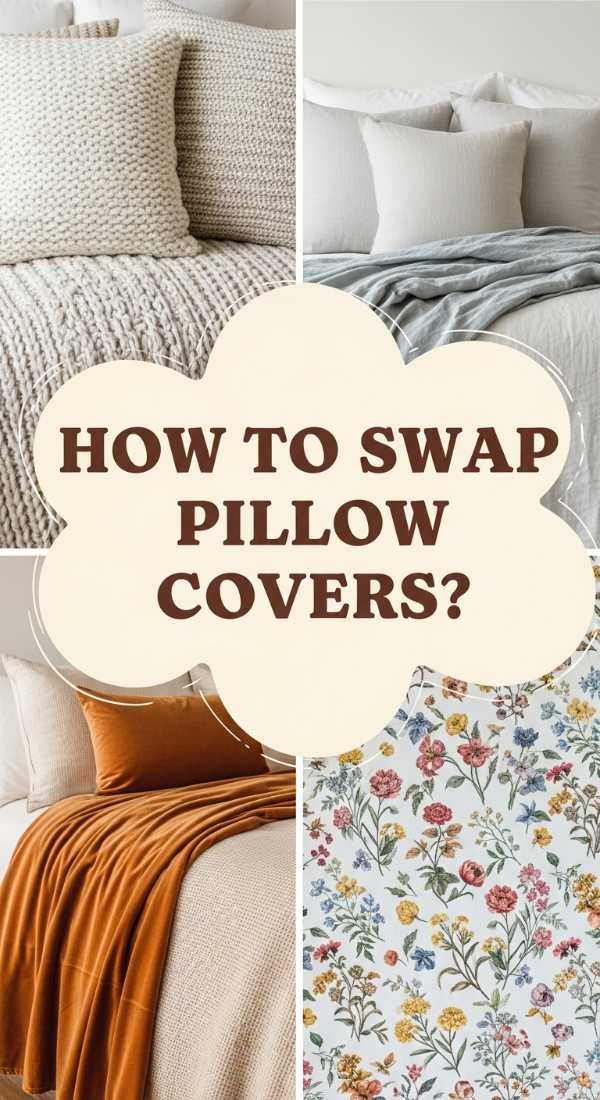
How to Refresh Your Space with Throw Pillow Covers for Every Season
Why we love this
Refreshing your pillows seasonally is the easiest way to keep your home feeling current without a full renovation. We love the anticipation of bringing out the ‘summer linens’ or ‘winter velvets.’ It changes the literal ‘temperature’ of the room—from the cool, breezy scent of cotton in July to the warm, spicy aroma of wool and cedar in December.
Essential Elements:
- A set of high-quality pillow inserts
- Seasonal cover sets (Linen/Cotton for Spring/Summer; Velvet/Wool for Fall/Winter)
- Storage bins for off-season covers
- A cohesive year-round color palette
- Small seasonal accessories (vases, throws)
How to make it
- Phase 1: The Seasonal Purge. Remove all current covers and laundered them before storage. This ensures no stale scents are trapped in the fabric, keeping your ‘pantry’ of decor fresh.
- Phase 2: Texture Selection. For warmer months, choose light-colored, breathable fabrics. For colder months, increase the ‘heat’ of the room with heavy knits and darker, moodier tones.
- Phase 3: The Swap. Fit the new covers onto your existing inserts. The visual cue is an immediate shift in the room’s mood—light and airy for summer, or deep and cozy for winter.
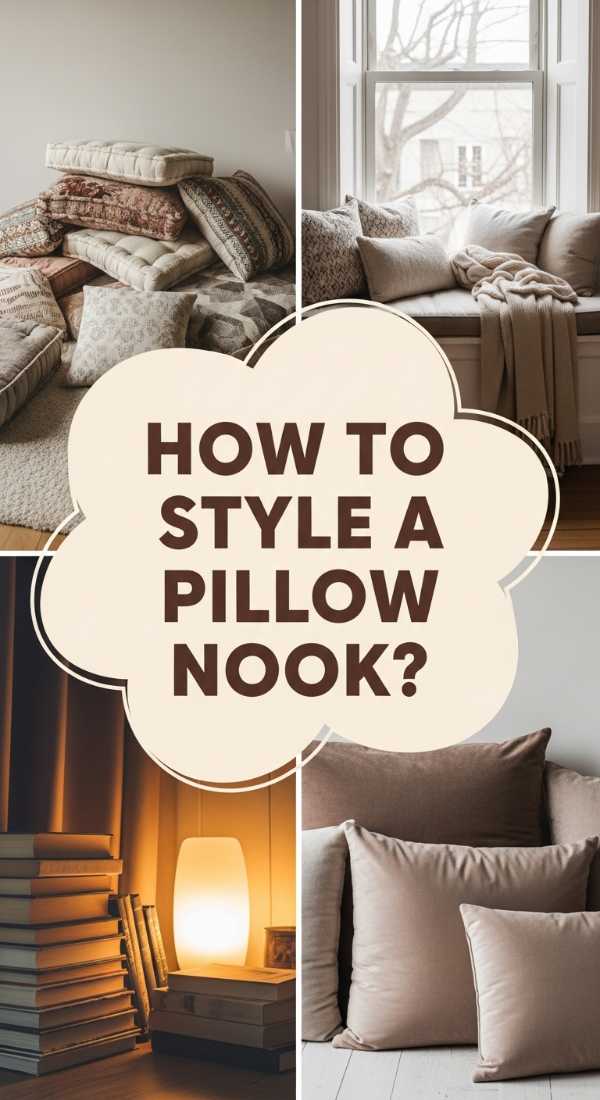
How to Use Creative Pillow Ideas for the Ultimate Reading Nook
Why we love this
A reading nook is a personal retreat, and we love using creative pillow arrangements to define this space as a ‘no-stress zone.’ The aroma of old paper and a hot cup of tea pairs perfectly with oversized floor cushions and supportive lumbar pillows. It’s all about the ergonomic ‘hug’—a feeling of being completely supported while you disappear into another world.
Essential Elements:
- One oversized floor pillow
- Two medium square pillows
- One long lumbar pillow for back support
- A soft, textured throw blanket
- Small side table for books and tea
How to make it
- Phase 1: The Base Layer. Place the oversized floor pillow in the corner. This acts as the ‘foundation’ of your nook. Ensure it is plump and hasn’t ‘deflated’ over time; replace the fill if necessary for a firm support cue.
- Phase 2: Wall Padding. Lean the two square pillows against the wall to create a soft backrest. Position them slightly overlapping to prevent any ‘cold spots’ where the wall might touch your back.
- Phase 3: Ergonomic Finish. Place the lumbar pillow at the base of the square pillows. The ‘doneness’ indicator is when you sit down and feel an immediate release of tension in your lower back—the perfect ‘prep’ for a long reading session.
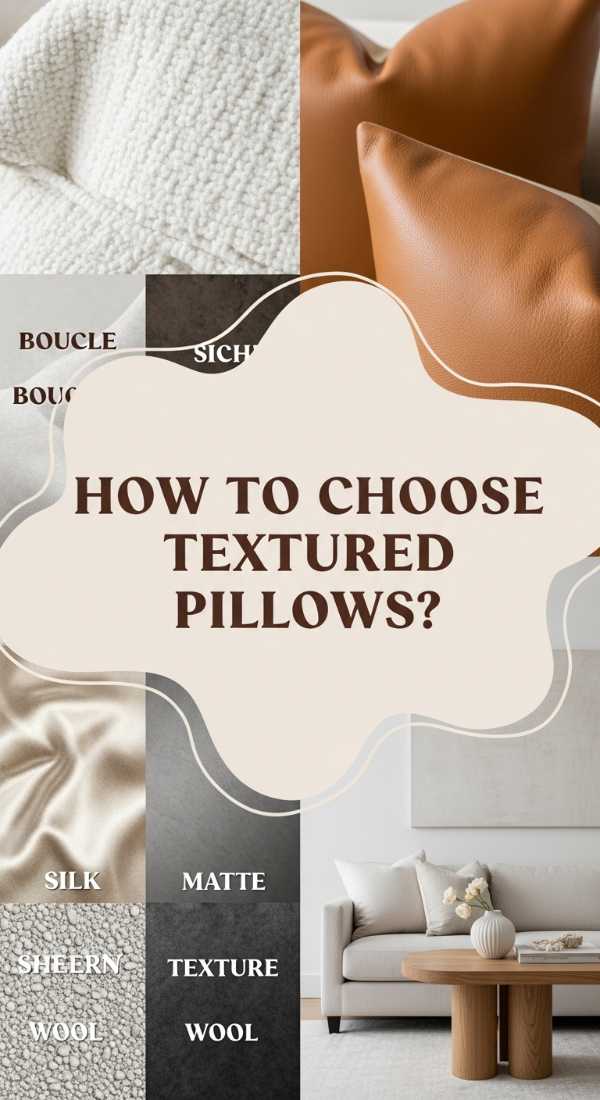
How to Select Decorative Pillows for a High End Textural Look
Why we love this
High-end design is often less about color and more about the interplay of light and shadow on different surfaces. We love this look because it feels sophisticated, quiet, and incredibly expensive. The scent is subtle—perhaps expensive leather or fresh eucalyptus—and the feeling is one of understated luxury where every touch reveals a new, interesting texture.
Essential Elements:
- Bouclé and shearling fabrics
- Genuine or high-quality faux leather
- Woven grasscloth or silk slub textiles
- Monochromatic color scheme (creams, tans, grays)
- Feather-down inserts only
How to make it
- Phase 1: The Tonal Selection. Pick one color family. Choose 4-5 pillows that are all within two shades of each other. This creates a ‘simmering’ visual effect that is calm rather than jarring.
- Phase 2: Material Contrast. Pair a rough, woven textile with a smooth, matte leather. The visual cue for success is how the light hits the different surfaces—if they all look the same, add more ‘grit’ with a chunky knit or bouclé.
- Phase 3: The Arrangement. Space them out slightly rather than crowding them. High-end looks need ‘room to breathe.’ Step back; the ‘visual doneness’ is a sense of effortless, expensive harmony.
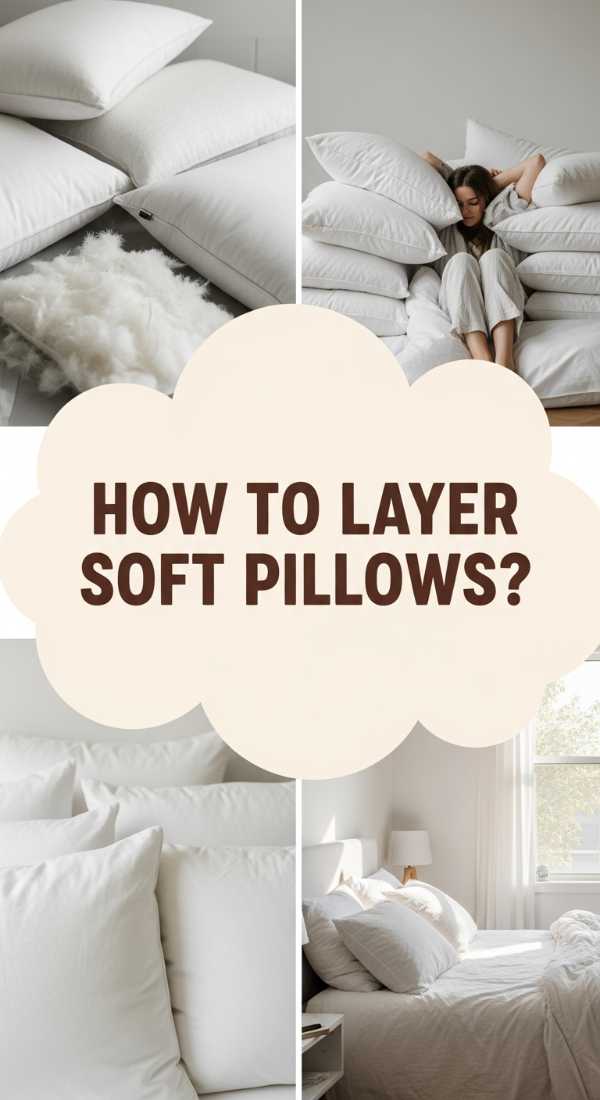
How to Layer Pillows for a Cloud Like Comfort Experience
[IMAGE_10]
Why we love this
This is the ultimate ‘comfort food’ of interior design. We love the sheer indulgence of a sofa or bed that looks like a literal cloud. It’s about the ‘squish factor’—the feeling of the air escaping the down inserts as you sit, and the aroma of a cozy home environment. It invites you to nap, talk, and truly relax without worrying about messing up a ‘perfect’ arrangement.
Essential Elements:
- Ultra-soft down inserts (size up for extra fluff)
- Jersey knit or soft linen covers
- Large quantities (6+ pillows for a sofa)
- Muted, soothing colors
- Oversized proportions
How to make it
- Phase 1: The Fluffing. Take every insert outside and give them a good shake. This incorporates air into the feathers, ensuring a ‘cloud-like’ rise. Visual cue: the pillows should look twice as thick as they did before.
- Phase 2: The Random Layer. Instead of strict lines, layer the pillows in ‘clusters’ of three. This creates a more organic, inviting ‘doneness’ that signals comfort over formality.
- Phase 3: The Softness Check. Press your hand into the center of the stack. If it doesn’t slowly bounce back, add more inserts. The final ‘prep’ is a light mist of linen spray to complete the sensory experience of a cloud-like retreat.
Conclusion: Your Home, Your Masterpiece
Pillow styling is one of the most rewarding ways to express your personal style while making your home more comfortable. By focusing on the ‘recipe’ of textures, sizes, and layers, you can turn any basic piece of furniture into a designer statement. Remember, there are no strict rules—only guidelines to help you find the ‘flavor’ that feels most like home to you. So go ahead, start swapping those covers and fluffing those inserts; your perfect Pinterest-worthy aesthetic is only a few pillows away!