
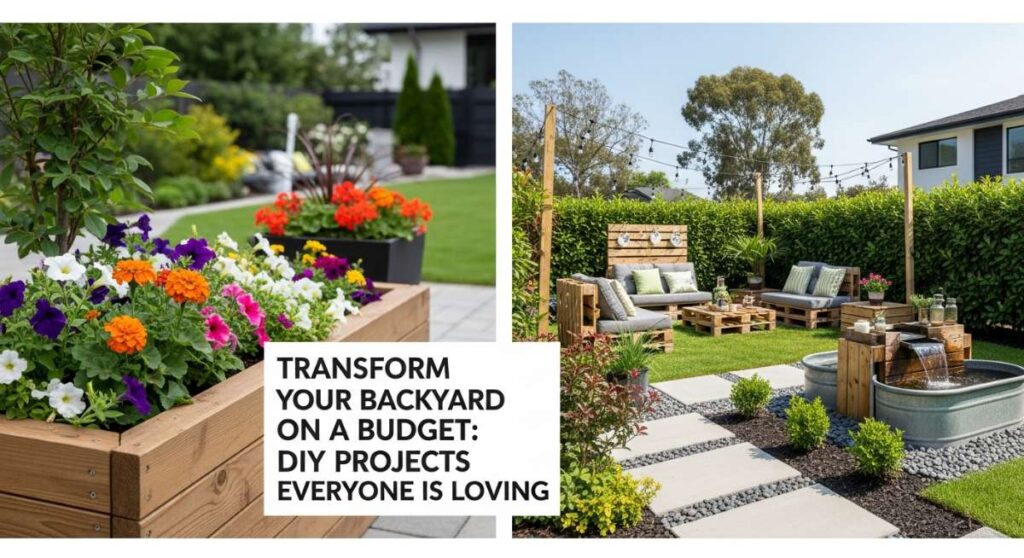
Transform Your Backyard on a Budget: DIY Projects Everyone Is Loving
You know that feeling when you step out onto your back porch with a cold drink in hand, ready to relax, but instead of peace, you’re met with a long list of ‘to-dos’ and a yard that feels just a little bit… uninspired? We’ve all been there. Your home should be your sanctuary, a place where the air feels lighter and the stresses of the day melt away into the sunset. But often, the gap between the Pinterest board of our dreams and the reality of our outdoor space feels like a mountain we can’t afford to climb.
The good news is that viral home transformations don’t require a professional crew or a second mortgage. Lately, the DIY community has been exploding with creative, budget-friendly ways to turn a basic backyard or a tired exterior into a high-end retreat. It’s all about the details—the texture of a well-placed fence, the shimmer of glass in the sunlight, and the smart organization of your square footage. Let’s dive into the projects that are currently breaking the internet and will help you fall back in love with your home.
How to Transform a Ranch Exterior for Modern Curb Appeal
Why we love this
There is something incredibly satisfying about taking a humble, single-story ranch and giving it a contemporary soul. When you update a ranch exterior, you aren’t just painting walls; you are redefining the first impression your home gives to the world. We love the crisp contrast of dark charcoal trim against creamy white siding, the warmth of natural wood accents that catch the golden hour light, and the way modern lighting casts inviting, soft shadows across your walkway. It feels like your home is finally taking a deep breath and showing its true potential.
Essential Elements:
- High-quality exterior paint in a modern palette (think black, white, and sage).
- Natural wood shutters or a new cedar-toned front door.
- Modern black metal house numbers and hardware.
- Low-voltage LED pathway lighting.
- Statement planters with architectural greenery like snake plants or boxwoods.
How to make it
- Begin by power washing the entire exterior to remove years of dust, spiderwebs, and grime; this ensures your new paint will bond perfectly to the surface.
- Remove all old shutters, house numbers, and outdated light fixtures, filling any unnecessary holes with exterior-grade wood filler or caulk.
- Apply a high-quality masonry or siding primer, then follow with two coats of your chosen base color using a professional-grade sprayer for a seamless, factory-like finish.
- Contrast the siding by hand-painting the trim, window frames, and fascia in a bold, darker hue to create architectural depth and visual interest.
- Install your new cedar shutters or stained wood accents, ensuring they are level and securely fastened to add organic texture to the flat surfaces.
- Swap out your old hardware for matte black or brushed gold fixtures, and place your modern planters symmetrically near the entrance to frame the view.
How to Incorporate Glass Yard Art for a Shimmering Garden
![]()
Why we love this
Glass yard art brings a magical, ethereal quality to a garden that plants alone simply cannot provide. As the sun moves across the sky, these pieces catch the light, scattering prismatic colors across your lawn and creating a dance of light that feels like something out of a fairytale. We love the smooth, cool texture of the glass against the soft velvet of flower petals and the way a gentle breeze makes glass chimes sing with a delicate, crystalline melody. It’s a sensory feast that adds height, color, and a touch of whimsy to even the smallest garden beds.
Essential Elements:
- Colorful glass bottles or recycled glass sculptures.
- Sturdy copper or rebar stakes for mounting.
- Copper wire or weather-resistant adhesive.
- Glass beads, marbles, or antique suncatchers.
- Solar-powered fairy lights to illuminate the glass at night.
How to make it
- Collect a variety of glass bottles or unique glassware in different heights and shades of blue, green, and amber to create a diverse color palette.
- Thoroughly clean the glass with a mixture of vinegar and water to ensure maximum clarity and light refraction.
- For a vertical ‘bottle tree’ effect, drive sturdy rebar stakes into the ground at varying heights, ensuring they are deep enough to remain stable in high winds.
- Slide the bottles over the stakes, or use decorative copper wire to wrap and hang glass prisms from low-hanging tree branches.
- Position your glass art in areas where it will catch the direct morning or afternoon sun, maximizing the ‘shimmer’ effect across your patio.
- Add a few solar spotlights at the base of your glass installation to keep the glow alive long after the sun has set.
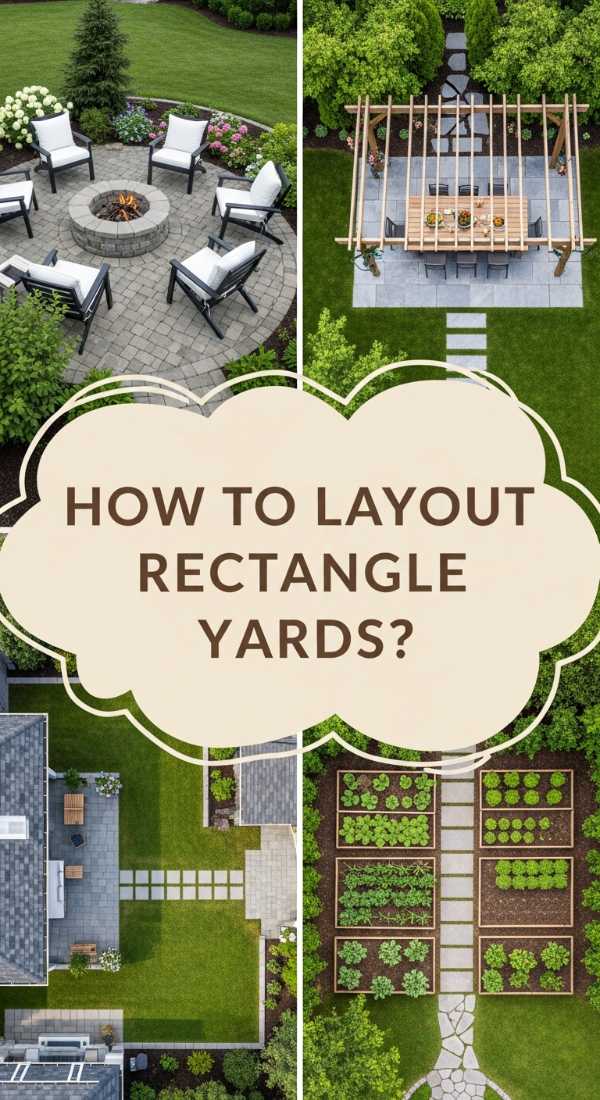
How to Organize a Rectangular Backyard for Maximum Fun
Why we love this
A rectangular backyard can often feel like a boring green hallway, but with the right organization, it becomes a multi-functional paradise. By creating distinct ‘rooms’ or zones, you turn a flat space into an experience where you can move from a cozy fire pit lounge to a vibrant dining area seamlessly. We love the feeling of walking along a crushed stone path, the crunch underfoot signaling a transition into a new area of the garden. It’s about maximizing every inch of your property so that your kids, your pets, and your guests all have a dedicated spot to enjoy.
Essential Elements:
- Outdoor rugs to define seating areas.
- Pavers, gravel, or stepping stones for pathways.
- Strategic landscaping (tall grasses or hedges) to act as natural dividers.
- String lights (Edison bulbs) to create an overhead ‘ceiling.’
- Vertical gardening elements like trellises or privacy screens.
How to make it
- Sketch a birds-eye view of your yard and divide the rectangle into three distinct zones: dining, lounging, and play/utility.
- Use landscape spray paint to mark out the boundaries of each zone and the paths that will connect them.
- Exert effort in leveling the ground for your dining area, laying down a base of weed-barrier fabric followed by leveled pavers or a thick layer of pea gravel.
- Install vertical elements like a wooden trellis or a row of tall planters between the zones to create visual ‘walls’ that provide a sense of cozy enclosure.
- Anchor your lounging zone with a large weather-proof rug and surround it with comfortable seating facing a central focal point, like a fire table.
- Hang string lights in a zig-zag pattern across the entire length of the yard to unite the zones under a warm, amber glow.
How to Create a Custom Air Return Vent Cover for a Polished Look

Why we love this
Interior design enthusiasts know that nothing ruins a beautiful wall faster than a dusty, industrial-looking metal vent cover. Creating a custom cover is one of those ‘hidden’ upgrades that instantly elevates the sophistication of a room. We love the smooth, matte finish of a custom-painted wooden grate that blends perfectly with your wall color, and the satisfying way a decorative pattern can turn a functional necessity into a piece of art. It’s a quiet detail that whispers luxury and shows that every corner of your home has been curated with care.
Essential Elements:
- Laser-cut decorative wood or metal panels.
- Wood trim or molding for the frame.
- Magnets or hidden hinges for easy removal.
- Fine-grit sandpaper and high-quality paint.
- Measuring tape and a miter saw.
How to make it
- Measure your existing air return opening carefully, adding an inch to each side to allow for the frame to sit flush against the wall.
- Select a decorative panel with enough ‘open’ space to ensure your HVAC system still receives proper airflow.
- Build a simple rectangular frame using mitered corners of thin decorative molding that fits around the perimeter of your panel.
- Attach the decorative panel to the back of the frame using a strong construction adhesive or small brad nails, ensuring it is perfectly centered.
- Sand the entire assembly until it is buttery smooth, then prime and paint it to match your wall color exactly or contrast it with a metallic finish.
- Install heavy-duty magnets to the corners of the vent opening and the back of your new cover so it snaps into place but remains easily removable for filter changes.
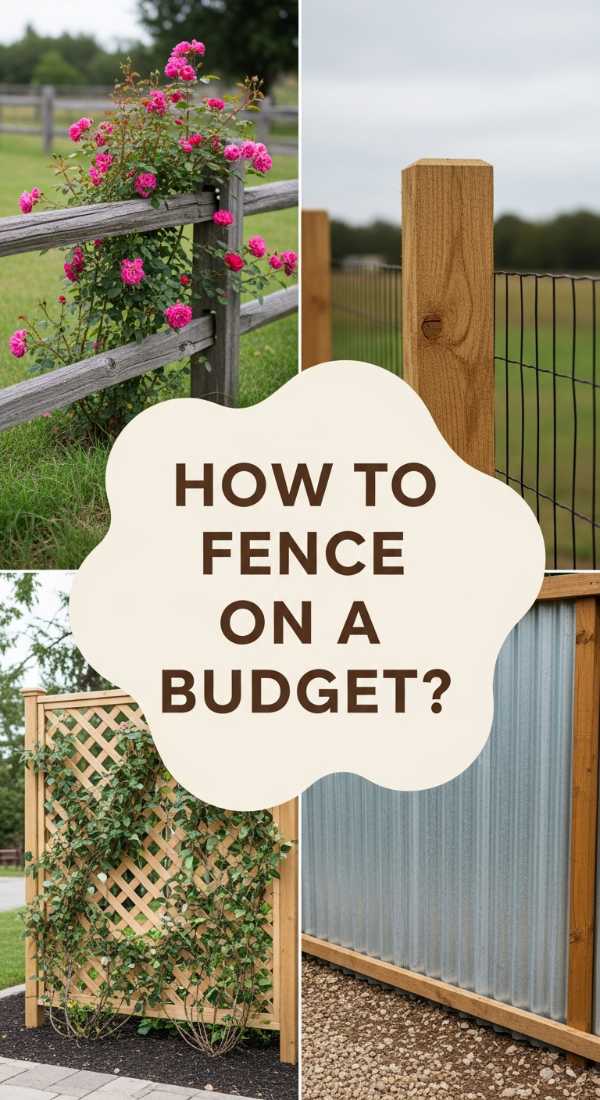
How to Build a Privacy Fence for a Fraction of the Cost

Why we love this
There is no substitute for the feeling of true privacy—that moment you step outside and know the world is shut away. Standard professional fencing can cost thousands, but a DIY approach using budget-friendly materials like cedar pickets or even reclaimed pallets can look even more high-end. We love the scent of freshly cut wood, the rhythmic pattern of horizontal slats that make a small yard feel wider, and the way a rich stain brings out the swirling grain of the timber. It’s a sturdy, protective hug for your backyard that looks like a million bucks.
Essential Elements:
- Pressure-treated 4×4 posts for structural integrity.
- Standard cedar or pine fence pickets.
- Outdoor-rated deck screws or galvanized nails.
- Quick-set concrete for post holes.
- Semi-transparent stain or exterior sealant.
How to make it
- Determine your property line and mark your post holes every 6 to 8 feet, ensuring they are perfectly aligned using a string line.
- Dig holes at least 2 feet deep (or below your frost line) and set your 4×4 posts in quick-set concrete, using a level to ensure they are perfectly vertical.
- Install horizontal support rails (2x4s) at the top, middle, and bottom of your posts to create a sturdy frame for your pickets.
- For a modern look, install your pickets horizontally with a 1/2 inch gap between each board to allow for wind passage and a sleek aesthetic.
- Use a spacer block between boards as you nail them in to ensure perfectly consistent gaps across the entire length of the fence.
- Finish the wood with a high-quality UV-resistant stain to prevent graying and protect the fibers from moisture damage.
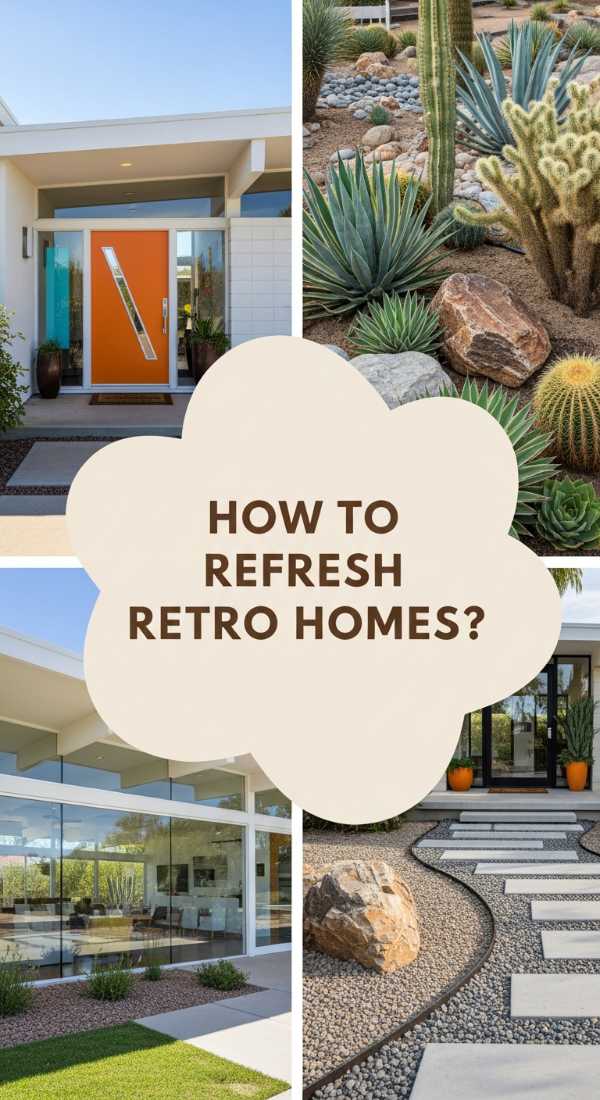
How to Refresh a Retro Home for Timeless Elegance
Why we love this
Retro homes have a character and ‘good bones’ that modern builds often lack, but they can easily start to feel dated rather than vintage. Refreshing these spaces is about honoring the past while introducing modern textures. We love the combination of mid-century clean lines with soft, organic fabrics, the warmth of original hardwood floors polished to a mirror shine, and the way brass accents pop against a fresh coat of moody, deep-hued paint. It’s a sophisticated blend that feels both nostalgic and incredibly current, like a classic cocktail served in a modern glass.
Essential Elements:
- Modern architectural hardware (brushed brass or matte black).
- Light-filtering window treatments or linen curtains.
- Period-appropriate paint colors (mustard, sage, or navy).
- Updated light fixtures (sputnik or globe styles).
- Vintage-style rugs with low pile and geometric patterns.
How to make it
- Identify the ‘hero’ features of your retro home, such as a stone fireplace or large windows, and clean them thoroughly to make them the focal point.
- Swap out dingy, yellowed plastic light switches and outlet covers for modern, screwless plates in a crisp white or metallic finish.
- Paint the interior trim a bright, clean white to make the older wall textures look intentional and refreshed rather than worn.
- Update the ‘jewelry’ of your home by replacing every door handle and cabinet knob with high-quality, weighted hardware in a consistent finish.
- Integrate modern tech, like a smart thermostat, but choose models with a minimalist design that doesn’t clash with the vintage aesthetic.
- Layer your lighting with floor lamps and sconces to avoid the harsh overhead glare common in older homes, creating a warm, moody atmosphere.
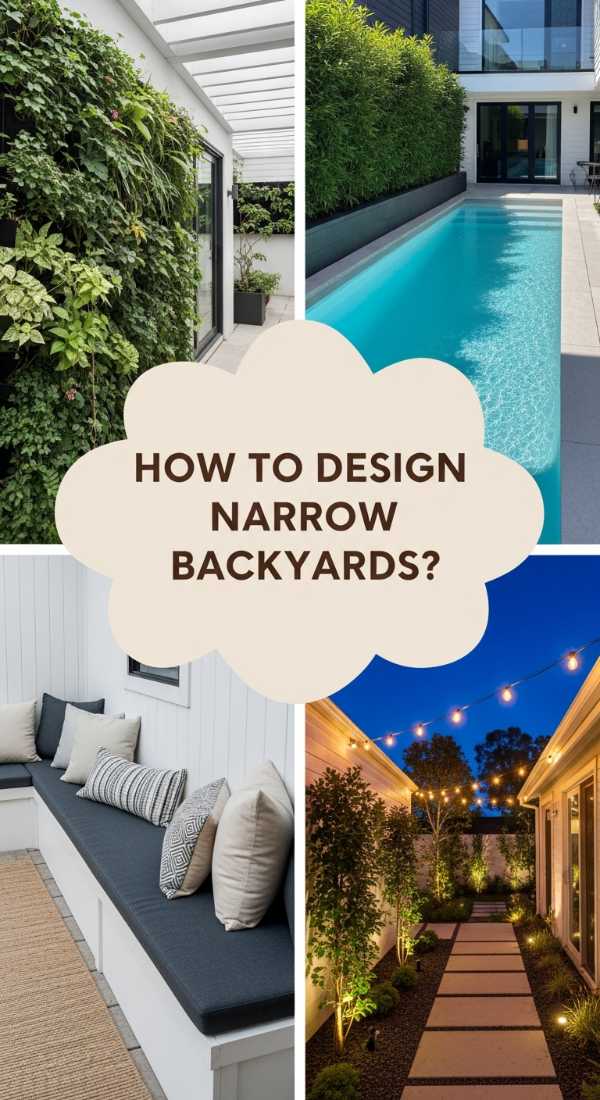
How to Design a Narrow Outdoor Space for Ultimate Relaxation
Why we love this
A narrow side yard or a slim balcony often goes to waste, but these are actually the best spots for creating an intimate, ‘secret garden’ vibe. Because the space is tight, you can focus on high-impact details. We love the lushness of a vertical herb garden climbing the wall, the soft glow of lanterns at eye level, and the way a slim bistro set invites you to slow down for a morning coffee. It’s a cozy, protected nook where the world feels far away, and every square inch is packed with comfort and greenery.
Essential Elements:
- Vertical planters or wall-mounted trellises.
- Slim-profile furniture (folding bistro sets or built-in benches).
- Outdoor mirrors to create the illusion of width.
- Pea gravel or outdoor carpet to define the floor.
- Hanging plants like ferns or ivy to draw the eye upward.
How to make it
- Clear the narrow path of all clutter and lay down a light-colored outdoor rug or light stone pavers to brighten the corridor and make it feel wider.
- Utilize vertical space by installing a series of wooden slats or a metal grid on the wall for climbing plants or hanging pots.
- Choose ‘skinny’ plants like Italian Cypress or tall grasses that provide height and privacy without encroaching on the walking path.
- Install a built-in bench along one side of the space with hidden storage underneath to maximize utility without adding bulky furniture.
- Place a large outdoor-safe mirror on the furthest wall to reflect the light and the greenery, effectively ‘doubling’ the visual size of the area.
- Add soft textiles like weather-resistant throw pillows and a thin knit blanket to make the space feel like a true extension of your indoor living room.
How to Craft Decorative Vent Covers for Seamless Wall Design

Why we love this
When your walls are a work of art, a standard utility vent can feel like a blemish. Crafting decorative covers allows you to maintain the seamless flow of your interior design while ensuring your home’s systems function perfectly. We love the way a Moroccan-inspired geometric pattern or a sleek linear design can complement your wallpaper or paint. The texture of the cut-outs creates a beautiful interplay of light and shadow on the wall, turning a boring utility into a designer statement that guests will actually compliment.
Essential Elements:
- Aluminum decorative sheets (available in various patterns).
- Lightweight wood stripping for the frame.
- Spray paint in a finish that matches your decor.
- Tin snips for cutting the metal.
- High-strength adhesive.
How to make it
- Measure the interior dimensions of your vent opening and cut your decorative aluminum sheet to size using tin snips, wearing gloves to protect your hands.
- Build a low-profile frame using thin balsa wood or pine strips, mitered at the corners for a professional look.
- Apply a metal-bonding primer to the aluminum sheet, then spray both the sheet and the frame with a high-quality finish (metallic gold or matte black).
- Glue the decorative sheet into the frame, ensuring it is flat and secure without any rattling parts.
- For a seamless wall look, paint the frame the exact same color as your wall, leaving only the decorative metal pattern as a focal point.
- Mount the cover using small finishing screws or industrial-strength Velcro for a clean, hardware-free appearance.
How to Secure Your Perimeter for Minimal Spending
Why we love this
Security doesn’t have to look like a fortress; it can be integrated beautifully into your landscaping. We love the peace of mind that comes with a well-lit perimeter, where the soft crunch of gravel serves as a natural alarm and smart, stylish lighting guides you home. There is a sense of calm that comes when you know your home is protected by thoughtful design rather than just iron bars. It’s about creating a boundary that feels welcoming to friends but clearly defined to the rest of the world, all while using smart, affordable tech.
Essential Elements:
- Solar-powered motion-sensor lights.
- Crushed stone or gravel for ‘noisy’ pathways.
- Thorny but beautiful landscaping (like roses or holly).
- Smart doorbells or discreet cameras.
- Reinforced strike plates for gates and doors.
How to make it
- Assess the ‘dark spots’ around your home and install solar-powered motion sensors that trigger bright LED lights whenever movement is detected.
- Create a perimeter path of loose gravel or decorative stones; the sound of footsteps on these materials is a highly effective, low-tech deterrent.
- Plant defensive greenery under windows, such as rose bushes or barberry, which offer beautiful blooms while providing a natural, prickly barrier.
- Upgrade your gate latches to heavy-duty, self-closing hardware that ensures your backyard perimeter remains closed at all times.
- Install a smart video doorbell at the main entry point to keep a digital eye on your property without the need for expensive monthly monitoring services.
- Use ‘Beware of Dog’ or security company signs strategically, as the mere suggestion of security is often enough to deter unwanted visitors.
How to Upgrade Your Outdoor Aesthetic for a High End Feel

Why we love this
The ‘High-End’ look is all about layering and intentionality. When you upgrade your outdoor aesthetic, you’re creating an environment that feels like a boutique hotel. We love the way a monochromatic color scheme makes everything look more expensive, the tactile luxury of a thick outdoor rug under bare feet, and the ambient glow of layered lighting that makes the space feel expensive even if the furniture was a Facebook Marketplace find. It’s about the ‘slow living’ vibe—where every detail invites you to linger, relax, and enjoy the beauty of your own creation.
Essential Elements:
- Cohesive color palette (whites, greys, and blacks).
- Large-scale planters in natural stone or concrete finishes.
- Outdoor curtains or shade sails for architectural height.
- High-quality outdoor textiles (pillows, rugs, throws).
- Ambient lighting (string lights, lanterns, and up-lighting).
How to make it
- Start by decluttering the space and removing any mismatched or rusted items that distract from a clean, unified look.
- Apply a consistent finish to your furniture—use a high-quality outdoor spray paint to turn various pieces into a matching ‘set’ in a sophisticated matte charcoal.
- Invest in two or three oversized statement planters; filling them with sculptural plants like Agave or tall grasses creates an immediate designer feel.
- Layer your lighting by combining overhead string lights with floor lanterns and small solar ‘up-lights’ hidden in the foliage to create depth.
- Add architectural interest with a simple white shade sail, which provides UV protection while mimicking the look of a high-end coastal resort.
- Style the area with high-performance outdoor fabrics in neutral tones, adding a few pops of texture like jute or fringe for a curated, finished look.
The Final Flourish: Your Dream Yard Awaits
Transforming your home isn’t about how much money you pour into it; it’s about the creativity and heart you put into every project. Whether you’re painting your ranch exterior or crafting a tiny vent cover, these DIYs prove that a polished, high-end look is within reach for everyone. So, grab your tools, put on some music, and start creating the sanctuary you deserve!
Frequently Asked Questions
Q: What is the most budget-friendly way to add privacy to a yard?
A: Using standard cedar pickets and installing them horizontally is very affordable. Alternatively, fast-growing privacy hedges like Arborvitae provide a ‘living’ fence for the cost of the plants and some soil.
Q: How can I make my DIY projects look professional?
A: The secret is in the prep work. Always sand before painting, use a level for every installation, and don’t skip the primer. Small details like mitered corners and hidden fasteners also make a huge difference.
Q: Will these upgrades increase my home’s value?
A: Absolutely! Curb appeal (exterior paint, lighting, and landscaping) has one of the highest returns on investment of any home project, as it creates an immediate positive impression for appraisers and buyers.