
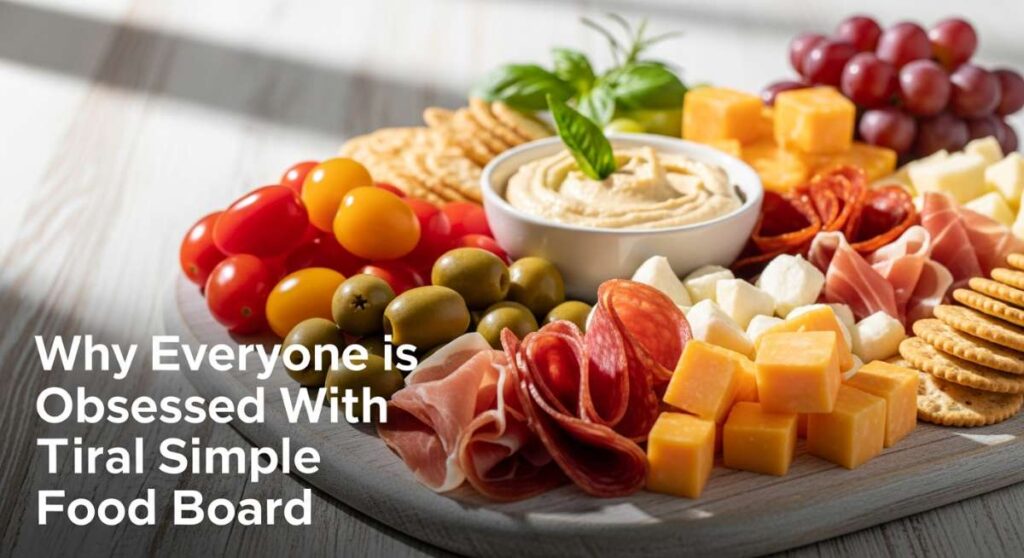
Why Everyone is Obsessed With This Viral Simple Food Board
There is something inherently magical about a shared meal that brings everyone together without the stiffness of a formal sit-down dinner. Lately, my social feed has been blowing up with these stunning ‘Life Boards’—an evolved version of the charcuterie board that blends wellness, comfort food, and high-protein snacks into one beautiful spread. It’s not just about the food; it’s about the feeling of reaching for a bite, sharing a story, and nourishing your body in a way that feels like a warm hug.
I decided to dive deep into this trend to see if it really lived up to the hype, and let me tell you, it does. From the sizzle of a perfectly grilled burger to the calming ritual of prepping for liver health, these boards are about more than just aesthetics. They represent a lifestyle where we prioritize flavor and function in equal measure, making every meal an event to remember.
Whether you’re hosting a backyard bash or looking for ways to lower your stress levels through nutrition, this guide covers every corner of the viral food board movement. Let’s get into the details of how you can recreate these mouth-watering elements at home!
How to grill juicy burgers?

Why we love this
There is nothing quite like the sensory explosion of a burger done right: the initial hiss as the patty hits the red-hot grate, the aroma of rendered fat mingling with woodsmoke, and that first bite where the juice literally runs down your wrist. When you master the art of the juicy burger, you aren’t just making dinner; you’re creating a masterpiece of textures, from the charred, salty exterior crust to the tender, buttery center that melts away. It is the ultimate comfort food that anchors any viral food board with its hearty, soul-satisfying presence.
Ingredients
- 80/20 ground chuck beef
- Kosher salt and freshly cracked black pepper
- Unsalted butter, melted
- Brioche buns
- Sharp cheddar cheese slices
How to make it
- Start with cold meat; handle it as little as possible to prevent the fat from melting into your hands, which keeps the texture light. Shape 6-ounce patties about 1 inch thick, making a slight thumbprint indentation in the center to prevent the ‘football’ bulge during cooking.
- Preheat your grill to high heat (about 450°F). Ensure the grates are scraped clean and lightly oiled to prevent sticking.
- Season the patties generously with salt and pepper only seconds before they hit the heat to avoid drawing moisture out of the meat too early.
- Place patties on the grill and sear for 3-4 minutes without moving them; you want a deep, caramelized crust (the Maillard reaction) to form. Flip only once.
- After flipping, add the cheese and close the grill lid for the final 2-3 minutes. Use a meat thermometer to pull them at 135°F for medium-rare or 145°F for medium.
- Brush your buns with melted butter and toast them on the edge of the grill for 30 seconds until golden brown, then let the meat rest for 5 minutes before serving to allow juices to redistribute.
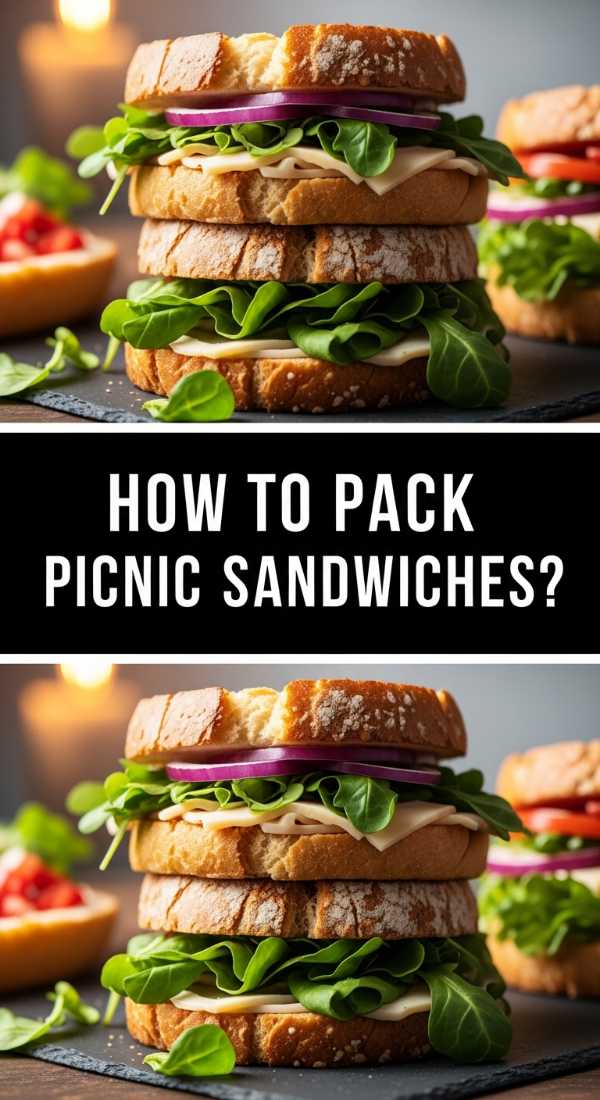
How to pack picnic sandwiches?
Why we love this
A picnic sandwich is a labor of love that tastes like sunshine and fresh air, specifically engineered to withstand the journey to your favorite park. We love the clever architecture of a well-packed sandwich—the way the crusty bread protects the delicate layers of artisanal meats and crisp vegetables within. Each bite offers a harmonious crunch followed by a creamy finish, providing a portable feast that feels much more sophisticated than a standard lunch, especially when presented on a vibrant outdoor board.
Ingredients
- Long baguette or ciabatta loaf
- Pesto or herbed aioli
- Thinly sliced prosciutto and salami
- Fresh mozzarella pearls
- Arugula and sun-dried tomatoes
How to make it
- Slice your bread lengthwise and hollow out a small portion of the top half; this creates a ‘pocket’ that holds the ingredients in place and prevents them from sliding out.
- Apply a moisture barrier: spread a generous layer of aioli or pesto on both sides of the bread. This fat-based layer prevents the juices from the vegetables from making the bread soggy.
- Layer your proteins at the bottom, followed by the cheese. The weight of the meat provides a sturdy base.
- Add the ‘wet’ ingredients like sun-dried tomatoes or pickles in the center, and top with fresh arugula last to keep the greens from wilting against the sauce.
- Wrap the entire sandwich tightly in parchment paper, then tie it with kitchen twine. This compression helps the flavors meld together.
- Store in a cooler with ice packs, but place the sandwich on top of the heavier items to avoid crushing the bread before you reach your destination.
How to eat for liver health?

Why we love this
Eating for liver health feels like giving your body a fresh start, focusing on vibrant, bitter, and detoxifying ingredients that leave you feeling light and energized. There is a crisp, refreshing quality to these foods—the snap of a raw radish, the earthy depth of steamed beets, and the bright, floral notes of fresh lemon zest. Incorporating these elements into your board adds a pop of color and a functional health boost that balances out richer treats, making your meal as restorative as it is delicious.
Ingredients
- Dandelion greens or radicchio
- Fresh beets, roasted and sliced
- Artichoke hearts
- Turmeric and black pepper dressing
- Fresh lemon wedges
How to make it
- Prepare your base by washing bitter greens like dandelion or radicchio in ice-cold water to crisp them up; the bitterness is essential for stimulating bile production.
- Roast your beets at 400°F wrapped in foil for 45 minutes until a knife slides in easily; peel them while warm and slice into rounds to maximize their betalain content.
- Steam fresh artichokes for 25-30 minutes until the petals pull off easily. Artichokes contain cynarin, which is excellent for supporting liver function.
- Whisk together a dressing of extra virgin olive oil, fresh lemon juice, grated ginger, and a teaspoon of turmeric. The black pepper is crucial here as it increases the absorption of the turmeric’s curcumin.
- Arrange the greens, beets, and artichokes on a section of your board, drizzling with the dressing just before serving.
- Finish with a sprinkle of milk thistle seeds or chopped parsley for an extra enzymatic punch.
How to eat more magnesium?

Why we love this
Adding magnesium-rich foods to your lifestyle feels like a natural sedative for the nervous system, offering a deep sense of calm with every crunchy, nutty bite. We love the richness of dark chocolate paired with the earthy toasted notes of pumpkin seeds, creating a snack profile that is both decadent and incredibly functional. It’s the kind of food that satisfies a sweet craving while simultaneously supporting muscle recovery and better sleep, making it a must-have for any holistic food board.
Ingredients
- Dark chocolate (at least 70% cacao)
- Raw pumpkin seeds (pepitas)
- Dry-roasted almonds
- Fresh spinach or Swiss chard
- Quinoa or buckwheat puffs
How to make it
- Start by lightly toasting your pumpkin seeds and almonds in a dry skillet over medium heat for 3-5 minutes. Watch for a slight golden hue and a nutty aroma—this unlocks the oils and makes the magnesium more bioavailable.
- Break high-quality dark chocolate into bite-sized shards. Cacao is one of the highest plant-based sources of magnesium, so look for high percentages.
- If incorporating greens, sauté spinach quickly with a dash of garlic and olive oil; cooking the spinach reduces oxalates, which can otherwise interfere with mineral absorption.
- Create ‘magnesium clusters’ by melting a small amount of dark chocolate and folding in the toasted seeds and quinoa puffs. Drop spoonfuls onto parchment paper and chill until set.
- Arrange these clusters alongside the raw nuts and fresh greens on your board for a varied texture profile.
- Serve with a side of mineral-rich sparkling water to help the body process these essential minerals efficiently.
How to serve party appetizers?

Why we love this
The perfect party appetizer is a tiny explosion of flavor that sparks conversation and keeps the energy high. We love the visual drama of a board overflowing with varied textures—crispy crostini, velvety dips, and tangy pickles. It’s all about the ‘grab-and-go’ ease that allows guests to mingle without being tied to a plate. There’s a certain joy in the discovery of a new flavor combination, like a salty olive paired with a sweet fig, that makes the appetizer portion of any board the true star of the show.
Ingredients
- Assorted olives and marinated peppers
- Whipped feta or hummus
- Thinly sliced baguette, toasted
- Prosciutto-wrapped melon
- Honey and balsamic glaze
How to make it
- Focus on the ‘Rule of Three’: include something crunchy, something creamy, and something acidic. This ensures the palate remains stimulated.
- Toast your baguette slices in a 375°F oven for 6-8 minutes until the edges are golden but the centers remain slightly chewy. Rub a raw garlic clove over the warm bread for an instant flavor boost.
- Prepare your dips by whipping feta with a splash of heavy cream and lemon zest in a food processor until it reaches a cloud-like consistency.
- Assemble the prosciutto-wrapped melon by slicing cantaloupe into thin wedges and wrapping them tightly; the salt-and-sweet contrast is a classic crowd-pleaser.
- Arrange the items on the board starting with the bowls for dips and olives, then ‘fanning’ the crackers and meats around them to create a sense of abundance.
- Garnish with fresh herbs like rosemary or thyme to provide a fragrant aroma that hits the guests as soon as they approach the table.
How to lower cortisol levels?

Why we love this
Eating to lower cortisol is essentially a culinary meditation, focusing on foods that stabilize blood sugar and soothe the adrenal glands. There is a gentle, grounding quality to these ingredients—the creaminess of a ripe avocado, the burst of antioxidants from deep purple berries, and the warmth of a herbal infusion. This approach to eating isn’t about restriction; it’s about abundance and choosing foods that signal safety and nourishment to the brain, which is the ultimate goal of a viral, stress-free food board.
Ingredients
- Fresh wild-caught salmon or walnuts (Omega-3s)
- Mixed berries (blueberries, raspberries)
- Avocado slices
- Fermented foods (kimchi or kefir)
- Dark leafy greens
How to make it
- Incorporate Omega-3 fatty acids by lightly poaching salmon at a low temperature (about 275°F in the oven) to keep the fats intact and the texture silky. If using walnuts, soak them overnight to make them easier to digest.
- Wash and dry a variety of berries; these are packed with Vitamin C, which helps the body clear cortisol more quickly after a stressful event.
- Slice avocado at the last minute to prevent browning. The healthy monounsaturated fats help keep blood sugar stable, preventing the cortisol spikes associated with ‘hangry’ feelings.
- Add a small bowl of kimchi or sauerkraut to the board. The gut-brain axis is vital for stress management, and probiotics support a healthy microbiome.
- Arrange these items in a ‘soothing’ color palette—lots of greens, deep blues, and soft pinks—to create a visual sense of calm.
- Pair the board with a cup of warm chamomile or tulsi (holy basil) tea to further lower physiological stress markers.
How to make mini scones?

Why we love this
Mini scones are the quintessential tea-time treat, offering a delicate, crumbly texture that feels incredibly fancy yet deeply comforting. We love the contrast between the golden-brown, slightly crunchy exterior and the soft, steam-filled interior that practically begs for a dollop of clotted cream. Their diminutive size makes them perfect for a food board, allowing you to sample multiple flavors without feeling overwhelmed. They bring a touch of whimsical elegance and a buttery aroma that is absolutely irresistible.
Ingredients
- All-purpose flour and baking powder
- Cold unsalted butter, cubed
- Heavy cream and one large egg
- Granulated sugar and a pinch of salt
- Dried currants or lemon zest
How to make it
- The secret to flaky scones is cold butter. Pulse your flour, sugar, and baking powder with the cold butter in a food processor until it looks like coarse meal with some pea-sized lumps remaining.
- Whisk the egg and heavy cream together, then fold them into the dry ingredients using a fork until just combined. Overworking the dough will lead to tough, bread-like scones.
- Turn the dough onto a floured surface and pat it into a circle about 3/4 inch thick. Do not use a rolling pin; your hands are gentler.
- Use a small 1.5-inch round cutter to stamp out mini scones. Press straight down without twisting the cutter; twisting seals the edges and prevents them from rising properly.
- Place on a baking sheet and chill in the freezer for 15 minutes before baking. This shocks the butter, creating those sought-after flaky layers.
- Bake at 400°F for 10-12 minutes until the tops are just beginning to brown. Serve warm with jam and cream for the full experience.
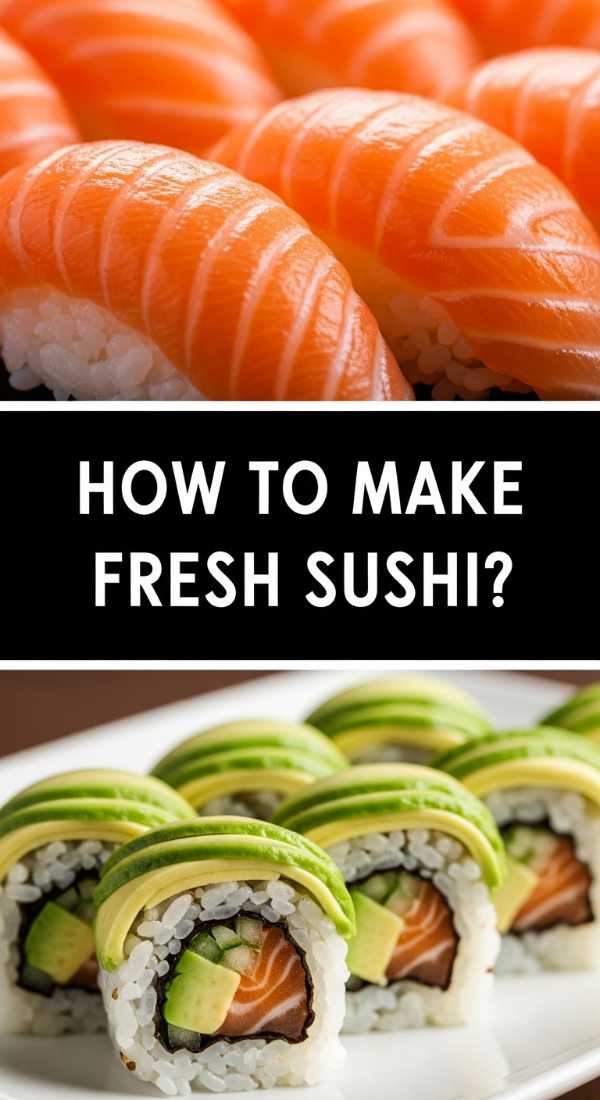
How to make fresh sushi?
Why we love this
Fresh sushi is a masterclass in balance, combining the zing of seasoned rice with the buttery, melt-in-your-mouth quality of high-grade fish. We love the clean, minimalist aesthetic it brings to a board—the vibrant oranges of salmon, the deep greens of nori, and the bright pop of wasabi. It feels like a celebration of ingredients in their purest form. The process of rolling sushi is also incredibly rewarding, turning a meal into a creative outlet that results in a beautiful, healthy, and sophisticated snack.
Ingredients
- Sushi-grade fish (salmon or tuna)
- Short-grain Japanese rice
- Rice vinegar, sugar, and salt
- Nori sheets
- Cucumber and avocado
How to make it
- Rinse your sushi rice under cold water until the water runs completely clear; this removes excess starch and ensures the rice is sticky but not mushy. Cook in a rice cooker or on the stove with a 1:1.2 rice-to-water ratio.
- While the rice is hot, fold in a mixture of rice vinegar, sugar, and salt (the ‘su’). Use a slicing motion with a wooden paddle to avoid smashing the grains, then fan the rice to cool it quickly and give it a glossy sheen.
- Place a nori sheet, shiny side down, on a bamboo rolling mat. Spread a thin, even layer of cooled rice over the nori, leaving a 1-inch border at the top.
- Lay your thinly sliced fish and vegetables in a line across the center of the rice.
- Using the mat, lift the edge closest to you and roll it over the filling, tucking it tightly. Apply firm, even pressure as you roll to the end.
- Wet a very sharp knife with a damp cloth and slice the roll into 6-8 pieces. Clean the knife between every single cut to ensure the edges remain neat and professional.
How to cook korean bbq?

Why we love this
Korean BBQ is the ultimate interactive dining experience, filled with the intoxicating scent of caramelized soy, sesame, and garlic. We love the sizzle of thinly sliced meats hitting a hot iron plate and the ritual of ‘ssam’—wrapping the smoky meat in fresh lettuce leaves with a dollop of spicy sauce. It’s a flavor profile that hits every note: sweet, salty, spicy, and savory. Adding a KBBQ element to your board transforms it into a high-energy, DIY feast that is guaranteed to be a hit.
Ingredients
- Thinly sliced ribeye (Bulgogi) or pork belly
- Soy sauce, brown sugar, and toasted sesame oil
- Grated Asian pear (natural tenderizer)
- Garlic and ginger mince
- Gochujang (Korean chili paste)
How to make it
- Marinate your meat for at least 4 hours, or overnight. The secret ingredient is the Asian pear; it contains enzymes that break down the muscle fibers, making the beef incredibly tender.
- Mix the pear with soy sauce, sugar, sesame oil, garlic, and ginger to create a rich, dark marinade. Submerge the meat completely.
- Heat a cast-iron grill pan or an outdoor grill to very high heat. You want the surface to be smoking slightly before you start cooking.
- Lay the meat flat on the grill. Because it is sliced so thin, it only needs about 60-90 seconds per side. Look for charred, ‘lacquered’ edges where the sugar in the marinade has caramelized.
- Cook in small batches to maintain the heat of the pan; overcrowding will cause the meat to steam in its own juices rather than sear.
- Serve immediately on your board alongside bowls of kimchi, pickled radishes, and fresh red leaf lettuce for wrapping.
How to prep high protein?

Why we love this
High-protein meal prep is the backbone of a high-energy lifestyle, providing the satiety and muscle-building blocks we need to feel our best. We love the efficiency of having a board stocked with perfectly cooked lean meats, hard-boiled eggs, and Greek yogurt dips. It takes the guesswork out of healthy eating and makes reaching your goals feel effortless. There’s a rugged, satisfying quality to these foods—the density of a well-cooked chicken breast or the creamy thickness of strained yogurt—that leaves you feeling truly fueled for the day.
Ingredients
- Chicken breasts or turkey tenderloins
- Large eggs (organic/pasture-raised)
- Greek yogurt (plain, non-fat)
- Edamame or chickpeas
- Cottage cheese
How to make it
- For the juiciest meal-prep chicken, use the ‘dry brine’ method: salt the meat 2 hours before cooking, then sear in a pan and finish in a 350°F oven until the internal temp reaches exactly 165°F. Let it rest before slicing.
- Perfect hard-boiled eggs: Place eggs in cold water, bring to a boil, then turn off the heat and cover for exactly 9 minutes. Shock in an ice bath immediately for easy peeling and a creamy yellow yolk (no grey rings!).
- Transform plain Greek yogurt into a savory high-protein dip by folding in dried dill, garlic powder, and a squeeze of lemon. It has double the protein of sour cream.
- Roast chickpeas at 400°F for 20 minutes with paprika and sea salt to create a crunchy, plant-based protein snack that adds texture to your board.
- Arrange these items in clear sections on your board, grouping animal proteins together and plant-based proteins together for a clean, organized look.
- Pre-slice everything so it’s ready to be grabbed for a quick post-workout snack or a balanced lunch.
The Final Word on the Viral Board Trend
As we’ve seen, the obsession with these boards isn’t just about the pretty pictures—it’s about a holistic approach to eating that honors our cravings, our health goals, and our need for connection. By combining elements like cortisol-lowering berries, high-protein chicken, and the pure joy of a mini scone, you create a culinary experience that feeds more than just your hunger. It’s about taking the time to prepare food with intention and sharing that effort with the people you love. So, grab your biggest platter and start building your own masterpiece!