

Why Everyone is Obsessed With These Simple DIY Food Boards
There is something inherently magical about a shared meal that brings people together, but lately, the traditional sit-down dinner has been reimagined into something much more visual, interactive, and undeniably cozy. The rise of the DIY food board is not just about aesthetics; it is about the emotional connection of grazing, the tactile joy of picking up a warm piece of bread, and the vibrant colors that turn a simple Tuesday night into a celebration. I remember the first time I set out a board overflowing with different textures and aromas—the room instantly felt warmer, and the conversation flowed as effortlessly as the honey we were drizzling.
The beauty of these boards lies in their versatility. You can take any comfort food classic and transform it into a stunning centerpiece that feels both high-end and humble. Whether it’s the sizzle of perfectly seared salmon or the sweet, buttery scent of freshly baked cookies, building a board allows you to curate a sensory experience that caters to every craving. It’s about slowing down, enjoying the process of prep, and finally seeing the delight on your friends’ faces as they dive into a spread that looks as good as it tastes. Let’s dive into the core components that make these boards go viral.
How to cook juicy chicken?
Why we love this
There is nothing quite like the sight of a golden-brown, glistening chicken breast sitting atop a wooden board, surrounded by fresh herbs. When cooked correctly, the meat is incredibly tender, releasing a savory steam that carries notes of garlic and thyme. Every bite offers a satisfying contrast between the slightly crisp, seasoned exterior and the succulent, moisture-rich interior that practically melts in your mouth, making it the ultimate protein anchor for any spread.
Ingredients
- 2 boneless, skinless chicken breasts
- 2 tablespoons olive oil
- 1 teaspoon sea salt
- 1/2 teaspoon cracked black pepper
- 1 teaspoon garlic powder
- 1 teaspoon dried oregano
- 2 tablespoons unsalted butter
- 2 cloves garlic, smashed
- Fresh sprigs of thyme
How to make it
- Begin by patting the chicken breasts completely dry with paper towels; removing surface moisture is the secret to a professional sear.
- Place the chicken between two sheets of plastic wrap and use a meat mallet or rolling pin to pound them to an even thickness of about 3/4 inch to ensure uniform cooking.
- Generously season both sides with salt, pepper, garlic powder, and oregano, pressing the spices into the meat so they adhere.
- Heat a heavy cast-iron skillet over medium-high heat for 3-4 minutes until it is wispy-hot but not smoking. Add the olive oil.
- Carefully lay the chicken in the pan away from you. Let it sear undisturbed for 5-6 minutes. You will know it is ready to flip when the edges turn opaque and the bottom releases easily from the pan with a deep golden crust.
- Flip the chicken, then immediately add the butter, smashed garlic, and thyme to the pan. As the butter melts and foams, tilt the pan and use a large spoon to continuously baste the chicken with the aromatic fat for another 5 minutes.
- Use an instant-read thermometer to check for a temperature of 160°F (it will rise to 165°F while resting). Remove from the pan and let it rest on a cutting board for at least 8 minutes before slicing against the grain to lock in all those precious juices.
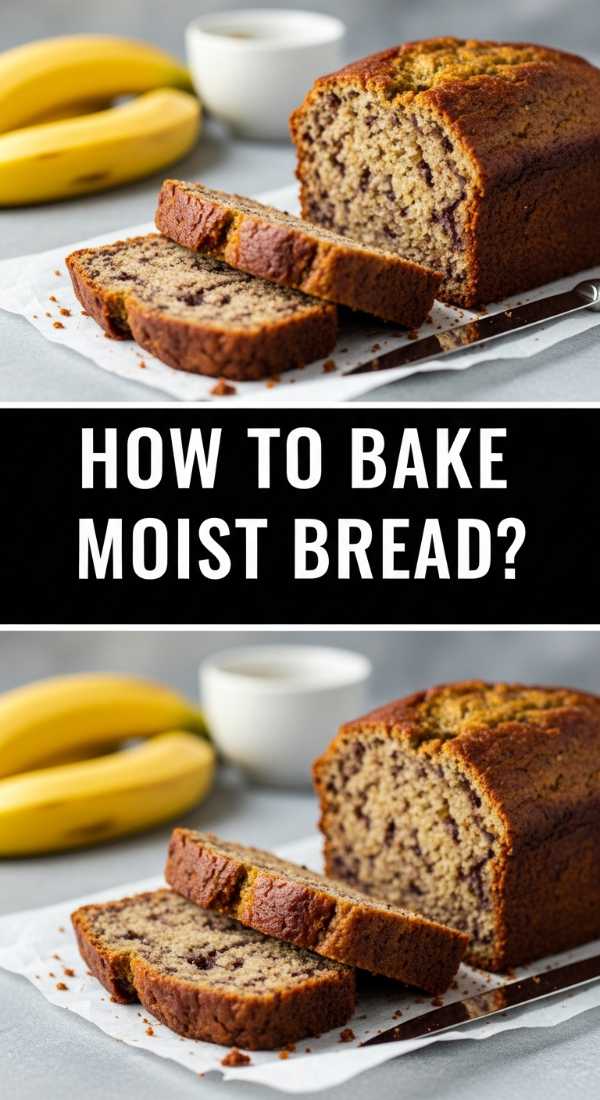
How to bake moist bread?
Why we love this
The aroma of baking bread is arguably the most comforting scent in existence, filling your home with a warm, yeasty hug that promises hearth and home. A truly moist loaf has a delicate, airy crumb that springs back when touched, and a crust that offers just the right amount of crunch without being tough. Tearing into a warm loaf and seeing the steam rise from the soft, pillowy center is a tactile experience that grounds you in the simple joys of slow living.
Ingredients
- 3 1/2 cups all-purpose flour
- 1 1/4 cups warm water (105-115°F)
- 2 1/4 teaspoons active dry yeast
- 1 tablespoon honey
- 1 1/2 teaspoons fine sea salt
- 2 tablespoons melted butter (for brushing)
How to make it
- In a large glass bowl, combine the warm water and honey. Sprinkle the yeast over the top and let it sit for about 5-10 minutes until it becomes frothy and bubbly, indicating the yeast is active.
- Add the salt and gradually stir in the flour one cup at a time using a sturdy wooden spoon until a shaggy dough forms.
- Turn the dough onto a lightly floured surface and knead by hand for 8-10 minutes. Use the heel of your hand to push the dough away, fold it back, and rotate. You are looking for the “windowpane test”—where a small piece of dough can be stretched thin enough to see light through it without tearing.
- Place the dough in a lightly greased bowl, cover with a damp cloth, and let it rise in a warm, draft-free spot for 1-1.5 hours until it has doubled in size.
- Gently punch the dough down to release air bubbles, shape it into a smooth oval or loaf, and place it in a greased loaf pan or on a baking sheet. Cover and let rise again for 45 minutes (the second rise is crucial for that airy texture).
- Preheat your oven to 375°F. Score the top of the loaf with a sharp knife to allow for expansion.
- Bake for 30-35 minutes. The loaf should be deep golden brown and sound hollow when tapped on the bottom. Immediately brush the crust with melted butter for a soft, silky finish and let cool on a wire rack for 20 minutes before slicing.
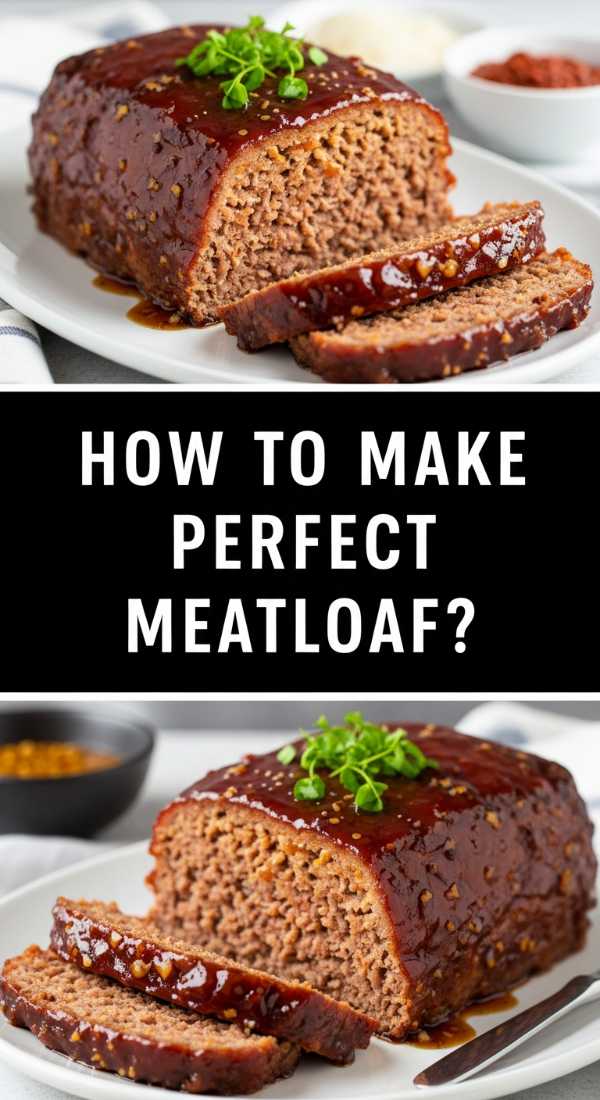
How to make perfect meatloaf?

Why we love this
Meatloaf is the quintessential comfort food, but when done right, it’s a savory masterpiece that anchors a hearty dinner board. The texture should be tender and uniform, never crumbly, with a rich depth of flavor from caramelized onions and savory seasonings. Topped with a tangy, slightly sweet glaze that becomes tacky and concentrated in the oven, each slice offers a nostalgic, soul-warming richness that feels like a big hug on a plate.
Ingredients
- 1.5 lbs ground beef (80/20 fat ratio)
- 1/2 cup panko breadcrumbs
- 1/3 cup whole milk
- 1 small onion, finely minced and sautéed
- 2 cloves garlic, minced
- 1 large egg, beaten
- 1 tablespoon Worcestershire sauce
- 1/4 cup ketchup (plus extra for glaze)
- 1 teaspoon dried thyme
- Salt and pepper to taste
How to make it
- Preheat your oven to 350°F and line a baking sheet with parchment paper or use a loaf pan.
- In a small bowl, soak the panko breadcrumbs in the milk for 5 minutes. This creates a “panade,” which is the secret to a moist meatloaf that doesn’t fall apart or get tough.
- In a large mixing bowl, combine the ground beef, sautéed onions, garlic, beaten egg, Worcestershire sauce, ketchup, thyme, salt, pepper, and the milk-soaked breadcrumbs.
- Mix the ingredients using your hands or a fork, but be extremely careful not to overwork the meat. Stop as soon as the ingredients are just combined; over-mixing leads to a dense, rubbery texture.
- Shape the mixture into a rectangular loaf on your prepared pan. If using a loaf pan, gently press it in without packing it too tightly.
- Whisk together a bit of extra ketchup, a teaspoon of brown sugar, and a dash of mustard to create a glaze. Spread half of it over the top of the loaf.
- Bake for 45 minutes, then apply the remaining glaze. Continue baking for another 10-15 minutes until the internal temperature reaches 160°F. Let the meatloaf rest for 10 full minutes before slicing to allow the structure to set and the juices to redistribute.
How to bake chewy cookies?

Why we love this
A tray of chewy chocolate chip cookies is the heart of any dessert board. We crave that specific texture—the slightly crisp, caramelized edges that give way to a soft, fudge-like center that lingers on the palate. The scent of vanilla and toasted butter wafting through the house is intoxicating, and when you pull them apart, the sight of melted chocolate pulling into thin, glossy ribbons is pure visual poetry.
Ingredients
- 1 cup unsalted butter, softened
- 3/4 cup granulated sugar
- 3/4 cup packed brown sugar
- 2 large eggs, room temperature
- 2 teaspoons vanilla extract
- 2 1/4 cups all-purpose flour
- 1 teaspoon baking soda
- 1/2 teaspoon salt
- 2 cups semi-sweet chocolate chips
How to make it
- In a large bowl, cream together the softened butter, granulated sugar, and brown sugar using a stand mixer or hand mixer on medium speed for about 3-5 minutes. You want the mixture to be pale and fluffy, which incorporates air for a soft bite.
- Add the eggs one at a time, beating well after each addition, then stir in the vanilla extract.
- In a separate bowl, whisk together the flour, baking soda, and salt. Gradually add the dry ingredients to the wet ingredients on low speed, mixing just until no white streaks remain.
- Fold in the chocolate chips by hand with a spatula to ensure they are evenly distributed without over-mixing the dough.
- Crucial Tip: Chill the dough in the refrigerator for at least 2 hours (or overnight). This prevents the cookies from spreading too thin and develops a deeper, toffee-like flavor.
- Preheat your oven to 350°F. Scoop rounded tablespoons of dough onto a parchment-lined sheet, spaced 2 inches apart.
- Bake for 9-11 minutes. The key to chewiness is to remove them when the edges are just barely golden but the centers still look slightly underdone and soft. They will firm up on the hot baking sheet for 5 minutes before you move them to a wire rack.
How to layer best lasagna?

Why we love this
Lasagna is a labor of love that rewards you with layers of molten cheese, silky pasta, and robust sauce. The magic is in the architecture—how the creamy ricotta or bechamel mingles with the acidic tomato sauce and the savory meat. When you cut into a perfectly layered lasagna, you see the beautiful striations of color and texture, and the aroma of toasted mozzarella and basil creates an irresistible pull toward the table.
Ingredients
- 12 lasagna noodles (boiled or no-boil)
- 3 cups marinara or meat sauce
- 15 oz ricotta cheese
- 1 egg, beaten
- 1/2 cup grated Parmesan
- 4 cups shredded mozzarella
- 1 tablespoon fresh parsley, chopped
How to make it
- Preheat your oven to 375°F. In a medium bowl, stir together the ricotta, beaten egg, half of the Parmesan, and the parsley. This creates a stable, creamy layer that won’t run when sliced.
- Spread about 1/2 cup of sauce on the bottom of a 9×13 inch baking dish. This prevents the bottom layer of pasta from sticking and ensures it cooks through.
- Place three or four lasagna noodles over the sauce, overlapping them slightly to create a solid base.
- Spread 1/3 of the ricotta mixture evenly over the noodles, then sprinkle with 1 cup of mozzarella and top with another cup of sauce. Repeat this layering process two more times.
- For the final layer, place the last set of noodles on top, cover generously with the remaining sauce, and finish with the rest of the mozzarella and Parmesan.
- Cover the dish tightly with foil, making sure the foil isn’t touching the cheese (use toothpicks if needed). Bake for 25 minutes.
- Remove the foil and bake for another 15-20 minutes until the cheese is bubbly and has developed charred, golden-brown spots. Let it rest for at least 15 minutes; this is essential for the layers to “set” so you get clean, beautiful slices.
How to sear fresh salmon?

Why we love this
Searing salmon is about achieving the perfect duality: a skin so crisp it crackles like parchment, and flesh that is tender, flaky, and vibrantly pink. The flavor is clean and rich, enhanced by the Maillard reaction that creates a savory crust on the surface. It’s a sophisticated addition to a board, offering a light yet satisfying bite that pairs beautifully with citrus and fresh greens.
Ingredients
- 2 salmon fillets (6 oz each), skin-on
- 1 tablespoon high-smoke point oil (like grapeseed or avocado oil)
- Kosher salt and black pepper
- 1 tablespoon unsalted butter
- Lemon wedges for serving
How to make it
- Remove the salmon from the fridge 15 minutes before cooking to take the chill off. Use a very sharp knife to lightly score the skin in 3-4 places; this prevents the fillet from curling when it hits the heat.
- Pat the skin side and the flesh side extremely dry with paper towels. Season generously with salt and pepper right before cooking.
- Heat a stainless steel or cast-iron skillet over medium-high heat. Add the oil and wait until it shimmers and just begins to smoke.
- Place the salmon fillets in the pan, skin-side down. Use a flexible spatula to press down firmly on each fillet for the first 30 seconds to ensure the entire surface of the skin makes contact with the pan.
- Lower the heat slightly to medium and let the salmon cook undisturbed for about 6-7 minutes. You will see the color of the fish change from opaque to pale pink as the heat travels up the fillet.
- Once the skin is crispy and releases easily from the pan, flip the fillets. Add a knob of butter to the pan and cook for just 1-2 minutes more for a medium-rare to medium center.
- Remove from the pan and serve immediately with a squeeze of fresh lemon to cut through the richness.
How to slow cook chicken?

Why we love this
Slow-cooked chicken is the ultimate “set it and forget it” luxury. After hours of gentle heat, the connective tissues break down, resulting in meat that is incredibly tender and literally falls apart at the touch of a fork. Infused with the flavors of broth, aromatics, and spices, the chicken becomes a versatile, juicy base for tacos, sliders, or grain bowls, filling the kitchen with a deep, savory scent that builds anticipation all day long.
Ingredients
- 2 lbs boneless, skinless chicken thighs
- 1 cup chicken broth
- 1 onion, sliced
- 3 cloves garlic, minced
- 1 teaspoon smoked paprika
- 1 teaspoon cumin
- Salt and pepper to taste
How to make it
- Place the sliced onions and minced garlic at the bottom of the slow cooker to create a flavorful bed for the meat and prevent the chicken from sticking.
- Season the chicken thighs generously on all sides with salt, pepper, paprika, and cumin. Chicken thighs are preferred over breasts for slow cooking because their higher fat content keeps them moist over long periods.
- Nestle the chicken into the slow cooker over the onions. Pour the chicken broth around the sides (not directly over the spices) so you don’t wash the seasoning off.
- Set the slow cooker to the “Low” setting. While “High” is faster, the “Low” setting for 6-7 hours allows the proteins to break down more gently, resulting in a superior, silky texture.
- Check the chicken at the 6-hour mark; it should be easy to shred with two forks.
- Remove the chicken from the pot and place it in a large bowl. Use two forks to pull the meat apart into shreds.
- Ladle about 1/2 cup of the concentrated cooking liquid from the pot back over the shredded meat to keep it moist and flavor-packed before serving on your board.
How to sauté garlic shrimp?

Why we love this
Garlic shrimp is a high-impact dish that takes minutes to prepare but feels like a total indulgence. The shrimp curl into perfect pink “C” shapes, coated in a glossy, golden sauce of butter and toasted garlic. The aroma is sharp, sweet, and oceanic all at once. It’s a bright, zesty addition to a food board, offering a snappy texture and a punch of flavor that pairs perfectly with a crisp glass of white wine.
Ingredients
- 1 lb large shrimp, peeled and deveined
- 4 cloves garlic, thinly sliced
- 3 tablespoons unsalted butter
- 1 tablespoon olive oil
- 1/4 teaspoon red pepper flakes
- 2 tablespoons fresh lemon juice
- Fresh parsley, chopped
How to make it
- Ensure your shrimp are completely thawed and patted dry with paper towels. Dry shrimp will sear and brown, whereas wet shrimp will simply steam in the pan.
- In a large skillet, heat the olive oil and 1 tablespoon of butter over medium heat. Once the butter is melted and bubbling, add the sliced garlic and red pepper flakes.
- Sauté the garlic for about 1-2 minutes, stirring constantly, until it is fragrant and just beginning to turn a pale golden color. Do not let it turn brown, or it will become bitter.
- Increase the heat to medium-high and add the shrimp in a single layer. Cook for 2 minutes without moving them to develop a slight crust.
- Flip the shrimp and add the remaining 2 tablespoons of butter and the lemon juice. Cook for another 1-2 minutes.
- The shrimp are done the moment they turn opaque and form a “C” shape. If they curl into an “O,” they are overcooked and will be rubbery.
- Toss in the fresh parsley, give everything a final stir to coat in the garlic butter sauce, and transfer immediately to your serving board.
How to roast sweet potatoes?

Why we love this
Roasted sweet potatoes bring a vibrant pop of orange and a natural sweetness to any spread. When roasted at high heat, the natural sugars caramelize, creating dark, chewy edges and a soft, custard-like interior. The earthy aroma combined with a hint of salt creates a complex flavor profile that is both healthy and deeply satisfying, making them the perfect textural counterpoint to savory meats.
Ingredients
- 2 large sweet potatoes, cubed (1-inch pieces)
- 2 tablespoons olive oil
- 1/2 teaspoon kosher salt
- 1/4 teaspoon cinnamon (optional for warmth)
- 1/2 teaspoon smoked paprika
How to make it
- Preheat your oven to 425°F. A high temperature is essential to trigger the Maillard reaction for those crispy, caramelized edges.
- Peel the sweet potatoes (or leave the skin on for extra fiber and texture) and cut them into uniform 1-inch cubes. Uniformity ensures they all finish cooking at the same time.
- In a large bowl, toss the cubes with olive oil, salt, paprika, and cinnamon until every piece is thoroughly and evenly coated.
- Spread the sweet potatoes onto a large rimmed baking sheet. Crucial Tip: Do not crowd the pan. If the cubes are touching, they will steam instead of roast. Use two pans if necessary to ensure plenty of airflow.
- Roast for 25-30 minutes. Halfway through the cooking time, use a spatula to flip and toss the potatoes so they brown evenly on all sides.
- The potatoes are finished when they are tender when pierced with a fork and have developed dark, caramelized brown spots on the exterior.
- Let them cool for 5 minutes on the pan to allow the exterior to firm up slightly before adding them to your board.
How to make strawberry shortcake?
[IMAGE_10]
Why we love this
Strawberry shortcake is the ultimate summer dessert board finale. It’s a play on temperatures and textures: the cold, macerated strawberries bleeding their bright red syrup into a warm, flaky, salt-flecked biscuit, topped with a cloud of airy whipped cream. Each bite is a balance of buttery richness, tart fruit, and sweet cream, evoking memories of garden parties and sun-drenched afternoons.
Ingredients
- 2 cups all-purpose flour
- 1 tablespoon baking powder
- 3 tablespoons sugar
- 1/2 teaspoon salt
- 1/2 cup cold unsalted butter, cubed
- 2/3 cup whole milk
- 1 lb fresh strawberries, sliced
- 2 tablespoons sugar (for berries)
- Whipped cream for serving
How to make it
- Start by prepping the fruit: Toss the sliced strawberries with 2 tablespoons of sugar in a bowl. Let them sit at room temperature for at least 30 minutes; this process (macerating) draws out the juices to create a natural syrup.
- Preheat your oven to 425°F. In a large bowl, whisk together the flour, baking powder, 3 tablespoons of sugar, and salt.
- Add the cold, cubed butter to the flour mixture. Use a pastry cutter or your fingers to work the butter into the flour until the mixture resembles coarse crumbs with some pea-sized pieces of butter remaining. The cold butter is what creates the flaky layers.
- Add the milk and stir just until a dough forms. Do not overwork the dough, or the biscuits will be tough.
- Turn the dough onto a floured surface, gently pat it to 1-inch thickness, and use a round cutter to stamp out biscuits. Re-roll scraps only once.
- Place biscuits on a parchment-lined sheet and bake for 12-15 minutes until the tops are golden brown.
- To assemble on your board: Split the warm biscuits in half, spoon a generous amount of strawberries and syrup over the bottom half, add a dollop of whipped cream, and place the top of the biscuit back on.
Conclusion
Creating a viral food board is less about following strict rules and more about embracing the joy of variety and presentation. By mastering these foundational recipes—from the juiciest chicken to the flakiest strawberry shortcake—you can mix and match components to suit any occasion. Remember to play with heights, colors, and textures, and most importantly, enjoy the process of sharing something beautiful and delicious with the people you love. Happy building!