
From TikTok to Table: How to Make a Viral Butter Board
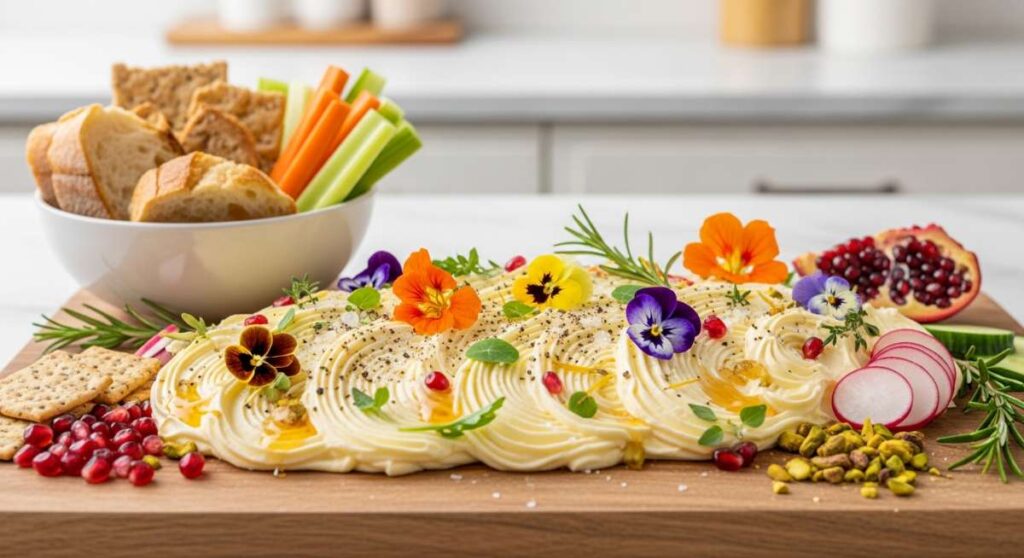
There is something undeniably magical about a shared meal that starts with a communal board, and lately, the world has fallen head over heels for the ‘butter board’ trend. It’s more than just a snack; it’s an invitation to gather, to linger over conversations, and to indulge in the simple pleasure of good bread and even better toppings. I remember the first time I set one down during a family Sunday—the room went quiet for a split second before the laughter and dipping began. It’s that shared joy that makes these viral food trends so special.
As we dive into this ultimate guide, think of your board as a blank canvas for flavor. Whether you’re hosting a cozy movie night or a fancy dinner party, the secret to a viral-worthy board isn’t just the aesthetics; it’s the heart and soul you put into the food. From slow-cooked proteins to the sweet finish of a homemade brownie, we’re going to explore how to master the staples that turn a simple board into a feast your friends won’t stop talking about.
How to cook tender corned beef?

Why we love this
There is nothing quite like the savory, salt-cured aroma of a perfectly cooked corned beef wafting through the house on a chilly afternoon. When done right, the meat loses all its toughness and transforms into succulent, fork-tender ribbons of pink perfection that melt on your tongue. It provides a deep, umami-rich foundation for any board, especially when paired with sharp mustards and crusty rye bread. The contrast between the salty brine and the soft, fatty edges creates a sensory experience that feels both nostalgic and deeply satisfying.
Ingredients
- 3-4 lb corned beef brisket (with spice packet)
- 1 large onion, quartered
- 3 cloves garlic, smashed
- 2 bay leaves
- 1 tbsp black peppercorns
- Water or beef stock to cover
How to make it
- Begin by removing the corned beef from its packaging and rinsing it under cold water to remove excess salt from the brine.
- Place the brisket in a large, heavy-bottomed Dutch oven or stockpot, fat side up. Add the onion, garlic, bay leaves, peppercorns, and the contents of the included spice packet.
- Submerge the meat completely in water or beef stock, ensuring there is at least an inch of liquid covering the top.
- Bring the liquid to a gentle boil over medium-high heat, then immediately reduce the heat to a very low simmer. You should see only occasional bubbles breaking the surface.
- Cover the pot tightly and simmer for approximately 50 to 60 minutes per pound. Use a meat thermometer to check for an internal temperature of 145°F, but the real test is the ‘fork test’—the tines should slide in and out with zero resistance.
- Once tender, remove the pot from the heat and let the meat rest in the liquid for 20 minutes before slicing against the grain to ensure maximum juiciness.
How to bake cheesy lasagna?

Why we love this
A bubbling tray of lasagna is the ultimate comfort food, offering layers upon layers of rich, velvety texture and complex flavors. The way the golden, slightly charred cheese pull stretches from the pan is enough to make anyone’s mouth water, while the aroma of slow-simmered marinara and fresh basil fills the kitchen with warmth. Each bite is a harmony of silky pasta sheets, creamy ricotta, and savory meat sauce that feels like a warm hug for the soul. It’s the centerpiece that demands attention and brings everyone to the table with a smile.
Ingredients
- 1 box lasagna noodles
- 1 lb ground beef or Italian sausage
- 24 oz marinara sauce
- 15 oz ricotta cheese
- 1 egg (to bind ricotta)
- 3 cups shredded mozzarella
- 1/2 cup grated parmesan
- Fresh parsley and basil
How to make it
- Preheat your oven to 375°F (190°C). In a large skillet, brown the meat over medium heat until fully cooked, then drain the excess fat. Stir in the marinara sauce and let it simmer for 10 minutes to develop depth.
- In a medium bowl, combine the ricotta cheese, one beaten egg, half of the parmesan, and chopped fresh parsley. This mixture should be creamy and hold its shape.
- Boil the lasagna noodles in salted water until just al dente—slightly firm to the bite, as they will finish cooking in the oven. Drain and lay them flat on parchment paper to prevent sticking.
- To assemble, spread a thin layer of meat sauce on the bottom of a 9×13 inch baking dish. Lay three noodles across, followed by a layer of the ricotta mixture, a layer of sauce, and a generous sprinkle of mozzarella.
- Repeat the layers until all ingredients are used, finishing with a thick layer of mozzarella and the remaining parmesan on top.
- Cover the dish with foil (tented so it doesn’t touch the cheese) and bake for 25 minutes. Remove the foil and bake for another 15 minutes until the cheese is bubbly and develops golden-brown spots. Let it rest for 15 minutes before slicing to ensure the layers stay intact.
How to use sourdough discard?

Why we love this
There is a unique, earthy tang that sourdough discard brings to recipes, turning what would be waste into a culinary treasure. It adds a sophisticated complexity to baked goods, creating a tender crumb and a signature sourdough zip that balances sweetness or saltiness beautifully. Whether you’re making crackers for your board or fluffy crumpets, the aroma is distinctly yeasty and inviting, signaling a homemade touch that store-bought items just can’t replicate. It’s the perfect way to honor the slow-living philosophy while adding a gourmet edge to your snacks.
Ingredients
- 1 cup sourdough discard (unfed)
- 2 cups all-purpose flour
- 1/2 tsp sea salt
- 4 tbsp melted butter
- Dried herbs (rosemary or thyme)
- Coarse salt for topping
How to make it
- In a large mixing bowl, combine the sourdough discard, melted butter, flour, and sea salt. Use a wooden spoon to bring it together until a shaggy dough forms.
- Turn the dough onto a lightly floured surface and knead gently for 2-3 minutes until it becomes smooth and pliable. Do not overwork it, or the final product will be tough.
- Wrap the dough in plastic wrap and let it rest in the refrigerator for at least 30 minutes. This allows the gluten to relax, making it easier to roll out thinly.
- Preheat your oven to 350°F (175°C). Divide the dough into two pieces and roll each out directly onto a sheet of parchment paper until it is paper-thin (about 1/16th of an inch).
- Lightly brush the surface with a tiny bit of water or oil, then sprinkle with your dried herbs and coarse salt. Use a rolling pin to gently press the toppings into the dough.
- Use a pizza cutter to score the dough into squares. Bake for 15-20 minutes, or until the edges are golden brown and the center is crisp. Let them cool completely on a wire rack to achieve maximum crunch.
How to make juicy chicken?

Why we love this
Perfectly cooked chicken is a masterclass in texture, featuring a skin so crisp it crackles under the knife, giving way to meat that is incredibly succulent and dripping with natural juices. The scent of roasted poultry seasoned with garlic and thyme is the quintessential ‘home-cooked’ smell that instantly makes a space feel lived-in and loved. It’s versatile enough to be the star of a board or shredded into salads, providing a clean, savory protein hit that satisfies without being overly heavy. Achieving that golden hue is a visual promise of the tender feast within.
Ingredients
- 2 lbs chicken thighs (bone-in, skin-on for best results)
- 2 tbsp olive oil
- 1 tsp smoked paprika
- 1 tsp garlic powder
- 1/2 tsp onion powder
- Salt and cracked black pepper to taste
- Fresh lemon wedges
How to make it
- Start by patting the chicken skin completely dry with paper towels. Moisture is the enemy of crispiness; the drier the skin, the better the sear.
- In a small bowl, whisk together the olive oil, paprika, garlic powder, onion powder, salt, and pepper to create a rub.
- Massage the rub all over the chicken, making sure to get some under the skin as well for maximum flavor penetration.
- Heat a heavy cast-iron skillet over medium-high heat with a teaspoon of high-smoke-point oil. Once the pan is shimmering, place the chicken skin-side down.
- Press down slightly and sear for 5-7 minutes without moving the pieces. You are looking for a deep, golden-brown crust that naturally releases from the pan.
- Flip the chicken and transfer the skillet to a preheated oven at 400°F (200°C). Roast for another 15-20 minutes until the internal temperature reaches 165°F. Rest the chicken for 5-10 minutes before serving to allow the juices to redistribute throughout the meat.
How to bake fudgy brownies?

Why we love this
A truly fudgy brownie is a decadent, multi-sensory delight, characterized by a thin, crackly top that breaks like parchment paper to reveal a dense, almost truffle-like center. The intense aroma of high-quality cocoa hits you long before the first bite, promising a rich chocolate experience that is both sophisticated and comforting. When it hits your palate, it’s thick and indulgent, coating the mouth in a way that demands a cold glass of milk or a scoop of vanilla bean ice cream. It is the undisputed king of the dessert board.
Ingredients
- 1/2 cup unsalted butter, melted
- 1 cup granulated sugar
- 2 large eggs
- 1 tsp vanilla extract
- 1/3 cup high-quality cocoa powder
- 1/2 cup all-purpose flour
- 1/4 tsp salt
- 1/4 tsp baking powder
- 1/2 cup chocolate chips
How to make it
- Preheat your oven to 350°F (175°C) and grease an 8×8 inch square baking pan, or line it with parchment paper for easy removal.
- In a large bowl, whisk the melted butter and sugar together vigorously for about 2 minutes. This aeration is what creates that iconic shiny, crackly top.
- Add the eggs and vanilla extract, beating again until the mixture is light in color and well combined.
- Sift in the cocoa powder, flour, salt, and baking powder. Using a rubber spatula, gently fold the dry ingredients into the wet ones just until no streaks of flour remain. Over-mixing will lead to a cakey texture rather than a fudgy one.
- Fold in the chocolate chips. Pour the thick batter into the prepared pan and smooth the top with your spatula.
- Bake for 20-25 minutes. The key is to look for slightly set edges while the center still has a tiny bit of jiggle. A toothpick inserted should come out with a few moist crumbs—never clean. Let them cool completely in the pan to set the fudgy structure.
How to sear perfect salmon?

Why we love this
Searing salmon is an art form that results in a stunning contrast of textures: a salty, crispy exterior that shatters beautifully, followed by a buttery, flakey interior that practically melts. The vibrant pink hue of the fish makes it a showstopper on any platter, while its rich omega-3 oils provide a luxurious mouthfeel that is both healthy and indulgent. The scent of searing fish with a hint of lemon and butter is fresh and appetizing, making it the perfect centerpiece for a brunch or light dinner board that feels elevated and modern.
Ingredients
- 2 salmon fillets (skin-on)
- 1 tbsp avocado oil (or other high-heat oil)
- 2 tbsp unsalted butter
- 2 cloves garlic, crushed
- Fresh sprig of thyme or rosemary
- Salt and pepper
- Lemon slices
How to make it
- Remove the salmon from the fridge 15 minutes before cooking to bring it closer to room temperature, ensuring even cooking. Pat the skin side extremely dry with paper towels.
- Season both sides generously with salt and pepper. The salt helps draw out remaining surface moisture on the skin for a better crunch.
- Heat a stainless steel or cast-iron skillet over medium-high heat. Once the pan is very hot, add the oil. Wait until the oil is shimmering and just beginning to smoke.
- Place the salmon fillets in the pan, skin-side down. Use a spatula to press down firmly on the fillets for the first 30 seconds to prevent the skin from curling.
- Cook undisturbed for about 5-6 minutes. You will see the cooked color creeping up the sides of the fish. When the skin is golden and releases easily from the pan, flip it.
- Add the butter, garlic, and herbs to the pan. As the butter foams, spoon it over the salmon (basting) for the final 2 minutes of cooking. Aim for an internal temperature of 125°F for medium-rare. Remove and rest for 3 minutes.
How to flip fluffy pancakes?

Why we love this
There is a profound sense of satisfaction in watching a pancake batter rise into a thick, airy disk of golden goodness on a hot griddle. The aroma of vanilla and sweet cream fills the morning air, creating an atmosphere of cozy relaxation that defines a perfect weekend. A truly fluffy pancake has a soft, sponge-like crumb that is ready to soak up pools of maple butter, making every bite a cloud-like experience. It’s a nostalgic staple that appeals to the child in everyone, especially when stacked high on a communal board.
Ingredients
- 1 1/2 cups all-purpose flour
- 3 1/2 tsp baking powder
- 1 tbsp white sugar
- 1 tsp salt
- 1 1/4 cups milk
- 1 egg
- 3 tbsp melted butter
- 1 tsp vanilla extract
How to make it
- In a large bowl, whisk together the flour, baking powder, sugar, and salt. Ensure there are no large clumps of baking powder to guarantee an even rise.
- In a separate bowl, whisk the egg, then stir in the milk, melted butter, and vanilla.
- Make a well in the center of the dry ingredients and pour in the wet mixture. Use a whisk to combine, but stop as soon as the flour is incorporated. A few lumps are perfectly fine; over-mixing will develop gluten and make the pancakes tough.
- Let the batter rest for 10 minutes. This allows the baking powder to activate and the flour to hydrate, resulting in a much fluffier texture.
- Heat a non-stick griddle or skillet over medium heat. Lightly grease with butter or oil. Drop 1/4 cup of batter per pancake.
- Wait for the ‘bubble cue’: when bubbles form on the surface and the edges look set and matte (usually 2-3 minutes), it’s time to flip. Flip with one quick motion and cook for another 1-2 minutes until golden brown on the bottom.
How to make pasta salad?

Why we love this
Pasta salad is the vibrant, zesty heart of a summer board, offering a refreshing explosion of textures and bright colors. The way the curly pasta catches the tangy vinaigrette in every nook ensures that each forkful is bursting with herbal notes and acidic brightness. It’s a sensory delight of crunchy bell peppers, creamy cheese pearls, and al dente pasta that provides a cool, satisfying contrast to heavier meats. The smell of fresh oregano and red wine vinegar is instantly appetizing, making it an essential side that keeps everyone coming back for ‘just one more scoop.’
Ingredients
- 1 lb rotini or fusilli pasta
- 1/2 cup red onion, finely diced
- 1 cup cherry tomatoes, halved
- 1 cup cucumber, diced
- 1/2 cup kalamata olives
- 1/2 cup feta or mini mozzarella pearls
- 1/2 cup Italian dressing (olive oil, vinegar, herbs)
- Fresh parsley
How to make it
- Boil a large pot of heavily salted water. Cook the pasta according to the package directions, but aim for the lower end of the time range to ensure it stays firm and doesn’t get mushy when it absorbs the dressing.
- Immediately after draining, rinse the pasta under cold running water. This stops the cooking process and removes excess starch so the pasta doesn’t stick together.
- In a very large mixing bowl, combine the cooled pasta with the onion, tomatoes, cucumber, olives, and cheese.
- Pour half of the Italian dressing over the mixture and toss gently to coat. The pasta will absorb some of the liquid as it sits.
- Cover and refrigerate for at least one hour. This ‘marinating’ time is crucial for the flavors to meld and the vegetables to slightly soften into the dressing.
- Just before serving on your board, add the remaining dressing and fresh parsley to revive the shine and flavor. Taste and add an extra pinch of salt or a squeeze of lemon if needed.
How to slow cook chili?

Why we love this
There is nothing more evocative of home than the deep, smoky, and spice-laden aroma of chili that has been simmering for hours. The texture is thick and hearty, with beans and meat that have broken down into a cohesive, velvety stew that warms you from the inside out. It’s a dish that celebrates the slow passage of time, with flavors of cumin, chili powder, and garlic deepening into a complex profile that is both spicy and comforting. Served on a board with corn chips and lime, it becomes a rustic, interactive feast.
Ingredients
- 1 lb ground beef or turkey
- 1 onion, chopped
- 2 cloves garlic, minced
- 2 cans (15 oz) kidney beans, rinsed
- 1 can (28 oz) crushed tomatoes
- 2 tbsp chili powder
- 1 tsp ground cumin
- 1/2 tsp cayenne pepper (optional)
- Salt and pepper
How to make it
- Start by browning the ground meat in a skillet over medium-high heat until no pink remains. Use a wooden spoon to break the meat into small, uniform crumbles.
- Add the chopped onion and garlic to the skillet and sauté for 3-4 minutes until the onions are translucent and fragrant. Drain any excess fat.
- Transfer the meat mixture to a slow cooker. Add the kidney beans, crushed tomatoes, chili powder, cumin, cayenne, salt, and pepper. Stir well to combine.
- If the mixture looks too thick, add half a cup of beef broth or water to ensure there is enough moisture for the long cook time.
- Set the slow cooker to ‘Low’ and cook for 6 to 8 hours (or ‘High’ for 3 to 4 hours). The long, low heat allows the collagen in the meat to break down and the spices to fully permeate every ingredient.
- Once finished, give it a good stir and adjust the seasoning. Serve warm with toppings like sour cream, shredded cheese, and green onions.
How to bake banana bread?

Why we love this
The smell of baking banana bread is perhaps the most universally loved kitchen aroma—a sweet, caramelized scent that promises a moist, tender crumb and rich flavor. It’s the ultimate way to transform overripe fruit into a golden-brown loaf that is as beautiful to look at as it is to eat. When sliced, the bread reveals a dense yet soft texture that is perfect for slathering with salty butter. It’s a rustic, humble bake that feels like a celebration of simple ingredients and cozy mornings, making it a star player on any brunch board.
Ingredients
- 3 very ripe bananas, mashed
- 1/3 cup melted butter
- 3/4 cup sugar
- 1 egg, beaten
- 1 tsp vanilla extract
- 1 tsp baking soda
- Pinch of salt
- 1 1/2 cups all-purpose flour
How to make it
- Preheat your oven to 350°F (175°C) and butter a 4×8 inch loaf pan.
- In a large mixing bowl, mash the ripe bananas with a fork until they reach a smooth, liquid consistency with only a few small lumps remaining.
- Stir the melted butter into the mashed bananas until fully combined.
- Mix in the baking soda and salt. Stir in the sugar, beaten egg, and vanilla extract until the mixture is uniform.
- Gently fold in the flour. Just like with pancakes and brownies, do not over-mix; you want the flour to be just barely incorporated to keep the bread light and moist.
- Pour the batter into your prepared loaf pan. Bake for 50 to 60 minutes. Use a long wooden skewer to test the center; it should come out clean. Let the bread cool in the pan for 10 minutes before transferring to a wire rack to cool completely before slicing.
Wrapping Up Your Viral Board
Creating a viral food board is about more than just following a trend; it’s about the textures, the flavors, and the people you share it with. Whether you’re layering silky butter or stacking fluffy pancakes, the key is to focus on quality ingredients and a little bit of patience. Now that you’ve mastered these staples, you’re ready to create a masterpiece that tastes even better than it looks on camera. Happy hosting!
Frequently Asked Questions
Check out these quick tips for making the most of your food board experience.