
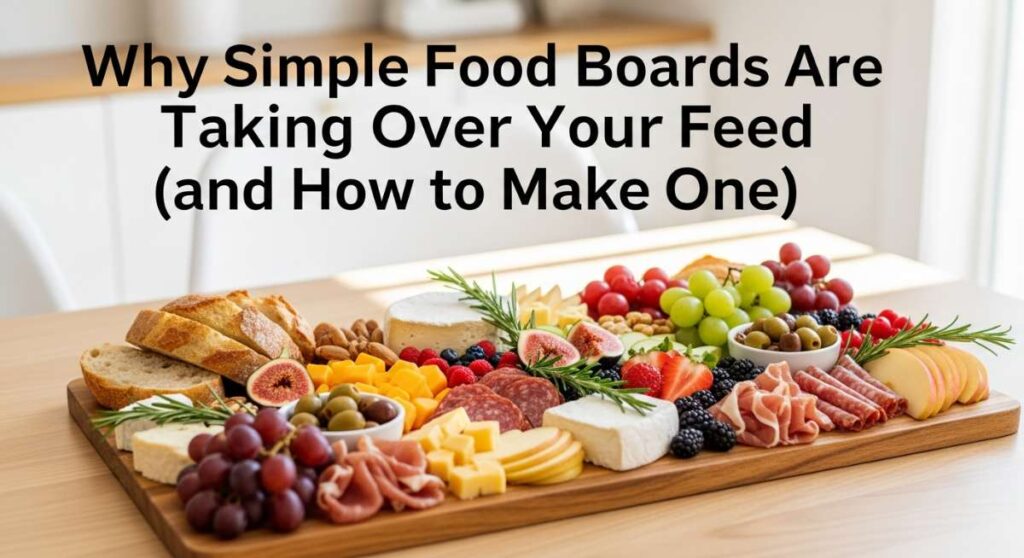
Why Simple Food Boards Are Taking Over Your Feed (and How to Make One)
There is something deeply nostalgic and undeniably comforting about a spread laid out on a wooden board. It’s the visual representation of a slow Sunday afternoon, where the pressure of a formal three-course meal melts away into the simple joy of grazing. Whether it’s the way the sunlight hits a cluster of grapes or the rustic charm of a roughly torn loaf of bread, food boards have become the ultimate lifestyle aesthetic. They invite us to linger longer at the table, encouraging conversation to flow as freely as the wine, and transforming everyday ingredients into a curated work of art.
We are living in an era where we crave connection over perfection. The ‘Viral Simple Food Board’ trend isn’t just about showing off; it’s about the sensory experience of sharing. It’s the sound of a crisp cracker snapping, the aroma of fresh basil filling the kitchen, and the tactile pleasure of assembling the perfect bite. This blog post is your guide to mastering this art form, from using up your sourdough discard to grilling the perfect steak, all presented in a way that is as beautiful to look at as it is delicious to eat.
Get ready to transform your dining table into a canvas. Below, we dive into ten unique ways to embrace the board trend, ensuring your next gathering—even if it’s just a quiet night in—is filled with flavor, texture, and a touch of effortless magic.
How to use sourdough discard?

Why we love this
There is an incredible sense of satisfaction in turning what would be waste into a crunchy, tangy masterpiece. These sourdough discard crackers are the ultimate base for any board, offering a complex, fermented depth that store-bought versions simply can’t replicate. Imagine the earthy scent of toasted rye and rosemary wafting through your home as these bake to a golden brown. Each bite provides a satisfying, shatteringly crisp texture that pairs beautifully with creamy bries or sharp aged cheddars, making your board feel grounded and artisanal.
Ingredients
- 1 cup (250g) sourdough discard
- 1/4 cup (60g) unsalted butter, melted
- 1 cup (120g) all-purpose flour
- 1/2 tsp sea salt (plus more for topping)
- 2 tbsp dried herbs (rosemary, thyme, or everything bagel seasoning)
How to make it
- Preheat your oven to 325°F (165°C). Prepare two large baking sheets with parchment paper or silicone mats to ensure the crackers don’t stick and brown evenly.
- In a medium mixing bowl, combine the sourdough discard and melted butter. Stir until the mixture is smooth and the butter is fully incorporated into the tangy starter.
- Add the flour, sea salt, and your chosen herbs. Mix with a spatula until a stiff dough forms. If the dough feels too sticky, add a tablespoon of flour at a time until it’s manageable.
- Divide the dough in half. Place one half on a piece of parchment paper and roll it out until it is paper-thin (about 1/16th of an inch). The thinner the dough, the crunchier the cracker. Aim for translucency at the edges.
- Transfer the parchment to the baking sheet. Use a pizza cutter or a sharp knife to score the dough into squares or diamonds. Prick each square with a fork to prevent air bubbles.
- Bake for 20-25 minutes. Keep a close eye on them; you are looking for a deep golden hue and firm edges. Rotate the pan halfway through for an even bake.
- Once removed, let them cool completely on the pan. They will crisp up significantly as they cool. Break them along the score lines and pile them high on your board.
How to make summer pasta?
Why we love this
Summer pasta is all about celebrating the peak of the season’s harvest, and presenting it on a board allows guests to customize their bowls. This dish captures the essence of a warm July evening, with the vibrant red of burst cherry tomatoes and the cooling green of fresh pesto. The aroma is a heady mix of sweet basil and pungent garlic, promising a light yet deeply satisfying meal. The texture is a playful dance between the silky, olive-oil-coated noodles and the snap of fresh vegetables, creating a refreshing dining experience that feels like a Mediterranean vacation.
Ingredients
- 1 lb spaghetti or linguine
- 2 cups cherry tomatoes
- 3 cloves garlic, thinly sliced
- 1/2 cup extra virgin olive oil
- 1 cup fresh basil leaves
- 1/2 cup grated Parmesan cheese
- 1/4 tsp red pepper flakes
How to make it
- Bring a large pot of heavily salted water to a rolling boil. Use about 1 tablespoon of salt per gallon of water; it should taste like the sea to properly season the pasta from within.
- Cook the pasta 1-2 minutes less than the package directions suggest. You want a true ‘al dente’ texture, as the pasta will finish cooking in the sauce. Reserve 1 cup of starchy pasta water before draining.
- In a wide skillet, heat the olive oil over medium-low heat. Add the sliced garlic and red pepper flakes. Sauté gently for 2 minutes until the garlic is fragrant and translucent, but not browned, which can make it bitter.
- Increase the heat to medium and add the cherry tomatoes. Cook for 5-7 minutes, stirring occasionally, until the skins begin to blister and pop, releasing their sweet juices into the oil.
- Add the drained pasta and half of the reserved pasta water to the skillet. Toss vigorously with tongs for 2 minutes. The starch in the water will emulsify with the oil to create a glossy, clingy sauce.
- Remove from heat. Fold in the fresh basil and Parmesan cheese. The residual heat will wilt the basil slightly, releasing its essential oils without turning it black.
- Transfer the pasta to a large wooden board or shallow platter, garnishing with extra basil and a drizzle of finishing oil.
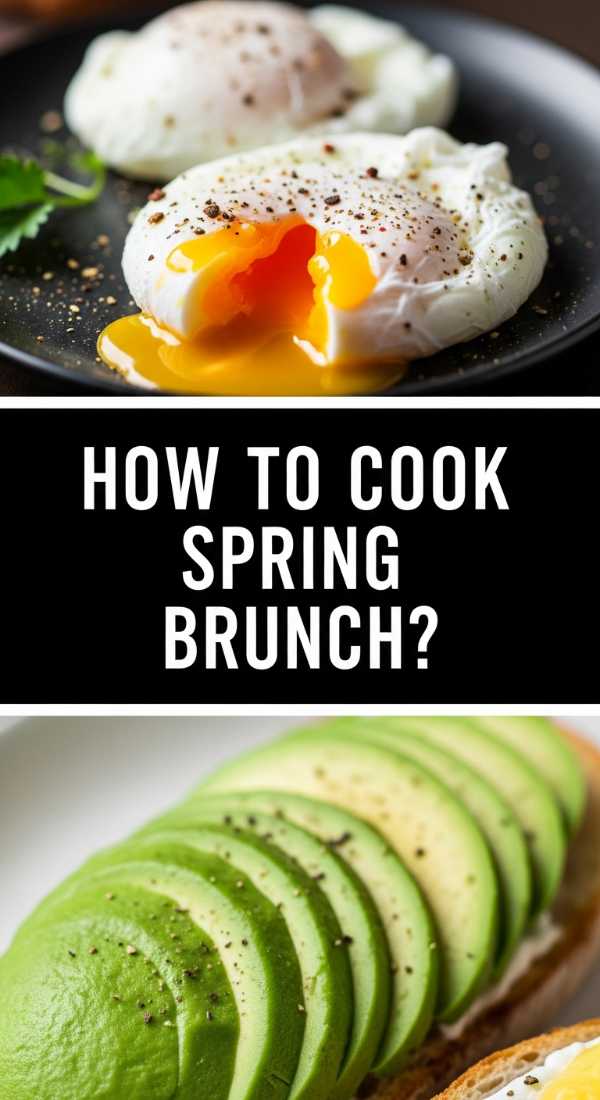
How to cook spring brunch?

Why we love this
A spring brunch board is a vibrant celebration of rebirth, featuring soft pastel colors and the delicate flavors of the new season. We love the contrast of a perfectly poached egg—its yolk spilling out like liquid gold—against the bright, zesty crunch of shaved radishes and asparagus. The air is filled with the scent of fresh dill and citrus, evoking thoughts of blooming gardens. This board offers a variety of textures, from the creamy richness of smashed avocado to the crusty snap of toasted sourdough, making every bite a refreshing discovery of spring’s bounty.
Ingredients
- 4 large eggs (very fresh)
- 1 bunch thin asparagus
- 1 loaf sourdough bread, sliced and toasted
- 2 ripe avocados
- 1 bunch radishes, thinly shaved
- Fresh dill and lemon wedges for garnish
How to make it
- Blanch the asparagus by dropping it into boiling water for exactly 2 minutes, then immediately plunging it into an ice bath. This stops the cooking and locks in the vibrant green color and crisp-tender texture.
- To poach the eggs, simmer water in a deep saucepan with a splash of vinegar. Do not let the water boil vigorously; you want gentle bubbles. Crack each egg into a small ramekin first.
- Create a gentle whirlpool in the water and slide the egg into the center. Cook for 3-4 minutes. The whites should be set but the yolk should remain soft. Remove with a slotted spoon and drain on a paper towel.
- Prepare the avocado by mashing it with a squeeze of lemon and a pinch of salt. Smear this generously over the toasted sourdough slices.
- Layer the blanched asparagus and shaved radishes over the avocado toast. Top each slice with a poached egg.
- Arrange the toasts on your board, scattering fresh dill and lemon wedges around the edges for extra brightness and visual appeal.
- Finish with a sprinkle of flaky sea salt and cracked black pepper right before serving to maintain the textural integrity of the dish.
How to decorate spring cookies?

Why we love this
Decorating spring cookies is a meditative, artistic process that results in a board that looks almost too beautiful to eat. These cookies are a sensory delight, with a buttery, vanilla-scented crumb that melts in your mouth, topped with a crisp, sweet icing. We love the use of edible flowers and botanical patterns, which bring the beauty of a spring meadow directly to your table. The textures range from the smooth, matte finish of the royal icing to the delicate, velvet-like petals of pansies, making this dessert board a sophisticated centerpiece for any afternoon tea.
Ingredients
- 1 batch of sugar cookies (chilled and cut into circles)
- 2 cups powdered sugar
- 1-2 tbsp milk or lemon juice
- Edible flowers (pansies, violas, or lavender)
- Gel food coloring (pastel shades)
How to make it
- Ensure your sugar cookies are completely cool before you begin decorating. A warm cookie will cause the icing to run and lose its definition.
- Prepare the royal icing by whisking the powdered sugar with milk or lemon juice until it reaches a thick, honey-like consistency. If you lift the whisk, the ribbon of icing should disappear back into the bowl after about 10 seconds.
- Divide the icing into small bowls and add tiny drops of gel food coloring. Use a toothpick to stir for subtle, pastel hues that reflect spring’s natural palette.
- Pipe a border around the edge of the cookie using a fine-tipped bag, then ‘flood’ the center with a slightly thinner icing to create a smooth, seamless surface. Pop any air bubbles with a pin.
- While the icing is still wet, gently press a clean, dry edible flower into the center. This allows the flower to adhere naturally as the icing dries.
- For a botanical look, use a small paintbrush to add gold leaf accents or painted ‘stems’ using green food coloring.
- Let the cookies dry undisturbed for at least 4-6 hours (ideally overnight) until the icing is completely hard. Arrange them on a marble board with sprigs of fresh mint for a stunning display.
How to make summer soup?

Why we love this
Summer soup, particularly a chilled gazpacho, is the ultimate antidote to a sweltering day, and serving it on a board with fresh garnishes turns it into an interactive feast. We love the cooling sensation of the vibrant, chilled liquid, which carries the intense, concentrated flavors of sun-ripened tomatoes and crisp cucumbers. The aroma is clean and garden-fresh, with a sharp kick of red wine vinegar that awakens the palate. The texture is a sophisticated blend of smooth purée and the crunch of finely diced toppings, offering a refreshing and hydrating experience that feels incredibly light and healthy.
Ingredients
- 2 lbs ripe Roma tomatoes
- 1 English cucumber, peeled
- 1 red bell pepper
- 1/2 red onion
- 2 tbsp red wine vinegar
- 1/3 cup extra virgin olive oil
- Salt and pepper to taste
How to make it
- Roughly chop the tomatoes, cucumber, bell pepper, and red onion. To ensure a professional depth of flavor, use the ripest produce you can find; the sugar content of the tomatoes is key.
- Place the vegetables in a high-powered blender. Add the red wine vinegar and a generous pinch of salt. Blend on high until the mixture is completely smooth and liquid.
- With the blender running on low, slowly drizzle in the olive oil. This creates a stable emulsion, giving the soup a creamy, luxurious mouthfeel without the need for dairy.
- Pass the soup through a fine-mesh sieve into a large bowl. This step is crucial for achieving that silky, restaurant-quality texture by removing any remaining seeds or bits of skin.
- Chill the soup in the refrigerator for at least 4 hours. Gazpacho must be served ice-cold to truly appreciate its refreshing qualities.
- When ready to serve, pour the soup into small glass bowls or shot glasses and arrange them on a large wooden board.
- Surround the bowls with small piles of garnishes: diced avocado, croutons, microgreens, and a small carafe of high-quality olive oil for guests to add themselves.
How to master summer grilling?

Why we love this
Mastering the grill is about more than just heat; it’s about the intoxicating blend of smoke, char, and caramelized sweetness that defines outdoor dining. A summer grilling board is a rustic, communal way to serve perfectly charred vegetables and succulent meats. We love the sight of those distinct grill marks and the way the heat intensifies the natural sugars in corn and peppers. The smoky aroma fills the air, instantly signaling a celebration, while the textures vary from the juicy snap of a grilled sausage to the tender, buttery softness of fire-roasted zucchini.
Ingredients
- 2 ears of corn, husks removed
- 1 bunch of thick asparagus
- 2 bell peppers, quartered
- 1 lb halloumi cheese, sliced
- Olive oil, salt, and smoked paprika for seasoning
How to make it
- Preheat your grill to medium-high heat (about 400°F/200°C). Clean the grates thoroughly with a wire brush and lightly oil them to prevent sticking.
- Toss all your vegetables and the halloumi in a bowl with olive oil, salt, and a dash of smoked paprika. The oil helps conduct heat and ensures even browning.
- Place the corn on the hottest part of the grill first, as it takes the longest. Rotate every 2-3 minutes until charred on all sides (about 8-10 minutes total).
- Add the bell peppers and asparagus. Cook the peppers for 4 minutes per side until the skin is slightly blistered. The asparagus only needs 2-3 minutes; you want it bright green with charred tips.
- Grill the halloumi last. It only needs about 1 minute per side. Look for the cheese to soften and develop deep brown grill marks without melting through the grates.
- Remove everything from the grill and let the corn cool slightly before cutting it into ‘ribs’ or smaller rounds.
- Arrange the charred bounty on a large, sturdy board. Serve with a side of chimichurri or a lemon-tahini dressing to cut through the smoky richness.
How to bake perfect cupcakes?

Why we love this
Perfect cupcakes are the jewels of any dessert board, offering individual portions of pure, sweet joy. We love the contrast between the light, airy sponge—which should spring back at the touch—and the rich, velvety clouds of buttercream frosting. The scent of warm vanilla and baking sugar is the ultimate comfort, creating an inviting atmosphere. These cupcakes are a textural delight, featuring a moist crumb that dissolves on the tongue, topped with a smooth frosting that can be accented with the crunch of sprinkles or the burst of a fresh berry.
Ingredients
- 1 1/2 cups all-purpose flour
- 1 cup granulated sugar
- 1 1/2 tsp baking powder
- 1/2 cup unsalted butter, softened
- 1/2 cup whole milk
- 1 large egg
- 1 tsp pure vanilla extract
How to make it
- Preheat your oven to 350°F (175°C) and line a cupcake tin with high-quality paper liners. This ensures the cupcakes release easily and maintain their shape.
- In a large bowl, cream the softened butter and sugar together using a hand mixer or stand mixer. Beat for at least 3-5 minutes until the mixture is pale, light, and fluffy; this incorporates air for a better rise.
- Add the egg and vanilla extract, beating until just combined. Over-mixing at this stage can lead to a dense cupcake, so keep it brief.
- In a separate bowl, whisk the flour and baking powder. Gradually add the dry ingredients to the wet ingredients, alternating with the milk. Begin and end with the flour.
- Fill each cupcake liner exactly 2/3 full. If you overfill them, they will muffin-top and spill over the edges, ruining the uniform look of your board.
- Bake for 18-20 minutes. Test with a toothpick in the center; it should come out clean or with a few moist crumbs. Let them cool in the pan for 5 minutes, then move to a wire rack.
- Once completely cool, pipe tall swirls of buttercream. Arrange the cupcakes on a tiered board or a flat wooden platter interspersed with fresh raspberries and white chocolate shavings.
How to bake spring cakes?
Why we love this
Spring cakes, often featuring light flavors like lemon, lavender, or carrot, are a breath of fresh air after the heavy desserts of winter. A board featuring mini spring cakes is an elegant way to showcase intricate decorations and seasonal textures. We love the moist, tender crumb infused with aromatic spices or citrus zest, topped with a tangy cream cheese frosting. The aroma is a delightful mix of sweet, floral, and earthy notes. Each mini cake offers a perfect balance of dense, flavorful cake and smooth, decorative frosting, making them a sophisticated addition to any spring celebration.
Ingredients
- 2 cups grated carrots
- 1 1/2 cups flour
- 1 cup brown sugar
- 1/2 cup vegetable oil
- 2 eggs
- 1 tsp cinnamon
- 1/2 cup chopped walnuts
- For Frosting: 8oz cream cheese, 1/2 cup butter, 2 cups powdered sugar
How to make it
- Preheat your oven to 350°F (175°C). Grease a mini-cake pan or a muffin tin very well. For spring cakes, the presentation is everything, so you want them to pop out perfectly.
- Whisk the oil, brown sugar, and eggs in a large bowl until the sugar has mostly dissolved. In another bowl, sift together the flour, cinnamon, and a pinch of salt.
- Fold the dry ingredients into the wet ones until no white streaks remain. Gently stir in the grated carrots and walnuts. The carrots provide moisture and a natural sweetness.
- Distribute the batter into the pan, filling each cavity about 3/4 full. Bake for 15-18 minutes until a tester comes out clean.
- While the cakes cool, prepare the frosting by beating the cream cheese and butter until smooth, then slowly adding the powdered sugar. The frosting should be stiff enough to hold its shape.
- Use a star tip to pipe small rosettes on top of each mini cake. This gives them a professional, ‘bakery-style’ finish that looks beautiful on a board.
- Arrange the mini cakes on a board lined with parchment, decorating the spaces between them with edible pansies or small candied carrot curls.
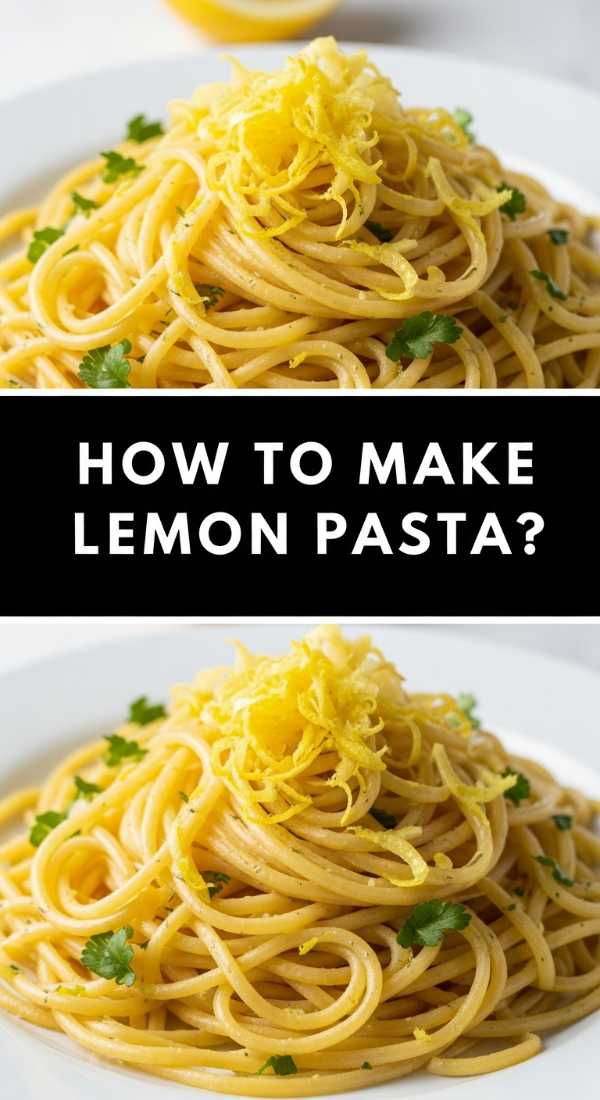
How to make lemon pasta?

Why we love this
Lemon pasta, or Al Limone, is the epitome of simple elegance, turning a few pantry staples into a bright, sunshine-filled meal. We love how the acidity of the lemon cuts through the richness of the butter and parmesan, creating a sauce that is light yet incredibly flavorful. The aroma is zesty and invigorating, instantly lifting your spirits. The texture is incredibly silky; the sauce should coat every strand of pasta like a thin, golden veil. It’s a refreshing, sophisticated dish that feels modern and chic when served on a minimalist board with extra lemon rounds and cracked pepper.
Ingredients
- 12 oz spaghetti or fettuccine
- 2 large lemons (zest and juice)
- 1/2 cup heavy cream
- 4 tbsp unsalted butter
- 1 cup freshly grated Parmigiano-Reggiano
- Fresh parsley for garnish
How to make it
- Cook your pasta in boiling salted water. For this dish, it is essential to pull the pasta out 2 minutes before it is fully cooked, as it needs to soak up the lemon cream sauce.
- While the pasta cooks, melt the butter in a large skillet over medium heat. Add the lemon zest and cook for 1 minute to release the fragrant oils into the fat.
- Whisk in the heavy cream and lemon juice. Bring to a gentle simmer for 2 minutes until the sauce slightly thickens. Do not let it boil rapidly or the cream may break.
- Using tongs, transfer the pasta directly from the water into the skillet. Add a half cup of the starchy pasta water.
- Toss the pasta constantly while adding the grated cheese in small handfuls. This technique, known as ‘mantecatura,’ creates a creamy, stable emulsion without clumps.
- If the sauce is too thick, add more pasta water a tablespoon at a time until the noodles are glossy and the sauce is fluid.
- Garnish with fresh parsley and more lemon zest. Serve on a wide board, swirling the pasta into nests for a beautiful, restaurant-ready presentation.
How to grill juicy steak?
[IMAGE_10]
Why we love this
There is nothing quite as primal or satisfying as a perfectly grilled steak, and slicing it onto a board makes it the ultimate centerpiece for a shared meal. We love the contrast of the salty, deeply browned Maillard crust against the tender, ruby-red interior. The aroma is rich, smoky, and savory, heightened by the scent of melting herb butter. The texture is a journey—from the initial crunch of the sear to the melt-in-your-mouth tenderness of the meat. It’s a bold, celebratory dish that encourages everyone to dig in and enjoy the simple perfection of high-quality beef.
Ingredients
- 2 thick-cut Ribeye or New York Strip steaks (at least 1.5 inches thick)
- 2 tbsp kosher salt
- 1 tbsp coarse black pepper
- 3 tbsp unsalted butter
- 2 cloves garlic, smashed
- 2 sprigs fresh rosemary
How to make it
- Take the steaks out of the refrigerator at least 45 minutes before cooking. Bringing them to room temperature ensures they cook evenly from the edge to the center.
- Pat the steaks completely dry with paper towels. Moisture is the enemy of a good sear. Season aggressively with salt and pepper on all sides, including the edges.
- Preheat a cast-iron skillet or grill to high heat. You want the surface to be screaming hot—the oil should just start to smoke.
- Place the steaks in the pan. Do not move them for 3-4 minutes to allow a thick, caramelized crust to form. Flip and cook for another 3-4 minutes for medium-rare (internal temp of 130°F/54°C).
- During the last 2 minutes of cooking, add the butter, garlic, and rosemary to the pan. Once the butter foams, use a large spoon to continuously baste the steaks with the flavored fat.
- Remove the steaks and place them on a cutting board. This is the most critical step: let them rest for at least 10 minutes. This allows the juices to redistribute so they don’t run out when sliced.
- Slice the steak against the grain into 1/2 inch strips. Arrange them in a fan shape on your serving board, pouring the residual pan juices and herb butter over the top.
The Art of the Board: A Final Thought
As we’ve explored, the magic of the food board lies in its versatility and the way it invites us to slow down. Whether you’re serving a zesty lemon pasta or a collection of spring cookies, the goal is to create a shared experience that appeals to all the senses. These boards aren’t just about food; they are about the memories made around them. So, the next time you find yourself in the kitchen, grab a wooden board, pick your favorite ingredients, and start building something beautiful.