
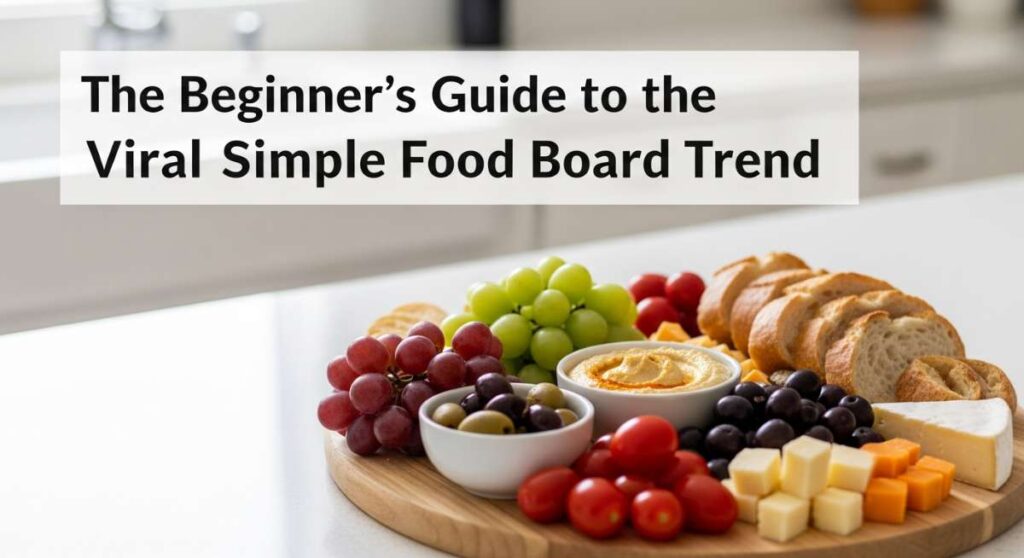
Have you ever looked at a dinner table and felt like you were staring at a work of art that was actually meant to be enjoyed, rather than just admired? That is the magic of the Viral Simple Food Board trend. It’s about more than just cheese and crackers; it’s about creating a communal, vibrant space where food is the centerpiece of connection. It’s that feeling of long afternoons turning into golden hour evenings, where everyone is leaning in, sharing stories, and picking at a board filled with the season’s best offerings.
I remember the first time I set one of these up—the pressure to make it ‘perfect’ was real, but the moment my friends started gathering around, the stress melted away. This guide is your invitation to ditch the formal plating and embrace the messy, beautiful, and delicious world of simple food boards. We’re diving into everything from light spring cakes to charred summer skewers, making sure your board is the talk of your next gathering.
How to make spring cakes?

Why we love this
There is something inherently joyful about a light-as-air spring cake nestled amongst a board of fresh berries. We love this because it captures the essence of the season—think of the delicate crumb melting on your tongue, infused with the bright, zesty aroma of lemon peel and the subtle floral notes of vanilla bean. It’s not just a dessert; it’s a sensory experience that feels like a warm breeze on a sunny April morning, providing a sweet, pillowy contrast to the savory elements on your food board.
Ingredients
- 2 cups cake flour (sifted)
- 1 1/2 cups granulated sugar
- 1 tbsp baking powder
- 1/2 tsp salt
- 3/4 cup unsalted butter (softened)
- 1 cup whole milk
- 4 large egg whites
- 1 tbsp lemon zest
- 1 tsp pure vanilla extract
How to make it
- Preheat your oven to 350°F (175°C) and grease your cake pans thoroughly. Sifting the flour is crucial here to achieve that signature airy spring texture; do not skip this step.
- In a large bowl, cream together the softened butter and sugar using a stand mixer on medium speed. Continue mixing for about 3-5 minutes until the mixture looks pale and incredibly fluffy, which builds the structure for the air bubbles.
- Slowly incorporate the dry ingredients (flour, baking powder, salt) alternately with the milk. Start and end with the flour to prevent the batter from curdling. Mix on low speed just until combined—over-mixing at this stage will result in a tough cake.
- In a separate clean glass bowl, whip the egg whites until they form stiff peaks. Gently fold these into the main batter using a silicone spatula. Use a ‘figure-eight’ motion to preserve the air you’ve just whipped in.
- Pour the batter into pans and bake for 25-30 minutes. Look for a light golden hue on top and check that a toothpick inserted in the center comes out clean. Let cool completely on a wire rack before attempting to slice or place on your board.
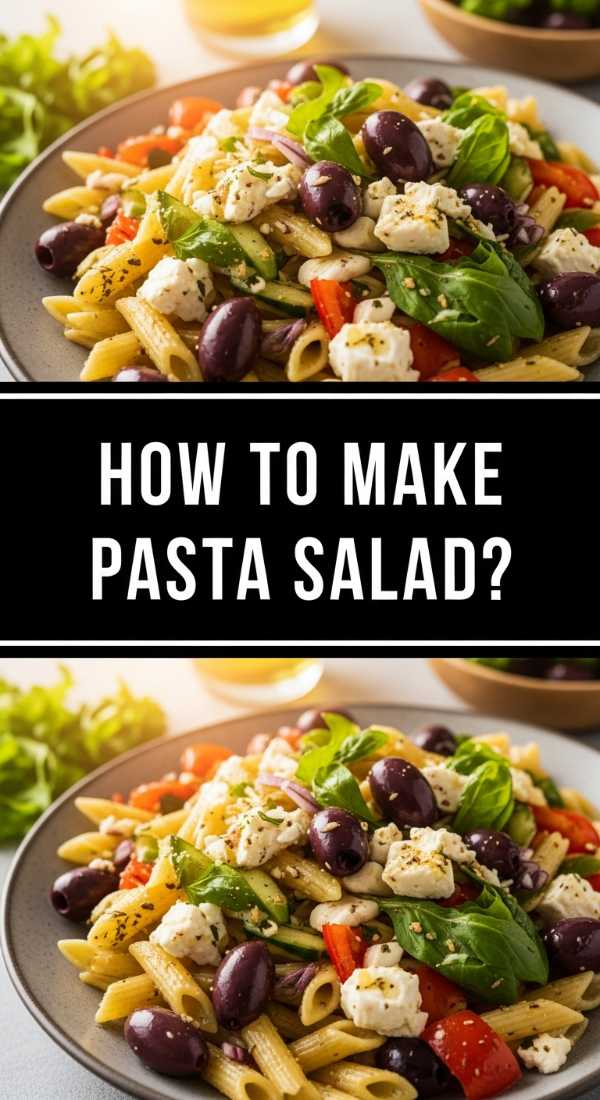
How to make pasta salad?
Why we love this
Pasta salad is the unsung hero of the food board, offering a hearty, refreshing base that satisfies everyone. We love it for the crunch of raw vegetables against the tender, al dente ridges of the pasta, all coated in a tangy dressing that wakes up the palate. Every bite is a symphony of textures—the snap of a cucumber, the silkiness of a sun-dried tomato, and the salty bite of feta cheese—all working together to create a dish that feels both indulgent and incredibly fresh.
Ingredients
- 1 lb Rotini or Fusilli pasta
- 1 cup cherry tomatoes (halved)
- 1 cucumber (diced)
- 1/2 red onion (thinly sliced)
- 1/2 cup Kalamata olives
- 1/2 cup crumbled feta cheese
- 1/4 cup fresh parsley (chopped)
How to make it
- Bring a large pot of heavily salted water to a rolling boil. Add your pasta and cook for exactly one minute less than the package directions for ‘al dente.’ This ensures the pasta stays firm and doesn’t get mushy when it absorbs the dressing later.
- Immediately drain the pasta and rinse it under cold running water. This stops the cooking process and removes excess starch, which prevents the noodles from sticking together in a clump.
- In a massive mixing bowl, toss the cooled pasta with a light drizzle of olive oil. Add in your halved cherry tomatoes, diced cucumbers, and red onions. The onions should be sliced paper-thin so they provide flavor without overpowering the other ingredients.
- Gently fold in the olives and feta cheese. Using a large wooden spoon, toss everything together with your chosen dressing (see the dressing section below for the best results).
- Let the salad sit in the refrigerator for at least 30 minutes before serving. This ‘marinating’ time allows the pasta to soak up the herbaceous flavors of the dressing, making every bite more impactful.
How to grill healthy meals?

Why we love this
Grilling transforms simple ingredients into something extraordinary through the power of char and smoke. We love healthy grilled meals because they highlight the natural sweetness of vegetables and the succulent juices of lean proteins without the need for heavy fats. There’s a primal satisfaction in the smoky aroma wafting from the grill and the beautiful sear marks that promise a depth of flavor that steaming or boiling simply cannot replicate, making your food board look rustic and sophisticated.
Ingredients
- 2 lbs lean protein (chicken breast or salmon)
- 3 bell peppers (assorted colors)
- 2 zucchinis (sliced into rounds)
- 1 bunch of asparagus (trimmed)
- 3 tbsp olive oil
- 1 tsp sea salt
- 1/2 tsp cracked black pepper
How to make it
- Preheat your grill to medium-high heat (about 400°F). Ensure the grates are scrubbed clean and lightly oiled using a paper towel dipped in vegetable oil to prevent sticking.
- Prepare your vegetables by slicing them into uniform pieces. Uniformity is key here so that everything cooks at the same rate; keep zucchini rounds about half an inch thick.
- Toss the protein and vegetables in a large bowl with olive oil, salt, and pepper. Ensure every surface is lightly coated, which helps conduct the heat and creates those beautiful charred lines.
- Place the protein on the hottest part of the grill first. For chicken, cook for 6-7 minutes per side until the internal temperature reaches 165°F. For salmon, grill for 4-5 minutes per side until it flakes easily with a fork.
- Add the vegetables around the edges of the grill where the heat is slightly less intense. Grill for 3-5 minutes, turning once, until they are tender-crisp and have visible grill marks. Remove everything and let the meat rest for 5 minutes before slicing to keep the juices locked in.
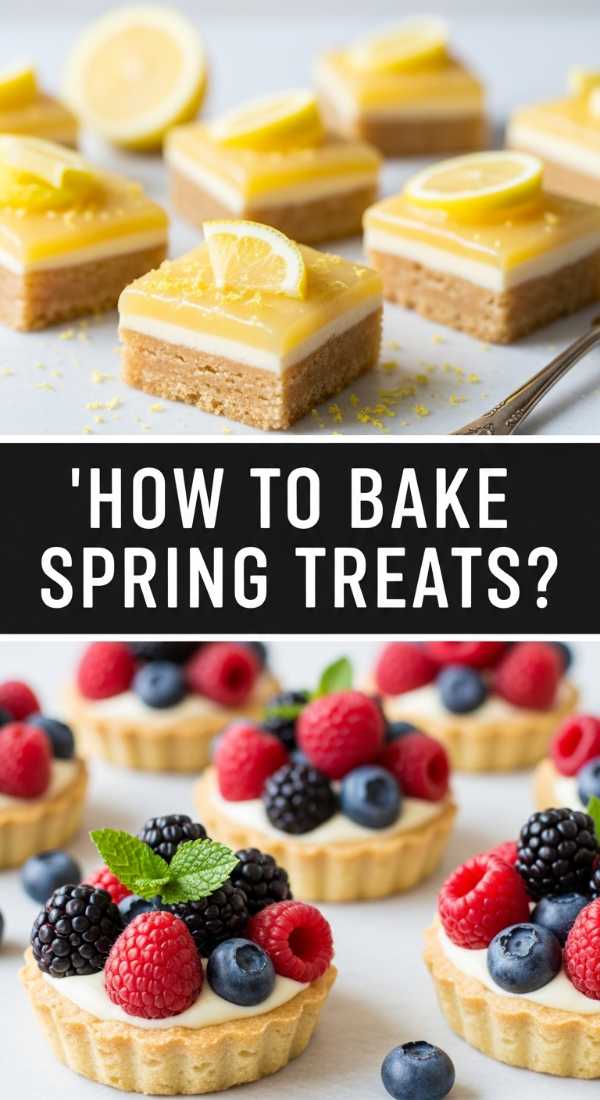
How to bake spring treats?
Why we love this
Spring treats are the little gems of a food board, providing bite-sized bursts of sweetness that keep people coming back for more. We love them for their versatility—whether it’s a shortbread cookie with an embossed floral design or a mini fruit tart with a buttery, crumbly crust. The texture is key here: the way a perfectly baked treat snaps and then melts, releasing the flavor of high-quality butter and seasonal fruits, creates a delightful contrast to the savory nuts and cheeses on the board.
Ingredients
- 2 cups all-purpose flour
- 1 cup cold unsalted butter (cubed)
- 1/2 cup powdered sugar
- 1 tsp lemon extract
- 1/4 cup apricot jam (for glazing)
- Assorted fresh berries
How to make it
- Begin by making a shortbread base. Combine the cold, cubed butter with the flour and powdered sugar in a food processor. Pulse until the mixture looks like coarse sand—do not over-process or the heat from the blades will melt the butter.
- Add the lemon extract and pulse a few more times until a dough starts to form. Turn it out onto a floured surface and gently pat it into a disk. Wrap in plastic and chill for at least 30 minutes to relax the gluten.
- Roll the dough out to 1/4 inch thickness and use small cookie cutters to create shapes. Place them on a parchment-lined baking sheet and bake at 325°F for 12-15 minutes until the edges are just barely beginning to turn golden.
- Once cooled, you can top these with a small dollop of apricot jam and a single fresh raspberry or blueberry. The jam acts as a ‘glue’ and adds a beautiful sheen.
- Arrange these in clusters on your board. The key is to keep them small so they are easy to grab with one hand while chatting.
How to make birthday cakes?

Why we love this
A birthday cake in the center of a food board turns a simple gathering into a celebration. We love it because it brings a sense of nostalgia and indulgence to the spread. Imagine a dense, moist crumb with a velvety buttercream frosting that smells of pure vanilla bean and toasted sugar. It’s the ultimate anchor for a food board, drawing everyone in with its height and decadence, promising a sweet finale to a beautiful meal shared with loved ones.
Ingredients
- 2 1/2 cups all-purpose flour
- 2 cups granulated sugar
- 1 cup unsweetened cocoa powder (for chocolate version)
- 1 1/2 tsp baking powder
- 1 1/2 tsp baking soda
- 1 cup buttermilk (room temperature)
- 1/2 cup vegetable oil
- 2 large eggs
- 1 cup boiling water
How to make it
- Preheat your oven to 350°F. Sift together all dry ingredients into a large mixing bowl. Sifting cocoa powder is especially important as it tends to clump, and you want a perfectly smooth batter.
- Add the buttermilk, oil, and eggs. Beat on medium speed for about two minutes. The buttermilk provides a subtle tang and reacts with the baking soda to create a very moist, tender crumb.
- Reduce the speed to low and carefully pour in the boiling water. The batter will be very thin—this is normal! The hot water ‘blooms’ the cocoa powder, intensifying the chocolate flavor and ensuring a silky texture.
- Pour into two 9-inch round pans and bake for 30-35 minutes. Test with a skewer; it should come out with just a few moist crumbs attached.
- Allow the cakes to cool in the pans for 10 minutes before transferring to a wire rack. Cooling completely is non-negotiable before frosting, otherwise, the buttercream will melt and slide right off.
How to season grilled chicken?

Why we love this
The right seasoning is the difference between a bland piece of protein and a mouthwatering centerpiece. We love well-seasoned grilled chicken for the way the spices form a savory, slightly crispy crust that locks in all the moisture. The aroma of smoked paprika mingling with dried oregano and garlic powder creates a Mediterranean profile that feels sophisticated yet approachable, making every slice a flavorful addition to your vibrant food board.
Ingredients
- 1 lb chicken thighs or breasts
- 2 tbsp olive oil
- 1 tsp smoked paprika
- 1 tsp garlic powder
- 1/2 tsp onion powder
- 1/2 tsp dried oregano
- 1/2 tsp kosher salt
- 1/4 tsp cayenne pepper (optional for heat)
How to make it
- Pat the chicken completely dry with paper towels. Any moisture on the surface will create steam rather than a sear, preventing that delicious crust from forming.
- In a small bowl, whisk together the olive oil and all the dry spices to create a thick paste. This ensure the spices are evenly distributed and will adhere to the meat.
- Rub the spice paste all over the chicken, ensuring you get into every crevice. If you have time, let the chicken marinate in the fridge for at least 1 hour; this allows the salt to penetrate the fibers, seasoning the meat from the inside out.
- Bring the chicken to room temperature for 15 minutes before grilling. Cold meat hits a hot grill and seizes up, which can lead to uneven cooking.
- Grill over medium heat. For thighs, go for 5-7 minutes per side. The sugars in the paprika will caramelize beautifully, giving the chicken a deep mahogany color and a complex, smoky flavor profile.
How to style spring cakes?

Why we love this
Styling is where the ‘viral’ part of the food board comes in; it’s the art of making the edible look incredible. We love styling spring cakes because it allows for total creative expression. Using soft textures like whipped cream, the delicate placement of fresh mint leaves, and a dusting of snow-like powdered sugar creates a visual that is almost too pretty to eat. It turns a simple cake into a focal point that captures the light and the imagination of your guests.
Ingredients
- Finished spring cakes
- Fresh mint leaves
- Powdered sugar (for dusting)
- Edible flowers (pansies or violas)
- Fresh berries (raspberries, blueberries)
- Honey (for drizzling)
How to make it
- Start with a clean, flat surface on your board. Place your largest cake slightly off-center to create a dynamic, asymmetrical look that feels more organic and less rigid.
- Dust the entire cake with a light layer of powdered sugar using a fine-mesh sieve. This creates a soft, matte finish that highlights the texture of the cake.
- Place small clusters of berries around the base of the cake, letting some ‘spill’ out onto the board. This creates a sense of abundance and movement.
- Nestle individual mint leaves between the berries. The pop of bright green against the fruit and white sugar provides a necessary visual contrast that makes the colors sing.
- For the final touch, use a pair of tweezers to place edible flowers on the top of the cake. A light drizzle of honey over the fruit adds a glistening, dewy effect that looks stunning in photos.
How to grill summer skewers?

Why we love this
Summer skewers are the ultimate interactive food board addition. We love them because they offer a variety of flavors and textures on a single stick—the sweetness of charred pineapple, the snap of a red onion, and the savory bite of grilled meat. There is a playful, rustic charm to eating off a skewer that perfectly matches the casual vibe of a food board, and the rainbow of colors they provide makes the entire spread look instantly more appetizing.
Ingredients
- Wooden or metal skewers
- 1 lb top sirloin or shrimp
- 1 red bell pepper (cubed)
- 1 red onion (cubed)
- 1 cup pineapple chunks
- 1/2 cup teriyaki or BBQ sauce
How to make it
- If using wooden skewers, soak them in water for at least 30 minutes. This is a critical step to prevent them from catching fire and snapping on the grill.
- Cut all your meat and vegetables into uniform 1-inch cubes. This ensures that the skewer lays flat on the grill and that every side of every ingredient makes contact with the heat.
- Thread the ingredients onto the skewers, alternating colors and textures. Don’t pack them too tightly; leaving a tiny bit of space between pieces allows the heat to circulate and cook everything evenly.
- Brush the skewers with a light coating of oil and season with salt. Place them on a preheated medium-high grill.
- Grill for 8-10 minutes, turning every 2-3 minutes. Only brush on your sauce during the last 2 minutes of grilling; most sauces contain sugar which will burn quickly if applied too early. You want a tacky, caramelized glaze, not a blackened char.
How to dress pasta salad?

Why we love this
The dressing is the soul of the pasta salad, tying all the disparate ingredients together into a cohesive dish. We love a well-dressed salad because of that perfect balance of acidity and fat—the way the sharp vinegar cuts through the richness of the olive oil and cheese. When done right, the dressing emulsifies into a silky coating that clings to every spiral of pasta, ensuring that every single forkful is bursting with bright, herbaceous flavor.
Ingredients
- 1/2 cup extra virgin olive oil
- 1/4 cup red wine vinegar
- 1 tbsp Dijon mustard
- 1 clove garlic (minced)
- 1 tsp dried Italian seasoning
- 1/2 tsp salt
- 1/4 tsp black pepper
How to make it
- In a small glass jar or a blender, combine the red wine vinegar, Dijon mustard, minced garlic, and dry seasonings. The mustard acts as a natural emulsifier, helping the oil and vinegar stay mixed.
- Slowly stream in the extra virgin olive oil while whisking vigorously. If using a jar, you can close the lid and shake it violently for 30 seconds until the mixture looks thick and opaque.
- Taste the dressing! It should be slightly more acidic than you think is necessary, as the pasta will dull the flavors once it’s applied. Add a pinch more salt or vinegar if it tastes flat.
- Pour the dressing over the pasta salad while the pasta is still slightly warm if possible, as it will absorb the flavors more effectively than cold pasta.
- Give it a final toss right before serving on the board. The oil will settle at the bottom of the bowl, so a quick stir ensures every piece is glistening and flavorful.
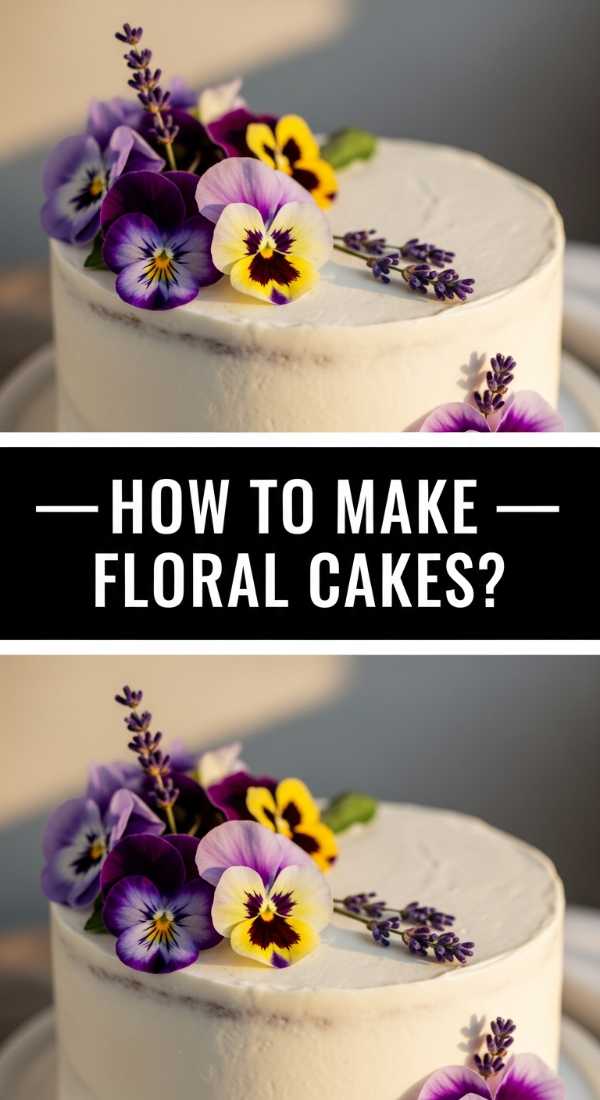
How to make floral cakes?
Why we love this
Floral cakes are the crown jewel of the viral food board trend, bringing an ethereal, botanical beauty to the table. We love them because they bridge the gap between gardening and baking, using nature’s own palette to decorate. The delicate, paper-thin petals of a pansy or the vibrant hue of a marigold pressed into smooth frosting create a sophisticated, high-fashion look that feels incredibly special and artisanal, making your gathering feel like a curated event.
Ingredients
- Standard sponge cake (cooled)
- White vanilla buttercream frosting
- Assorted edible flowers (pansies, violas, borage, or rose petals)
- Offset spatula
- Tweezers
How to make it
- Start by applying a ‘crumb coat’ of buttercream to your cake—a very thin layer that traps any loose crumbs. Chill the cake for 20 minutes until this layer is firm.
- Apply a second, thicker layer of buttercream. Use an offset spatula to create a smooth, clean surface. A rotating cake stand is extremely helpful here to get an even finish.
- Select your edible flowers. Ensure they are specifically grown for consumption (not from a florist, which may use pesticides). Gently pull the stems off so only the flat flower head remains.
- Using tweezers, carefully press the flowers into the fresh buttercream. If you wait too long and the frosting ‘crusts,’ they won’t stick. Start from the bottom and work your way up to create a ‘meadow’ effect.
- For a more modern look, press the flowers firmly enough that the petals are slightly embedded in the frosting. Chill the cake one last time to set the flowers in place before moving it onto your food board.
Conclusion
Creating a viral-worthy simple food board isn’t about perfection; it’s about the joy of assembly and the pleasure of sharing. By combining these detailed techniques—from the perfect sear on a skewer to the delicate placement of a flower petal—you’re not just making a meal; you’re crafting an experience. So, grab a board, pick your favorite recipes from this guide, and start building. Your guests (and your Instagram feed) will thank you!