
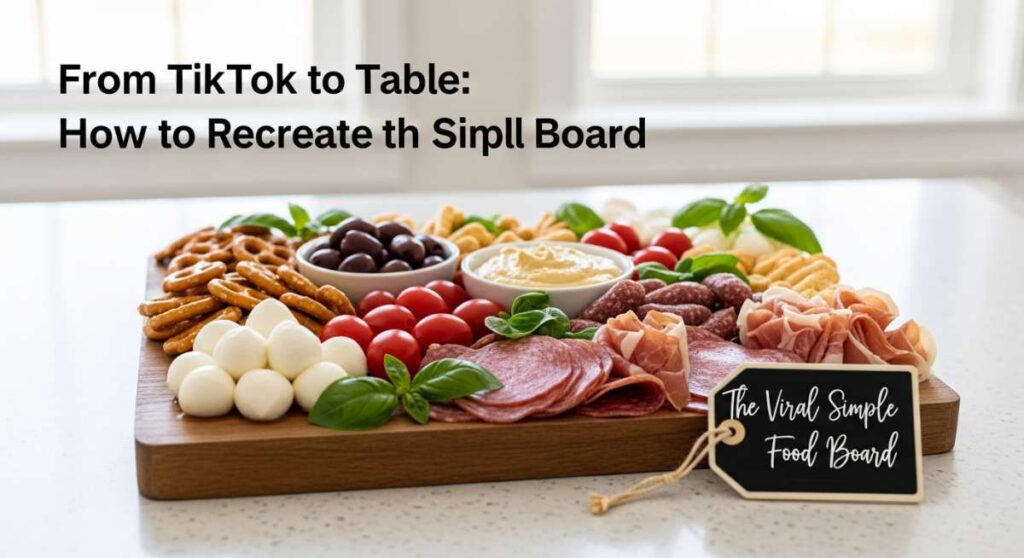
From TikTok to Table: How to Recreate the Viral Simple Food Board
We’ve all been there—scrolling through TikTok at 11 PM, mesmerized by the rhythmic chopping, the vibrant colors, and that effortless ‘cool girl’ aesthetic of a perfectly assembled food board. There’s something deeply soul-soothing about seeing fresh, seasonal ingredients laid out like a work of art, promising a meal that is as nourishing as it is beautiful. It’s more than just food; it’s an invitation to slow down and savor the season.
Bringing that viral magic into your own kitchen doesn’t require a culinary degree or a professional film crew. It’s about the small, intentional details: the way you dress your greens, the char on your spring vegetables, and the sweetness you share with the nature outside your window. Today, I’m breaking down the components of the ultimate viral food board so you can transform your everyday meals into a Pinterest-worthy experience that tastes even better than it looks.
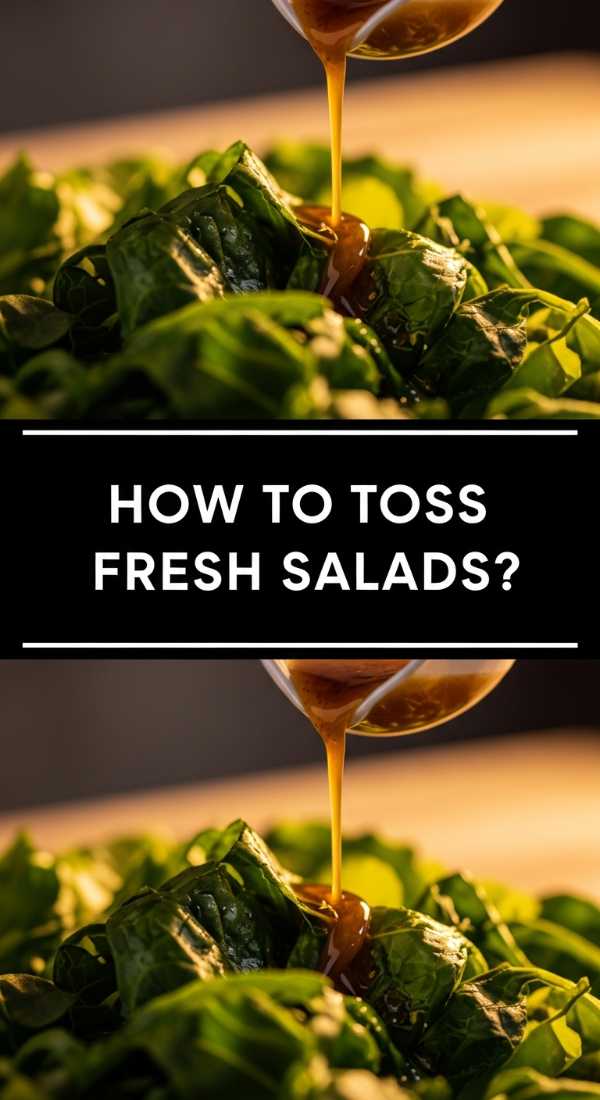
Summer Salad Secrets | Fresh Greens Technique
Why we love this
There is nothing quite like the crisp, refreshing snap of perfectly prepped summer greens hitting your palate on a humid afternoon. When you master the fresh greens technique, every leaf becomes a vessel for flavor, coated in just enough acidity to make the natural sweetness of the produce sing. Imagine the peppery bite of arugula mingling with the cooling crunch of gem lettuce, all tied together by the aroma of torn mint and basil that fills your kitchen with the scent of a sun-drenched garden. It’s a sensory explosion that feels light yet indulgent, providing that clean energy we all crave during the warmer months.
Ingredients
- 2 heads of Little Gem lettuce
- 1 bunch of wild arugula
- Fresh mint and basil leaves
- Cold filtered water and ice
- Flaky sea salt
- Extra virgin olive oil
- Fresh lemon zest
How to make it
- Begin by ‘shocking’ your greens; fill a large basin with ice-cold water and submerge the lettuce leaves for at least 10 minutes to restore their structural integrity and peak crunch.
- Using a salad spinner, dry the greens thoroughly in small batches; any excess water will prevent the oil from adhering, leading to a soggy salad.
- Instead of chopping with a knife, gently tear the leaves by hand into bite-sized pieces to prevent bruising and preserve the delicate cellular walls of the greens.
- In a large chilled wooden bowl, toss the greens lightly with a drizzle of high-quality olive oil first, ensuring every leaf is coated with a thin, protective layer before adding any acidic components.
- Finish with a generous sprinkle of flaky sea salt and freshly grated lemon zest, tossing with your hands to feel the texture and ensure even distribution without crushing the leaves.
Spring Dinner Ideas | Roasted Spring Veggies

Why we love this
Roasting spring vegetables is like capturing the essence of the awakening earth on a single baking sheet. The high heat of the oven transforms humble stalks of asparagus and tender carrots into caramelized treasures, with edges that are slightly charred and crispy while the centers remain buttery and succulent. As they roast, the kitchen fills with an earthy, sweet perfume that signals the end of winter and the arrival of brighter days. It’s a comforting, warm addition to your food board that provides a grounding contrast to the raw, crisp elements, making the meal feel complete and deeply satisfying.
Ingredients
- 1 bunch of thin asparagus (woody ends removed)
- 1 bunch of heirloom carrots (scrubbed, not peeled)
- 1 pound of baby marble potatoes, halved
- 3 tablespoons avocado oil
- 4 cloves of garlic, smashed
- Fresh thyme and rosemary sprigs
- Balsamic glaze for drizzling
How to make it
- Preheat your oven to 425°F (218°C) and place the baking sheet inside while it heats; hitting a hot pan ensures immediate caramelization and prevents the veggies from steaming.
- Toss the halved potatoes in a bowl with avocado oil and salt, then spread them cut-side down on the preheated sheet; roast for 15 minutes alone as they take the longest to cook.
- Move the potatoes to one side and add the carrots and garlic; roast for another 10 minutes until the carrots begin to soften and show golden spots.
- Finally, add the delicate asparagus and fresh herbs; these only need 5-8 minutes to reach a vibrant green color with tender-crisp tips.
- Look for the ‘golden brown and delicious’ (GBD) visual cue on the potato skins and the slight shriveling of the carrot skins before removing from the oven and finishing with a drizzle of balsamic glaze.
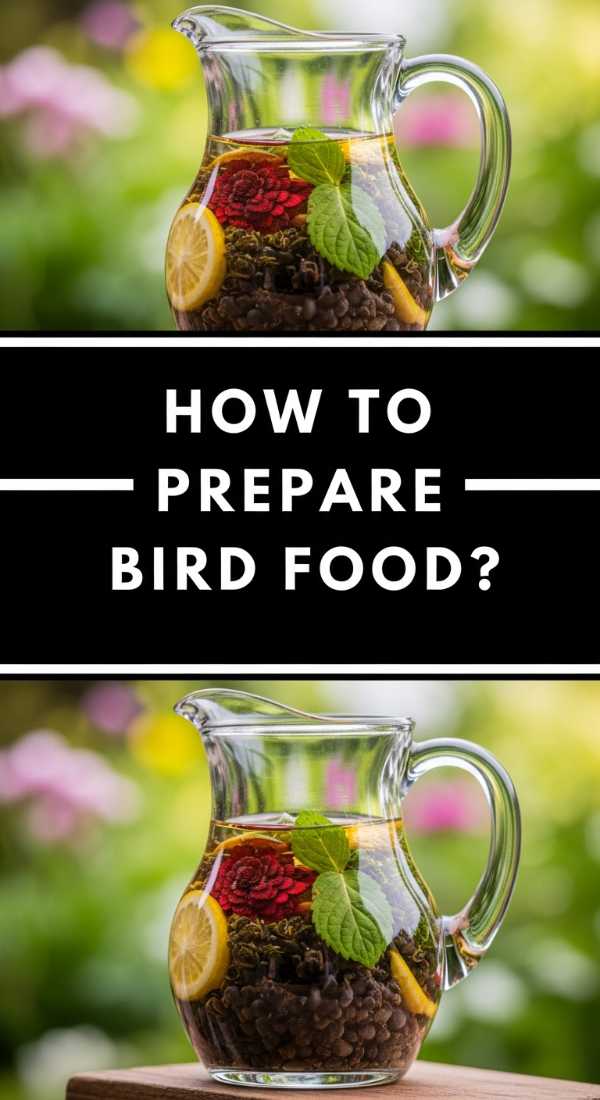
DIY Hummingbird Food | Homemade Bird Nectar

Why we love this
Creating a sanctuary for hummingbirds is the ultimate lifestyle flex that brings a touch of whimsical nature right to your window. There is a profound sense of peace in watching these iridescent creatures dart through the air, their wings a blur of motion as they enjoy a nectar you prepared with your own hands. This homemade blend is free from the harsh dyes found in store-bought versions, offering a pure, clear sweetness that mimics the flowers they love. It connects your indoor dining experience to the outdoor world, making your home feel like a living, breathing ecosystem of beauty and care.
Ingredients
- 1 cup of refined white granulated sugar
- 4 cups of filtered water
- Small saucepan
- Glass storage container
- Clean hummingbird feeder
How to make it
- Measure out four parts water to one part white sugar; it is crucial to use only refined white sugar as honey, brown sugar, or sugar substitutes can be fatal to hummingbirds.
- Mix the sugar and water in a saucepan over medium heat, stirring constantly until the sugar is completely dissolved and the liquid is crystal clear.
- Bring the mixture to a low boil for exactly two minutes to eliminate any bacteria or impurities in the water that could cause mold growth in the feeder.
- Remove from heat and allow the nectar to cool completely to room temperature; never put hot nectar into a plastic feeder as it can warp the material and harm the birds.
- Fill your clean feeder and store any extra nectar in a sealed glass jar in the refrigerator for up to two weeks, ensuring you change the feeder every 3-5 days to keep it fresh.
Seasonal Cookie Guide | Lemon Cookie Decorating

Why we love this
A tray of lemon cookies is like serving up literal sunshine on a plate, providing a bright, citrusy finale to your viral food board. The texture of a perfect lemon cookie is a delicate balance—soft and pillowy in the center with a slightly crisp, buttery edge that melts the moment it hits your tongue. The aroma of fresh citrus zest combined with sweet vanilla is intoxicating, lifting the mood of anyone in the room. Decorating them is a meditative process, allowing you to swirl creamy icing into artful patterns that look as though they belonged in a high-end French patisserie.
Ingredients
- Freshly baked lemon shortbread or sugar cookies
- 2 cups powdered sugar
- 2-3 tablespoons fresh lemon juice
- 1 tablespoon heavy cream
- Yellow food coloring (optional)
- Dried edible flowers or lemon zest for topping
How to make it
- Ensure your cookies are completely cold before you begin; even a hint of warmth will cause the icing to melt and run off the edges.
- Sift the powdered sugar into a medium bowl to remove all lumps, then whisk in the lemon juice one tablespoon at a time until you reach a thick, honey-like consistency.
- Add the heavy cream to give the icing a professional sheen and a creamy mouthfeel, whisking until the glaze is smooth and opaque.
- Use a small offset spatula or the back of a spoon to dollop a tablespoon of icing into the center of the cookie, gently pushing it toward the edges in a circular motion.
- Immediately sprinkle with dried lavender or fresh zest while the icing is still ‘wet’ so the decorations set into the glaze; let them dry for 2 hours for a firm, stackable finish.
Sourdough Discard Hack | Easy Discard Pancakes
Why we love this
There is a unique rustic charm to sourdough discard pancakes that regular flapjacks simply cannot match. They carry a sophisticated tang that balances perfectly with the sweetness of maple syrup, creating a complex flavor profile that feels incredibly high-end for a ‘leftover’ ingredient. As they hit the hot griddle, the sourdough starter creates beautiful, lacy bubbles that result in a texture that is impossibly light and airy. Eating these feels like a cozy, sustainable hug, knowing you’ve turned a kitchen byproduct into a delicious, golden-brown masterpiece that anchors your brunch board with warmth.
Ingredients
- 1 cup sourdough discard (unfed)
- 1 large egg
- 2 tablespoons melted butter
- 1/2 teaspoon vanilla extract
- 1/2 cup all-purpose flour
- 1 teaspoon baking soda
- Pinch of salt
How to make it
- In a large mixing bowl, whisk together the sourdough discard, egg, melted butter, and vanilla until the mixture is completely homogenous and smooth.
- In a separate small bowl, combine the flour, baking soda, and salt; fold these dry ingredients into the wet mixture using a spatula, being careful not to over-mix—a few lumps are okay.
- Heat a cast-iron skillet over medium-low heat and coat with a thin layer of butter; wait for the butter to foam and then subside before pouring the batter.
- Pour 1/4 cup of batter per pancake; wait for bubbles to form on the surface and the edges to look matte and ‘set’ before flipping—this usually takes about 3 minutes.
- Flip gently and cook for an additional 2 minutes until the bottom is a deep golden brown; serve immediately while the steam is still rising from the center.
Conclusion
Building a viral-inspired food board is less about perfection and more about the celebration of ingredients. Whether you’re shocking your greens for that ultimate crunch or turning sourdough discard into a fluffy breakfast, these techniques elevate the everyday into something extraordinary. So, put down the phone, head to the kitchen, and start creating a board that nourishes both your body and your feed. Happy hosting!