
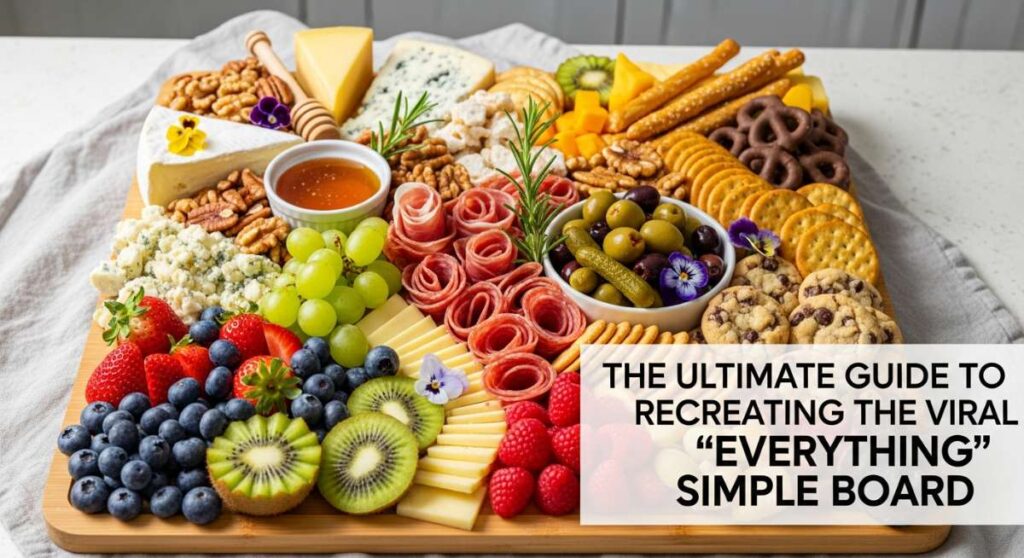
The Ultimate Guide to Recreating the Viral ‘Everything’ Simple Board
There is something inherently magical about the way food brings us together, isn’t there? Last weekend, as the sun dipped below the horizon and the air turned that perfect shade of twilight blue, I looked at my dining table and realized it wasn’t just about the meal—it was about the movement. The ‘Everything Board’ isn’t just a trend; it’s a lifestyle that celebrates the messy, beautiful, and delicious chaos of life gathered in one place. It’s about the tactile joy of reaching for a spicy crawfish while laughing over a glass of chilled wine, creating a tapestry of flavors that tells the story of your season.
I remember my first attempt at a communal board; I was so worried about things being ‘perfect’ that I forgot the most important ingredient: soul. But the viral ‘Everything’ Simple Board has taught us that the beauty lies in the variety. It’s a curated collection of your favorites—from grilled proteins to delicate spring sweets—all anchored by the spirit of hospitality. Whether you’re hosting a backyard bash or a quiet spring evening, this guide is designed to help you master every component of that viral masterpiece so you can spend less time in the kitchen and more time making memories.
How to cook crawfish boil?

Why we love this
There is nothing quite like the sensory explosion of a traditional crawfish boil spilling out onto a table. The aroma of cayenne, lemon, and garlic wafts through the air, immediately signaling that a celebration has begun. As you peel into the succulent, spicy meat, you feel the warmth of the seasoning on your fingertips and the satisfying pop of the shell, creating a rhythmic, communal experience that turns a simple meal into an interactive event. It is messy, vibrant, and absolutely packed with deep, soul-warming flavors that linger long after the last claw has been cracked.
Ingredients
- 15 lbs live crawfish
- 4 gallons water
- 1 bag liquid or powder crab boil seasoning
- 6 lemons, halved
- 3 heads of garlic, halved crosswise
- 2 lbs small red potatoes
- 6 ears of corn, halved
- 1 lb smoked sausage, sliced into chunks
- 2 onions, quartered
How to make it
- Begin by purging your crawfish in a large tub of cool water, rinsing them several times until the water runs clear; this ensures a clean, grit-free eating experience.
- Fill a very large stockpot with 4 gallons of water and bring it to a rolling, aggressive boil over high heat.
- Add your seasonings, halved lemons (squeezing the juice in first), garlic, and onions, allowing them to boil for about 10 minutes to create a concentrated, aromatic broth.
- Carefully add the red potatoes and the smoked sausage; boil these for about 15-20 minutes or until the potatoes are just fork-tender but not falling apart.
- Drop the live crawfish into the pot and stir gently; once the water returns to a boil, cook them for exactly 5 minutes until they turn a bright, vibrant red.
- Turn off the heat and add the corn, then let the entire pot soak for 20-30 minutes; this is the secret step where the crawfish absorb all the spicy, citrusy juices without overcooking.
- Drain the pot and spread the contents directly onto a newspaper-lined table or a massive board for the ultimate viral presentation.
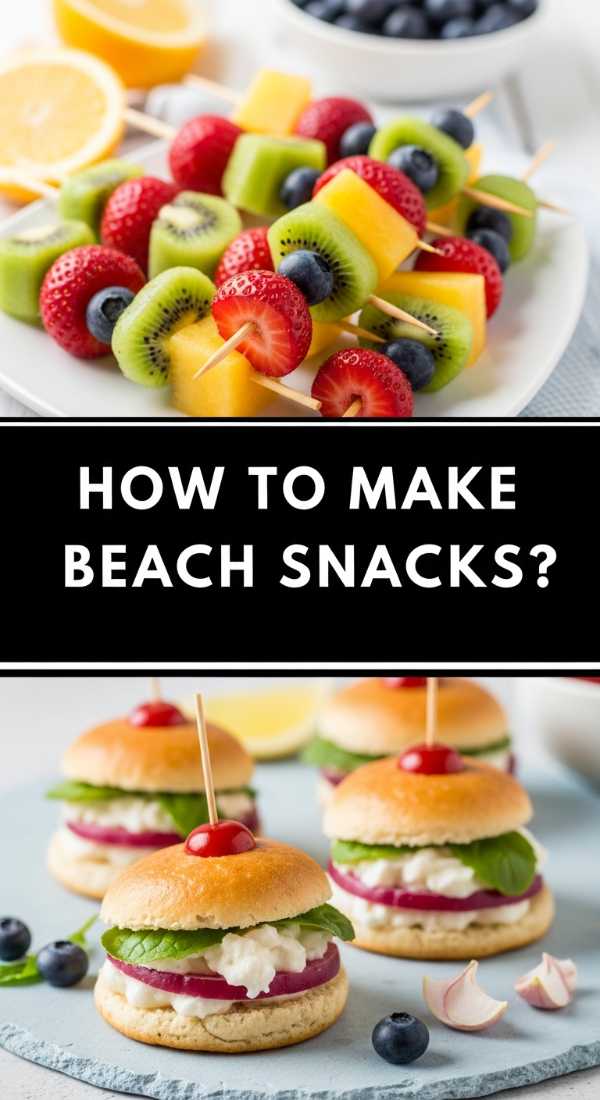
How to make beach snacks?
Why we love this
The perfect beach snack is a delicate balance of hydration, salt, and portability that keeps the energy high under the summer sun. Imagine the crunch of a perfectly salted nut paired with the burst of a chilled, sweet grape while the sound of crashing waves provides the background score. These snacks are designed to be light and refreshing, preventing that heavy, sluggish feeling while providing enough nourishment to keep you swimming and sunbathing all afternoon. They are the ultimate companions for sandy fingers and salty skin, offering a crisp, clean contrast to the heat of the day.
Ingredients
- Green and red seedless grapes
- Pretzels or sea salt crackers
- Raw almonds or cashews
- English cucumber slices
- Hummus or tzatziki
- Dried apricots or mango
- Cheese cubes (cheddar or gouda)
How to make it
- Wash and thoroughly dry all fresh produce; moisture is the enemy of a beach bag, as it can make crackers soggy or cause fruit to spoil faster.
- Freeze your grapes overnight on a baking sheet; these act as edible ice cubes that stay chilled for hours and provide a slushy-like texture when eaten on the sand.
- Slice your cucumbers into thick rounds and store them in an airtight container with a damp paper towel to maintain their crisp, snap-like texture.
- Portion out nuts and dried fruits into individual small reusable bags or jars to prevent sand from contaminating the entire stash.
- Place hummus in a small, insulated container and surround it with the cheese cubes to keep everything at a safe, cool temperature.
- When assembling your board at the beach, place the wetter items (fruit and cucumbers) in the center and line the perimeter with the dry crackers and nuts to maintain their crunch.
- Always keep your snack board in a shaded area or atop a cooler to preserve the freshness of the ingredients.
How to bake spring cake?

Why we love this
A spring cake is like a garden in edible form, characterized by a crumb that is so light and airy it practically melts on the tongue. The subtle infusion of lemon zest and perhaps a hint of lavender creates a floral, citrusy profile that feels remarkably sophisticated yet comforting. When you slice into it, the texture is soft and velvety, perfectly complemented by a delicate layer of frosting that isn’t overly sweet. It’s the kind of cake that pairs beautifully with a cup of Earl Grey tea, capturing the essence of new beginnings and blooming flowers in every bite.
Ingredients
- 2 1/2 cups cake flour
- 1 1/2 cups granulated sugar
- 1 tbsp baking powder
- 1/2 tsp salt
- 3/4 cup unsalted butter, softened
- 1 cup whole milk, room temperature
- 4 large egg whites
- 2 tsp vanilla extract
- 1 tbsp fresh lemon zest
How to make it
- Preheat your oven to 350°F (175°C) and grease two 8-inch round cake pans, lining the bottoms with parchment paper for a flawless release.
- In a large bowl, sift together the cake flour, sugar, baking powder, and salt to ensure there are no lumps and the cake remains light and airy.
- Using a stand mixer with a paddle attachment, beat the softened butter into the dry ingredients on low speed until the mixture looks like fine, sandy crumbs.
- Whisk together the milk, egg whites, vanilla, and lemon zest in a separate jug; slowly pour half of this liquid into the flour mixture and beat on medium speed for 2 minutes to develop the cake’s structure.
- Add the remaining liquid in two batches, scraping the bowl often, and mix just until combined; over-mixing at this stage will make the cake tough.
- Divide the batter evenly between the prepared pans and smooth the tops with a spatula.
- Bake for 25-30 minutes, or until a toothpick inserted in the center comes out clean and the edges are just beginning to pull away from the pan.
- Let the cakes cool in the pans for 10 minutes before transferring them to a wire rack to cool completely before frosting.
How to make birthday cakes?

Why we love this
Birthday cakes are the crowning jewel of any celebration, carrying with them a sense of nostalgia and pure, unadulterated joy. A classic chocolate birthday cake offers a deep, cocoa-rich intensity that feels indulgent and celebratory, with a moist, dense crumb that holds up perfectly under layers of silky buttercream. The aroma of melting chocolate and vanilla filling the kitchen is a precursor to the happiness of blowing out candles and sharing a slice with the people you love most. It’s more than just a dessert; it’s a centerpiece that anchors the entire party with its decadent presence.
Ingredients
- 2 cups all-purpose flour
- 2 cups granulated sugar
- 3/4 cup unsweetened cocoa powder
- 2 tsp baking soda
- 1 tsp baking powder
- 1 tsp salt
- 1 cup buttermilk
- 1/2 cup vegetable oil
- 2 large eggs
- 1 cup hot brewed coffee
How to make it
- Preheat your oven to 350°F and prepare your pans with butter and a dusting of cocoa powder to prevent sticking.
- Whisk all the dry ingredients (flour, sugar, cocoa, baking soda, baking powder, salt) in a large bowl until the color is uniform.
- Add the buttermilk, oil, and eggs, mixing on medium speed until the batter is thick and smooth.
- Carefully pour in the hot coffee while the mixer is on low; the hot liquid ‘blooms’ the cocoa powder, deepening the chocolate flavor significantly and thinning the batter.
- Pour the batter into the pans and bake for 30-35 minutes; check for doneness by ensuring the center of the cake springs back when lightly pressed.
- Cool the cakes completely; for the best frosting results, wrap the cooled layers in plastic wrap and chill them in the fridge for an hour to firm up the crumb.
- Level the cakes with a serrated knife before frosting to ensure a stable, professional-looking stack.
How to bake spring treats?

Why we love this
Spring treats, like lemon shortbread bars or pastel-dipped cookies, are the bite-sized wonders of the board that offer a punch of flavor in a small package. We love them for their versatility and the way they can be easily grabbed while mingling, offering a sweet reprieve that isn’t too heavy. The combination of a buttery, crumbly base with a tangy, bright citrus curd creates a dance of textures and flavors that feels like sunshine on a plate. They bring a pop of color and a whimsical energy to the ‘Everything’ board, making them a favorite for both kids and adults alike.
Ingredients
- 2 cups all-purpose flour
- 1/2 cup powdered sugar
- 1 cup cold unsalted butter, cubed
- 4 large eggs
- 1 1/2 cups granulated sugar
- 1/2 cup fresh lemon juice
- 2 tbsp lemon zest
- 1/4 cup flour (for filling)
How to make it
- Preheat your oven to 350°F and line an 8×8 inch baking pan with parchment paper, leaving an overhang on the sides for easy removal.
- Pulse the 2 cups of flour, powdered sugar, and cold butter in a food processor until it looks like coarse meal; press this firmly into the bottom of the prepared pan.
- Bake the crust for 20 minutes or until the edges are just barely golden brown.
- While the crust bakes, whisk together the eggs, granulated sugar, lemon juice, zest, and the remaining 1/4 cup of flour until the mixture is smooth and slightly frothy.
- Pour the lemon filling over the hot crust and return the pan to the oven for another 20-25 minutes until the center is set and no longer jiggles.
- Allow the bars to cool completely at room temperature, then refrigerate for at least 2 hours before lifting them out of the pan and slicing them into clean squares.
- Dust with a final layer of powdered sugar just before serving to maintain that fresh, snowy look.
How to decorate spring cakes?

Why we love this
Decorating is where the artistry of the spring board truly shines, turning a simple bake into a botanical masterpiece. Using edible flowers, soft watercolor frosting techniques, and fresh herbs creates a visual feast that feels organic and high-end. There is a deep satisfaction in seeing a smooth, pastel-hued cake adorned with delicate pansies or sprigs of mint, reflecting the natural beauty of the season. It’s an opportunity to play with color and texture, making the cake look almost too beautiful to eat, while ensuring every element on the board feels cohesive and thoughtfully designed.
Ingredients
- Edible flowers (pansies, violas, marigolds)
- Fresh mint sprigs
- Gel food coloring (pastel tones)
- Swiss meringue buttercream
- Piping bags and assorted tips
- Offset spatula
How to make it
- Apply a thin ‘crumb coat’ of frosting to your chilled cake layers and refrigerate for 20 minutes to seal in any loose crumbs.
- Divide your remaining buttercream into small bowls and tint them with tiny amounts of gel coloring to achieve soft, muted pastel shades.
- Apply the final layer of frosting using an offset spatula; for a watercolor effect, dab small spots of different colors around the cake and smooth them together with a bench scraper.
- Wash and thoroughly dry your edible flowers, ensuring they are sourced from an organic, pesticide-free supplier.
- Press the flowers gently into the frosting while it is still soft, creating a ‘cascading’ effect from the top down one side of the cake.
- Tuck small sprigs of mint around the base or between the flowers to add a vibrant green contrast and a fresh aroma.
- Keep the cake in a cool spot until serving to prevent the flowers from wilting and the frosting from softening too much.
How to make pasta salad?

Why we love this
A great pasta salad is the unsung hero of the communal board, providing a zesty, vinegar-forward bite that cuts through richer flavors. We love the medley of textures—the chew of al dente pasta, the crunch of fresh bell peppers, and the creamy crumble of feta cheese—all tied together by a bright, herb-infused vinaigrette. It’s a dish that actually tastes better as it sits, allowing the pasta to soak up the dressing and develop a complex, rounded flavor. It serves as the perfect chilled side that keeps the palate refreshed and ready for the next bite of the board.
Ingredients
- 1 lb rotini or fusilli pasta
- 1/2 cup extra virgin olive oil
- 1/4 cup red wine vinegar
- 1 tsp dried oregano
- 1 cup cherry tomatoes, halved
- 1/2 cup cucumber, diced
- 1/2 cup kalamata olives, sliced
- 1/2 cup red onion, finely minced
- 1/2 cup crumbled feta cheese
How to make it
- Cook the pasta in a large pot of heavily salted boiling water; cook it for 1 minute less than the package directions for ‘al dente’ to ensure it doesn’t get mushy once the dressing is added.
- Drain the pasta and immediately rinse it under cold running water to stop the cooking process and wash away excess starch.
- In a small jar, shake together the olive oil, red wine vinegar, oregano, salt, and pepper until emulsified.
- In a large bowl, combine the cooled pasta with the tomatoes, cucumbers, olives, and red onion.
- Pour the dressing over the mixture and toss thoroughly to coat every piece of pasta; the ridges in rotini are perfect for trapping the vinaigrette.
- Fold in the feta cheese gently at the very end to prevent it from breaking down and making the salad look cloudy.
- Refrigerate for at least 30 minutes before serving on your board to allow the flavors to marry and the salad to become perfectly chilled.
How to grill healthy meals?

Why we love this
Grilling healthy meals brings out the natural sweetness of vegetables and the savory depth of lean proteins through the magic of caramelization. There is a primal, smoky aroma that comes from a hot grill, transforming simple ingredients like zucchini, asparagus, and bell peppers into charred, flavorful delights. It’s a way of cooking that requires very little added fat, relying instead on high heat and seasoning to create satisfaction. This component of the board adds a vibrant, colorful element that feels nourishing and balanced, ensuring there’s something light and wholesome for everyone to enjoy.
Ingredients
- 2 zucchini, sliced into ribbons
- 1 bunch asparagus, trimmed
- 2 bell peppers, cut into wide strips
- 1 lb large shrimp or lean chicken strips
- 2 tbsp olive oil
- 1 tbsp balsamic glaze
- Sea salt and cracked black pepper
- Fresh lemon wedges
How to make it
- Preheat your grill to medium-high heat (about 400°F) and ensure the grates are clean and lightly oiled to prevent sticking.
- Toss all your vegetables and protein in a large bowl with the olive oil, salt, and pepper until evenly coated.
- Place the vegetables across the grates (perpendicular to the bars so they don’t fall through) and grill for 3-4 minutes per side until distinct char marks appear.
- Grill the shrimp for only 2 minutes per side until they are opaque and pink, or chicken for 5-6 minutes per side until the internal temperature reaches 165°F.
- Remove everything from the grill and immediately drizzle with the balsamic glaze while the food is still hot; this allows the glaze to thin out and coat the items perfectly.
- Arrange the grilled components in organized rows on your board to showcase the beautiful char marks and vibrant colors.
- Serve with extra lemon wedges on the side for a final hit of acidity that brightens the smoky flavors.
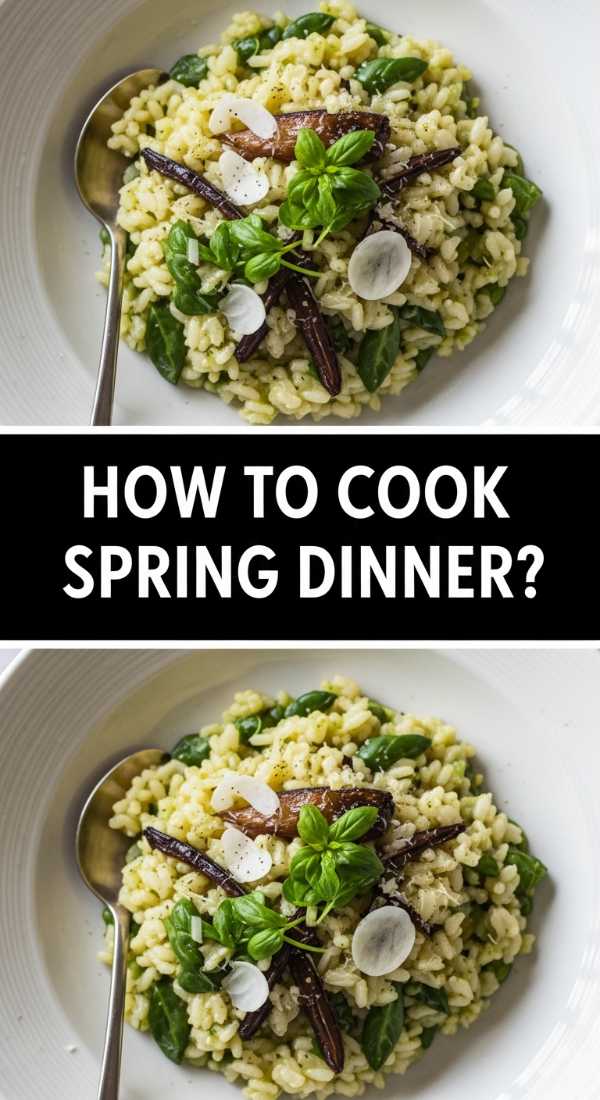
How to cook spring dinner?
Why we love this
A spring dinner on a board usually centers around a beautifully prepared piece of fish or a light roast, symbolizing the elegance of the season. We love a pan-seared salmon for its buttery texture and the way its rich, pink hue pops against the greens of the board. The flavor is clean and sophisticated, especially when paired with a bright dill butter or a squeeze of charred lemon. It feels special enough for a celebration but simple enough for a weeknight, bridging the gap between casual and gourmet with ease and grace.
Ingredients
- 4 salmon fillets (6 oz each)
- 2 tbsp butter
- 1 tbsp fresh dill, chopped
- 1 garlic clove, minced
- Salt and lemon pepper
- 1 lemon, sliced into rounds
How to make it
- Pat the salmon fillets completely dry with paper towels; moisture on the surface of the fish is the enemy of a crispy, golden skin.
- Season the flesh side of the fish generously with salt and lemon pepper.
- Heat a large heavy-bottomed skillet over medium-high heat and add 1 tablespoon of oil; once the oil is shimmering, place the salmon skin-side down in the pan.
- Press down lightly on the fillets with a spatula for the first 30 seconds to ensure the skin makes full contact with the heat and doesn’t curl.
- Cook for 4-5 minutes without moving them until the skin is crispy and the flesh has cooked about halfway up the side of the fillet.
- Flip the fillets and add the butter, garlic, and dill to the pan; as the butter melts, spoon it repeatedly over the salmon for 2 more minutes to ‘baste’ it with flavor.
- Remove the salmon when it is slightly translucent in the center (it will continue to cook as it rests) and place it on the board garnished with fresh dill and the pan-browned lemon slices.
How to grill tender chicken?

Why we love this
Tender, grilled chicken is a staple for a reason: when done right, it is incredibly juicy and carries a smoky char that is impossible to resist. We love the contrast between the slightly crispy exterior and the succulent, tender meat inside that has been infused with a bright marinade. It is a crowd-pleaser that serves as a fantastic protein base for the ‘Everything’ board, pairing effortlessly with everything from pasta salad to grilled veggies. Mastering the technique of the perfect grill ensures your board is grounded by a reliable, delicious, and satisfying main component.
Ingredients
- 1.5 lbs chicken thighs (boneless, skinless)
- 1/4 cup olive oil
- 2 tbsp soy sauce
- 1 tbsp honey
- 2 cloves garlic, smashed
- 1 tsp smoked paprika
- Juice of 1 lime
How to make it
- Whisk together the olive oil, soy sauce, honey, garlic, paprika, and lime juice in a large bowl to create a marinade that balances salt, acid, and sweetness.
- Add the chicken thighs, ensuring they are completely submerged, and marinate in the refrigerator for at least 30 minutes (but no more than 4 hours, or the lime juice will begin to cook the meat).
- Preheat your grill to medium heat; chicken thighs are best cooked at a slightly lower temperature than steak to allow the fat to render without burning the outside.
- Place the chicken on the grill and cook for 6-7 minutes per side; avoid the temptation to move them too soon, as they need time to release naturally from the grates.
- Use a meat thermometer to ensure the internal temperature reaches exactly 165°F at the thickest part.
- Crucially, let the chicken rest on a cutting board for at least 5-10 minutes before slicing; this allows the juices to redistribute throughout the meat, ensuring every bite is tender.
- Slice into thick strips and fan them out on your board, drizzling with any remaining juices from the resting plate.
Conclusion
Recreating the viral ‘Everything’ Simple Board is an exercise in creativity and a testament to the joy of shared meals. By mastering these ten distinct elements—from the spicy depths of a crawfish boil to the delicate crumb of a spring cake—you are building more than just a meal; you are building an experience. Remember, the board is simply the canvas, and your ingredients are the paint. Don’t be afraid to let things overlap, to let colors mingle, and to let the conversation flow as naturally as the flavors. Now, gather your friends, lay out your spread, and enjoy the beautiful, delicious results of your hard work. Happy hosting!