

Have you ever scrolled through your feed and felt a literal physical pull toward a photo of a sun-drenched patio or a perfectly styled reading nook? You aren’t alone. We are currently living in the era of the ‘Dreamy Aesthetic,’ a movement that prioritizes warmth, magic, and a deep connection to our surroundings. It’s about more than just decor; it’s about creating a sanctuary that feels like a permanent vacation.
The secret to this viral obsession lies in the details—the way light filters through a sheer curtain, the scent of fresh wildflowers on a wooden table, or the soft glow of a garden path at twilight. It’s a sensory experience that invites us to slow down and savor the beauty of our everyday lives. Whether you have a sprawling backyard or a tiny apartment, these vibes are entirely within your reach.
In this guide, I’m breaking down ten of the most viral home and garden projects that are currently taking over the internet. We’re going deep into the ‘how-to’ so you can stop scrolling and start building your own slice of paradise. Let’s dive into the elements that turn a house into a dreamy, curated home.
How to Build a Planter Light Post for a Magical Garden Glow

Why we love this
There is something inherently romantic about the soft, amber flicker of a garden light nestled within a blooming planter. It captures the essence of a moonlit evening in a secret garden, where the air is thick with the sweet fragrance of night-blooming jasmine and the damp, earthy scent of fresh mulch. As the sun dips below the horizon, these posts become beacons of warmth, casting long, dancing shadows that make your outdoor space feel intimate and incredibly high-end.
Essential Elements:
- Large heavy-duty ceramic or wooden planter
- 4×4 Pressure-treated wooden post (6-8 feet)
- Quick-set concrete mix
- Solar or hardwired post-top lantern
- Trailing vines (like Ivy or Creeping Jenny)
- Seasonal flowers (like Petunias or Marigolds)
- Drainage gravel and high-quality potting soil
How to make it
- Begin by prepping your planter; ensure it has a drainage hole, but temporarily plug it with a piece of tape or a rag so the concrete doesn’t leak out during the initial pour.
- Place your 4×4 wooden post exactly in the center of the planter. Use a level on two adjacent sides to ensure it is perfectly vertical, as even a slight tilt will be visible once the light is attached.
- Mix your quick-set concrete in a separate bucket according to the manufacturer’s instructions until it reaches the consistency of thick peanut butter. Carefully pour the concrete into the planter around the post, filling it about halfway up.
- Hold the post steady for 5-10 minutes (or use braces) until the concrete sets enough to support the weight of the wood. Let it cure fully for 24 hours to ensure a rock-solid foundation.
- Once cured, remove the plug from the drainage hole. Add a 2-inch layer of drainage gravel over the concrete, then fill the remainder of the planter with premium potting soil.
- Attach your chosen lantern to the top of the post using exterior-grade screws. If using a solar light, ensure it is positioned to receive direct sunlight during the day.
- Plant your trailing vines around the base of the post so they can eventually climb or spill over the edges, and fill the rest with colorful blooms for a lush, layered look.
How to Style Spring Flowers Wallpaper for a Dreamy Pink Aesthetic

Why we love this
Stepping into a room adorned with delicate pink floral wallpaper feels like walking into a perpetual spring morning in Paris. The visual texture of soft petals and winding green stems creates a sense of movement and life on the walls, making the space feel both grand and incredibly cozy. The aroma of a nearby peony-scented candle only enhances the experience, pulling the colors off the wall and into the room for a fully immersive, feminine sanctuary.
Essential Elements:
- High-quality peel-and-stick or traditional floral wallpaper
- Wallpaper smoothing tool (felt-edged squeegee)
- Sharp utility knife with extra blades
- Plumb line or spirit level
- Measuring tape
- Microfiber cloth and mild cleaning solution
How to make it
- Start with a clean slate by wiping down your walls with a damp microfiber cloth to remove dust and oils. If your walls are newly painted, wait at least 4 weeks for the paint to fully outgas before applying wallpaper.
- Measure the height of your wall and add 2-3 inches of ‘bleed’ to the top and bottom. Cut your first panel based on this measurement.
- Use a plumb line or level to draw a perfectly vertical line on the wall where the first panel will go. This is the most critical step; if the first panel is crooked, the entire room will be off.
- Peel back about 12 inches of the backing paper and align the edge of the wallpaper with your vertical line, leaving an inch of overhang at the ceiling.
- Slowly press the paper onto the wall, using your smoothing tool to push air bubbles from the center outward toward the edges. Work in small sections, peeling and smoothing as you go.
- When you reach the next panel, pay close attention to the pattern match. Align the flowers at eye level first, then work your way up and down to ensure the design is seamless.
- Once all panels are up, use a very sharp utility knife and a straight edge to trim the excess paper at the ceiling and baseboards for a professional, flush finish.
How to Curate a Cute Campsite Setup for Tropical Island Vibes

Why we love this
Forget the gritty, utilitarian camping of the past; the tropical island campsite is all about luxury and sensory bliss. Imagine the sound of waves lapping against the shore while you lounge on a plush floor cushion, the air smelling of coconut suntan oil and saltwater. It’s a curated escape that blends the ruggedness of the outdoors with the refined comfort of a boutique resort, making every moment feel like a scene from a travel vlog.
Essential Elements:
- Canvas bell tent or high-quality aesthetic tent
- Battery-powered rattan lanterns
- Faux or real palm fronds for decor
- Linen throw blankets and outdoor rugs
- Portable bamboo table
- Citronella candles in stylish ceramic jars
- String lights (Edison style)
How to make it
- Choose a level site, preferably with a view of the water or surrounded by lush greenery. Lay down a heavy-duty ground tarp that is slightly smaller than your tent footprint to prevent moisture from seeping in.
- Pitch your tent carefully, ensuring all guy-lines are taut to create that iconic, crisp silhouette. A saggy tent ruins the aesthetic!
- Layer the floor inside with a large outdoor rug or several overlapping smaller rugs to provide a soft, barefoot-friendly surface.
- Set up your sleeping area with a high-profile air mattress, topped with real linen sheets and a lightweight duvet rather than a sleeping bag to elevate the comfort level.
- Place a bamboo table outside the tent entrance to serve as a ‘tropical bar’ or coffee station. Decorate it with palm fronds and a tray for your drinks.
- String Edison-style lights between the tent and nearby trees or poles, ensuring the wires are tucked away and the glow is soft and warm.
- Finish the look by scattering rattan lanterns around the perimeter of your site to create a defined, magical ‘room’ in the middle of nature.
How to Design a Low Retaining Wall for Stunning Curb Appeal

Why we love this
A well-designed low retaining wall acts as the sophisticated frame for your home’s landscape, providing structure and a sense of permanence. There is a tactile satisfaction in the cool, rough surface of the stones and the way they contrast with the soft, vibrant greenery of a manicured lawn. It’s an architectural element that adds depth and dimension, making your front yard feel like an intentional, professionally designed estate that welcomes you home with open arms.
Essential Elements:
- Interlocking retaining wall blocks or natural stone
- Leveling sand and crushed stone base (3/4-inch minus)
- Landscape fabric
- Perforated drainage pipe
- Plate compactor or hand tamper
- Torpedo level and 4-foot level
- Rubber mallet
How to make it
- Mark the layout of your wall using stakes and string or marking paint. Dig a trench that is roughly 12-15 inches wide and deep enough to accommodate 6 inches of base material plus half the height of the first course of blocks.
- Fill the trench with 6 inches of crushed stone and use a plate compactor to pack it down until it is rock-hard and perfectly level. This foundation prevents the wall from shifting or sagging over time.
- Apply a 1-inch layer of leveling sand over the gravel. Place your first block at the lowest point of the wall. Use your torpedo level to ensure it is level from front-to-back and side-to-side.
- Lay the rest of the first course, checking each block against the previous one. Use a rubber mallet to tap them into place. If the first course isn’t perfect, the whole wall will be crooked.
- Install landscape fabric behind the first course and lay a perforated drainage pipe on top of the gravel base behind the wall to prevent water pressure from building up.
- Stack subsequent courses, staggering the vertical joints (like a brick pattern). If using interlocking blocks, ensure the lips are seated correctly against the course below.
- Fill the space behind the wall with crushed stone (not dirt) for drainage, then cap the wall with matching flat stones using outdoor-rated masonry adhesive for a polished finish.
How to Arrange Wildflower Centerpieces for a Whimsical Dinner Party

Why we love this
There is nothing more charming than a table that looks like it was decorated by the meadow itself. Wildflower centerpieces bring an airy, effortless beauty to a dinner party, with their wispy stems and vibrant, mismatched petals dancing in the candlelight. The scent is fresh and herbal—think hints of chamomile, lavender, and crushed grass—creating an atmosphere that feels grounded, unpretentious, and deeply magical for every guest who sits down.
Essential Elements:
- Assorted glass jars, vintage bottles, or ceramic bud vases
- Floral shears or sharp scissors
- A mix of ‘thrillers’ (Cosmos, Zinnias), ‘fillers’ (Queen Anne’s Lace, Statice), and ‘spillers’ (Sweet Peas, Ivy)
- Clear floral tape or chicken wire
- Fresh water with floral preservative
How to make it
- Gather your flowers in the early morning when their moisture content is highest. Immediately place them in a bucket of cool water to hydrate for at least two hours before arranging.
- Choose a variety of vessel heights. A mix of tall, slender bottles and short, round jars creates a more dynamic and ‘undone’ look across the table.
- If using a wider bowl, create a grid across the top with clear floral tape or insert a small ball of chicken wire to give the stems support.
- Start with your ‘filler’ greens to establish the shape and volume of the arrangement. Let some pieces lean out horizontally to create that whimsical, overgrown feel.
- Add your primary ‘thriller’ flowers—the stars of the show. Distribute them at varying heights and angles so the arrangement looks beautiful from every seat at the table.
- Tuck in the delicate ‘spiller’ elements and smaller blossoms to fill gaps and add texture. Avoid making it look too symmetrical; imperfection is the key to this aesthetic.
- Finish by misting the petals with water and placing them on the table. Keep them out of direct sunlight and change the water daily to keep the meadow-fresh vibe alive.
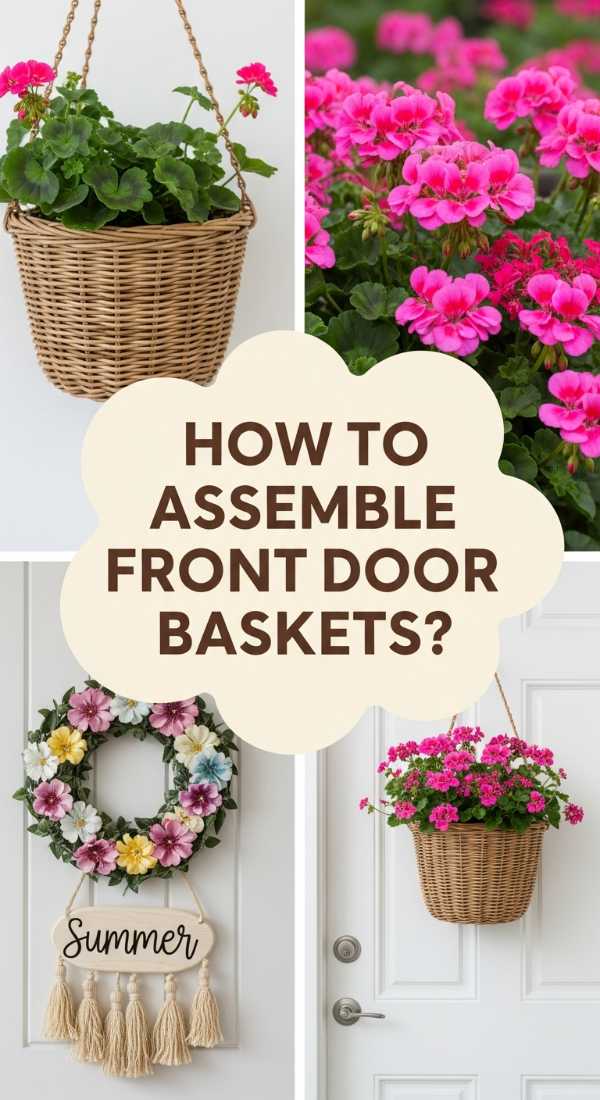
How to Assemble Front Door Baskets for a Warm Summer Welcome
Why we love this
Replacing a traditional wreath with a flat-backed wicker basket is the ultimate ‘cottagecore’ upgrade for your entryway. It feels personal and abundant, like you’ve just returned from a walk through the garden with a fresh harvest. The sight of overflowing greenery against the wood of the door, paired with the faint, sun-warmed scent of dried eucalyptus or fresh herbs, creates an instant sense of home and hospitality that greets you before you even turn the key.
Essential Elements:
- Flat-backed hanging basket (wicker, seagrass, or wire)
- Floral foam (dry for faux, wet for real)
- Floral wire or zip ties
- Faux or fresh greenery (Eucalyptus, Ferns, Ruscus)
- Seasonal accents (dried orange slices, silk ribbons, or lavender sprigs)
- Command hook or over-the-door hanger
How to make it
- Secure your floral foam inside the basket. If it’s a wire basket, you may need to line it with moss first. Ensure the foam is wedged in tightly so it doesn’t shift when the door opens and closes.
- Start with your tallest greenery in the back, pushing the stems deep into the foam. These should fan out slightly to create a backdrop for the rest of the arrangement.
- Layer in your mid-sized elements, focusing on creating fullness in the center. Use a variety of textures—mix soft, feathery ferns with broad-leafed eucalyptus for visual interest.
- Add ‘spilling’ elements at the front of the basket. Let them drape over the edge to soften the lines of the wicker and create a sense of abundance.
- Incorporate your accents. Weave a silk or linen ribbon through the handle and tie a long, flowing bow. If using dried oranges or lavender, wire them into small bundles before inserting them.
- Check the weight of the basket. If it’s heavy, use a sturdy over-the-door hanger. If it’s light, a heavy-duty outdoor Command hook will work perfectly.
- Hang the basket and fluff the greenery. Step back to the sidewalk to ensure it looks balanced and inviting from a distance.
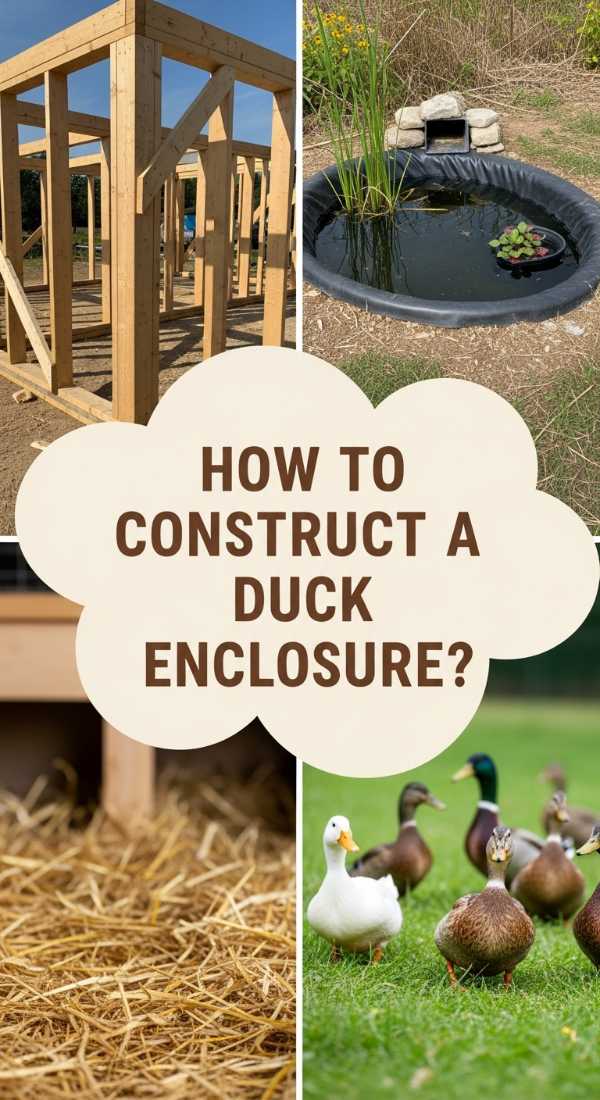
How to Construct a Duck Enclosure for a Sustainable Backyard Farm
Why we love this
There is a rhythmic, peaceful quality to backyard farming that modern life often misses. A well-designed duck enclosure isn’t just a pen; it’s a rustic sanctuary where the soft patter of webbed feet and the gentle splashing of water become the soundtrack to your mornings. The smell of clean straw and the sight of happy ducks foraging in the grass bring a grounding, soulful energy to your property, connecting you to the cycles of nature in the most rewarding way.
Essential Elements:
- Pressure-treated lumber for the frame (2x4s)
- Hardware cloth (not chicken wire—it’s more predator-proof)
- Plywood for the coop walls and roof
- Corrugated metal or asphalt shingles
- Heavy-duty barrel bolts and hinges
- Straw or wood shavings for bedding
- A predator-proof floor (concrete or buried wire)
How to make it
- Plan for at least 4-5 square feet of floor space per duck inside the house and 10-15 square feet per duck in the outdoor run. Safety is the priority; ducks are vulnerable to predators like raccoons and foxes.
- Build the frame of the house using 2×4 lumber. Ensure the floor is slightly elevated off the ground to keep it dry and prevent rot.
- Attach hardware cloth to the outdoor run portion. Dig a 12-inch deep trench around the perimeter and bury the bottom of the wire to prevent predators from digging under.
- Construct a wide, low ramp for the ducks to enter the coop. Ducks aren’t as agile as chickens, so the incline must be gentle.
- Install a large door for human access (for cleaning) and a smaller ‘duck door’ for the animals. Use locking barrel bolts that require two steps to open, as raccoons are surprisingly clever.
- Roof the structure with corrugated metal, ensuring there is plenty of ventilation at the top. Ducks produce a lot of moisture, so airflow is vital for their health.
- Add a thick layer of straw inside for nesting and provide a shallow water basin or ‘duck pool’ in the run area for them to bathe and play.
How to Use Concrete Molds for a Luxe Poolside Path

Why we love this
A custom stone path around a pool adds an element of architectural luxury that feels like a private Mediterranean villa. The smooth, cool touch of the concrete under bare, sun-warmed feet is the ultimate summer sensation. Visually, the geometric or organic patterns of the molds create a sophisticated rhythm in the landscape, reflecting the shimmering blue of the water and making the entire outdoor space feel cohesive, expensive, and intentionally designed.
Essential Elements:
- Reusable walkway concrete molds (various patterns available)
- High-strength concrete mix (Quikrete or similar)
- Concrete pigment (charcoal or terracotta for a custom look)
- Large mixing tub or wheelbarrow
- Flat shovel and margin trowel
- Concrete sealer (satin or high-gloss finish)
- Release agent or vegetable oil spray
How to make it
- Clear the path area of grass and debris. Dig down about 2 inches and level the soil. For the best results, add a 1-inch layer of sand and compact it to provide a stable base.
- Mix your concrete to a firm, ‘mud-pie’ consistency. If it’s too runny, the shapes won’t hold; if it’s too dry, it will be crumbly and weak. This is when you add your liquid or powder pigment for a custom color.
- Lightly spray the inside of the mold with a release agent or vegetable oil to prevent the concrete from sticking.
- Place the mold at the start of your path. Fill the cavities with concrete using a shovel, then use a trowel to smooth and level the surface of each section.
- Wait about 5-10 minutes (depending on the temperature) for the concrete to begin setting. Carefully lift the mold straight up. If the edges slump, wait a few more minutes for the next one.
- Place the mold adjacent to the finished section, aligning the pattern, and repeat. You can rotate the mold 90 degrees each time to create a more random, natural stone appearance.
- Let the path cure for at least 48 hours. Once dry, sweep sand into the joints or fill them with moss, then apply a high-quality concrete sealer to protect against pool chemicals and UV rays.
How to Create Mud Kitchen Rock Food for Endless Outdoor Play

Why we love this
There is a whimsical, nostalgic joy in watching children engage in tactile, imaginative play. These hand-painted ‘rock foods’—tiny strawberries, sunny-side-up eggs, and slices of pizza—turn a simple backyard corner into a bustling gourmet bistro. The smooth texture of the river stones, the vibrant colors of the acrylics, and the clinking sound they make in a wooden bowl provide a rich sensory experience that encourages kids to get outside and get creative in the dirt.
Essential Elements:
- Smooth, flat river rocks (various sizes)
- Outdoor-rated acrylic paints
- Variety of paintbrushes (fine tip and flat)
- Pencil for sketching
- Outdoor clear sealant (UV-resistant)
- A wooden crate or ‘mud kitchen’ setup
How to make it
- Scrub your rocks with soapy water and a stiff brush to remove any dirt or lichen. Let them dry completely in the sun; any moisture trapped in the rock will cause the paint to peel.
- Sort your rocks by shape. A triangular rock is perfect for a pizza slice or watermelon, while small ovals make great strawberries or peas.
- Lightly sketch your design onto the rock with a pencil. Don’t worry about being perfect—the charm of ‘rock food’ is its folk-art, handmade quality.
- Apply a base coat of white or a light color if you are painting a bright fruit, as this will make the top colors pop. Let it dry between layers.
- Paint your main colors, then use a fine-tip brush to add the ‘tasty’ details like seeds on a strawberry, zest on a lemon, or grill marks on a steak.
- Once the paint is fully cured (usually 24 hours), spray or brush on a heavy-duty outdoor clear sealant. This is crucial to prevent the paint from chipping when the ‘food’ is submerged in mud or water.
- Present the rocks in a cute basket or on a wooden ‘stove’ and let the imaginative play begin!
How to Build an Outdoor Shower for Refreshing Summer Days

Why we love this
An outdoor shower is the ultimate symbol of a slow, sun-drenched lifestyle. There is nothing quite like the feeling of cool water rinsing away the salt and sand while the warm summer breeze hits your skin. The scent of cedar planks and the sound of water splashing onto smooth stones create a spa-like atmosphere that turns a basic hygiene routine into a meditative ritual. It’s the perfect blend of luxury and nature, making your backyard feel like a five-star tropical retreat.
Essential Elements:
- Cedar or teak wood planks for the enclosure
- Outdoor shower kit (fixtures and showerhead)
- Pressure-treated 4×4 posts for the frame
- Pea gravel or river rock for the drainage base
- Stainless steel hardware (to prevent rust)
- Garden hose adapter or PEX piping
- Outdoor-rated wood sealer
How to make it
- Choose a location with good natural drainage and, ideally, some privacy from neighbors. Dig out a 3×3 foot area to a depth of 6 inches and fill it with drainage gravel or large river rocks to prevent mud.
- Set your 4×4 posts into the ground using concrete, ensuring they are perfectly plumb. These will form the corners of your shower stall.
- Build a simple floor deck using cedar planks, leaving small gaps (about 1/8 inch) between the boards for water to drain through to the gravel below.
- Attach the horizontal or vertical cedar slats to the posts to create your privacy walls. Leave the top open to the sky to maximize that ‘outdoor’ feeling.
- Mount your shower fixture to one of the walls. If you don’t want to hire a plumber, use an outdoor shower kit that connects directly to your garden hose.
- Install hooks on the outside of the enclosure for towels and a small cedar shelf on the inside for organic soap and shampoo.
- Apply a UV-resistant wood sealer to the cedar to maintain its warm glow and protect it from water damage, then test the water pressure and enjoy your first alfresco rinse!
The Magic is in the Making
Creating a dreamy aesthetic isn’t about spending a fortune; it’s about the intention you put into your space. Whether it’s the glow of a DIY lantern or the tactile joy of a wildflower arrangement, these projects allow you to craft a home that feels like an escape from the noise of the world. Start with one project, follow the steps, and watch as your surroundings transform into the viral-worthy sanctuary you’ve always dreamed of. Happy making!