

The Lazy Girl’s Guide to Viral Simple Food Boards
There is something about a perfectly curated food board that just feels like a warm hug for your soul. You know the feeling—it’s a Sunday afternoon, the golden hour light is streaming through your kitchen window, and you want to create something that looks like it belongs on a high-end lifestyle feed without spending five hours scrubbing pots and pans. We have all been there, scrolling through endless reels of aesthetic spreads, wishing we had the energy to be *that* girl. Well, I have a secret for you: you can totally be that girl while staying firmly in your pajamas.
The magic of the ‘Lazy Girl’ food board isn’t about perfection; it’s about the vibe. It’s about taking simple, seasonal ingredients and arranging them with just a little bit of intentionality. Whether you are hosting your besties for a wine night or just treating yourself to a fancy solo lunch, these viral-inspired ideas are designed to be low-stress and high-impact. We are leaning into the freshness of spring, the sweetness of cherries, and the effortless charm of a well-placed garnish. Let’s dive into how you can make your culinary dreams a reality with zero gatekeeping and maximum flavor.
How to Bake Cherry Cakes?

Why we love this
There is nothing quite like the aroma of a cherry cake wafting through the house to signal that warmer days are finally here. Each bite is a delicate balance of buttery, vanilla-scented crumb and the explosive, tart sweetness of roasted cherries that have slumped into jammy pockets of joy. The texture is incredibly moist, almost melting on the tongue, while the vibrant red juice stains the cake in beautiful, organic swirls. It feels nostalgic and sophisticated all at once, like a treat you’d find at a hidden countryside bakery, perfect for enjoying with a cold glass of milk or a hot cup of tea.
Ingredients
- 2 cups all-purpose flour
- 1.5 cups pitted fresh cherries
- 1 cup granulated sugar
- 1/2 cup unsalted butter, softened
- 2 large eggs, room temperature
- 1/2 cup whole milk
- 1 tsp vanilla extract
- 1.5 tsp baking powder
- 1/4 tsp salt
How to make it
- Preheat your oven to 350°F (175°C) and grease a 9-inch round cake pan thoroughly. Line the bottom with parchment paper to ensure an easy release later.
- In a medium bowl, whisk together the flour, baking powder, and salt. Set this aside. This ensures the leavening agents are evenly distributed so you don’t end up with uneven rising.
- Using a stand mixer or hand mixer, cream the softened butter and sugar together on medium-high speed for about 3-5 minutes. You are looking for a pale, fluffy texture which indicates enough air has been incorporated.
- Add the eggs one at a time, beating well after each addition. Incorporate the vanilla extract. If the mixture looks slightly curdled, don’t worry; it will come together once the flour is added.
- Reduce the mixer to low speed. Alternately add the dry ingredients and the milk in three batches, starting and ending with the flour. Mix only until just combined—overmixing leads to a tough cake.
- Gently fold in half of the pitted cherries using a spatula. Pour the batter into the prepared pan and smooth the top.
- Scatter the remaining cherries over the top of the batter. Press them in very slightly. Bake for 40-45 minutes. You’ll know it’s done when a toothpick inserted into the center comes out clean and the edges are golden brown and pulling away from the sides.
- Let the cake cool in the pan for 10 minutes before transferring to a wire rack. Dust with powdered sugar before serving for that viral aesthetic look.
How to Cook Spring Dinners?

Why we love this
Spring dinners are all about lightness, brightness, and celebrating the first harvest of the season. Imagine a plate filled with crisp-tender asparagus, zesty lemon, and delicate herbs that make your palate dance with every forkful. The beauty of these meals lies in their simplicity; you aren’t hiding ingredients behind heavy sauces, but rather letting their natural, earthy flavors shine through. There is a certain crispness to the air in spring that calls for food that feels revitalizing and clean, leaving you satisfied but never weighed down, perfect for those long, lingering twilight hours.
Ingredients
- 1 lb thin asparagus spears
- 2 chicken breasts, thinly sliced
- 3 cloves garlic, minced
- 1 lemon (zest and juice)
- 2 tbsp olive oil
- 1/2 cup chicken broth
- Fresh parsley and red pepper flakes
- Salt and pepper to taste
How to make it
- Start by prepping your vegetables. Trim the woody ends off the asparagus and cut the spears into 2-inch pieces. Thinly slicing the chicken ensures it cooks quickly and remains tender.
- Heat olive oil in a large skillet over medium-high heat. Once the oil shimmers, add the chicken slices in a single layer. Season with salt and pepper.
- Sear the chicken for about 3-4 minutes per side until golden brown. Remove the chicken from the skillet and set aside on a plate; it doesn’t need to be fully cooked through yet as it will finish in the sauce.
- In the same skillet, add the asparagus. Sauté for 3 minutes until they turn a vibrant, bright green. Add the minced garlic and red pepper flakes, stirring constantly for 1 minute so the garlic doesn’t burn.
- Deglaze the pan by pouring in the chicken broth and lemon juice. Use a wooden spoon to scrape up any browned bits (the fond) from the bottom of the pan—this is where the flavor lives.
- Return the chicken to the skillet. Simmer the mixture for 3-5 minutes until the liquid has reduced by half and the chicken is cooked through.
- Turn off the heat and stir in the lemon zest and fresh parsley. The residual heat will release the oils in the zest for a fragrant finish. Serve immediately over a bed of quinoa or light pasta.
How to Bake Spring Cookies?
Why we love this
Spring cookies are like little bites of sunshine, often infused with floral notes or citrus zests that brighten up your dessert tray. We love them because they offer a playful break from the heavy chocolate and spice of winter, leaning instead into textures that are soft, chewy, and light. The visual appeal is half the fun—think pale pastels, delicate royal icing, or even edible dried petals pressed into the dough. They are the ultimate crowd-pleaser for garden parties or baby showers, offering a sweet, buttery crunch that pairs perfectly with a chilled glass of floral iced tea.
Ingredients
- 2.5 cups all-purpose flour
- 1 cup unsalted butter, softened
- 3/4 cup granulated sugar
- 1 egg
- 1 tsp almond extract
- 1 tbsp dried edible lavender (optional)
- 1/2 tsp baking soda
- Pinch of salt
How to make it
- In a small bowl, rub the dried lavender (if using) into the sugar with your fingertips. This bruises the lavender and releases its fragrant oils directly into the sugar for maximum flavor.
- Cream the softened butter and the lavender-sugar together in a large bowl until the mixture is light and airy. This should take about 3 minutes of vigorous mixing.
- Add the egg and the almond extract. The almond extract provides a professional, complex flavor profile that elevates simple sugar cookies to something special.
- Sift together the flour, baking soda, and salt. Gradually add the dry ingredients to the wet mixture on low speed until a soft dough forms.
- Wrap the dough in plastic wrap and chill in the refrigerator for at least 30 minutes. Chilling the dough prevents the cookies from spreading too much in the oven and ensures a chewy center.
- Preheat your oven to 350°F (175°C). Line a baking sheet with a silicone mat or parchment paper.
- Scoop rounded tablespoons of dough and place them 2 inches apart on the sheet. Flatten them slightly with the palm of your hand.
- Bake for 8-10 minutes. The key is to remove them when the edges are just barely beginning to turn golden, but the centers still look slightly soft. They will firm up as they cool on the baking sheet.
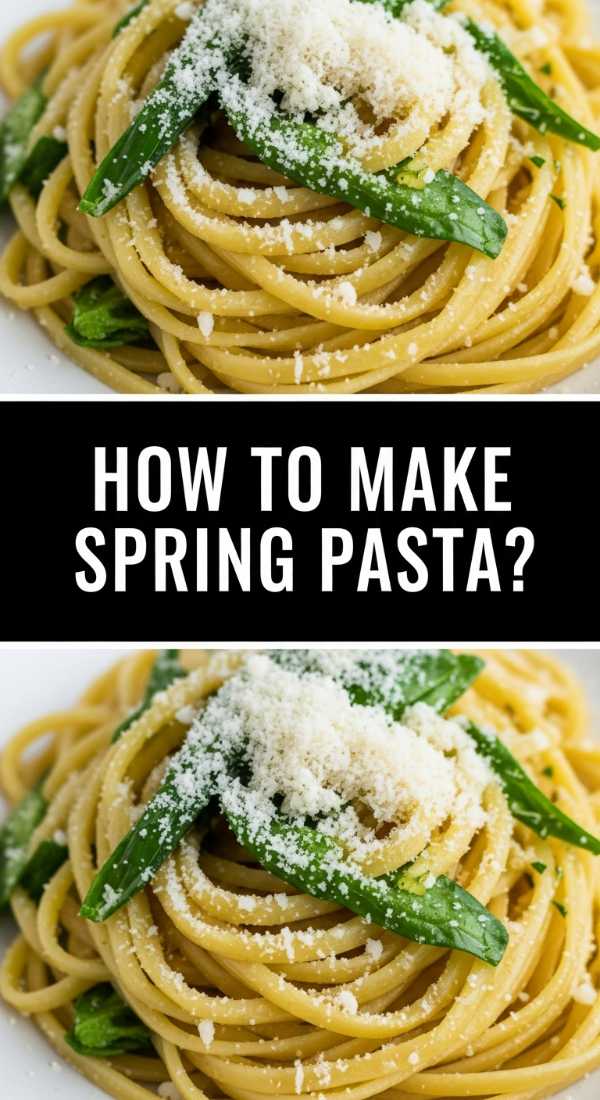
How to Make Spring Pasta?

Why we love this
This pasta dish is the embodiment of a fresh start, utilizing the greenest produce of the season to create a bowl that is as beautiful as it is delicious. The combination of sweet peas, mint, and salty parmesan creates a sophisticated flavor profile that feels incredibly high-end despite taking less than twenty minutes to assemble. We love the way the light sauce coats every ridge of the pasta without being oily, creating a silky mouthfeel that highlights the snap of the fresh vegetables. It’s the perfect “emergency” dinner that looks like you spent hours in the kitchen.
Ingredients
- 12 oz pappardelle or linguine
- 1 cup fresh or frozen peas
- 1/2 cup heavy cream
- 1/4 cup fresh mint leaves, chiffonade
- 1/2 cup grated Parmesan cheese
- 2 tbsp butter
- 1 shallot, finely diced
- Zest of 1 lemon
How to make it
- Bring a large pot of salted water to a boil. Add the pasta and cook according to package directions until it is just al dente. About 2 minutes before the pasta is done, drop the peas into the boiling water with the pasta.
- Before draining, reserve at least 1 cup of the starchy pasta water. This is the secret ingredient for a glossy, restaurant-quality sauce. Drain the pasta and peas.
- In the same pot (now empty), melt the butter over medium heat. Add the diced shallots and sauté for 2-3 minutes until they are translucent and soft.
- Pour in the heavy cream and bring to a gentle simmer. Do not let it reach a rolling boil, or the cream might break.
- Whisk in the Parmesan cheese until melted and smooth. Gradually add 1/2 cup of the reserved pasta water to thin the sauce to your desired consistency.
- Add the pasta and peas back into the pot. Toss vigorously with tongs so the sauce emulsifies and clings to the pasta.
- Fold in the fresh mint and lemon zest at the very last second. The heat from the pasta will wilt the mint just enough to release its refreshing aroma.
- Serve with an extra sprinkle of Parmesan and a crack of fresh black pepper.
How to Prepare Crawfish Boils?

Why we love this
A crawfish boil isn’t just a meal; it’s an event, a celebration of community and the messy, joyous side of eating. There is something deeply satisfying about gathering around a newspaper-covered table, hands stained with spice, as you peel and eat succulent, seasoned crawfish. The aroma is intoxicating—a heavy mix of cayenne, garlic, and citrus that fills the air and draws everyone in. We love the communal nature of it, the way people linger over the table for hours, picking at corn on the cob and spicy potatoes, making it the ultimate laid-back spring or summer gathering.
Ingredients
- 5-10 lbs live crawfish
- 1 bag commercial crawfish boil spice mix
- 4 lemons, halved
- 2 heads garlic, tops sliced off
- 1 lb smoked andouille sausage, sliced
- 6 ears of corn, halved
- 2 lbs small red potatoes
- 2 large onions, quartered
How to make it
- Start by “purging” the live crawfish. Place them in a large tub or cooler and cover with fresh water. Let them sit for 10-15 minutes, then drain. Repeat until the water runs clear. This removes mud and grit.
- Fill a very large pot (at least 30 quarts) halfway with water. Add the crawfish boil spice mix, halved lemons, onions, and garlic. Bring this to a rolling boil.
- Once the water is boiling vigorously, add the red potatoes. Cook for about 10-12 minutes, as they take the longest to soften.
- Add the sliced andouille sausage and the corn. Let this boil for another 5 minutes.
- Now, add the purged crawfish. Cover the pot and bring it back to a boil. Once it returns to a boil, cook the crawfish for exactly 3 minutes. Do not overcook them, or the meat will become rubbery and hard to peel.
- Turn off the heat. This is the most important step: let the crawfish soak in the hot liquid for 15-20 minutes. This allows the spices to penetrate the shells and the meat to absorb all that juicy flavor.
- Check a crawfish for doneness and spice level. If you want it spicier, let them soak another 5 minutes.
- Drain the entire pot and dump the contents directly onto a table covered in brown paper or newspaper. Serve with cold drinks and plenty of paper towels.
How to Pack Beach Snacks?

Why we love this
Beach snacks need to be two things: refreshing and sand-proof. There is nothing like the feeling of salt on your skin and the sun on your face, followed by a crisp, hydrating bite of chilled fruit or a savory, easy-to-grab wrap. We love this approach because it turns a simple day at the shore into a gourmet experience. By focusing on mess-free, individual portions, you can spend less time worrying about sticky fingers and more time enjoying the waves. It’s all about high-energy, cooling foods that keep the vibe light and the energy high for a full day of coastal relaxation.
Ingredients
- Individual mason jars or bento boxes
- Pre-sliced watermelon and pineapple
- Frozen grapes (they act as ice packs!)
- Hummus and cucumber slices
- Turkey and cheese pinwheels
- Sparkling water cans
How to make it
- Start by prepping your fruit the night before. Slice watermelon into triangles and pineapple into spears. Place them in airtight containers.
- Freeze a bag of grapes overnight. Not only are they a delicious, slushy treat when they start to thaw, but they also help keep the rest of your cooler cold without the mess of melting ice.
- Prepare your pinwheels by spreading cream cheese on a large tortilla, layering with turkey and spinach, and rolling tightly. Slice into 1-inch rounds. Packing these in a hard-sided container prevents them from getting squished.
- For the veggies, put a layer of hummus at the bottom of a small mason jar and stick celery and cucumber sticks vertically into the hummus. This keeps the veggies crisp and makes them easy to grab without needing a separate dipping bowl.
- When packing the cooler, place the heaviest items and the ice packs at the bottom. Layer your snacks on top, keeping the items you’ll want first (like drinks) near the lid.
- Always include a dedicated “sand-free” bag with wet wipes and a small bottle of hand sanitizer to use before you dive into your snacks.
How to Decorate Spring Cakes?

Why we love this
Decorating a spring cake is where you can truly let your inner artist shine, turning a simple dessert into a viral-worthy centerpiece. We love using organic elements like edible flowers, soft watercolor frosting, and whimsical textures that mimic the awakening of nature. It’s not about stiff, formal lines; it’s about a relaxed, “undone” elegance that feels approachable and fresh. A beautifully decorated cake becomes the focal point of any food board, drawing everyone in with its ethereal colors and the promise of a sweet, floral-infused finish to the meal.
Ingredients
- Freshly baked cake (cooled)
- Vanilla buttercream frosting
- Gel food coloring (pastel tones)
- Edible flowers (pansies, violas, or marigolds)
- Offset spatula
- Piping bags with star tips
How to make it
- Ensure your cake is completely cool before starting. A warm cake will melt the buttercream, ruining the structure. Apply a thin “crumb coat” of frosting over the entire cake and chill for 20 minutes to seal in crumbs.
- Divide your remaining buttercream into three bowls. Keep one white, and tint the others with very small amounts of pink and yellow gel coloring to achieve soft pastels.
- Using an offset spatula, dab small amounts of the different colored frostings randomly around the sides of the cake.
- Hold the spatula vertically against the side of the cake and spin the turntable. This will blend the colors together, creating a beautiful, soft watercolor effect. Don’t over-spin, or the colors will turn into one muddy shade.
- Pipe small dollops or “stars” around the top edge of the cake using a piping bag to create a border.
- Gently press your edible flowers into the frosting. It’s best to group them in a crescent shape on one side for a modern, asymmetrical look.
- For a final viral touch, use a clean paintbrush to flick a tiny bit of gold luster dust or watered-down cocoa powder over the cake for a “speckled egg” appearance.
How to Make Birthday Cakes?

Why we love this
There is a special kind of magic in a homemade birthday cake; it’s a labor of love that tastes a thousand times better than anything store-bought. We love the height and drama of a multi-layer cake, dripping with rich frosting and topped with colorful sprinkles. It’s the ultimate centerpiece for a celebration board, representing joy and the making of memories. The texture should be a perfect balance of a tight, velvety crumb that holds up to the weight of the frosting, while still feeling light and indulgent with every celebratory bite.
Ingredients
- 3 cups cake flour
- 2 cups sugar
- 1 cup unsalted butter
- 4 large eggs
- 1 cup buttermilk
- 1 tbsp vanilla extract
- 1 tbsp baking powder
- 1/2 tsp salt
How to make it
- Preheat oven to 350°F (175°C). Grease and flour three 8-inch cake pans. Using cake flour instead of all-purpose flour is crucial for that fine, professional texture.
- Sift the cake flour, baking powder, and salt together twice. Sifting twice aerates the flour, ensuring the cake rises evenly and feels light.
- Cream the butter and sugar for a full 5 minutes until it looks like white whipped cream. Add eggs one at a time, ensuring each is fully emulsified before adding the next.
- Add the vanilla to the buttermilk. Alternately add the dry ingredients and the buttermilk to the butter mixture, starting and ending with the flour.
- Divide the batter equally between the three pans. Tap the pans sharply on the counter to release any large air bubbles.
- Bake for 25-30 minutes. The cakes are done when they spring back lightly when touched in the center.
- Let the cakes cool in the pans for 10 minutes, then invert onto wire racks. It is often helpful to wrap the cooled layers in plastic wrap and freeze them for 30 minutes before frosting to make them easier to handle.
- Level the tops of the cakes with a serrated knife, then stack with generous layers of frosting in between. Finish with a smooth outer layer and plenty of festive decorations.
How to Bake Spring Goods?
Why we love this
Baking “spring goods” encompasses those lovely, rustic treats like lemon loaves, carrot breads, and hot cross buns that feel so intrinsic to the season. We love the way these bakes use warming spices paired with bright, acidic notes to create a comforting yet fresh experience. These are the items that fill the gaps on your food board, offering various textures from the dense, moist crumb of a quick bread to the flaky, golden layers of a scone. They are the versatile workhorses of the lazy girl’s kitchen, often tasting even better the next day.
Ingredients
- 1.5 cups all-purpose flour
- 1 cup sugar
- 1/2 cup Greek yogurt
- 1/2 cup vegetable oil
- 3 eggs
- 2 lemons (zest and juice)
- 1.5 tsp baking powder
- 1/2 tsp salt
How to make it
- For a classic Lemon Spring Loaf, begin by whisking together the flour, baking powder, and salt in a bowl.
- In a separate large bowl, combine the sugar and lemon zest. Use your fingers to rub the zest into the sugar until it becomes fragrant and yellow. This is a pro-baker tip to ensure the lemon flavor is intense throughout.
- Whisk in the oil, eggs, yogurt, and lemon juice until the mixture is smooth. The Greek yogurt provides moisture and a slight tang that complements the lemon perfectly.
- Gradually fold the dry ingredients into the wet ingredients using a spatula. Stop as soon as the last streak of flour disappears to keep the loaf tender.
- Pour the batter into a greased 9×5 inch loaf pan. Bake at 350°F (175°C) for 50-55 minutes.
- Test with a skewer; if it comes out clean, the loaf is ready. Let it cool in the pan for 15 minutes before removing.
- While the loaf is still slightly warm, whisk together 1 cup of powdered sugar and 2 tablespoons of lemon juice. Pour this glaze over the top so it seeps slightly into the crust.
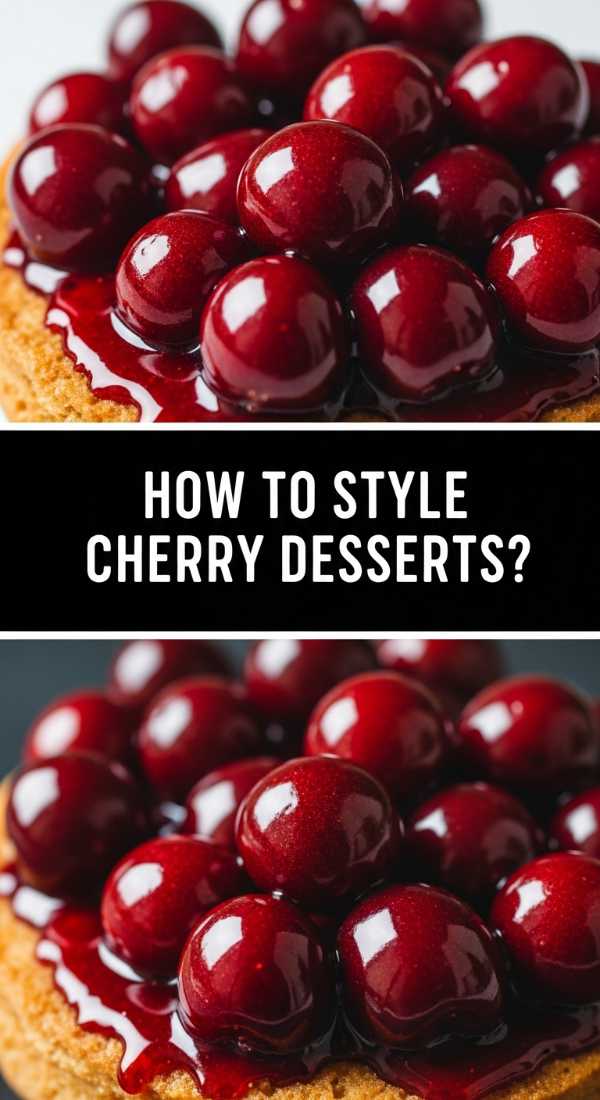
How to Style Cherry Desserts?
[IMAGE_10]
Why we love this
Styling cherry desserts is all about playing with that deep, seductive crimson color against contrasting backdrops like white cream or golden pastry. We love this because cherries are naturally photogenic; their glossy skins and elegant stems add a touch of high-fashion flair to even the simplest tart or bowl of mousse. It’s the visual “pop” that makes a food board go viral. When you style these desserts, you aren’t just presenting food; you’re creating a mood that is both decadent and vibrantly alive, capturing the essence of peak-season indulgence.
Ingredients
- Fresh cherries with stems attached
- Mint sprigs
- Powdered sugar for dusting
- Whipped cream or mascarpone
- Dark chocolate shavings
- Clear glass serving dishes
How to make it
- Always start with the best produce. Select cherries that are firm and have bright green stems; the stems provide a rustic, organic look that is much more appealing than de-stemmed fruit.
- If serving a cherry tart or cake, place it on a white marble or light wood board to make the red color vibrate.
- Add a “cloud” of whipped cream or a dollop of mascarpone to the side. Use the back of a spoon to create a deep well or swirl in the cream for texture.
- Place a few whole cherries into the cream swirl, and halve a few others to show off the juicy interior.
- Garnish with micro-mint leaves or very small mint sprigs. The green provides a complementary color contrast to the red cherries, making the dish look more balanced.
- Dust the entire plate lightly with powdered sugar from a height. This creates a soft, “snow-kissed” effect that looks incredible in photos.
- Finish with a few curls of dark chocolate. Use a vegetable peeler on a block of room-temperature chocolate to get those long, elegant shavings that add height and sophistication.
Conclusion: The Art of the Effortless Board
At the end of the day, the viral simple food board isn’t about being a professional chef; it’s about the joy of assembly. It’s taking these individual elements—the cherry cakes, the spring pastas, the styled desserts—and laying them out in a way that invites people to dig in. The best part about being a ‘Lazy Girl’ in the kitchen is that you prioritize flavor and aesthetics without the burnout. So, pour yourself a glass of something sparkling, put on your favorite playlist, and start building. Your feed (and your stomach) will thank you!