
The Minimalist’s Blueprint for Chic Spring Manicures
Hi, my loves. Can you feel it? That soft, whispered change in the air? As the frost melts away and the first tiny green buds start peeking through the soil, I find myself craving a sense of renewal, not just in my home, but in the way I carry myself. There is something so incredibly grounding about taking twenty minutes out of a busy afternoon to tend to our hands—the very tools we use to hug our friends, type our dreams, and plant our spring gardens.
This season, I’m leaning into the quiet beauty of minimalism. We don’t need loud, complicated patterns to feel elegant; sometimes, a single delicate line or a soft wash of petal-pink is enough to make us feel polished and whole. I’ve curated this little guide like a warm embrace for your nails, designed to bring a touch of chic, effortless spring magic right to your fingertips. Let’s breathe in the sweetness of the new season together.
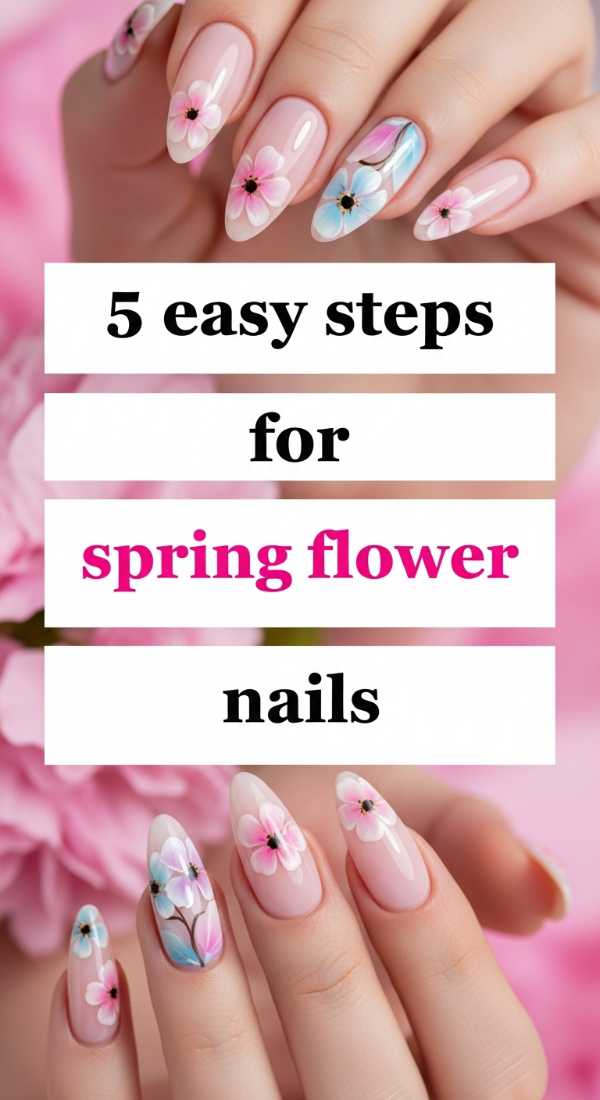
5 Easy Steps for Spring Flower Nails
Why to love these Nails:
These tiny floral accents are like carrying a portable garden with you wherever you go. They represent the delicate resilience of spring, offering a whimsical yet sophisticated touch that never feels like it’s trying too hard.
Essential Items:
- Pale pink or nude base polish
- White and yellow acrylic paint or polish
- A double-ended dotting tool
- A glossy top coat
How to Prepare:
- Apply two thin coats of your base color and let dry completely.
- Dip the larger end of your dotting tool into white polish.
- Create five small dots in a circle to form the petals.
- Use the smaller end of the tool to place a single yellow dot in the center.
- Seal your tiny blossoms with a high-shine top coat for longevity.
Budget Range
- Essie Ballet Slippers ($9.00)
- Nail Art Dotting Tool Set ($6.00)
- Sally Hansen Insta-Dri Top Coat ($7.00)
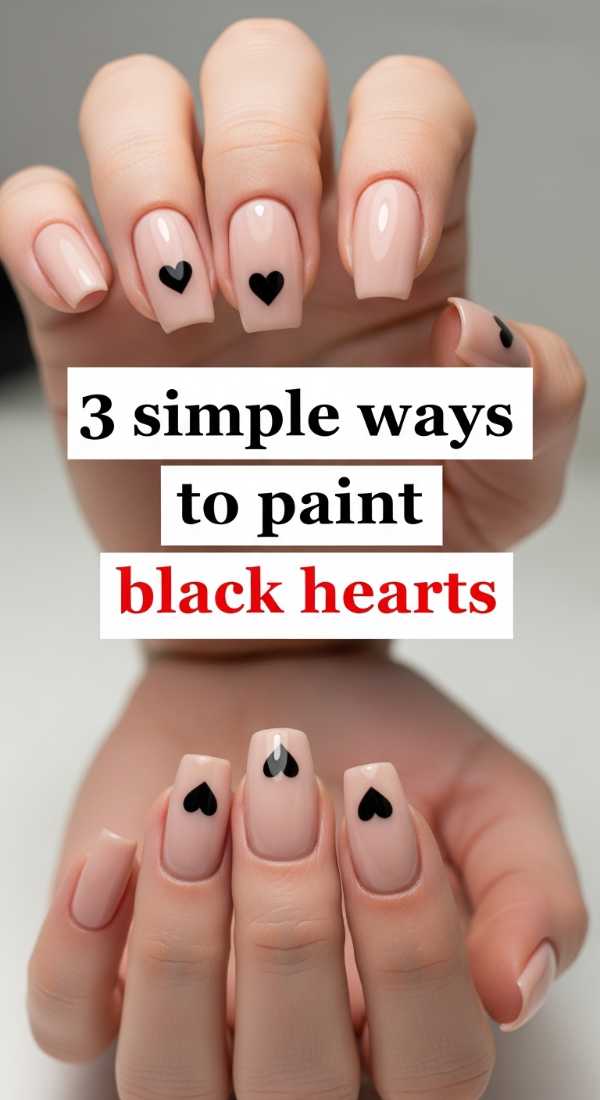
3 Simple Ways to Paint Black Hearts
Why to love these Nails:
Who says spring has to be all pastels? A tiny black heart adds a touch of modern romanticism and a little bit of an edge to a clean, minimalist manicure. It’s the perfect ‘cool girl’ nod to the season of love.
Essential Items:
- Sheer base coat
- Black nail lacquer
- A toothpick or ultra-fine liner brush
How to Prepare:
- The Two-Dot Method: Place two small dots of black polish side-by-side and drag them down into a ‘V’ shape to connect.
- The Stencil Method: Use a small heart-shaped sticker as a guide, painting over it and peeling it away.
- The Freehand Method: Use a fine liner brush to draw two tiny arcs that meet at the bottom for a delicate, hand-painted look.
Budget Range
- OPI Black Onyx ($11.50)
- Orly Bonder Base Coat ($12.00)
- Wooden Toothpicks ($2.00)
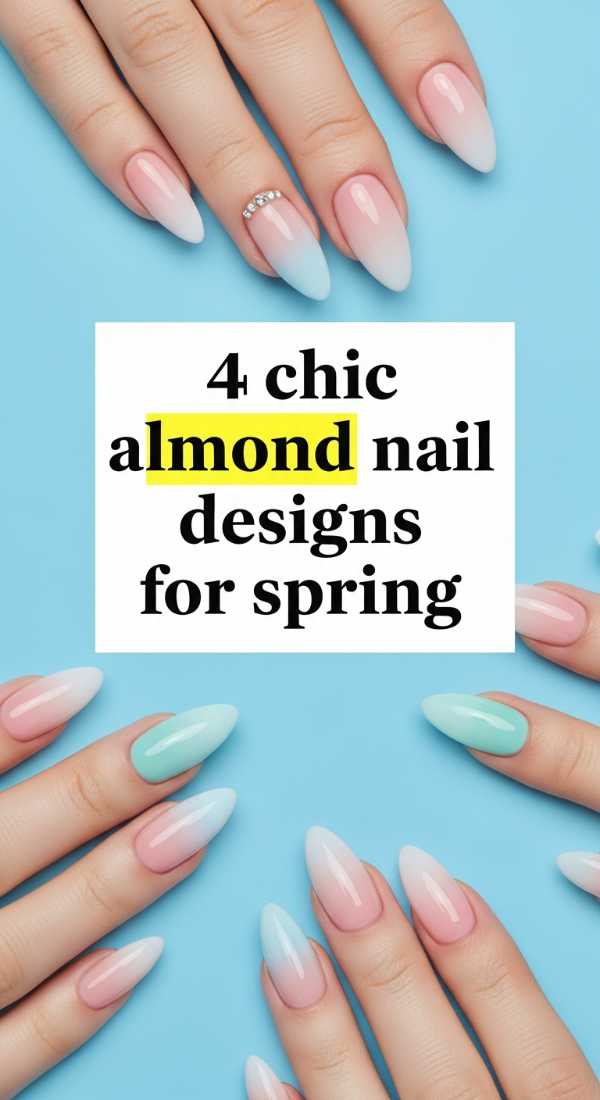
4 Chic Almond Nail Designs for Spring
Why to love these Nails:
The almond shape is the ultimate canvas for elegance. It elongates the fingers and provides a soft, feminine silhouette that mirrors the gentle curves of a spring leaf. These designs focus on negative space and subtle highlights.
Essential Items:
- Glass nail file
- Nude jelly polish
- Gold leaf flakes
- Fine striping brush
How to Prepare:
- The Negative Space Half-Moon: Leave the base of the nail bare and paint only the top two-thirds.
- The Gold Leaf Accent: Apply small flakes of gold leaf to the tips of a sheer manicure.
- The Side Swoosh: Draw a single curved line along the side of the almond tip.
- The Minimalist Dot: Place one single dot of a contrasting color at the very base of the nail bed.
Budget Range
- Czech Glass Nail File ($10.00)
- Cirque Colors Chiffon ($12.50)
- Gold Leaf Nail Art Kit ($8.00)
Get Perfect Bow Nail Art in 2 Steps

Why to love these Nails:
The coquette aesthetic is blooming this spring, and nothing captures that sweet, vintage charm quite like a dainty bow. It’s a soft reminder to treat ourselves with kindness and grace.
Essential Items:
- Soft cream polish
- Fine liner brush
- Pale blue or pink polish for the bow
How to Prepare:
- Paint two small triangles meeting at the points in the center of your nail.
- Add two short, flowing lines coming down from the center to act as the ribbons.
Budget Range
- Olive & June ‘HD’ White ($9.00)
- Winstonia Fine Nail Art Brushes ($10.00)
- Zoya ‘Abby’ Pastel Purple ($12.00)
3 Steps to Master the Plaid Grid
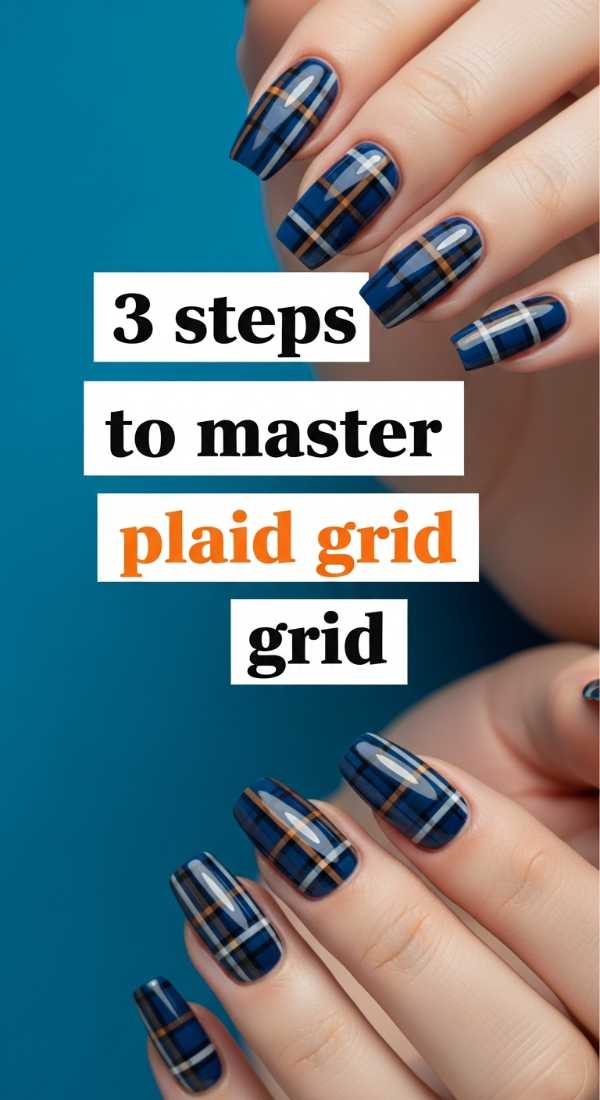
Why to love these Nails:
Think of this as your favorite light spring blazer, but for your nails. A simple grid pattern is structured, clean, and adds an architectural element to an otherwise soft look.
Essential Items:
- Opaque white base
- Thin striping tape
- Pastel green or lavender polish
How to Prepare:
- Apply your base color and let it dry until it is rock-hard.
- Lay thin striping tape in a vertical and horizontal grid pattern.
- Paint over the tape with your pastel color, then peel the tape away immediately to reveal crisp lines.
Budget Range
- Holt Nail Striping Tape ($5.00)
- Essie ‘Mint Candy Apple’ ($9.00)
- Seche Vite Dry Fast Top Coat ($9.50)
4 Ways to Refresh Simple French Tips
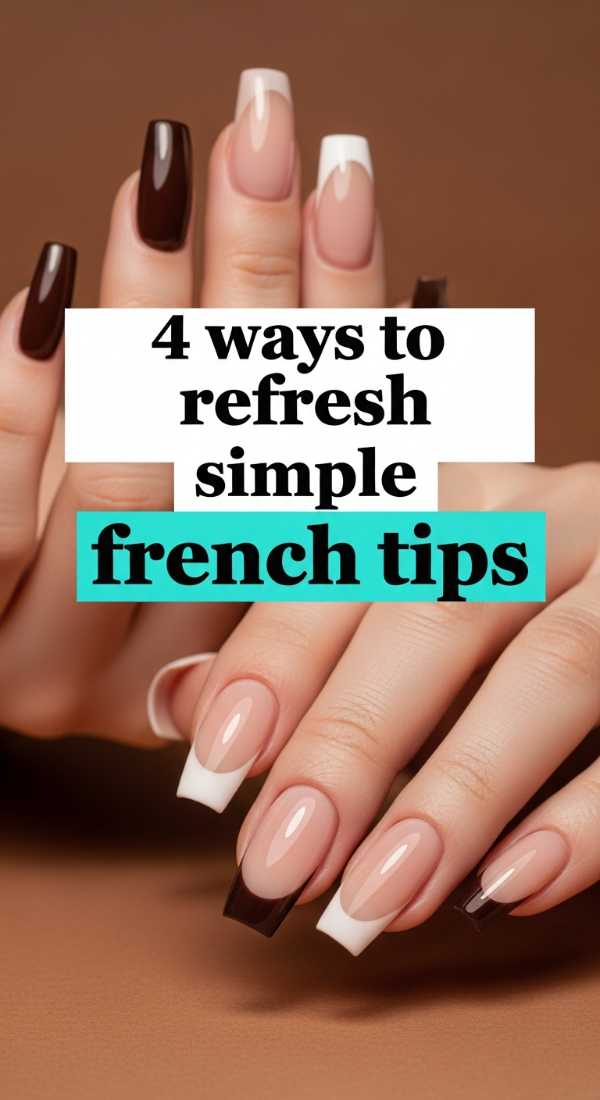
Why to love these Nails:
The French manicure is a timeless classic, but for spring, we’re giving it a light, airy update. It’s like a fresh coat of paint on a beloved heirloom—familiar, but wonderfully new.
Essential Items:
- Silicone nail stamper
- Various pastel polishes
- Base concealer polish
How to Prepare:
- The Micro-Tip: Paint an incredibly thin line at the very edge of the nail for a modern look.
- The Pastel Tip: Swap the traditional white for a soft lemon or lilac.
- The Double French: Draw two thin lines instead of one for a graphic touch.
- The Sideways French: Angle the tip so it slopes down one side of the nail.
Budget Range
- Silicone Nail Stamper ($7.00)
- Lights Lacquer ‘Paper Snow’ ($13.00)
- Butter London Sheer Wisdom ($18.00)
5 Secrets to Perfect Almond Spring Nails
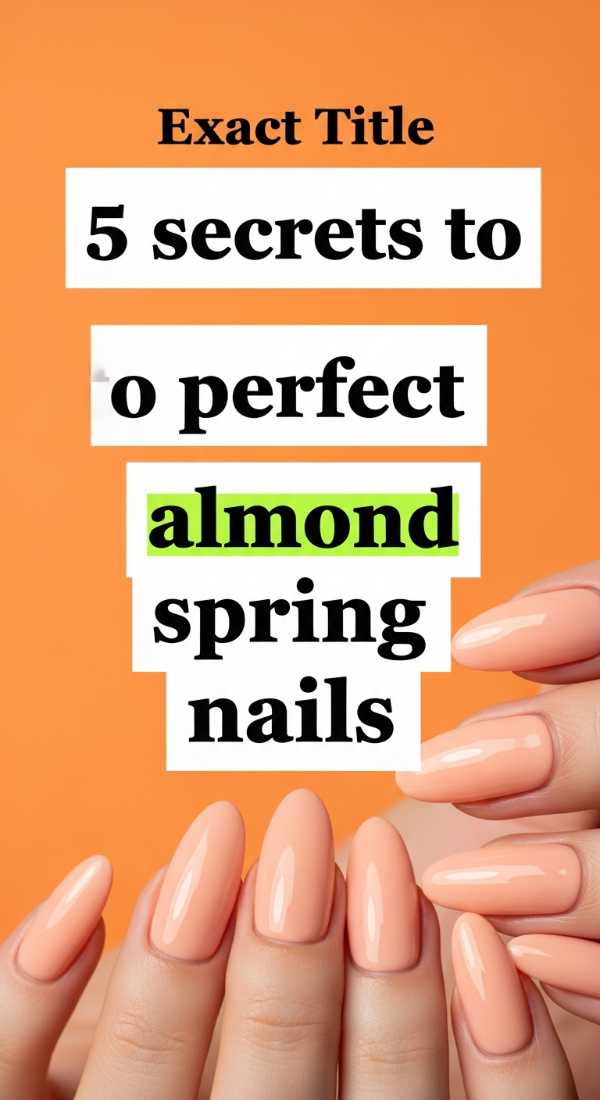
Why to love these Nails:
Achieving the perfect almond shape is an art form in itself. When done correctly, it provides a sophisticated foundation that makes even the simplest clear coat look like a professional salon job.
Essential Items:
- 180-grit nail file
- Cuticle softener
- Buffer block
- Nourishing cuticle oil
How to Prepare:
- Mark the Center: Find the exact center of your nail tip to ensure symmetry.
- File at an Angle: File the sides toward the center at a 45-degree angle.
- Round the Peak: Gently soften the point into a smooth, almond-like curve.
- Buff the Edges: Use a buffer to remove any jagged bits for a seamless finish.
- Oil Up: Massage cuticle oil into the skin to make the shape pop.
Budget Range
- CND SolarOil ($9.00)
- Flowery Blue Center Buffer ($3.00)
- Tweezerman Stainless Steel Cuticle Pusher ($20.00)
3 Easy Methods for Latte Coffee Art
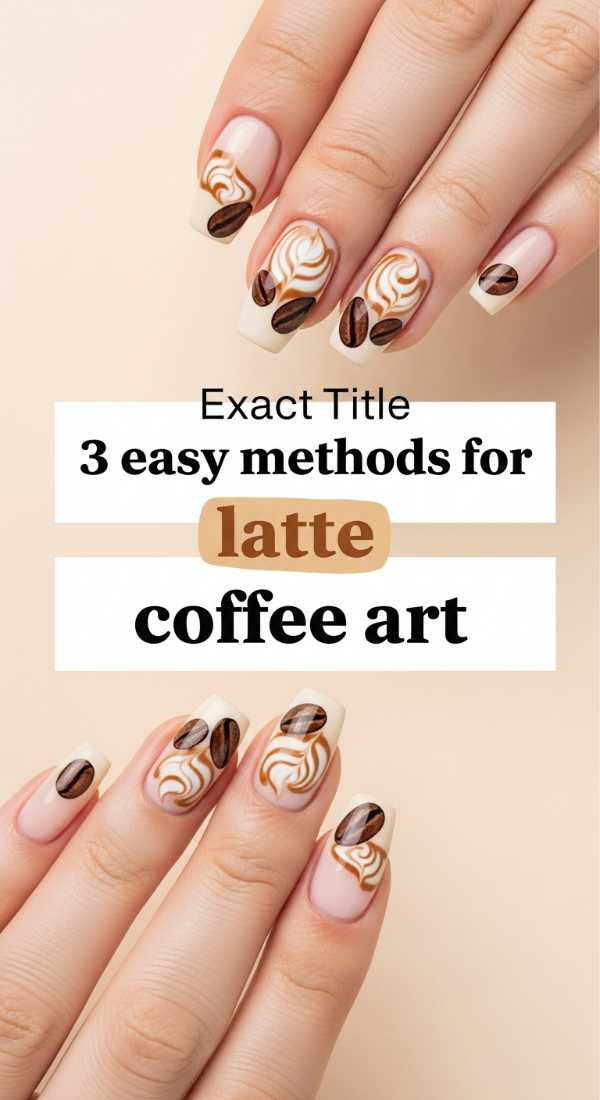
Why to love these Nails:
There is nothing quite as cozy as the first iced latte of the season. These nails bring that creamy, swirled aesthetic to your look, offering a neutral palette that goes with every spring outfit.
Essential Items:
- Coffee brown polish
- Cream/beige polish
- A thin needle or detailing brush
How to Prepare:
- The Wet-on-Wet Swirl: Drop dots of cream onto wet brown polish and swirl with a needle.
- The Gradient Ombre: Use a makeup sponge to blend beige into espresso brown.
- The Marble Effect: Mix the colors slightly on a palette before dabbing them onto the nail for a stone-like finish.
Budget Range
- Ethereal Lacquer ‘Coffee Shop’ ($13.00)
- Makeup Sponges ($5.00)
- Nail Art Palette ($6.00)
6 Simple Steps for a Matte Finish
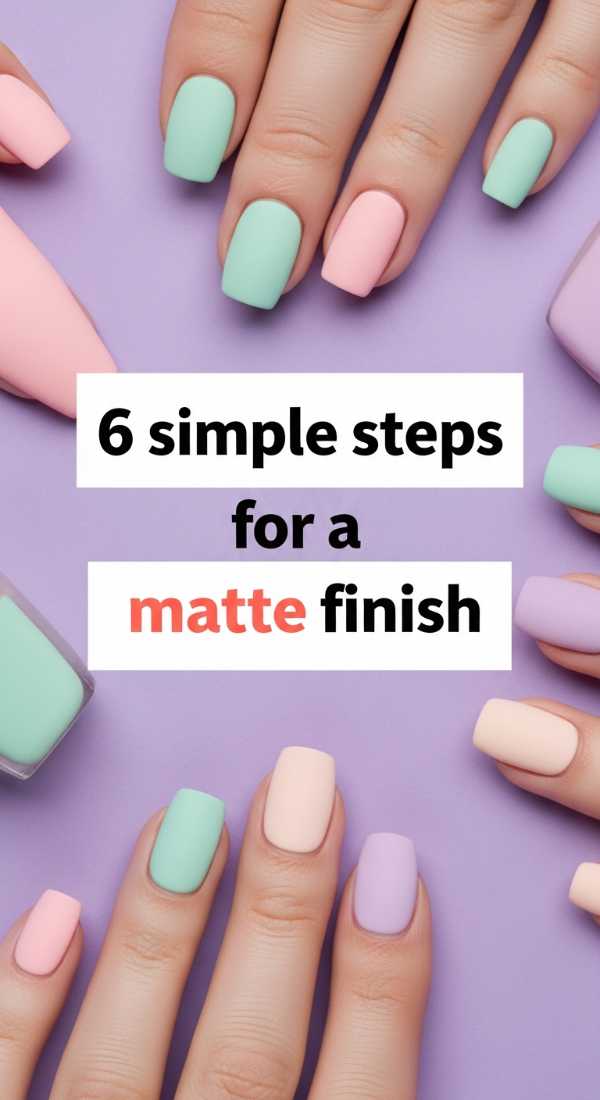
Why to love these Nails:
Matte nails feel like velvet. They take away the shine and leave behind a sophisticated, soft-touch texture that feels incredibly modern and high-end for the spring season.
Essential Items:
- Your favorite spring color
- Matte top coat
- Alcohol wipes
How to Prepare:
- Clean the nail surface with alcohol to remove oils.
- Apply a base coat to protect the natural nail.
- Apply two coats of your chosen pastel or nude color.
- Let the color dry for at least 5 minutes.
- Apply a thin, even layer of matte top coat.
- Avoid touching the nails until they are completely ‘flat’ and dry.
Budget Range
- Essie ‘Matte About You’ ($10.00)
- 70% Isopropyl Alcohol ($3.00)
- OPI ‘Bubble Bath’ ($11.50)
4 Trendy Ways to Use Spring Pastels
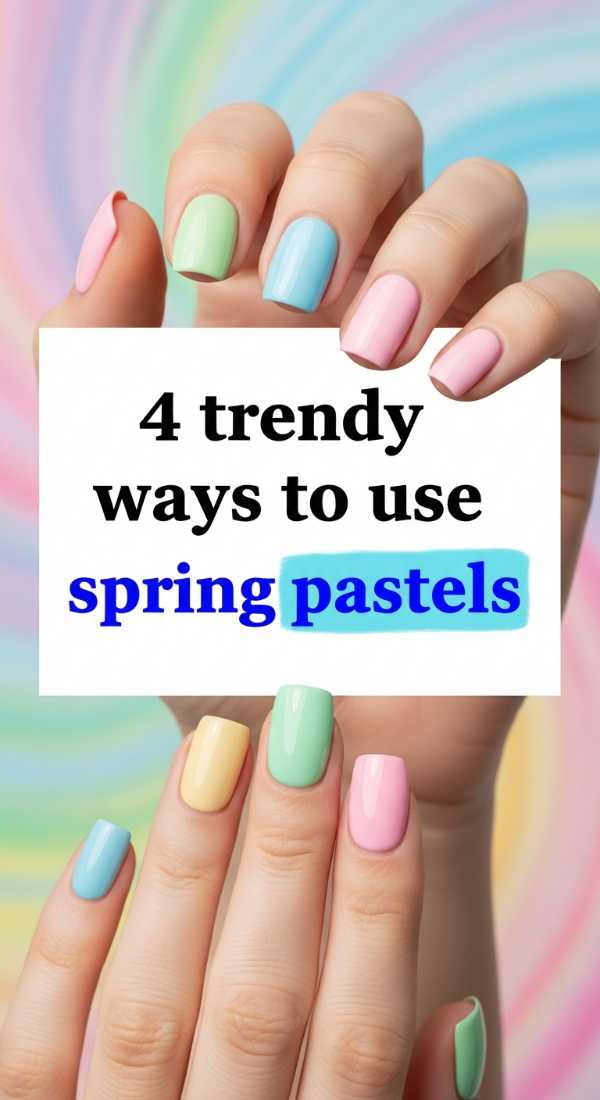
Why to love these Nails:
Pastels are the heartbeat of spring. Using them in unexpected ways allows you to play with color while maintaining that ‘clean girl’ aesthetic we all adore.
Essential Items:
- A set of pastel polishes (Yellow, Blue, Green, Pink)
- Matte and Glossy top coats
How to Prepare:
- The Mismatched Hand: Paint each nail a different soft pastel shade.
- The Gradient Finger: Use different shades of the same color (e.g., light to dark blue) across your hand.
- The Half-and-Half: Paint half the nail one pastel and the other half a different one.
- The Pastel Dot: Use a neutral base and add one tiny pastel dot to each nail.
Budget Range
- Lights Lacquer Pastel Bundle ($50.00)
- Sally Hansen Hard as Nails ($4.00)
- KL Polish (Vintage find) or similar boutique brand.
Embracing the Softness of the Season
As you finish your manicure and admire the way the light catches your hands, I hope you feel a sense of peace. Spring isn’t just about the flowers outside; it’s about the flowers we allow to bloom within ourselves. These simple acts of self-care are the threads that weave our days into something beautiful. Wear your chic, minimalist nails as a reminder that you are worthy of beauty, quiet moments, and a fresh start. Until next time, stay soft, my loves.