
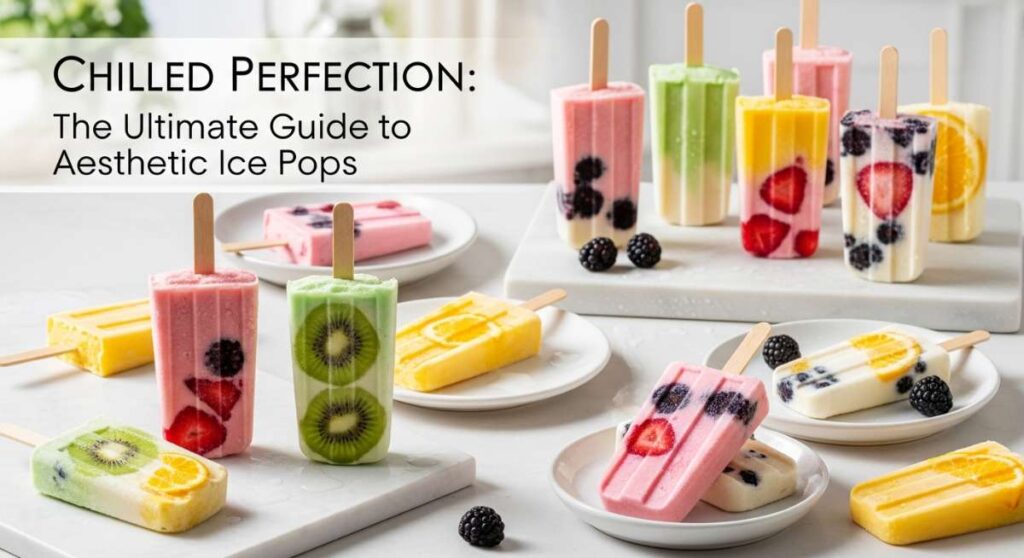
Hello, my loves! There is something so incredibly magical about those slow, sun-drenched afternoons when the light filters through the linen curtains and the only thing on the agenda is staying cool. I’ve always believed that the most beautiful memories are made in the smallest moments—like the first bite of a frosty treat that melts perfectly on your tongue. Today, I am so excited to welcome you into my kitchen for a journey into the world of aesthetic frozen delights that are as stunning to look at as they are delicious to eat.
In this space, we celebrate the art of slow living and the joy of creating something with our own two hands. These recipes aren’t just about cooling down; they are about nourishing your soul with vibrant colors, wholesome ingredients, and a touch of kitchen whimsy. Whether you’re hosting a backyard garden party or simply want to treat yourself to a moment of chilled perfection after a long day, these ice pops and frozen bites are designed to bring a soft, cloud-like embrace to your summer routine.
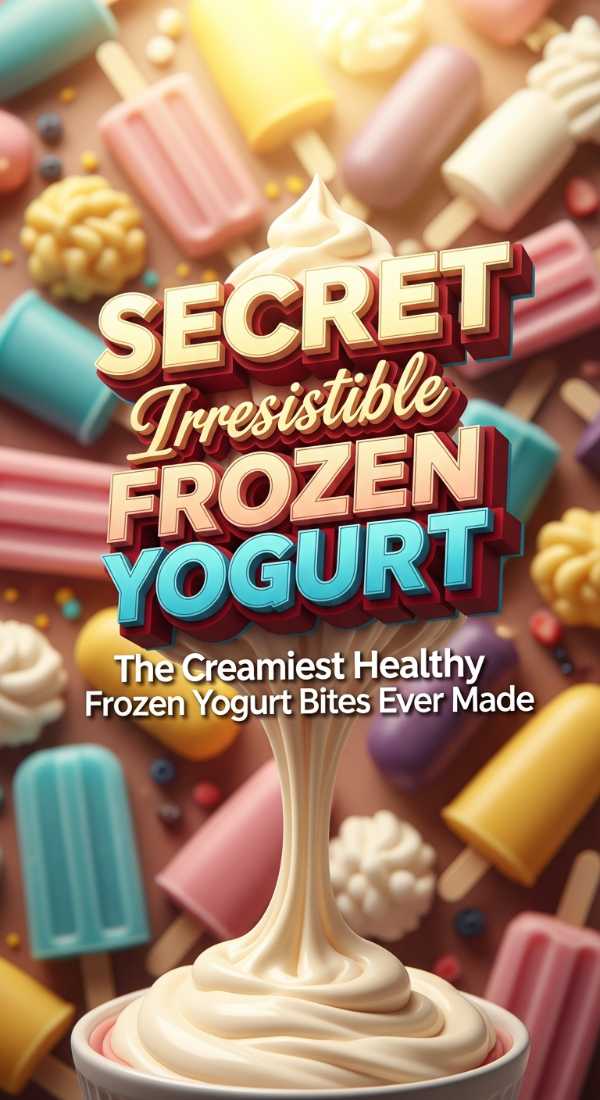
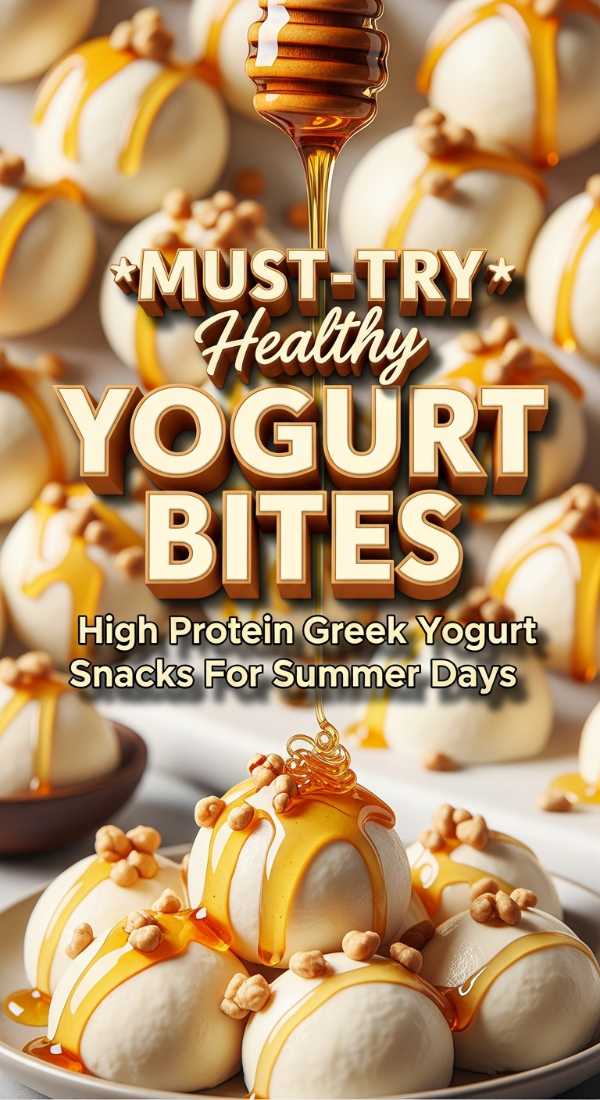
The Ultimate Secret To Creamy Frozen Yogurt Bites
Why we love this
These little bites of heaven are the perfect solution for those mid-afternoon cravings when you want something sweet but light. The secret to their incredible texture lies in the delicate balance of full-fat yogurt and a touch of heavy cream, creating a velvet-like finish that feels indulgent. We love how they look like little gems resting in a bowl, dusted with just a hint of zest or edible glitter. They are the ultimate bite-sized escape that reminds us to slow down and savor the sweetness of life.
Ingredients
- 2 cups full-fat Greek yogurt
- 1/4 cup heavy whipping cream
- 3 tablespoons organic honey or maple syrup
- 1 teaspoon pure vanilla bean paste
- 1/2 cup fresh blueberries or pomegranate arils
- Zest of one organic lemon
How to make it
- In a large glass mixing bowl, whisk together the Greek yogurt, heavy cream, honey, and vanilla bean paste until the mixture is completely smooth and slightly aerated.
- Line a large baking sheet with parchment paper, ensuring there are no folds to keep the bottom of your bites perfectly flat and aesthetic.
- Using a small cookie scoop or a tablespoon, drop uniform mounds of the yogurt mixture onto the parchment paper, leaving about an inch of space between each.
- Gently press a single blueberry or a few pomegranate arils into the center of each mound to create a beautiful, jeweled appearance.
- Sprinkle the fresh lemon zest over the top of all the bites for a pop of color and a bright, citrusy aroma that cuts through the creaminess.
- Place the tray in the coldest part of your freezer for at least 3 to 4 hours, or until the bites are completely firm to the touch.
- Once frozen, peel them gently off the parchment and store in a glass airtight container; serve immediately for the best melt-in-your-mouth experience.
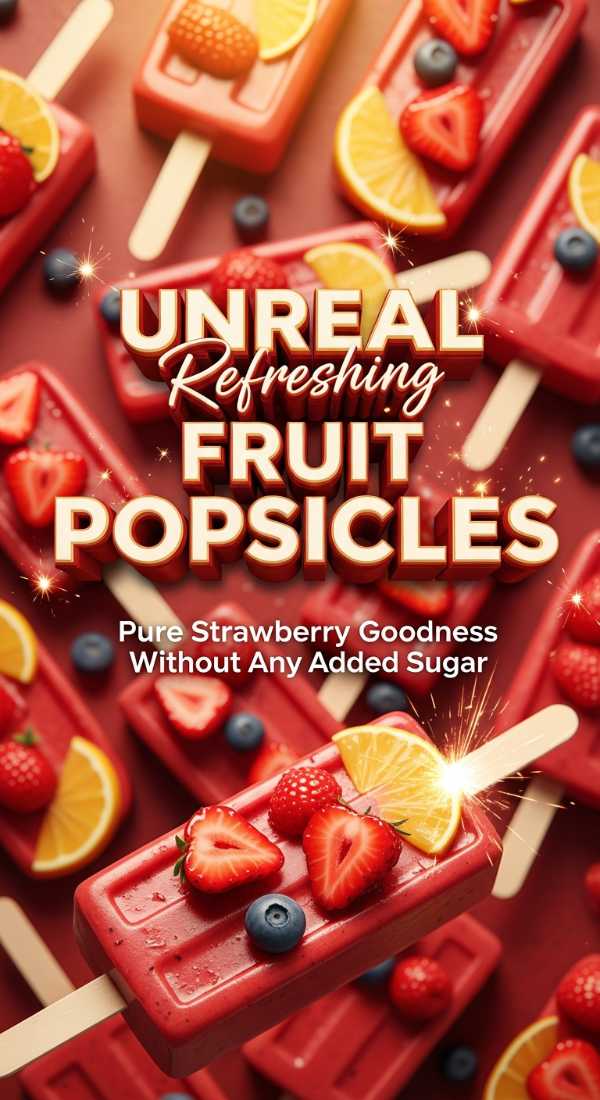
Fresh Strawberry Fruit Popsicles For Summer
Why we love this
There is nothing quite as nostalgic or refreshing as the taste of sun-ripened strawberries captured in a crystalline frozen form. These popsicles are a love letter to June afternoons, celebrating the natural sweetness of berries without any of the artificial additives found in store-bought versions. They have a vibrant, ruby-red glow that looks stunning against a summer backdrop, making them a favorite for garden gatherings. We adore how the addition of a little lime juice makes the strawberry flavor dance across your palate.
Ingredients
- 4 cups fresh, organic strawberries (hulled and sliced)
- 1/4 cup filtered water
- 2 tablespoons agave nectar or honey
- 1 tablespoon fresh lime juice
- Thinly sliced strawberry rounds for decoration
How to make it
- Begin by washing your strawberries thoroughly and removing the green tops; slice them into quarters to make them easier for your blender to process.
- Place the sliced strawberries, water, agave nectar, and lime juice into a high-speed blender and pulse until the mixture is a silky smooth puree.
- Take your popsicle molds and carefully slide one or two thin strawberry slices against the inner walls of each cavity; this creates that beautiful, professional aesthetic.
- Slowly pour the strawberry puree into the molds, leaving about a quarter-inch of space at the top to allow for the liquid to expand as it freezes.
- Insert your wooden popsicle sticks firmly into the center of each mold, ensuring they are straight so your popsicles are easy to hold later.
- Freeze the molds for a minimum of 6 hours, though overnight is always best to ensure the fruit sugars have fully set and the texture is consistent.
- To unmold, run the bottom of the plastic molds under warm water for 10 seconds, then gently pull the sticks to release your gorgeous, glowing treats.
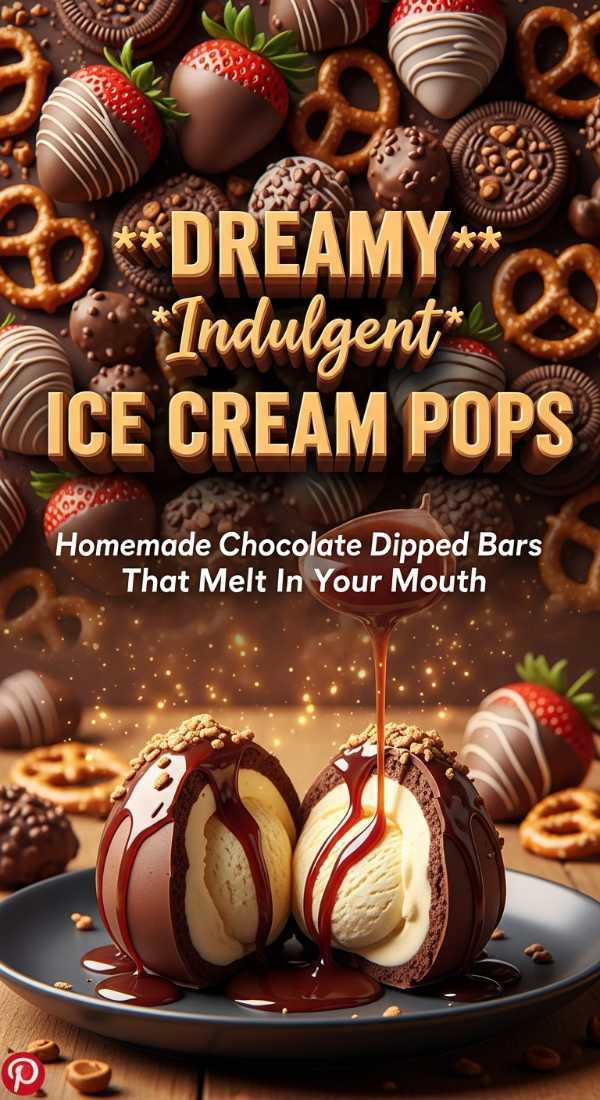
Indulgent Chocolate Dipped Ice Cream Bars
Why we love this
When you need a moment of pure, unadulterated luxury, these chocolate-dipped bars are the answer to your heart’s desires. The contrast between the cold, creamy vanilla interior and the crisp, dark chocolate shell is a sensory experience that feels like a warm hug for your soul. They are reminiscent of vintage ice cream parlors but elevated with high-quality ingredients and a beautiful sprinkle of sea salt. We love that satisfying ‘snap’ of the chocolate as you take your first bite, revealing the soft cloud underneath.
Ingredients
- 1 pint high-quality vanilla bean ice cream
- 1.5 cups dark chocolate melting wafers
- 2 tablespoons coconut oil (refined)
- 1/2 cup crushed roasted almonds or hazelnuts
- Flaky sea salt for finishing
How to make it
- Start by letting your vanilla ice cream soften slightly at room temperature for about 5 minutes so it is easy to work with but not melting.
- Press the softened ice cream firmly into rectangular silicone bar molds, smoothing the tops with an offset spatula to ensure a professional, flat surface.
- Insert popsicle sticks into the base of each mold and place them in the freezer for at least 4 hours until they are rock hard and easy to handle.
- While the bars are freezing, combine the dark chocolate wafers and coconut oil in a microwave-safe bowl, heating in 30-second intervals until melted and glossy.
- Pour the melted chocolate into a tall, narrow glass; this makes dipping the bars much easier and ensures an even coating every single time.
- Remove the ice cream bars from their molds and dip them one by one into the chocolate, letting the excess drip off for a few seconds before the shell sets.
- Quickly sprinkle the crushed nuts and flaky sea salt over the wet chocolate before it hardens, then place on parchment paper and return to the freezer for 20 minutes.
How To Make Aesthetic Marble Swirl Popsicles
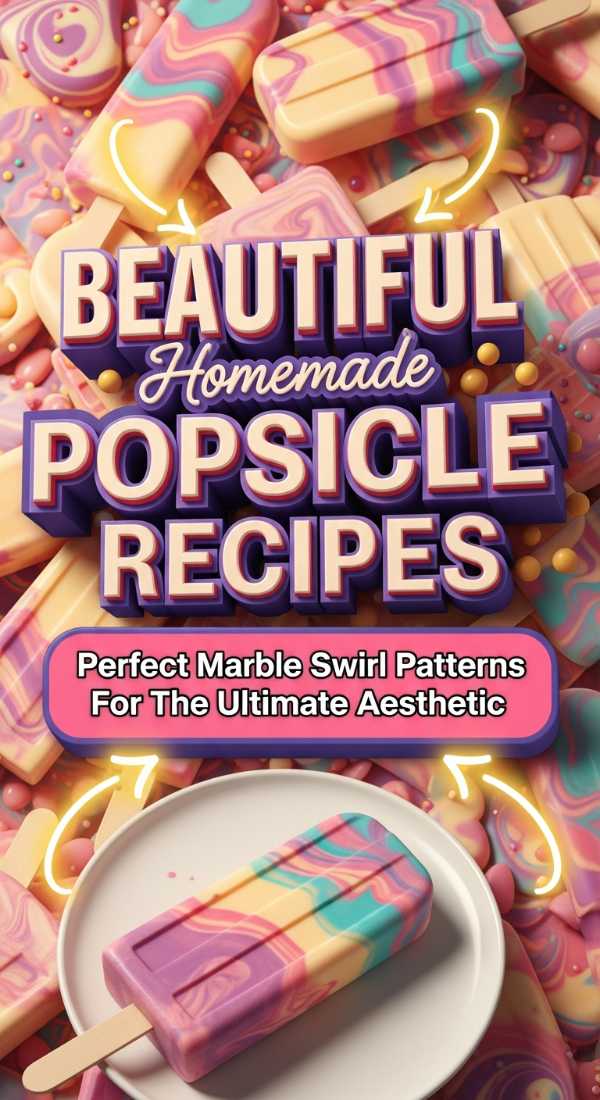
Why we love this
These popsicles are truly a work of art, featuring mesmerizing swirls of color that look like a watercolor painting frozen in time. The marble effect is surprisingly simple to achieve, yet it never fails to impress anyone who sees them held up against the bright summer sun. By combining a creamy base with a vibrant fruit reduction, you get a beautiful play of textures and flavors in every single lick. We love how unique each pop turns out, making every single one a tiny, edible masterpiece just for you.
Ingredients
- 1 cup full-fat coconut milk or heavy cream
- 1/2 cup sweetened condensed milk
- 1 cup blackberry or raspberry puree
- 1 teaspoon vanilla extract
- 2 tablespoons sugar (for the fruit puree)
How to make it
- In a small saucepan, simmer your berries with two tablespoons of sugar over medium heat until they break down and thicken into a concentrated syrup.
- Strain the fruit mixture through a fine-mesh sieve to remove the seeds, resulting in a smooth, intensely colored puree that will create the best swirls.
- In a separate bowl, whisk together the coconut milk (or heavy cream), sweetened condensed milk, and vanilla extract until the mixture is fully incorporated and creamy.
- Fill your popsicle molds about three-quarters of the way with the white cream mixture, leaving plenty of room for the fruit swirl to be added.
- Drop two teaspoons of the fruit puree into each mold; use a long wooden skewer to gently swirl the fruit into the cream using a figure-eight motion.
- Be careful not to over-mix, as you want distinct ribbons of color rather than a solid pink or purple pop; stop as soon as it looks artistic to you.
- Insert your sticks and freeze for at least 8 hours; when you pull them out, you’ll be greeted by a stunning, marbled design that is total Instagram bait.
High Protein Greek Yogurt Frozen Snacks
Why we love this
For my loves who are always on the go but still want to nourish their bodies with goodness, these high-protein snacks are a total game-changer. They offer that chilled satisfaction of a dessert while providing the fuel your muscles need to keep you glowing all day long. The texture is thick and satisfying, and because they are packed with protein, they actually keep you full between your summer adventures. We love how easy they are to customize with your favorite protein powder flavors and crunchy toppings for that extra bit of joy.
Ingredients
- 2 cups 2% or 5% Greek yogurt
- 2 scoops vanilla or cake batter protein powder
- 1/4 cup almond butter
- 1/4 cup mini dark chocolate chips
- A drizzle of honey for extra sweetness
How to make it
- In a medium-sized mixing bowl, combine the Greek yogurt and the protein powder, stirring slowly at first so the powder doesn’t fly out of the bowl.
- Once the powder is fully incorporated, fold in the almond butter; don’t mix it perfectly, as having little ribbons of nut butter adds a wonderful texture.
- Stir in the mini dark chocolate chips, ensuring they are evenly distributed throughout the thick yogurt mixture so every bite has a bit of crunch.
- Line a muffin tin with silicone liners or parchment paper and spoon the mixture into each cavity, smoothing the tops with the back of the spoon.
- Drizzle a tiny bit of honey over the top of each snack and perhaps add an extra chocolate chip or two for a beautiful, finished look.
- Place the muffin tin in the freezer for about 2 to 3 hours; you want them firm enough to hold but not so hard that they lose their creamy bite.
- Pop the snacks out of the liners and store them in a freezer bag for a quick, chilled, and healthy protein boost whenever the craving strikes.
Tropical Mango Coconut Ice Pops Recipe
Why we love this
Close your eyes and take a bite—suddenly, you’re transported to a white-sand beach with the sound of waves gently lapping at the shore. These tropical pops are a vacation in a mold, combining the buttery sweetness of fresh mango with the rich, velvety fat of coconut milk. They have a gorgeous golden hue that feels like sunshine captured in ice, and the flavor profile is exotic yet comforting. We love how the naturally high sugar content of the mango creates a softer, less icy texture that feels truly premium.
Ingredients
- 2 large ripe mangoes (Alphonso or Honey mangoes work best)
- 1 can (13.5 oz) full-fat coconut milk
- 1 tablespoon lime juice
- 1/4 cup shredded unsweetened coconut
- 2 tablespoons maple syrup (optional)
How to make it
- Peel the mangoes and slice the flesh away from the large inner pit, placing all the golden fruit pieces into your blender container.
- Add the full-fat coconut milk (make sure to shake the can first!), lime juice, and maple syrup to the blender and blend until completely liquified and frothy.
- In a small dry pan over low heat, lightly toast the shredded coconut for about 2 minutes until it turns a pale golden brown and smells fragrant.
- Stir the toasted coconut into the mango mixture by hand; this adds a lovely bit of texture and reinforces that delicious tropical coconut flavor.
- Carefully pour the mixture into your favorite popsicle molds, making sure to tap the molds on the counter a few times to release any trapped air bubbles.
- Place the sticks into the molds and freeze for at least 7 hours to allow the coconut fats to solidify into a perfectly creamy consistency.
- When serving, you can dip the tips of the finished pops into a little extra shredded coconut for an extra touch of island-inspired aesthetic flair.
Healthy Frozen Yogurt Bars For Breakfast
Why we love this
Who says you can’t have dessert for breakfast? These frozen yogurt bars are essentially a deconstructed parfait that has been turned into a refreshing morning treat. They are packed with fiber, antioxidants, and probiotics, making them the most beautiful and nourishing way to start a hot summer morning. We love the way the granola stays crunchy against the frozen yogurt, providing a satisfying contrast that makes breakfast feel like a special occasion. It’s a soft, cold, and wholesome way to wake up your senses.
Ingredients
- 2 cups plain or vanilla Greek yogurt
- 1/2 cup homemade or low-sugar granola
- 1 cup mixed berries (raspberries, blackberries, and blueberries)
- 1 tablespoon chia seeds
- A handful of fresh mint leaves for garnish
How to make it
- Line a rectangular 9×9 baking pan with parchment paper, leaving a bit of overhang on the sides so you can easily lift the bars out later.
- Spread the Greek yogurt into the pan in an even layer about half an inch thick; use a spatula to make sure the surface is as level as possible.
- Sprinkle the chia seeds evenly across the surface of the yogurt to add a boost of omega-3s and a subtle, poppy-seed-like texture.
- Distribute the mixed berries across the yogurt, pressing them in slightly so they are nestled into the cream rather than just sitting on top.
- Scatter the granola over the entire tray, ensuring every square inch has a bit of that golden, oaty crunch that makes these bars so breakfast-worthy.
- Freeze the entire tray for at least 4 hours until it is completely solid and can be handled without the yogurt melting too quickly.
- Lift the parchment paper out of the pan, place it on a cutting board, and use a sharp knife to slice into rectangular bars or rustic shards for serving.
Creamy Cold Brew Coffee Popsicles

Why we love this
For my fellow coffee lovers, this recipe is the ultimate afternoon pick-me-up that combines your caffeine fix with a sweet, icy treat. It’s like your favorite iced latte has been transformed into a sophisticated popsicle that looks incredibly chic with its deep mocha layers. These pops are less about childhood nostalgia and more about adult indulgence, offering a bold coffee flavor tempered by a touch of cream. We love how they provide a gentle energy boost while cooling you down from the inside out on a humid day.
Ingredients
- 1.5 cups strong cold brew coffee concentrate
- 1/2 cup half-and-half or oat milk
- 3 tablespoons maple syrup
- 1/2 teaspoon ground cinnamon
- A splash of vanilla extract
How to make it
- In a glass pitcher, combine your cold brew coffee concentrate with the maple syrup, cinnamon, and vanilla, stirring until the sweetener is fully dissolved.
- To create a beautiful “latte” effect, pour a small amount of the half-and-half (or oat milk) into the bottom of each popsicle mold first.
- Carefully and slowly pour the coffee mixture over the milk; the liquids will naturally swirl together in a gorgeous, gradient pattern.
- If you prefer a more uniform look, simply mix the milk and coffee together in the pitcher before pouring into the molds for a consistent tan color.
- Insert the popsicle sticks and place the molds in the freezer, allowing them to set for a minimum of 6 hours to ensure the coffee crystals are firm.
- The caffeine in the coffee can sometimes make these melt a little faster than fruit pops, so be sure to keep them in the freezer until the very second you’re ready to enjoy.
- For an extra touch of luxury, you can drizzle a tiny bit of melted white chocolate over the finished pops to mimic the look of latte art.
Natural Rainbow Fruit Layered Pops
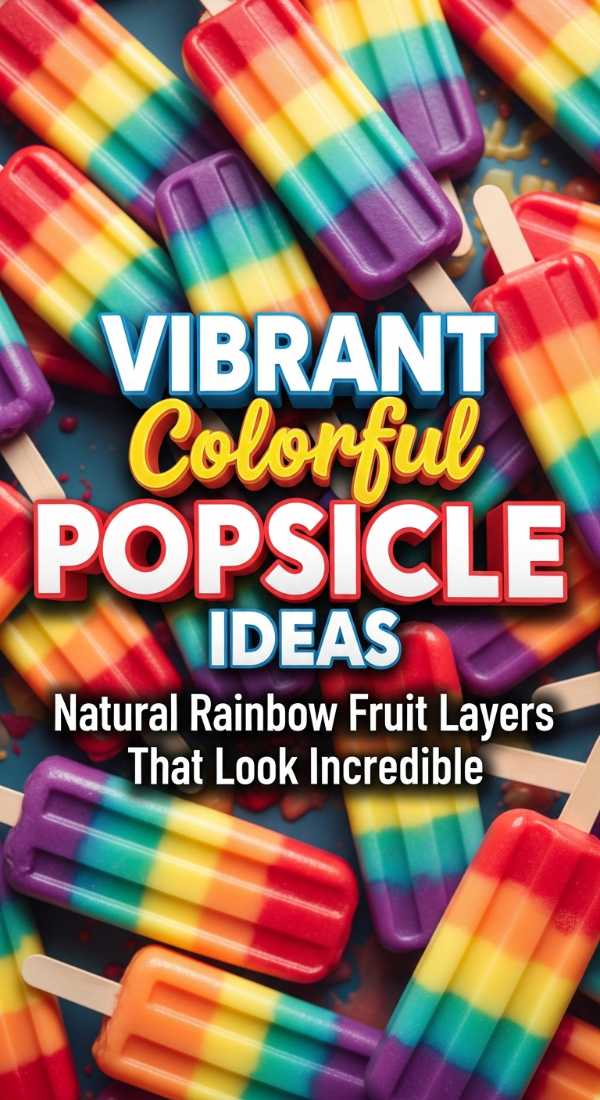
Why we love this
There is nothing that brings out your inner child quite like a rainbow, and these layered fruit pops are pure happiness on a stick. Each layer represents a different fruit, creating a stunning spectrum of natural colors that are entirely free from artificial dyes or syrups. They are a celebration of nature’s bounty and look absolutely breathtaking when they are stacked in a glass of ice. We love the journey of flavors you experience as you eat your way through the layers, from tangy citrus to sweet berry.
Ingredients
- 1/2 cup pureed strawberries (red layer)
- 1/2 cup pureed mango (orange layer)
- 1/2 cup pureed pineapple (yellow layer)
- 1/2 cup pureed kiwi (green layer)
- 1/2 cup pureed blueberries (blue/purple layer)
How to make it
- Prepare each fruit puree separately by blending the fruit with a tiny splash of water or lime juice, then set them aside in individual small bowls.
- Start by pouring the blueberry puree into the bottom fifth of your popsicle molds and place the mold in the freezer for about 30-40 minutes to set.
- Once the first layer is firm but not rock-hard, carefully spoon the kiwi puree on top and return the mold to the freezer for another 30 minutes.
- Repeat this process with the pineapple, then the mango, and finally the strawberry puree, freezing briefly between each layer to keep the colors distinct.
- If you want the layers to be perfectly horizontal, make sure the mold is sitting completely level in your freezer during the entire process.
- Insert the popsicle stick during the third layer so it is anchored deep into the lower layers while still having enough grip for the top layers.
- This recipe takes a bit more patience than the others, but the stunning, multi-colored result is worth every single minute of waiting!
Honey Nut Frozen Yogurt Bars Recipe

Why we love this
These bars are for those who appreciate the earthy, grounded flavors of honey and toasted nuts paired with a cool, creamy base. They feel incredibly sophisticated, like something you would find at a high-end artisanal creamery, yet they are so simple to make in your own kitchen. The honey provides a floral sweetness that lingers on the tongue, while the nuts offer a deep, roasted crunch that satisfies your soul. We love serving these at sunset gatherings when the air starts to cool and the golden honey tones match the evening light.
Ingredients
- 2 cups thick Greek yogurt
- 1/3 cup wildflower honey (plus extra for drizzling)
- 1/2 cup chopped walnuts and pistachios
- 1/4 teaspoon sea salt
- 1/2 teaspoon almond extract
How to make it
- In a large bowl, whisk the Greek yogurt with the honey and almond extract until it is light, airy, and has a beautiful, glossy sheen.
- Spread the mixture into a parchment-lined rectangular pan, ensuring the yogurt is about an inch deep to create a substantial, satisfying bar.
- In a small pan over medium heat, toast the chopped walnuts and pistachios for 3 minutes until they are warm and the oils have been released.
- Sprinkle the toasted nuts and the sea salt over the top of the yogurt, pressing them down gently with your fingers so they stay put once frozen.
- Drizzle a generous amount of extra honey over the top in a zig-zag pattern, which will create beautiful amber ribbons once the bars are set.
- Freeze for at least 5 hours; the honey has a lower freezing point than the yogurt, so it will remain slightly tacky and delicious even when the yogurt is firm.
- Slice into thick, generous squares and serve on a wooden board for the ultimate rustic-meets-aesthetic presentation that your loves will adore.
A Note From My Heart To Yours
I hope these recipes bring a sense of peace and a splash of color to your beautiful summer days. Creating these treats is a form of meditation for me, a way to slow down and appreciate the simple magic of transformation—from liquid to ice, from individual ingredients to a cohesive work of art. Remember, my loves, that life is meant to be savored, one chilled bite at a time. I can’t wait to see your own aesthetic creations, so please share them with me and keep blooming in your own unique way.