

Have you ever had one of those afternoons where time just seems to slow down, and the only thing that matters is the laughter echoing across the patio? I used to stress about individual plating and keeping every side dish perfectly timed, but then I discovered the magic of the ‘Everything Board.’ It is not just a meal; it is an invitation to linger, to graze, and to truly connect over flavors that hit home without the stuffy formality of a three-course dinner.
This simple food board concept is a total game changer because it celebrates the beauty of abundance and variety. Imagine a table filled with textures—crunchy, creamy, smoky, and sweet—all laid out for your favorite people to pick and choose their own perfect bite. It turns a standard Tuesday night or a special weekend gathering into an immersive sensory experience that people will be talking about for months.
HOW TO GRILL SMOKY STEAK?
Why we love this
There is something primal and deeply satisfying about a steak that has been kissed by the flames of a grill. The aroma of rendering fat hitting hot coals creates a perfume that signals ‘summer’ louder than any calendar ever could. We love the contrast between the dark, salty crust—the result of a perfect Maillard reaction—and the tender, ruby-red center that melts like butter on the tongue. It is a bold, high-protein anchor for any food board that brings a sophisticated, masculine energy to the spread.
Ingredients
- 2 thick-cut Ribeye or New York Strip steaks
- Coarse kosher salt and cracked black pepper
- 3 cloves of garlic, smashed
- 2 sprigs of fresh rosemary
- 2 tablespoons of high-smoke point oil (like avocado oil)
- 4 tablespoons of unsalted butter
How to make it
- Take your steaks out of the refrigerator at least 45 minutes before grilling to ensure they reach room temperature, which allows for even cooking throughout.
- Pat the meat completely dry with paper towels; any moisture on the surface will create steam instead of a crust. Season aggressively with salt and pepper on all sides, including the edges.
- Preheat your grill to high heat (about 450-500°F). Lightly oil the grates using a folded paper towel dipped in oil and held with tongs.
- Place the steaks on the hottest part of the grill. Sear for 3-4 minutes without moving them until a deep brown crust forms. Flip using tongs.
- Add a small cast-iron skillet to the grill grates containing the butter, garlic, and rosemary. Once melted, spoon this infused butter over the steaks repeatedly during the last 2 minutes of cooking.
- Use an instant-read thermometer to check for doneness: pull the steaks at 130°F for medium-rare. Transfer to a cutting board and let them rest for at least 10 minutes to allow the juices to redistribute before slicing against the grain.
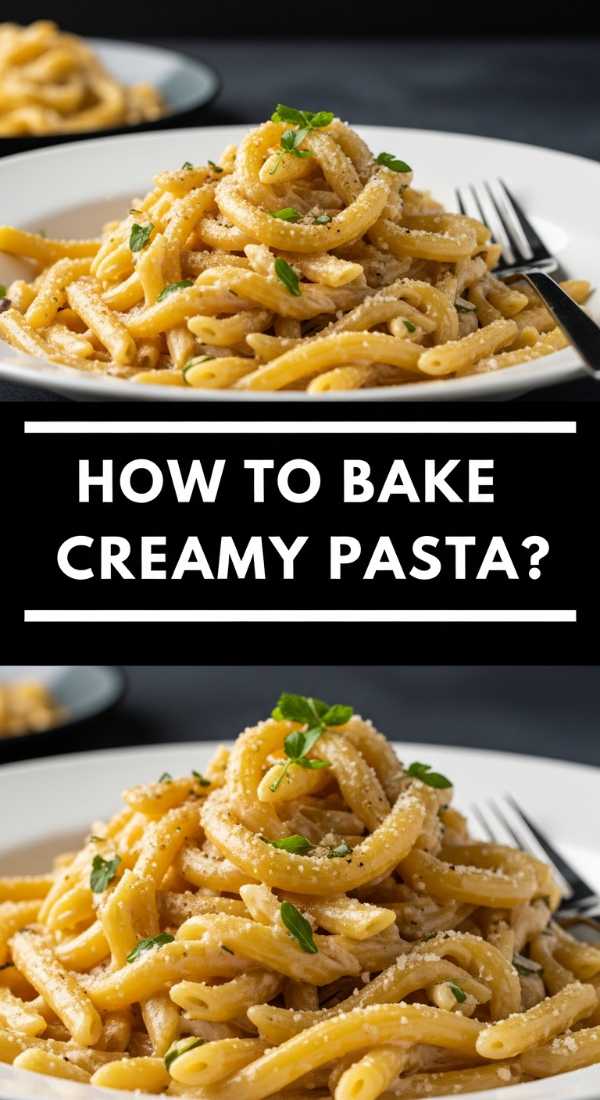
HOW TO BAKE CREAMY PASTA?

Why we love this
Baked pasta is the ultimate culinary hug, offering a level of comfort that few other dishes can match. We adore the way the cheese transforms in the oven, creating those sought-after crispy, golden-brown edges while the center remains a molten, velvety sea of sauce. The aroma of bubbling dairy and toasted wheat wafting through the house is enough to bring everyone to the kitchen before the timer even goes off. It is the perfect communal dish because it stays warm for a long time on the board.
Ingredients
- 1 lb Rigatoni or Penne pasta
- 3 cups whole milk
- 8 oz sharp cheddar, shredded
- 8 oz Gruyere, shredded
- 1/2 cup heavy cream
- 4 tablespoons butter
- 1/4 cup all-purpose flour
- 1/2 teaspoon nutmeg and 1 teaspoon garlic powder
- 1 cup panko breadcrumbs
How to make it
- Boil a large pot of heavily salted water and cook the pasta for 2 minutes less than the package instructions for ‘al dente’. It will finish cooking in the oven, so you want it to have a firm bite.
- In a heavy-bottomed saucepan, melt the butter over medium heat. Whisk in the flour and cook for 2 minutes to remove the raw flour taste, creating a pale roux.
- Slowly drizzle in the milk while whisking constantly to prevent lumps. Simmer until the sauce thickens enough to coat the back of a spoon.
- Remove from heat and stir in the heavy cream, nutmeg, garlic powder, and 3/4 of the cheese until completely smooth and glossy.
- Fold the cooked pasta into the cheese sauce until every tube is filled. Pour the mixture into a buttered baking dish.
- Top with the remaining cheese and panko breadcrumbs. Bake at 375°F for 20-25 minutes until the sauce is bubbling around the edges and the top is a deep golden brown. Let sit for 5 minutes before serving.
HOW TO MAKE JUICY BURGERS?

Why we love this
A truly juicy burger is a masterpiece of balance between salt, fat, and char. We love how the first bite releases a savory explosion of juice that is immediately soaked up by a toasted, pillowy bun. There is a nostalgic joy in a burger that feels substantial and messy in the best way possible, topped with crisp greens and tangy pickles. It provides a customizable element to your food board, allowing guests to build their own handheld feast exactly how they like it.
Ingredients
- 1.5 lbs ground chuck (80/20 fat ratio is essential)
- 4 Brioche buns
- 4 slices of American or Sharp Cheddar cheese
- Salt and black pepper
- 1 tablespoon butter for the buns
- Toppings: Lettuce, tomato, thinly sliced red onion, and pickles
How to make it
- Gently divide the meat into four equal portions. Form them into balls and then flatten into patties that are about 1 inch wider than your buns, as they will shrink during cooking.
- Crucial tip: use your thumb to make a shallow indentation in the center of each patty. This prevents the burger from ‘doming’ and keeps it flat.
- Heat a cast-iron skillet or griddle over medium-high heat until it is smoking slightly. Only season the outside of the patties with salt and pepper right before they hit the pan to keep the texture tender.
- Place patties in the hot pan. Sear for 3-4 minutes without pressing down on them; pressing squeezes out the juices. Flip once you see a dark brown crust.
- Immediately place a slice of cheese on each patty. Add a teaspoon of water to the pan and cover with a lid for 30 seconds to create steam that melts the cheese perfectly.
- Butter the buns and toast them on the griddle until golden. Assemble the burgers with the fresh toppings and serve immediately while the fat is still hot and liquid.
HOW TO ROAST CRISPY CHICKEN?

Why we love this
The sound of a knife cracking through perfectly roasted chicken skin is one of the most rewarding noises in the kitchen. We love the contrast between that shatteringly crisp exterior and the succulent, herb-scented meat underneath that falls right off the bone. It is an elegant addition to a food board that feels both rustic and sophisticated, filling the air with the timeless aroma of thyme and roasting poultry. It is the ultimate crowd-pleaser that looks like a centerpiece but feels like home.
Ingredients
- 1 whole chicken (4-5 lbs)
- 3 tablespoons softened butter
- 1 tablespoon olive oil
- Fresh thyme and rosemary, chopped
- 1 lemon, halved
- 1 head of garlic, sliced crosswise
- Kosher salt and cracked black pepper
How to make it
- Remove the chicken from the fridge an hour before cooking. Pat the skin extremely dry with paper towels; moisture is the enemy of crispiness.
- Stuff the cavity of the chicken with the lemon halves and the garlic head. This infuses the meat with moisture and aroma from the inside out.
- Mix the softened butter with the chopped herbs. Carefully loosen the skin over the breast meat and spread half of the herb butter underneath the skin. Rub the remaining butter and olive oil all over the outside of the skin.
- Season the entire bird generously with salt and pepper. Truss the legs with kitchen twine to ensure the chicken cooks evenly and holds its juices.
- Place the chicken on a rack in a roasting pan. Roast at 425°F for the first 15 minutes to blast the skin with heat, then lower the temperature to 375°F.
- Continue roasting for about 50-60 minutes until the internal temperature of the thigh reaches 165°F. Let the chicken rest uncovered for 15 minutes before carving to ensure the skin stays crisp.
HOW TO BAKE SOFT COOKIES?
Why we love this
A warm, soft cookie is the soul of any dessert board, offering a chewy, brown-sugar sweetness that lingers on the palate. We love that specific texture where the edges are just barely set and the center remains almost dough-like and gooey. The smell of caramelizing butter and vanilla beans creates an instant sense of nostalgia and warmth that draws everyone together. When you break one open and see the melted chocolate pull apart in silky ribbons, you know you have achieved baking perfection.
Ingredients
- 1 cup unsalted butter, softened
- 3/4 cup brown sugar, packed
- 3/4 cup granulated sugar
- 2 large eggs
- 1 tablespoon vanilla extract
- 2 1/4 cups all-purpose flour
- 1 teaspoon baking soda and 1/2 teaspoon salt
- 2 cups semi-sweet chocolate chunks
How to make it
- Cream the softened butter with both sugars in a large bowl for at least 3-4 minutes until the mixture is pale and fluffy. This aeration is key to a soft texture.
- Add the eggs one at a time, beating well after each addition, then stir in the vanilla extract.
- In a separate bowl, whisk together the flour, baking soda, and salt. Gradually fold the dry ingredients into the wet ingredients until just combined; do not overmix, as this develops gluten and makes the cookies tough.
- Fold in the chocolate chunks by hand. For the best flavor, chill the dough in the refrigerator for at least 2 hours (or overnight). This hydrates the flour and deepens the caramel notes.
- Scoop rounded tablespoons of dough onto a parchment-lined baking sheet, leaving 2 inches of space between them.
- Bake at 350°F for 9-11 minutes. The key is to pull them out when the edges are lightly golden but the centers still look slightly ‘underdone’ and soft. They will firm up on the hot pan as they cool.
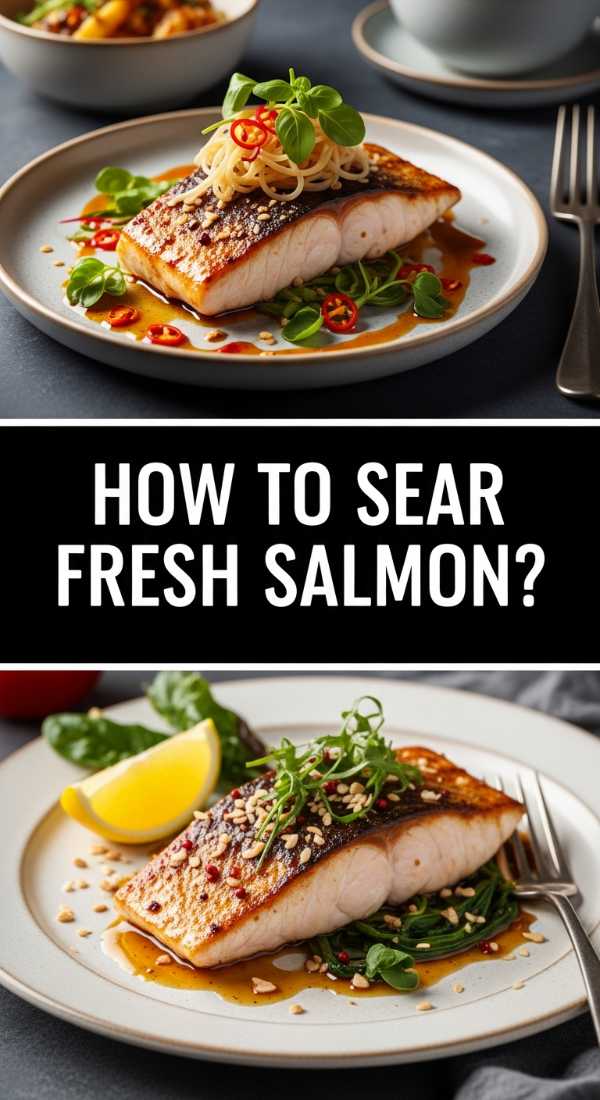
HOW TO SEAR FRESH SALMON?
Why we love this
Searing salmon is an art form that yields a stunningly sophisticated result with minimal effort. We love the vibrant, coral-pink hue of the fish contrasted against a mahogany-colored, crispy skin that provides a satisfying snap with every bite. The texture of properly seared salmon is incredibly delicate, with large, moist flakes that fall away effortlessly at the touch of a fork. It adds a light, refreshing, and heart-healthy element to the food board that balances out the richer, heavier meats.
Ingredients
- 2 large center-cut salmon fillets (skin-on)
- 2 tablespoons olive oil
- 1 tablespoon unsalted butter
- Zest of 1 lemon
- Kosher salt and coarse black pepper
- Fresh dill for garnish
How to make it
- Remove salmon from the fridge 15 minutes before cooking. Pat the skin side extremely dry with paper towels. Any moisture will prevent the skin from becoming crispy.
- Season the flesh side with salt, pepper, and lemon zest. Do not salt the skin until right before it hits the pan to prevent it from drawing out moisture.
- Heat a stainless steel or cast-iron skillet over medium-high heat. Add the oil. Once the oil is shimmering and wisps of smoke appear, place the salmon skin-side down in the pan.
- Use a flexible spatula to press down firmly on the fillets for the first 30 seconds. This prevents the skin from curling and ensures even contact with the heat.
- Lower the heat to medium and cook for 5-6 minutes on the skin side. You will see the color of the fish change from opaque to light pink climbing up the sides.
- Flip the fish carefully and add the butter to the pan. Sear the flesh side for only 1-2 minutes for medium-rare. The skin should be paper-thin and crunchy like a potato chip. Remove and garnish with fresh dill.
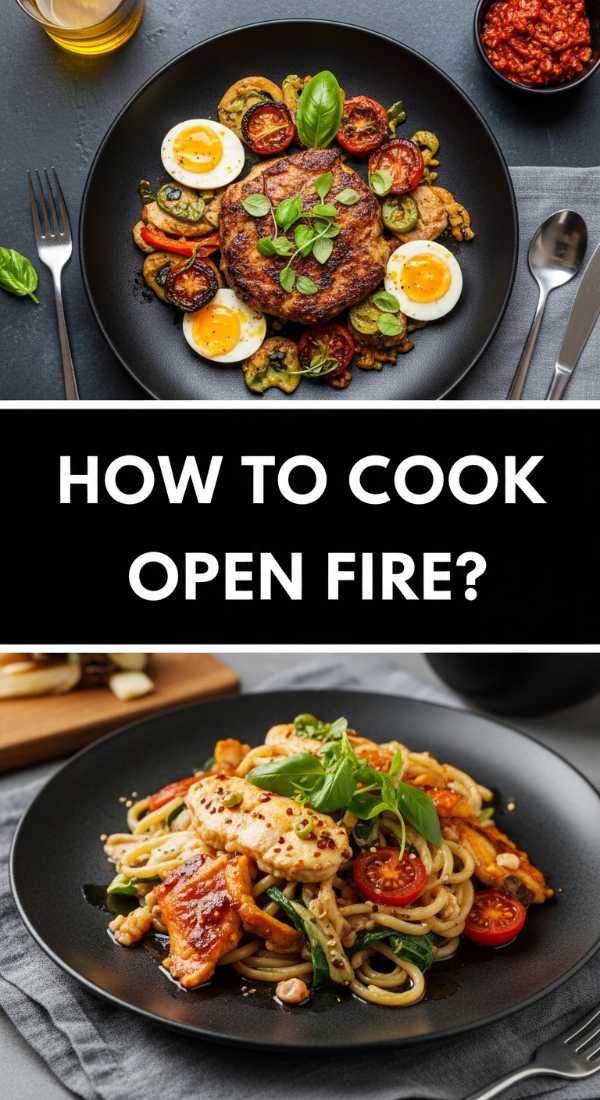
HOW TO COOK OPEN FIRE?

Why we love this
Cooking over an open fire is the ultimate expression of outdoor living, connecting us to the most basic and beautiful form of heat. We love the unpredictable nature of the flames that impart a complex, woody smokiness that you simply cannot replicate in a modern kitchen. There is a specific char and a rustic blackened edge that develops on vegetables and meats alike, creating a flavor profile that is deep, earthy, and adventurous. It turns the act of cooking into a performance and a gathering point for everyone on the board.
Ingredients
- Hardwood logs (oak or hickory) or high-quality lump charcoal
- Cast iron cookware or heavy-duty grill grates
- Whole vegetables (peppers, onions, corn)
- Thick cut chops or sausages
- Coarse sea salt and high-heat oil
How to make it
- Build your fire at least 45 minutes before you plan to cook. You are not cooking over the dancing flames, but rather over the glowing red embers which provide steady, intense heat.
- Arrange your coals into a ‘two-zone’ setup: pile more embers on one side for high-heat searing and keep a thinner layer on the other side for indirect, slower cooking.
- Lightly coat your ingredients in oil and salt. For open-fire cooking, larger pieces of food work better as they won’t fall through the grates and can withstand the heat.
- Place your cast iron skillet directly onto the embers to get it screaming hot if you are searing meat, or place items on a grate set 4-6 inches above the coals.
- Monitor the food constantly; the heat from wood embers is more intense than a gas flame. Use long-handled tongs to rotate food frequently to avoid scorching.
- Leverage the smoke by tossing a handful of fresh herbs (like rosemary or sage) directly onto the coals during the last few minutes of cooking to perfume the food.
HOW TO MAKE LOADED FRIES?

Why we love this
Loaded fries are the ultimate crowd-pleaser, turning a simple side into a decadent, multi-layered mountain of flavor. We love the structural integrity of a double-fried potato that holds up under the weight of melted cheese, tangy crema, and savory toppings. Every bite offers a different combination of textures—the crunch of the fry, the snap of fresh green onions, and the spicy kick of jalapeños. It is a visual feast that screams fun and indulgence, making it the most popular corner of any food board.
Ingredients
- 1 bag of high-quality frozen steak fries or hand-cut Russet potatoes
- 2 cups shredded Mexican blend cheese
- 1/2 cup cooked, crumbled bacon
- 1/4 cup pickled jalapeños
- 1/2 cup sour cream or Mexican crema
- Fresh cilantro and green onions for garnish
How to make it
- If using fresh potatoes, soak them in cold water for 30 minutes to remove excess starch, then pat extremely dry. If using frozen, preheat your oven or air fryer to 425°F.
- Cook the fries until they are extra crispy—slightly more than you think you need. They need a strong exterior to stay crunchy under the toppings.
- Spread the hot fries out on a baking sheet in a single layer. Immediately sprinkle the shredded cheese and bacon crumbles over the top while the fries are still at their peak temperature.
- Place the tray back into the oven for 3-5 minutes until the cheese is completely melted and starting to brown at the edges.
- Remove from the oven and drizzle the sour cream in a zigzag pattern across the entire tray. Top with the jalapeños, sliced green onions, and chopped cilantro.
- Serve directly on the baking sheet or transfer carefully to the board. Provide small forks, though these are best enjoyed with fingers among friends!
HOW TO MAKE FLUFFY PANCAKES?
Why we love this
There is nothing quite like a stack of pancakes that are so light and airy they feel like biting into a cloud. We love the golden-brown ring that forms around the edge and the way a pat of butter slowly slides down the side, melting into the honeycomb-like texture. The scent of warm maple syrup and toasted flour is the universal language of a slow, easy morning. They bring a playful, brunch-inspired energy to the board that works just as well for dinner as it does for breakfast.
Ingredients
- 2 cups all-purpose flour
- 3 tablespoons sugar
- 1.5 teaspoons baking powder and 1.5 teaspoons baking soda
- 1/2 teaspoon salt
- 2 cups buttermilk (the acidity is key for fluffiness)
- 2 large eggs
- 4 tablespoons melted butter (plus extra for the pan)
How to make it
- In a large bowl, whisk together the flour, sugar, baking powder, baking soda, and salt. Ensure there are no large clumps of flour.
- In a separate jug, whisk the buttermilk and eggs together. Slowly pour in the melted butter while whisking to incorporate.
- Make a well in the center of the dry ingredients and pour in the wet mixture. Use a spatula to fold the ingredients together until *just* combined. Stop while there are still some small lumps; overmixing is the #1 reason for tough pancakes.
- Let the batter rest for 10 minutes. You will see bubbles forming on the surface—this is the leavening agents activating, which creates the lift.
- Heat a non-stick griddle over medium heat. Lightly grease with a small amount of butter. Pour 1/3 cup of batter per pancake.
- Wait until you see bubbles pop on the surface and the edges look set and matte (about 2-3 minutes). Flip once and cook for another 1-2 minutes until golden brown. Serve in a warm stack.
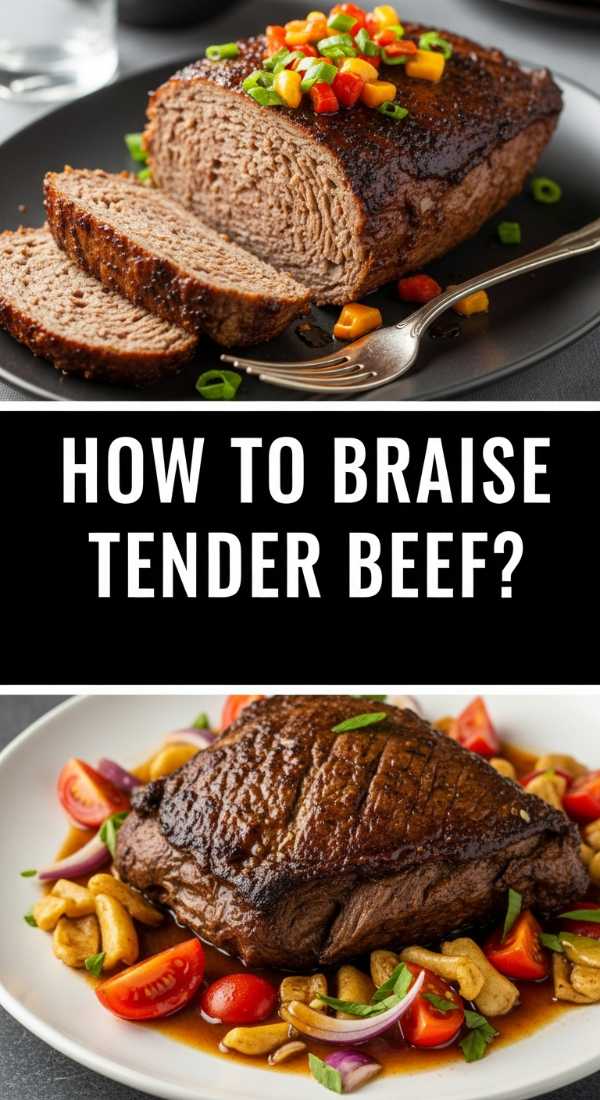
HOW TO BRAISE TENDER BEEF?
[IMAGE_10]
Why we love this
Braising is the ultimate lesson in patience, rewarding the cook with beef so tender it practically dissolves at the mere suggestion of a fork. We love the rich, deep mahogany sauce that develops from hours of slow simmering, concentrating the flavors of wine, aromatics, and beef stock into a liquid gold. It is a hearty, sophisticated dish that feels expensive and celebratory, yet it is rooted in humble, slow-cooking techniques. Adding this to your board provides a ‘main event’ feel that is deeply grounding and incredibly satisfying.
Ingredients
- 3 lbs beef chuck roast, cut into 2-inch chunks
- 2 tablespoons tomato paste
- 2 cups dry red wine (like Cabernet)
- 3 cups beef bone broth
- 3 large carrots and 2 onions, roughly chopped
- 4 sprigs of thyme and 2 bay leaves
- Salt, pepper, and olive oil
How to make it
- Season the beef chunks heavily with salt and pepper. Heat olive oil in a large Dutch oven over medium-high heat.
- Sear the beef in batches, making sure not to crowd the pan. You want a dark, crusty sear on all sides of every piece. Remove the beef and set aside.
- In the same pot, add the onions and carrots. Cook until the onions are translucent and picking up the brown bits (fond) from the bottom of the pan. Stir in the tomato paste and cook for 2 minutes until it turns a rusty color.
- Pour in the red wine to deglaze the pan, scraping the bottom with a wooden spoon to release all that flavor. Let the wine reduce by half.
- Add the beef back in along with the broth, thyme, and bay leaves. The liquid should almost cover the meat. Bring to a simmer, then cover with a tight-fitting lid.
- Place in a 300°F oven for 3 to 3.5 hours. The beef is done when it is completely ‘fork-tender.’ Remove the herbs and skim any excess fat from the surface before serving.
The Ultimate Gathering Start Here
Building a food board like this isn’t just about the recipes; it’s about the spirit of sharing. Whether you choose the smoky depth of the grilled steak or the pillowy softness of the cookies, these dishes are designed to bring people closer. So, stop overcomplicating your dinner parties. Put everything on a board, let the flavors mingle, and watch the magic happen.
Frequently Asked Questions
Q: Can I prepare these items in advance?
A: Absolutely! The braised beef and the cookie dough actually taste better when prepared a day ahead. However, items like the salmon and loaded fries are best served immediately for the best texture.
Q: What size board do I need for all of this?
A: For a spread this size, I recommend using a clean wooden butcher block or even a dedicated kraft-paper-covered tabletop if you’re feeding a large crowd.