
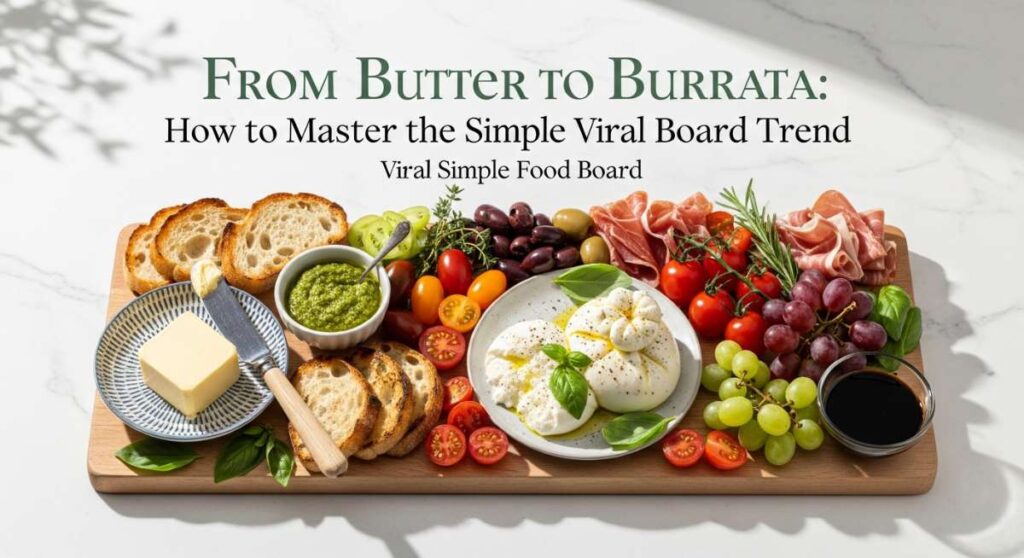
From Butter to Burrata: How to Master the Simple Viral Board Trend
There is something undeniably magical about a shared meal that doesn’t require a formal seating chart or a stack of heavy dinner plates. We have all seen them—those luscious, sprawling boards filled with textures and colors that seem to take over our social feeds. It started with butter, but it has evolved into a lifestyle of effortless hosting where the food itself becomes the centerpiece of conversation. When I first laid out a board for my friends, the room instantly filled with the sound of laughter and the gentle scraping of bread against wood; it was an emotional shift from ‘serving a meal’ to ‘creating an experience.’
As we move through the seasons, the viral board trend has taught us that simplicity is the ultimate sophistication. It’s about the tactile joy of assembly and the sensory delight of seeing fresh, vibrant ingredients gathered in one place. Whether you are hosting a sunset gathering on the patio or a cozy indoor movie night, these boards invite everyone to dive in, customize their bites, and linger a little longer. Let’s explore how to take these viral concepts and apply them to every craving, from zesty tacos to the fluffiest southern biscuits.
How to make summer chicken?

Why we love this
Nothing captures the essence of a sun-drenched afternoon like the aroma of herb-marinated chicken hitting a hot grill. The skin turns into a golden, crackling masterpiece while the meat remains incredibly succulent and infused with the bright, acidic notes of lemon and fresh rosemary. When sliced and fanned out on a wooden board, it becomes the ultimate communal protein, inviting guests to grab a piece and pair it with a dollop of tzatziki or a sprinkle of flaky sea salt. The contrast between the charred exterior and the tender interior is a sensory symphony that defines outdoor dining.
Ingredients
- 2 lbs boneless, skinless chicken thighs
- 1/4 cup extra virgin olive oil
- 2 cloves garlic, minced
- 1 tbsp fresh rosemary, chopped
- Zest and juice of one large lemon
- 1 tsp smoked paprika
- Salt and cracked black pepper to taste
How to make it
- Begin by whisking together the olive oil, lemon juice, zest, garlic, rosemary, and paprika in a large glass bowl to create a vibrant marinade that will tenderize the meat.
- Pat the chicken thighs completely dry with paper towels to ensure a proper sear, then submerge them in the marinade, tossing to coat every crevice; cover and refrigerate for at least 30 minutes, though 2 hours is ideal for deep flavor penetration.
- Preheat your grill or a heavy cast-iron grill pan over medium-high heat until a drop of water sizzles instantly upon contact.
- Place the chicken on the heat, listening for that signature sear, and cook undisturbed for 6-7 minutes until deep char marks form and the meat releases easily from the surface.
- Flip the pieces and cook for another 5-6 minutes, using an instant-read thermometer to ensure the internal temperature reaches a safe 165°F (74°C).
- Remove the chicken from the heat and let it rest on a cutting board for at least 5-8 minutes; this crucial step allows the juices to redistribute so every bite remains moist and flavorful before you slice it for your board.
How to cook healthy pasta?

Why we love this
Healthy pasta is all about celebrating the harvest, turning a simple bowl of noodles into a vibrant tapestry of colors and nutrients. Imagine al dente strands coated in a light, silken sheen of high-quality olive oil, tossed with blistered cherry tomatoes that burst with sweetness and earthy kale that provides a satisfying crunch. The scent of toasted garlic and toasted pine nuts wafting through the kitchen creates an immediate sense of comfort and well-being. It is a dish that feels indulgent because of its richness in flavor, yet leaves you feeling energized and nourished.
Ingredients
- 12 oz whole grain or chickpea fusilli
- 2 cups cherry tomatoes, halved
- 3 cups baby kale or spinach
- 3 tbsp toasted pine nuts
- 4 cloves garlic, thinly sliced
- 1/4 cup extra virgin olive oil
- Freshly grated parmesan and red pepper flakes
How to make it
- Bring a large pot of heavily salted water to a rolling boil—it should taste like the sea to properly season the pasta from the inside out.
- Add the pasta and cook according to the package directions, but aim for ‘al dente’ (about 1-2 minutes less than the box suggests) so the noodles maintain a firm bite when tossed with the sauce.
- While the pasta cooks, heat the olive oil in a large skillet over medium-low heat and add the sliced garlic, sautéing gently until it becomes fragrant and turns a pale golden hue; do not let it brown or it will turn bitter.
- Increase the heat to medium and add the cherry tomatoes, cooking for about 5 minutes until they begin to soften and release their natural juices, creating a light sauce.
- Just before draining the pasta, reserve 1/2 cup of the starchy pasta water; then add the greens to the skillet, stirring until they just begin to wilt.
- Toss the drained pasta into the skillet, adding the reserved water and a generous handful of parmesan, stirring vigorously over the heat to emulsify the oil and water into a silky coating.
How to prepare Mexican tacos?

Why we love this
Tacos are the ultimate DIY board food, offering a playground of textures from the soft, warm embrace of a corn tortilla to the sharp, refreshing bite of pickled red onions. There is a deep satisfaction in the way the savory, spiced filling mingles with the creamy richness of mashed avocado and the bright, herbaceous punch of fresh cilantro. The visual appeal of a taco board—scattered with lime wedges, crumbled cotija, and vibrant salsas—is enough to make anyone’s mouth water. Each bite is a customizable explosion of heat, acidity, and salt that brings the festive spirit of a street market right to your table.
Ingredients
- 1 lb flank steak or firm tofu, cubed
- 12 small corn tortillas
- 1 cup finely shredded cabbage
- 1/2 cup pickled red onions
- 1/2 cup crumbled cotija cheese
- 2 avocados, sliced
- Taco seasoning: Cumin, chili powder, garlic powder, salt
How to make it
- Start by seasoning your protein of choice generously with the spice blend, ensuring even coverage so every piece develops a flavorful crust when cooked.
- Heat a heavy skillet or griddle over high heat with a tablespoon of high-smoke-point oil (like avocado oil) and sear the protein quickly to lock in moisture, aiming for a charred exterior while keeping the center tender.
- While the protein rests, warm the corn tortillas directly over a low gas flame for about 10 seconds per side using tongs, or in a dry pan until they become pliable and develop small charred spots; keep them wrapped in a clean cloth to stay warm.
- Prepare your ‘toppings station’ on the board by arranging the cabbage, onions, and cheese in small bowls to prevent the board from getting soggy.
- Slice the protein against the grain into thin strips or bite-sized pieces to ensure maximum tenderness.
- Assemble the board by placing the warm tortillas in the center, surrounded by the protein and all the colorful accompaniments, allowing guests to build their perfect taco with a final squeeze of fresh lime.
How to bake southern biscuits?

Why we love this
The perfect Southern biscuit is a marvel of engineering—layers upon layers of buttery, flaky dough that practically melt the moment they hit your tongue. There is a nostalgic, homey aroma that fills the house as they bake, a scent of toasted flour and cultured butter that promises warmth and comfort. When you pull them apart, the steam rises in a gentle puff, revealing a soft, pillowy interior that is just begging for a drizzle of honey or a smear of fruit preserves. Serving these on a board with various butters and jams makes for an breakfast or brunch experience that feels like a warm hug.
Ingredients
- 2 1/2 cups all-purpose flour
- 1 tbsp baking powder
- 1 tsp salt
- 1/2 cup (1 stick) unsalted butter, frozen
- 1 cup cold buttermilk
- 2 tbsp melted butter for brushing
How to make it
- Preheat your oven to a hot 425°F (220°C) and line a baking sheet with parchment paper; the high heat is essential for the rapid steam expansion that creates those iconic layers.
- Whisk the dry ingredients together in a large chilled bowl, then use a box grater to grate the frozen butter directly into the flour; this ensures tiny, cold pockets of fat that create steam vents during baking.
- Gently toss the butter shreds in the flour with your fingertips, then make a well in the center and pour in the cold buttermilk, stirring with a fork just until a shaggy dough forms—do not overmix.
- Turn the dough onto a floured surface and gently pat it into a rectangle; fold it in half, rotate, and repeat 5-6 times to create the internal layers (this is called laminating).
- Pat the dough to a 1-inch thickness and use a sharp circular cutter to press straight down—never twist the cutter, as twisting seals the edges and prevents the biscuit from rising high.
- Place the biscuits on the tray so they are just touching each other (this helps them climb upward) and bake for 12-15 minutes until the tops are a beautiful deep golden brown, brushing with melted butter immediately upon removal.
How to make quick burgers?

Why we love this
A quick burger doesn’t have to sacrifice quality for speed; it’s all about the intensity of the sear and the classic combination of flavors. Imagine a juicy patty with a craggy, caramelized crust that provides a satisfying crunch before giving way to a tender, savory center. The way the cheese drapes over the edges, becoming slightly translucent and gooey, is a visual cue of pure indulgence. Set against a soft, toasted brioche bun with a crisp leaf of lettuce and a swipe of tangy sauce, it represents the pinnacle of casual, high-impact dining that everyone loves to gather around.
Ingredients
- 1 lb ground chuck (80/20 fat ratio)
- 4 brioche buns
- 4 slices sharp cheddar cheese
- Butter for toasting
- Kosher salt and coarse black pepper
- Classic toppings: Lettuce, tomato, onion, pickles
How to make it
- Divide the cold ground beef into four equal portions and gently shape them into balls, then flatten them into patties that are slightly wider than your buns, as they will shrink during cooking.
- Use your thumb to create a small indentation in the center of each patty; this prevents the ‘burger bulge’ and ensures a flat surface for even topping distribution.
- Heat a cast-iron skillet over medium-high heat until it is smoking slightly, then season the patties generously with salt and pepper only right before they hit the pan.
- Place the patties in the hot skillet and press down firmly with a heavy spatula for the first 30 seconds to maximize contact and develop a deep brown crust; cook for 3-4 minutes on the first side.
- Flip the burgers and immediately place a slice of cheese on each; add a teaspoon of water to the pan and cover with a lid for 30 seconds—the steam will melt the cheese perfectly.
- Toast the buttered buns in a separate pan until golden brown and assemble your burgers on the board with all the fixings arranged nearby for a ‘build-your-own’ burger bar experience.
How to cook asian stirfry?

Why we love this
Asian stirfry is a high-energy dance of heat and flavor that results in a dish bursting with vitality. The vegetables retain a brilliant, jewel-like color and a crisp-tender snap, while the sauce—a glossy reduction of soy, ginger, and garlic—clings to every surface with an addictive savory-sweet balance. The aroma is intoxicating, with the nuttiness of sesame oil and the sharp bite of green onions cutting through the air. It’s a versatile masterpiece that looks stunning on a large platter, garnished with sesame seeds and fresh chilies, offering a healthy and fast way to feed a crowd.
Ingredients
- 1 lb thinly sliced protein (flank steak, chicken, or shrimp)
- 2 cups broccoli florets
- 1 red bell pepper, sliced
- 2 tbsp soy sauce
- 1 tbsp oyster sauce
- 1 tsp grated fresh ginger
- 2 cloves garlic, minced
- 1 tsp toasted sesame oil
How to make it
- Prepare all your ingredients beforehand (mise en place) because stir-frying happens extremely fast; once the heat is on, you won’t have time to chop.
- Whisk the soy sauce, oyster sauce, ginger, and garlic together in a small bowl to create your concentrated stir-fry base.
- Heat a wok or large heavy skillet over high heat with a tablespoon of neutral oil (like peanut or vegetable oil) until it starts to shimmer and wisps of smoke appear.
- Add the protein in a single layer and let it sear for 1-2 minutes without moving it to get a good char, then stir and cook until just barely done; remove from the pan and set aside.
- Add a little more oil if needed and toss in the vegetables, stir-frying constantly for 2-3 minutes until they are bright and crisp; add a splash of water if the pan gets too dry to create steam.
- Return the protein to the pan, pour the sauce over everything, and toss vigorously for 1 minute until the sauce thickens into a glaze that coats every piece evenly; finish with a drizzle of sesame oil for aroma.
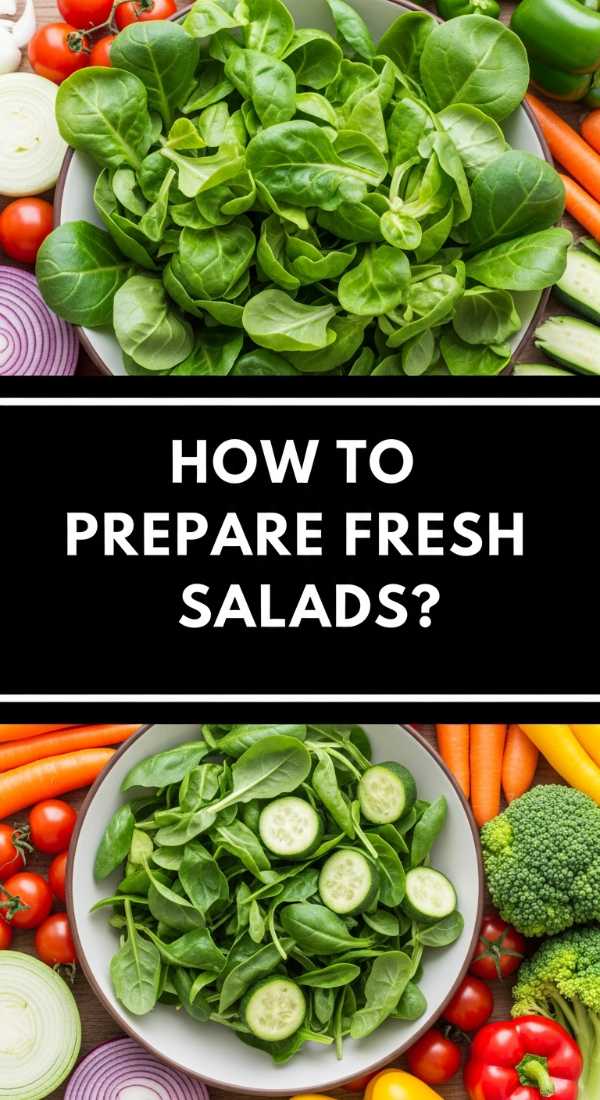
How to prepare fresh salads?
Why we love this
A fresh salad board is a celebration of seasonal abundance, moving far beyond the basic side dish into a main-event experience. It is all about the interplay of textures: the crispness of romaine, the creaminess of goat cheese, the snap of cucumbers, and the crunch of toasted nuts. The visual appeal is undeniable, with various greens, fruits, and vegetables arranged in ombre patterns or artistic clusters. Dressed with a zesty vinaigrette, each forkful is a refreshing burst of garden-fresh flavor that cleanses the palate and leaves you feeling light yet completely satisfied.
Ingredients
- 4 cups mixed baby greens or arugula
- 1 cup sliced strawberries or roasted beets
- 1/2 cup crumbled feta or goat cheese
- 1/4 cup candied walnuts or sunflower seeds
- 1 cucumber, thinly sliced
- Vinaigrette: 3 parts olive oil, 1 part balsamic vinegar, 1 tsp dijon mustard, honey
How to make it
- Start with a very large, flat board or platter to allow the ingredients space to ‘breathe’ rather than being crushed in a bowl.
- Wash and thoroughly dry your greens using a salad spinner; wet greens will prevent the dressing from adhering and lead to a soggy salad.
- Whisk your vinaigrette ingredients in a small jar until emulsified; keeping the dressing on the side in a small pitcher allows guests to control their own portions and keeps the board fresh longer.
- Layer the greens as a base, then arrange the heavier items like cucumbers and fruits in diagonal rows or aesthetic clusters across the surface.
- Scatter the cheese and nuts over the top at the very last minute to maintain their distinct textures and prevent the cheese from softening too much.
- Garnish with fresh herbs like mint or basil and serve immediately, encouraging guests to scoop their desired portions onto small plates.
How to make crispy bacon?

Why we love this
Crispy bacon is the ultimate salty indulgence, its smoky fragrance capable of drawing anyone into the kitchen from three rooms away. There is a specific satisfaction in the perfect snap—a crunch that gives way to a melt-in-your-mouth richness. When prepared correctly, the fat renders out beautifully, leaving behind translucent, mahogany-hued strips that are perfectly flat and ready for dipping into maple syrup or stacking on a breakfast board. It is the gold standard of comfort food, providing a savory counterpoint to everything from sweet pancakes to creamy avocado toast.
Ingredients
- 1 package thick-cut high-quality bacon
- Optional: Black pepper or a sprinkle of brown sugar for a ‘candied’ effect
How to make it
- The secret to perfectly flat, evenly cooked crispy bacon is using the oven rather than a stovetop skillet; preheat your oven to 400°F (200°C).
- Fit a wire cooling rack inside a large rimmed baking sheet; this allows the hot air to circulate around the bacon and the fat to drip away, ensuring maximum crispness on both sides.
- Lay the bacon strips across the rack in a single layer, ensuring they do not overlap, which would cause them to steam and become rubbery.
- Slide the tray into the oven and bake for 15-20 minutes; the exact timing will depend on the thickness of the cut, so start checking around the 12-minute mark.
- Look for a deep golden-brown color and a bubbling surface as your visual cues for doneness; the bacon will crisp up further as it cools.
- Transfer the strips to a paper-towel-lined plate for just one minute to remove excess oil, then move them to your serving board immediately to maintain that perfect crunch.
How to bake ground chicken?

Why we love this
Baked ground chicken is a versatile, lean protein that acts as a flavor sponge, making it an incredible addition to any healthy board. When seasoned well and baked, it develops a surprisingly tender texture that can be shaped into meatballs or flat patties. The subtle, savory aroma of toasted poultry seasoned with garlic and onion is light and inviting. It’s the perfect ‘blank canvas’ that can be dressed up with spicy buffalo sauce, tangy pesto, or a simple squeeze of lemon, making it an ideal choice for guests looking for a high-protein, low-fuss option that still feels gourmet.
Ingredients
- 1 lb ground chicken (preferably a mix of breast and thigh)
- 1/2 cup panko breadcrumbs
- 1 egg, lightly beaten
- 2 tbsp grated parmesan cheese
- 1 tsp garlic powder and 1 tsp onion powder
- Salt and pepper
How to make it
- Preheat your oven to 400°F (200°C) and lightly grease a baking sheet or line it with parchment paper to prevent sticking.
- In a large bowl, combine the ground chicken, breadcrumbs, egg, parmesan, and spices; mix gently with your hands or a fork just until combined, as overworking ground chicken can make it tough and rubbery.
- Shape the mixture into small, uniform 1-inch balls or small sliders; uniformity is key to ensuring they all finish cooking at the exact same time.
- Place the chicken on the prepared tray with about an inch of space between each piece to allow for browning.
- Bake for 15-18 minutes, or until the internal temperature reaches 165°F (74°C); the tops should be slightly firm to the touch and a light golden color.
- For a boost of flavor, brush them with a little glaze (like BBQ or Teriyaki) during the last 3 minutes of baking, then serve them on your board with toothpicks for easy grabbing.
How to cook easy dinners?

Why we love this
Easy dinners are the soul of the home; they are the meals that prove you don’t need hours of prep to create something deeply nourishing and visually stunning. This approach focuses on the ‘one-pan’ philosophy or the assembly of high-quality ingredients that require minimal intervention. The result is a relaxed kitchen environment where the cook is just as happy as the guests. Serving an entire ‘dinner’ on a board—perhaps some roasted sausages, a pile of charred veggies, and a dipping sauce—encourages a communal, family-style way of eating that turns a regular Tuesday into a special occasion.
Ingredients
- 1 lb pre-cooked sausages or rotisserie chicken
- 1 bag pre-cut roasting vegetables (carrots, potatoes, sprouts)
- 2 tbsp olive oil
- 1 tsp dried Italian herbs
- Dipping sauce of choice (honey mustard or aioli)
How to make it
- Embrace the power of the sheet pan: toss your vegetables in olive oil, salt, and herbs, and spread them in a single layer on a baking sheet.
- Roast the vegetables at 425°F (220°C) for 20-25 minutes until they are tender and have caramelized edges, which provides a deep, sweet flavor profile.
- During the last 10 minutes of roasting, add your sliced sausages or pre-cooked protein to the tray just to heat them through and let them mingle with the vegetable juices.
- While the main components roast, prepare a quick dipping sauce or set out a high-quality store-bought option to add a creamy element to the meal.
- Clear off a large wooden board and arrange the roasted components in mounds, keeping the colors varied for visual interest.
- Finish with a sprinkle of fresh parsley or a squeeze of lemon to brighten the flavors, and place the board in the center of the table for everyone to dig in together.
Conclusion
Mastering the viral board trend isn’t just about the food; it’s about the connection that happens when we gather around a beautiful, shared spread. From the crunch of perfectly baked bacon to the vibrant colors of a fresh salad, these recipes are designed to make hosting feel like a breeze and eating feel like an event. So, grab your favorite wooden board, pick a few of these subtopics, and start creating your own masterpiece. Your guests—and your social feed—will thank you!