
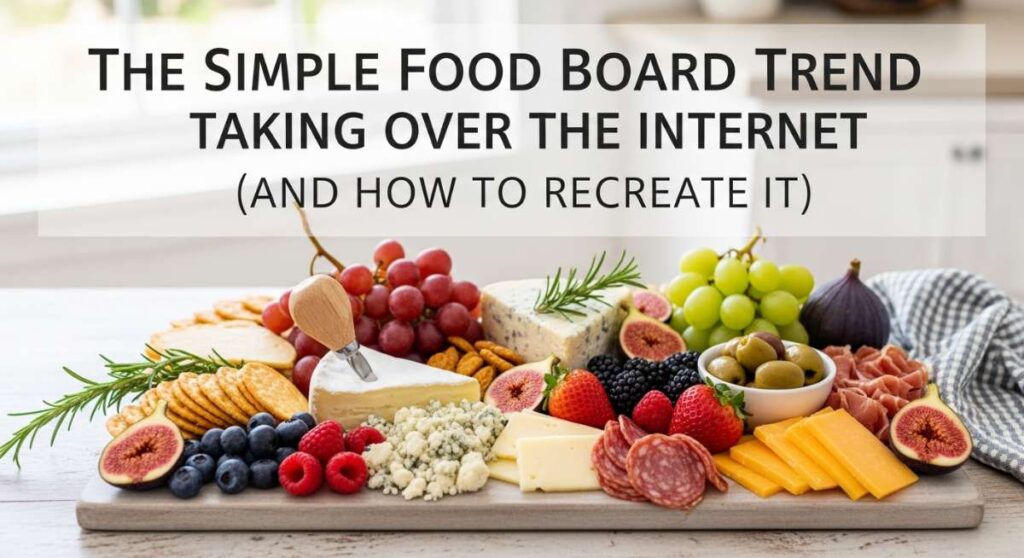
There is something inherently magical about gathering around a table filled with simple, beautiful foods. Lately, my social media feed has been a whirlwind of vibrant colors and rustic textures, all centered around a trend that is taking over the internet: the elevated food board. It is more than just a platter; it is an invitation to slow down, to savor each bite, and to find beauty in the everyday ritual of eating. Whether it is a sun-drenched afternoon in the backyard or a cozy evening indoors, these boards represent a return to tactile, shared experiences that feel both indulgent and grounded.
As a blogger, I have always believed that the best memories are made in the kitchen, and this trend perfectly captures that sentiment. I have spent the last few weeks experimenting with flavors that bridge the gap between childhood nostalgia and sophisticated gourmet palettes. From the tart snap of fresh rhubarb to the velvety smooth finish of a homemade pesto, these recipes are designed to be the centerpieces of your next gathering. Let’s dive into how you can recreate this viral aesthetic right in your own home with dishes that taste even better than they look.
Easy Professional Graduation Cake Guide
Why we love this
There is an undeniable sense of pride that comes with slicing into a towering, multi-layered cake that you crafted with your own two hands. This cake is the epitome of celebratory elegance, featuring a tight, tender crumb that smells faintly of high-quality Madagascar vanilla and sweet cream butter. As the knife glides through the silky Swiss meringue buttercream, you are met with a texture that is simultaneously light as air and incredibly rich. The visual of a clean, professional finish makes it the crowning jewel of any graduation spread, evoking a feeling of accomplishment and joy.
Ingredients
- 3 cups cake flour, sifted
- 2 cups granulated sugar
- 1.5 cups unsalted butter, room temperature
- 1 cup whole milk
- 4 large eggs
- 1 tbsp vanilla extract
- 1.5 tsp baking powder
- 0.5 tsp salt
- For Frosting: 5 egg whites, 1.5 cups sugar, 2 cups butter
How to make it
- Begin by preheating your oven to 350°F (175°C) and greasing three 8-inch round cake pans with butter and a light dusting of flour. For extra security, line the bottoms with parchment paper rounds.
- In a large stand mixer bowl, cream the softened butter and sugar on medium-high speed for at least 5 minutes. You are looking for a pale, fluffy consistency where the sugar granules have partially dissolved into the fats.
- Add the eggs one at a time, ensuring each is fully incorporated before adding the next. This prevents the batter from curdling. Stir in the vanilla extract at this stage for deep aromatic infusion.
- Whisk together your dry ingredients (flour, baking powder, salt). Alternately add the dry ingredients and the milk to the butter mixture, starting and ending with the flour. Mix on low speed just until no streaks of flour remain; over-mixing will result in a tough cake.
- Divide the batter evenly between the three pans. Use an offset spatula to smooth the tops. Bake for 28-32 minutes. Test for doneness by inserting a toothpick; it should come out clean or with a few moist crumbs.
- Cool the cakes in the pans for 10 minutes before transferring to wire racks to cool completely. For the best frosting experience, wrap the cooled layers in plastic wrap and chill in the fridge for two hours to firm up the crumb.
- Prepare the Swiss meringue buttercream by whisking egg whites and sugar over a double boiler until the sugar dissolves (160°F). Whip to stiff peaks, then slowly add cubes of butter until a smooth, velvety frosting forms. Frost the cake with a thin crumb coat first, chill for 20 minutes, then apply the final smooth layer.
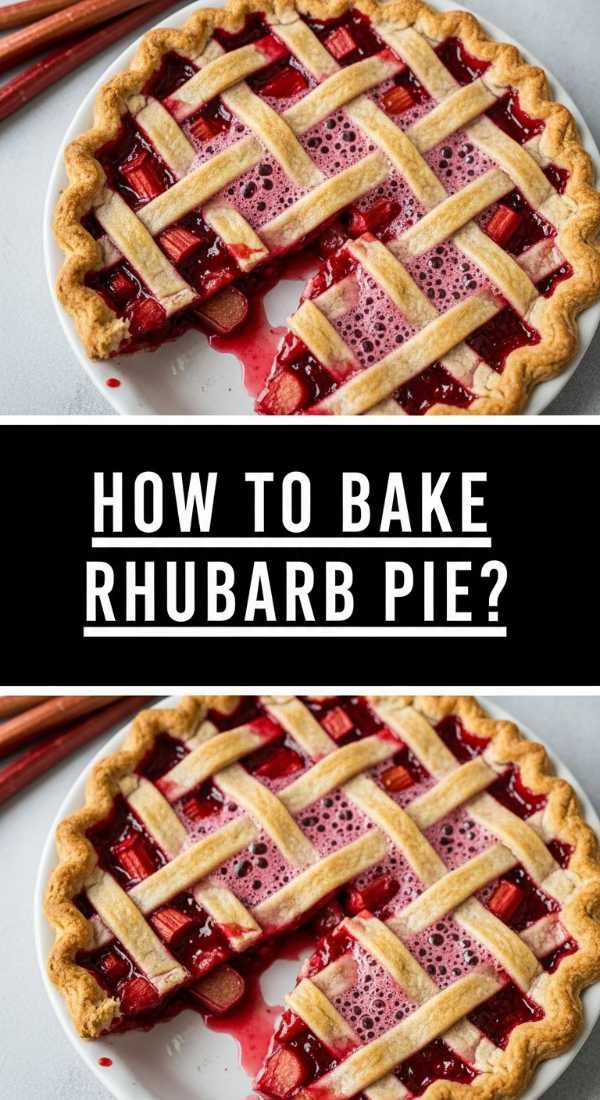
Homemade Strawberry Rhubarb Pie Recipe
Why we love this
This pie is a masterclass in the balance of flavors, where the aggressive tang of the rhubarb meets the jammy, honeyed sweetness of sun-ripened strawberries. When it emerges from the oven, the crust is a shimmering, golden-brown landscape of flaky layers that shatter satisfyingly under a fork. The aroma is intoxicating—a blend of warm cinnamon, buttery pastry, and bubbling fruit juices that fill the entire kitchen with a sense of rustic comfort. It is a dish that feels like a warm hug, perfectly capturing the transition from spring to summer in every bite.
Ingredients
- 2.5 cups all-purpose flour
- 1 cup cold unsalted butter, cubed
- 1 tsp salt
- 1 tsp sugar
- 6-8 tbsp ice water
- 3 cups sliced rhubarb
- 3 cups sliced strawberries
- 3/4 cup granulated sugar
- 1/4 cup cornstarch
- 1 tsp lemon zest
How to make it
- Prepare the crust by pulsing flour, salt, and 1 tsp sugar in a food processor. Add cold butter cubes and pulse until the mixture resembles coarse meal with some pea-sized bits of butter remaining.
- Drizzle in ice water one tablespoon at a time, pulsing until the dough just begins to clump together. Turn onto a floured surface, divide into two discs, wrap, and refrigerate for at least 1 hour.
- In a large mixing bowl, toss the rhubarb and strawberries with the 3/4 cup sugar, cornstarch, and lemon zest. Let this mixture sit for 15 minutes to allow the fruit to release its juices, which helps the cornstarch thicken into a glossy filling.
- Roll out the first dough disc to fit a 9-inch pie plate. Trim the edges to a 1/2 inch overhang. Pour the fruit filling into the bottom crust, including all the liquid.
- Roll out the second disc and cut into strips to create a lattice top, or place the whole sheet on top and cut several large steam vents. Crimp the edges tightly to seal.
- Brush the top with an egg wash (1 egg beaten with 1 tbsp water) and sprinkle with coarse sugar. Bake at 400°F for 20 minutes, then reduce heat to 375°F and bake for another 40-50 minutes until the crust is deep golden and the filling is bubbling thick.
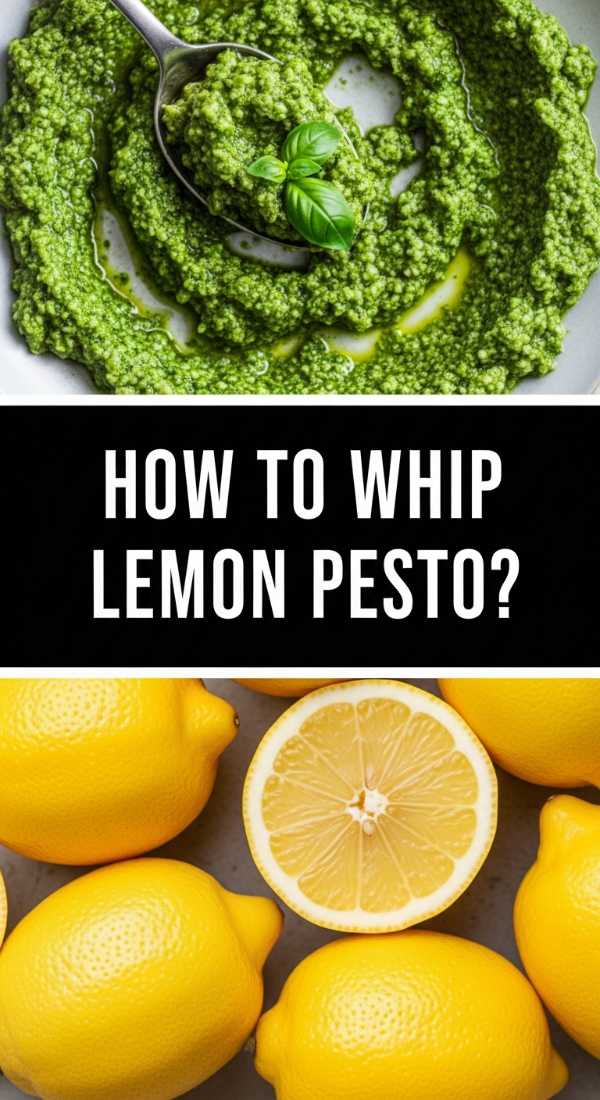
Zesty Lemon Pesto From Scratch

Why we love this
Forget the heavy, muted green jars from the store; this homemade lemon pesto is an explosion of brightness and vitality. The scent of freshly slapped basil leaves fills the air, mingling with the sharp, clean fragrance of lemon zest and the savory depth of toasted pine nuts. As you swirl it onto a board, its vibrant emerald hue acts as a visual anchor, promising a flavor profile that is both peppery and citrus-forward. The texture is wonderfully rustic, with small bits of nutty crunch suspended in a silky, high-quality olive oil that coats the palate beautifully.
Ingredients
- 2 cups fresh basil leaves, packed
- 1/2 cup freshly grated Parmesan cheese
- 1/3 cup pine nuts, lightly toasted
- 2 garlic cloves, minced
- 1/2 cup extra virgin olive oil
- Zest of 1 large lemon
- 2 tbsp lemon juice
- Salt and black pepper to taste
How to make it
- Begin by toasting your pine nuts in a dry skillet over medium-low heat. Shake the pan constantly for 3-5 minutes until they are golden brown and fragrant. Do not walk away, as they burn quickly. Let them cool completely.
- In a food processor, combine the fresh basil, toasted pine nuts, and garlic. Pulse several times until the ingredients are coarsely chopped.
- With the processor running on low, slowly drizzle in the extra virgin olive oil in a steady stream. This emulsification process is key to getting a creamy rather than oily texture.
- Add the grated Parmesan, lemon zest, and lemon juice. Pulse just a few more times to incorporate. You want to maintain a little bit of texture from the cheese and nuts.
- Taste the pesto and season with salt and freshly ground black pepper. If the pesto is too thick, add another tablespoon of olive oil. Store in a glass jar with a thin layer of oil on top to prevent oxidation (browning).
Creative Graduation Cupcake Ideas
Why we love this
Cupcakes are the ultimate canvas for celebration, and these graduation-themed treats bring a whimsical, personalized touch to your food board. Imagine a moist, chocolatey base topped with a mountain of silky buttercream that has been piped into perfect swirls. The contrast between the dark cake and the bright, festive decorations creates a stunning visual rhythm that draws the eye. These aren’t just desserts; they are miniature trophies that celebrate hard work and new beginnings, offering a delightful pop of sweetness that is easy for guests to grab and enjoy as they mingle.
Ingredients
- 24 pre-baked chocolate or vanilla cupcakes
- 1 batch vanilla buttercream frosting
- Ghirardelli chocolate squares (for caps)
- Mini peanut butter cups
- Sour belt candy or fruit leather (for tassels)
- M&Ms or small round candies
- Food coloring
How to make it
- Once your cupcakes are completely cool, tint your buttercream frosting to match the graduate’s school colors using gel food coloring, which provides vibrant hues without thinning the frosting.
- Fit a piping bag with a large open star tip (like a 1M). Pipe a tall, stable swirl onto each cupcake, starting from the outside edge and moving inward and upward.
- To assemble the graduation caps: Unwrap the mini peanut butter cups and place them upside down on top of the frosting swirl. This acts as the base of the hat.
- Apply a small dot of frosting to the bottom of a Ghirardelli chocolate square and press it firmly onto the peanut butter cup. This creates the flat mortarboard top.
- Cut thin strips from your sour belt candy or fruit leather to create tassels. Use a tiny dab of frosting to attach the tassel to the center of the chocolate square.
- Complete the look by placing an M&M or a small candy button on top of the tassel’s anchor point to hide the seam. Chill the cupcakes for 15 minutes to set the decorations before serving.
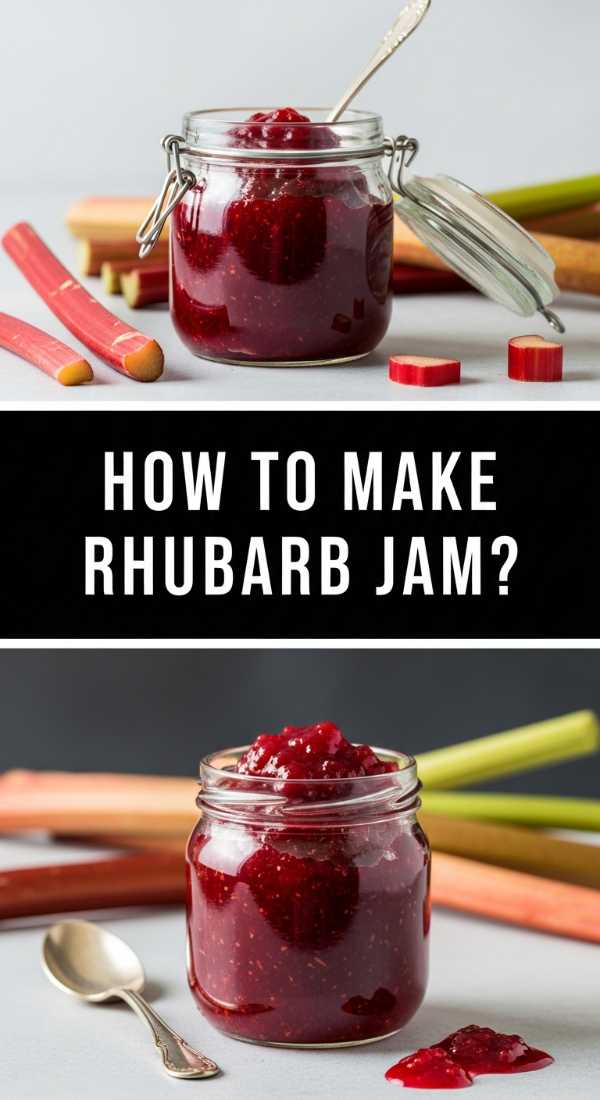
Small Batch Rhubarb Jam Tutorial

Why we love this
There is a specific, ruby-red brilliance to fresh rhubarb jam that feels like capturing spring in a jar. This small-batch recipe focuses on the fruit’s natural acidity, resulting in a spread that is intensely tangy and perfectly balanced by a delicate sweetness. The texture is thick and luscious, filled with softened bits of rhubarb that melt into warm toast or swirl beautifully into yogurt. The aroma of the simmering fruit is bright and sharp, a refreshing departure from the cloying sweetness of mass-produced jams, making it a sophisticated addition to any breakfast board.
Ingredients
- 4 cups rhubarb, chopped into 1/2 inch pieces
- 1.5 cups granulated sugar
- 2 tbsp lemon juice
- 1 tsp vanilla bean paste (optional)
- A pinch of salt
How to make it
- In a heavy-bottomed saucepan, combine the chopped rhubarb, sugar, and lemon juice. Stir well and let the mixture sit for 30-60 minutes at room temperature. This maceration process draws out the moisture and creates a natural syrup.
- Place the pan over medium heat and bring the mixture to a boil, stirring frequently with a wooden spoon to prevent the sugar from scorching on the bottom.
- Once boiling, reduce the heat to medium-low. Simmer the jam for 20-25 minutes. As it cooks, the rhubarb will break down and the liquid will thicken and turn a deep, vibrant pink.
- To test for the gel point, place a small plate in the freezer for 5 minutes. Drop a spoonful of jam onto the cold plate, wait 30 seconds, and push it with your finger. If it wrinkles, it is ready.
- Stir in the vanilla bean paste and salt during the last minute of cooking. The salt enhances the fruit flavors, while the vanilla adds a floral depth.
- Remove from heat and let cool for 10 minutes before transferring to clean glass jars. The jam will continue to thicken as it cools completely in the refrigerator.
Aesthetic Summer Sugar Cookies Decorating

Why we love this
These summer sugar cookies are as much a treat for the eyes as they are for the taste buds. With their clean, crisp edges and soft, buttery centers, they provide the perfect foundation for artistic expression. We love the way the smooth royal icing creates a porcelain-like finish that can be transformed into sun-kissed citrus slices, tropical leaves, or minimalist abstract designs. The sound of the icing “snap” when you take a bite, followed by the sweet, melt-in-your-mouth cookie, creates a sensory experience that feels like a boutique bakery find in your own kitchen.
Ingredients
- 1 batch of chilled sugar cookie dough
- 4 cups powdered sugar
- 3 tbsp meringue powder
- 5-7 tbsp warm water
- Gel food coloring (pastel tones recommended)
- Scribe tool or toothpick
How to make it
- Roll out your chilled dough to a consistent 1/4 inch thickness. Use summer-themed cutters (sun, flowers, or simple circles) and bake according to recipe instructions. Ensure cookies are completely cold before decorating.
- Make the royal icing by whisking powdered sugar, meringue powder, and 5 tbsp of water. Whip on medium speed for 7-10 minutes until stiff peaks form. This is your “piping” consistency for outlines.
- Thin out portions of the icing with tiny drops of water until it reaches a “15-second consistency” (where a line drawn in the icing disappears in 15 seconds). This is your “flooding” icing.
- Outline the edge of the cookie with the stiff icing using a small round tip. Immediately fill the center with the corresponding flood icing.
- Use a scribe tool or toothpick to pop any tiny air bubbles and to move the icing into the corners. Let this base layer dry for at least 4 hours, or ideally overnight, until it is hard to the touch.
- Once the base is dry, use the stiff piping icing to add details like citrus segments, flower petals, or delicate dots. This layering adds dimension and that “professional” aesthetic.
Gourmet Homemade Spice Blends Guide

Why we love this
There is a profound difference between store-bought ground spices and a gourmet blend you have toasted and ground yourself. These blends are the secret weapon of the kitchen, offering an aromatic intensity that can transform a simple roasted vegetable or a piece of grilled protein into a masterpiece. The smell of toasted cumin, coriander, and peppercorns filling the air is earthy and complex, signaling a meal that is prepared with intention. Each jar is a concentrated burst of flavor, providing a customizable way to bring global inspirations to your daily cooking.
Ingredients
- Whole cumin seeds
- Whole coriander seeds
- Black peppercorns
- Smoked paprika
- Dried oregano
- Granulated garlic and onion
- Coarse sea salt
How to make it
- Select the whole spices you wish to use (like cumin and coriander). Place them in a dry skillet over medium heat. Toast for 2-4 minutes, tossing frequently, until they release a strong, toasted aroma and turn a shade darker.
- Remove the spices from the heat immediately to prevent burning. Let them cool for a few minutes.
- Transfer the toasted whole spices to a spice grinder or a clean coffee grinder. Pulse until you reach your desired texture—some prefer a fine powder, while others like a coarser, rustic grind.
- In a small bowl, mix your freshly ground spices with pre-ground ingredients like smoked paprika, garlic powder, and sea salt. Using a whisk ensures the fine powders are evenly distributed among the larger grains.
- Store your custom blends in small, airtight glass jars away from direct sunlight. Freshly ground spices maintain their peak potency for about 3-6 months. Label them with the date and the specific flavor profile (e.g., “Smoky Mediterranean” or “Toasted Taco”).
Barista Style Fun Coffee Drinks
Why we love this
A beautifully crafted coffee drink is the ultimate morning luxury, turning a routine caffeine fix into a cafe-style ritual. We love the visual of dark, rich espresso marbling through creamy milk, topped with a cloud of micro-foam that holds its shape. The contrast between the bitter chocolate notes of the coffee and the silky sweetness of a homemade syrup is intoxicating. Holding a warm glass or an ice-cold tumbler that looks like it came from a high-end coffee shop provides a moment of peace and indulgence before the day begins.
Ingredients
- 2 shots of high-quality espresso or 1/2 cup strong cold brew concentrate
- 1 cup milk of choice (oat milk froths exceptionally well)
- 1 tbsp vanilla or salted caramel syrup
- Ice cubes (for cold versions)
- Cinnamon or cocoa powder for dusting
How to make it
- For a hot latte: Pull two fresh shots of espresso into a tall glass. If you don’t have an espresso machine, use a moka pot or very strongly brewed coffee.
- Heat your milk to roughly 150°F (65°C). Use a handheld milk frother or a steam wand to create micro-foam. The goal is small, uniform bubbles that look like wet paint, rather than large, soapy bubbles.
- Stir your flavored syrup into the hot coffee. Pour the steamed milk slowly over the coffee, holding back the thickest foam with a spoon until the very end, then dollop it on top.
- For an iced version: Fill a glass with large ice cubes. Add your syrup and then pour in the cold milk, leaving about two inches of space at the top.
- Pour the espresso or cold brew concentrate slowly over the ice. The difference in temperature and density will create a beautiful layered or “marbled” effect that looks incredible in photos.
- Top with a light dusting of cinnamon or a drizzle of extra syrup for that final barista-level aesthetic.
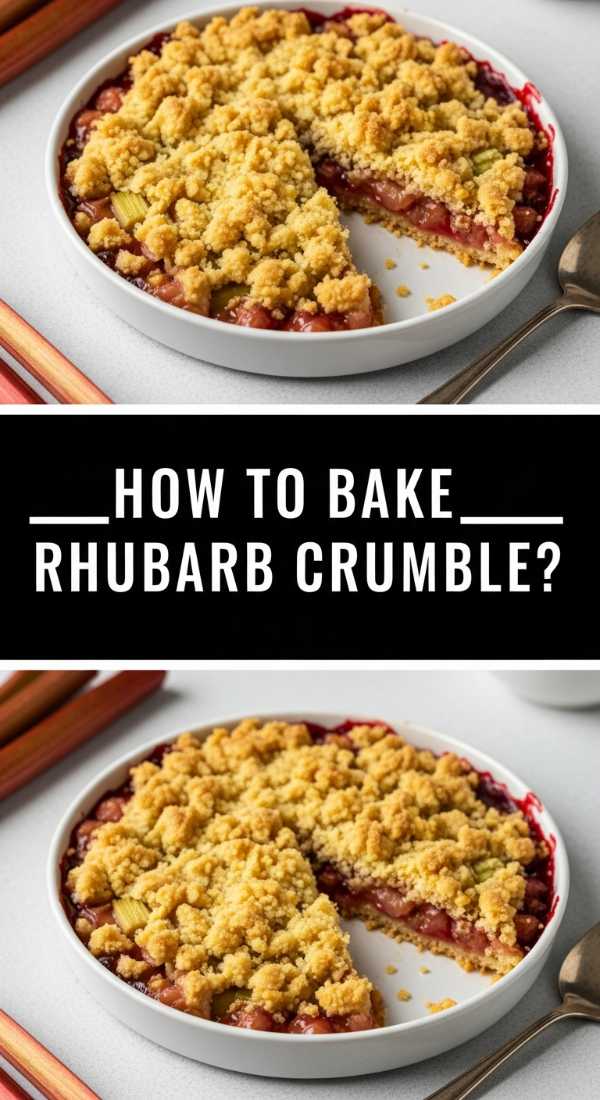
Classic Rhubarb Crumble with Oats
Why we love this
The classic rhubarb crumble is the ultimate comfort dessert, celebrated for the dramatic contrast between its textures. On top, you have a rugged, buttery landscape of toasted oats and brown sugar that provides a satisfying, crunchy resistance. Beneath that layer lies a vibrant, molten sea of softened rhubarb, which has broken down into a tart, silky compote. It is the kind of dish that is best served warm, where the heat of the fruit begins to melt a scoop of vanilla ice cream into a creamy sauce that flows into every nook and cranny of the oat topping.
Ingredients
- 6 cups rhubarb, cut into 1-inch pieces
- 3/4 cup granulated sugar
- 1 tbsp orange zest
- 1 cup old-fashioned rolled oats
- 1 cup all-purpose flour
- 1 cup brown sugar, packed
- 1/2 cup unsalted butter, cold and cubed
- 1 tsp cinnamon
How to make it
- Preheat your oven to 375°F (190°C). In a 9×9 inch baking dish, toss the fresh rhubarb with the granulated sugar and orange zest. Spread the fruit in an even layer; the orange zest is a secret ingredient that perfectly complements the rhubarb’s acidity.
- In a medium bowl, combine the oats, flour, brown sugar, and cinnamon. Whisk them together to ensure the cinnamon is evenly distributed.
- Add the cold, cubed butter to the dry mixture. Use a pastry cutter or your fingertips to work the butter into the oats until the mixture looks like coarse crumbs with some larger, pea-sized clumps. This variety in size creates a better texture.
- Sprinkle the crumble mixture evenly over the rhubarb. Do not press it down; you want it to remain loose so the heat can circulate and crisp up the oats.
- Bake for 35-45 minutes. You are looking for two visual cues: the fruit filling should be bubbling vigorously around the edges, and the oat topping should be a deep, golden brown.
- Let the crumble rest for at least 15 minutes before serving. This allows the juices to thicken slightly, ensuring every scoop has the perfect ratio of fruit to crunch.
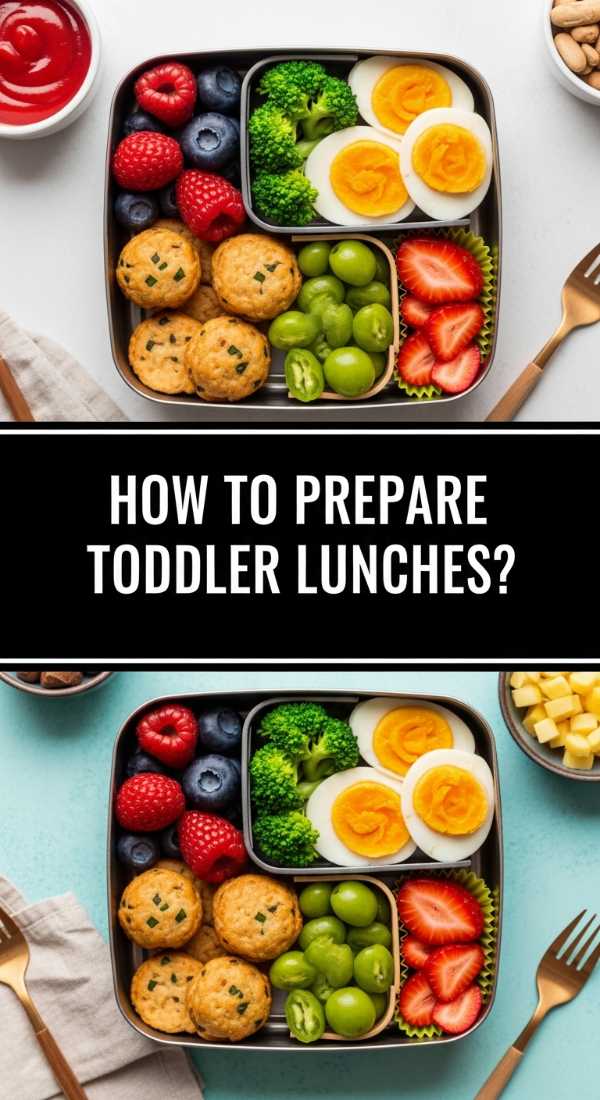
Healthy Toddler Lunch Meal Prep
[IMAGE_10]
Why we love this
Meal prepping for a toddler is about creating a rainbow on a plate, where variety and nutrition meet convenience. We love this approach because it turns a potentially stressful midday rush into a calm, organized experience. By focusing on bite-sized, colorful components like crisp cucumbers, sweet berries, and savory protein, you’re not just feeding a child; you’re encouraging sensory exploration and healthy habits. There is a deep satisfaction in seeing a perfectly partitioned box filled with fresh, whole foods that you know will fuel your little one’s afternoon adventures.
Ingredients
- Mini whole-wheat pita pockets or crackers
- Turkey or ham slices, rolled up
- Cheddar cheese cubes or strings
- Cucumber slices or baby carrots
- Fresh berries or sliced grapes
- Hummus or Greek yogurt dip
- Hard-boiled eggs (optional)
How to make it
- Dedicate 30 minutes on a Sunday to prep all your components. Wash and dry all fruit and vegetables thoroughly to prevent them from becoming soggy in the fridge.
- Slice cucumbers into fun shapes using a small crinkle cutter, and halve grapes vertically (never horizontally) to ensure they are safe for small children.
- Roll deli meats tightly and secure them with a small piece of cheese or simply place them seam-side down in the container to keep them tidy.
- Use bento-style lunch boxes with built-in dividers. This prevents “food touching” (a common toddler hurdle) and keeps the crackers or pitas from getting damp from the fruit.
- Place a small dollop of hummus or yogurt in a leak-proof center container. This encourages dipping, which is a great way for toddlers to engage with their vegetables.
- Assemble 3-4 boxes at once. Store them at the eye-level of your refrigerator so they are ready to grab. Use within 3 days for maximum freshness and texture.
The Art of the Simple Food Board
Bringing these elements together is more than just following a recipe; it’s about creating a moment of connection. Whether you are celebrating a big milestone like a graduation or simply making it through a busy weekday with a toddler, the way we present our food reflects the care we put into our lives. These simple boards invite us to linger a little longer at the table, to share stories over a slice of pie, and to find joy in the vibrant colors of a fresh pesto. I hope these guides inspire you to create your own edible masterpieces and share the warmth of your kitchen with those you love.