
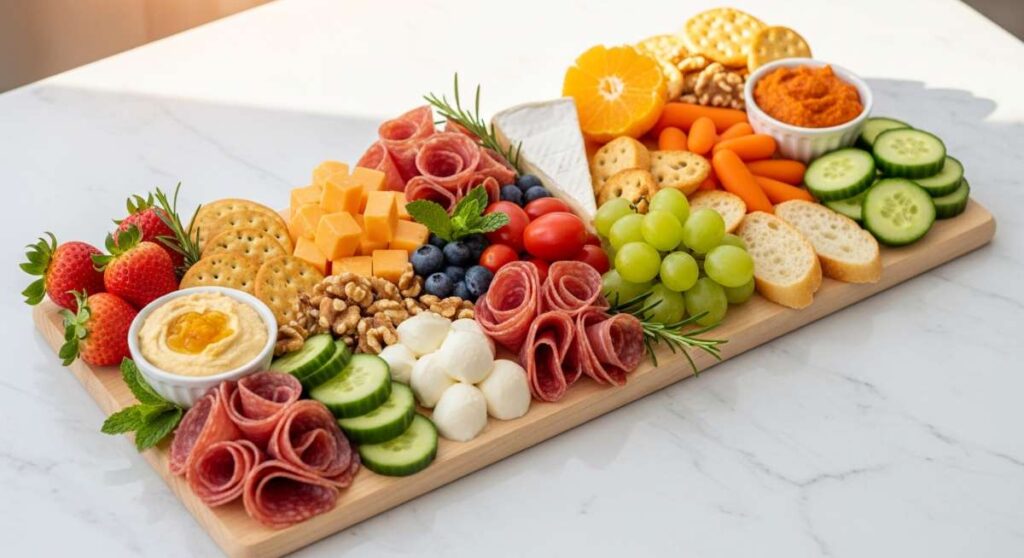
10-Minute Magic: The Viral Simple Food Board for Every Occasion
There is something truly magical about the way food brings us together, especially during those milestone seasons that feel like they are passing by in the blink of an eye. Whether you are celebrating a graduation, hosting a spring brunch, or just trying to survive a busy weekday, the secret to effortless entertaining is what I call the ‘Viral Simple Food Board.’ It is not just about the food; it is about creating a visual centerpiece that invites your loved ones to linger a little longer and share stories over bites of something delicious.
I remember the first time I set out a spread like this—the tension in the room just melted away. There is no pressure of a formal sit-down meal, just a beautiful, colorful array of textures and flavors that cater to every whim. From the tart pop of fresh rhubarb to the celebratory sweetness of graduation treats, this board is designed to be a living, breathing part of your home. It’s about making the ordinary feel extraordinary with just a few clever techniques and a lot of heart.
Today, I am sharing the ultimate guide to the components that make this board a viral sensation. We are diving deep into seasonal favorites and celebratory staples that will make your next gathering unforgettable. Grab a cup of coffee, and let’s get into the kitchen!
How to bake stunning graduation cakes
Why we love this
There is nothing quite like the sight of a towering, perfectly crumbed cake to signal a momentous achievement. The aroma of Madagascar vanilla bean and whipped butter fills the kitchen, creating an atmosphere of pure celebration. When you slice into it, the texture is velvety and moist, yielding effortlessly to the fork, while the subtle sweetness lingers on the palate, making every bite feel like a golden memory in the making. It is the ultimate centerpiece that demands attention and rewards everyone with a taste of pure joy.
Ingredients
- 2 1/2 cups cake flour, sifted
- 1 1/2 cups granulated sugar
- 1 cup unsalted butter, room temperature
- 4 large eggs
- 1 cup whole milk
- 1 tbsp vanilla extract
- 2 1/2 tsp baking powder
- 1/2 tsp salt
How to make it
- Begin by preheating your oven to 350°F (175°C) and generously greasing two 8-inch round cake pans with butter and a dusting of flour to ensure a clean release.
- In a large mixing bowl, cream the softened butter and sugar together using a stand mixer fitted with a paddle attachment on medium-high speed for at least 5 minutes until the mixture is pale, light, and exceptionally fluffy.
- Add the eggs one at a time, beating well after each addition and scraping down the sides of the bowl to ensure a homogenous emulsion of fats and liquids.
- Sift together the cake flour, baking powder, and salt; then, alternate adding the dry ingredients and the milk to the butter mixture, starting and ending with the flour to prevent the batter from curdling.
- Divide the batter evenly between the prepared pans and bake for 30-35 minutes, or until a wooden skewer inserted into the center comes out clean with just a few moist crumbs attached.
- Cool the cakes in their pans for 10 minutes before inverting them onto a wire rack to cool completely, which prevents the steam from making the base soggy.
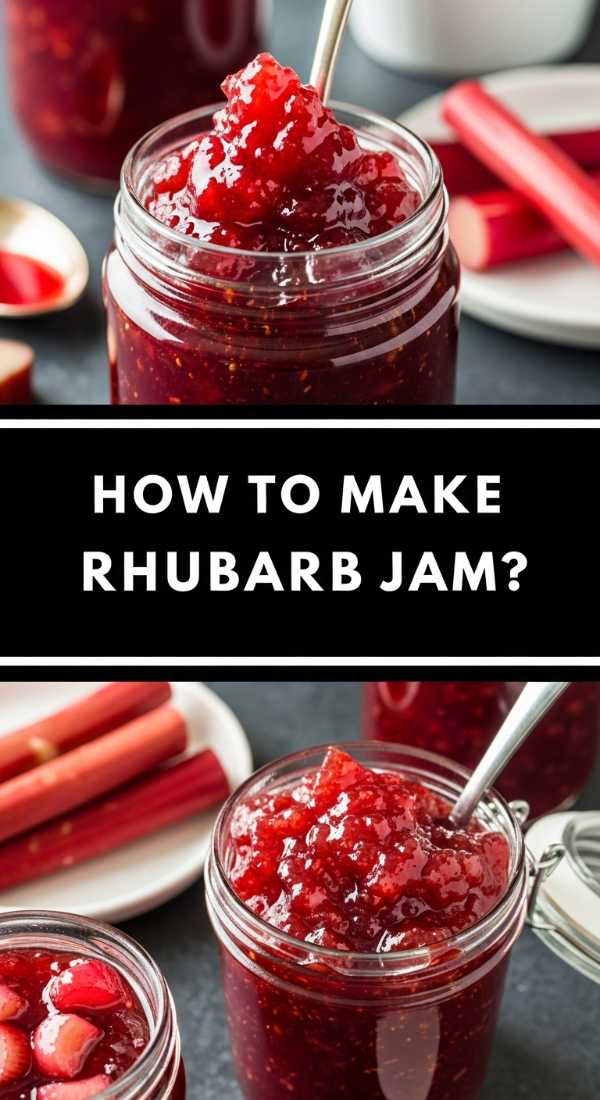
How to make homemade rhubarb jam

Why we love this
This jam captures the very essence of spring in a jar, offering a brilliant ruby-red hue that glows against a piece of toasted sourdough. The flavor profile is a sophisticated dance between the assertive, lip-puckering tartness of the rhubarb and the smooth, mellow sweetness of pure cane sugar. As it simmers, the kitchen is enveloped in a bright, botanical scent that feels both nostalgic and refreshing, resulting in a thick, spreadable treasure that adds a gourmet touch to any food board.
Ingredients
- 4 cups fresh rhubarb, chopped into 1/2-inch pieces
- 1 1/2 cups granulated sugar
- 2 tbsp lemon juice
- 1 tsp lemon zest
- 1/2 tsp vanilla paste
How to make it
- Combine the chopped rhubarb and sugar in a heavy-bottomed stainless steel saucepan and let it sit for about 30 minutes to allow the sugar to macerate the fruit and draw out its natural juices.
- Place the saucepan over medium heat and bring the mixture to a gentle boil, stirring frequently with a wooden spoon to prevent the sugar from scorching on the bottom.
- Add the lemon juice and zest, which provides the necessary acidity to help the natural pectins in the rhubarb set the jam.
- Reduce the heat to low and simmer the mixture for 20-25 minutes, stirring occasionally, until the rhubarb has completely broken down and the liquid has thickened to a glossy, syrupy consistency.
- To test the set, place a small spoonful of jam on a chilled plate; if it wrinkles when pushed with your finger, it is ready.
- Stir in the vanilla paste at the very end to preserve its delicate floral aroma, then transfer to sterilized glass jars and cool.
How to decorate graduation cupcakes
Why we love this
Cupcakes are the playful, handheld cousins of the grand celebration cake, offering a personalized touch for every guest. We love the contrast between the tender, airy sponge and the rich, silken swirls of buttercream that sit atop them like edible crowns. The visual appeal of meticulously placed sprinkles and miniature mortarboard toppers creates an instant festive vibe, while the first bite delivers a satisfying explosion of cream and cake that makes everyone feel like a guest of honor.
Ingredients
- 12 pre-baked vanilla or chocolate cupcakes
- 2 cups stiff vanilla buttercream frosting
- Black fondant or small chocolate squares
- Sour belt candies or fruit leather
- Gold star sprinkles
- Piping bag and a large star tip
How to make it
- Fit your piping bag with a large open star tip and fill it with your stiff buttercream, ensuring there are no air bubbles trapped inside by squeezing a small amount out first.
- Starting from the outer edge of the cupcake, pipe a continuous spiral moving inward and upward to create a high, professional-looking swirl that provides a stable base for decorations.
- To create the ‘cap,’ place a small square of dark chocolate or a flat piece of black fondant directly onto the peak of the frosting swirl.
- Cut thin strips of sour belt candy to act as the ‘tassel’ and attach one end to the center of the chocolate square using a tiny dot of frosting as glue.
- Finish by placing a gold star sprinkle or a small round candy in the center of the chocolate square to cover the tassel attachment point.
- Chill the cupcakes for 15 minutes before serving to help the decorations set firmly into the frosting.
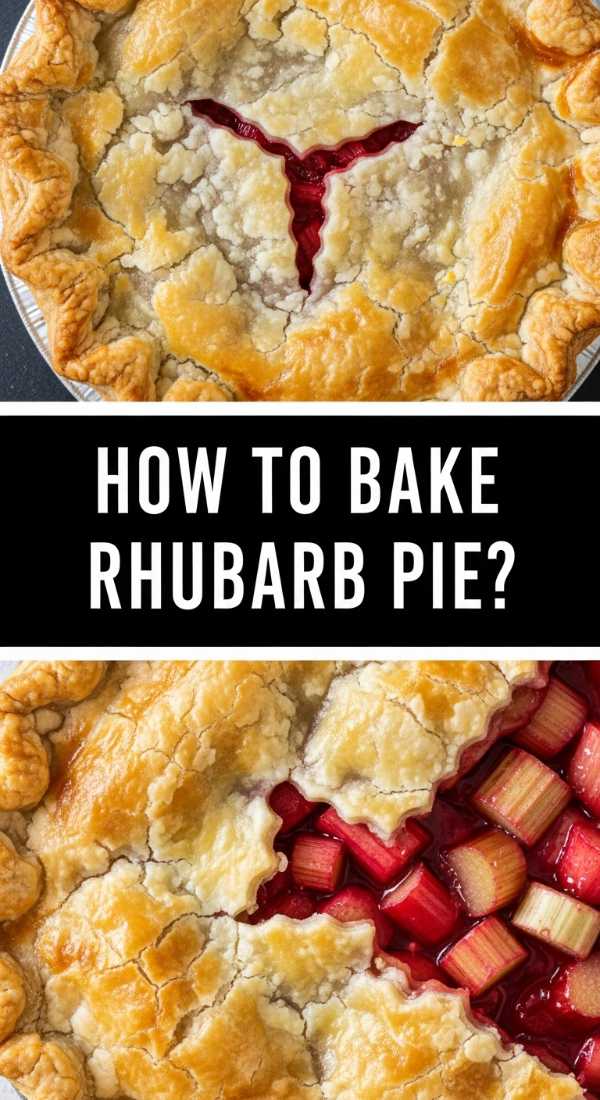
How to bake rhubarb custard pie

Why we love this
There is a rustic elegance to a rhubarb custard pie that is simply unmatched, combining a flaky, buttery crust with a filling that is simultaneously creamy and sharp. The custard acts as a velvety canvas for the vibrant stalks of rhubarb, which soften into jammy pockets of flavor during the baking process. Every slice offers a delightful sensory contrast—the crunch of the golden crust, the silkiness of the egg custard, and the refreshing zing of the fruit—making it a sophisticated centerpiece for any dessert board.
Ingredients
- 1 unbaked 9-inch pie crust
- 3 cups fresh rhubarb, sliced
- 3 large eggs
- 1 1/4 cups granulated sugar
- 1/2 cup heavy cream
- 3 tbsp all-purpose flour
- 1/2 tsp ground nutmeg
How to make it
- Preheat your oven to 400°F (200°C) and fit your chilled pie crust into a deep-dish pie plate, crimping the edges for a decorative finish.
- In a medium bowl, whisk together the eggs, sugar, heavy cream, flour, and nutmeg until the mixture is perfectly smooth and the sugar has mostly dissolved.
- Arrange the sliced rhubarb evenly across the bottom of the pie crust, ensuring the pieces are spread out to allow the custard to flow between them.
- Slowly pour the custard mixture over the rhubarb, using a spoon to gently nudge the fruit so it is fully submerged and the custard reaches all the edges.
- Bake at 400°F for the first 10 minutes to set the crust, then reduce the oven temperature to 350°F (175°C) and continue baking for another 35-40 minutes.
- The pie is done when the custard is set around the edges but still has a slight, gentle jiggle in the center; cool completely on a wire rack to allow the custard to firm up before slicing.
How to brew fun coffee drinks
Why we love this
Coffee is the heartbeat of any gathering, providing that much-needed caffeine kick wrapped in a blanket of comfort. We love the theater of creating layered coffee drinks, where the dark, rich espresso meets the cloud-like froth of steamed milk and a drizzle of artisanal syrup. The aroma of freshly ground beans is an instant mood-booster, and the warmth of the mug in your hands creates a cozy, inviting atmosphere that encourages guests to settle in and stay for a while.
Ingredients
- 2 shots of strong espresso or 1/2 cup cold brew concentrate
- 1 cup whole milk or oat milk
- 2 tbsp flavored syrup (vanilla, lavender, or salted caramel)
- Ice cubes (for cold drinks)
- Whipped cream and cinnamon for garnish
How to make it
- For a layered iced latte, fill a tall glass with large ice cubes and pour in your choice of flavored syrup first, followed by the cold milk, leaving about two inches of space at the top.
- Slowly pour the espresso or cold brew concentrate over the back of a spoon onto the milk; the difference in density will create a beautiful, Instagram-worthy layered effect.
- For a hot drink, steam the milk using a frothing wand or by shaking it in a jar and microwaving it until it creates a thick, stable foam.
- Brew your espresso directly into a warmed mug and stir in the syrup to ensure even distribution of sweetness.
- Gently pour the steamed milk into the coffee, holding back the foam with a spoon, and then top with the remaining froth.
- Finish with a flourish of whipped cream and a light dusting of cinnamon or cocoa powder for a professional coffee-shop look.
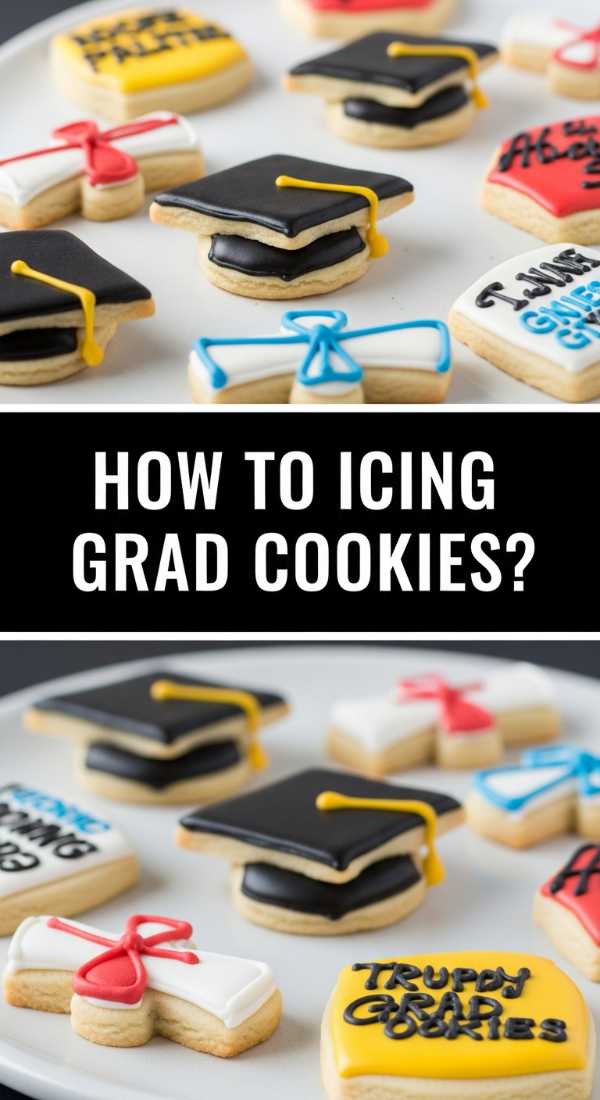
How to ice graduation cookies
Why we love this
Icing graduation cookies is an art form that transforms a simple sugar cookie into a miniature canvas of celebration. The smooth, glass-like finish of royal icing provides a satisfying snap when you bite into it, giving way to the soft, buttery cookie underneath. We love the precision of the lines and the vibrant colors that can be customized to match any school’s palette, turning the food board into a personalized tribute to the graduate’s hard work and bright future.
Ingredients
- Batch of baked sugar cookies (caps, diplomas, stars)
- 4 cups powdered sugar
- 3 tbsp meringue powder
- 1/2 cup warm water
- Gel food coloring
- Fine-tip piping bags
How to make it
- In a stand mixer, combine the powdered sugar, meringue powder, and water, beating on low speed for 7-10 minutes until the icing is stiff and forms peaks.
- Divide the icing into separate bowls and add gel food coloring drop by drop until you achieve the desired school colors, keeping in mind that the color will darken slightly as it dries.
- Transfer a portion of the icing to a piping bag with a tiny round tip; this will be your ‘outline’ icing, which should be the consistency of toothpaste.
- Pipe the border around the edge of each cookie and let it dry for 5 minutes to create a dam that will hold the thinner icing.
- Thin out the remaining icing with a few drops of water until it reaches ‘flood’ consistency (like thick syrup) and use it to fill in the centers of the outlined cookies.
- Use a toothpick to pop any air bubbles and drag the icing into the corners, then let the cookies dry undisturbed for at least 12 hours for a hard, glossy finish.
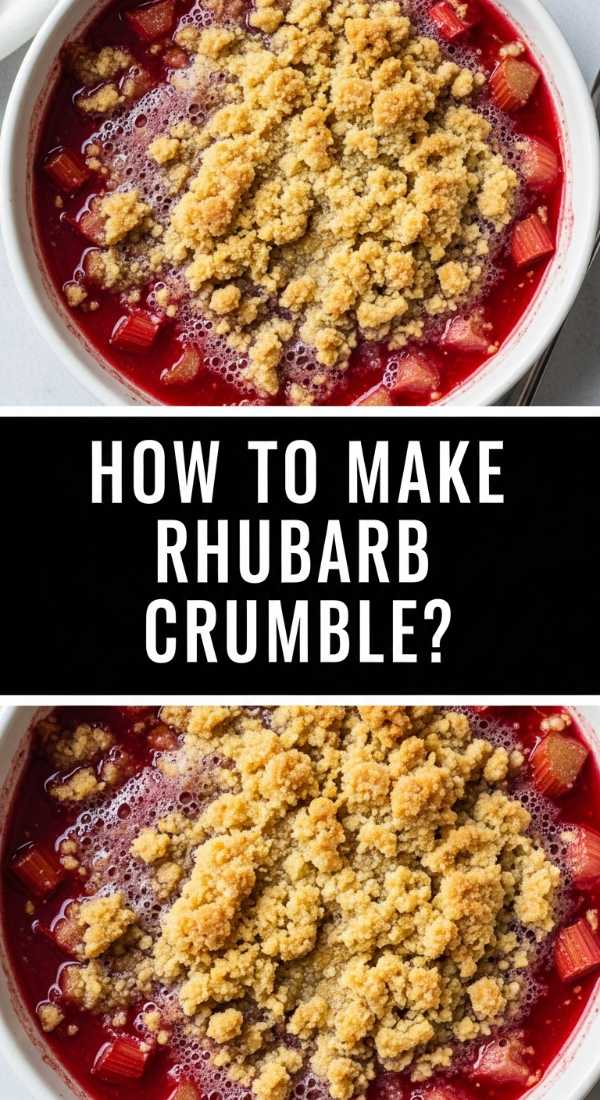
How to make rhubarb crumble
Why we love this
Rhubarb crumble is the ultimate comfort food, offering a symphony of textures that delight the senses. The bubbling, tart fruit base creates a warm, magenta-hued sauce that contrasts beautifully with the golden, buttery crunch of the oat-filled topping. As it bakes, the scent of toasted grains and cinnamon wafts through the house, promising a dessert that is as wholesome as it is indulgent, especially when topped with a melting scoop of cold vanilla bean ice cream.
Ingredients
- 5 cups fresh rhubarb, cut into chunks
- 3/4 cup granulated sugar
- 1 cup old-fashioned oats
- 1 cup all-purpose flour
- 1 cup packed brown sugar
- 1/2 cup cold unsalted butter, cubed
- 1 tsp ground cinnamon
How to make it
- Toss the chopped rhubarb with the granulated sugar in a 9×9 inch baking dish, spreading it out into an even layer to ensure consistent cooking.
- In a separate mixing bowl, combine the oats, flour, brown sugar, and cinnamon, whisking them together to break up any large clumps of sugar.
- Add the cold, cubed butter to the dry mixture and use a pastry cutter or your fingertips to rub the butter into the oats until the mixture resembles coarse, pea-sized crumbs.
- Sprinkle the crumble mixture evenly over the rhubarb, making sure not to pack it down, as you want air to circulate for maximum crispiness.
- Bake in a preheated oven at 375°F (190°C) for 35-40 minutes, or until the fruit juices are bubbling vigorously around the edges and the topping is a deep golden brown.
- Allow the crumble to sit for 10 minutes before serving; this allows the fruit juices to thicken slightly so they don’t run all over the plate.
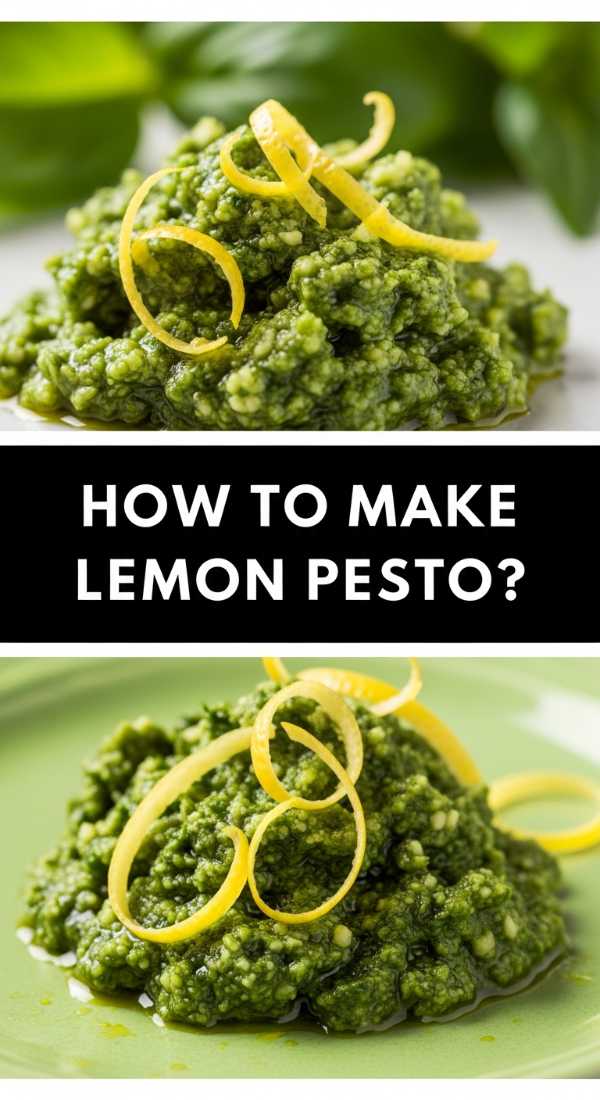
How to prepare lemon pesto
Why we love this
Lemon pesto is a bright, zesty reimagining of the classic basil sauce, bringing a sun-drenched Mediterranean feel to your food board. The fragrance of fresh lemon zest combined with the peppery bite of basil and the richness of toasted pine nuts creates an olfactory experience that is incredibly invigorating. Its vibrant green color and explosive citrus flavor make it the perfect dip for crusty bread or a dressing for fresh vegetables, adding a sophisticated pop of acidity to the spread.
Ingredients
- 2 cups fresh basil leaves, packed
- 1/2 cup freshly grated Parmesan cheese
- 1/3 cup toasted pine nuts
- 2 large cloves garlic
- 1/2 cup extra virgin olive oil
- Zest and juice of 1 large lemon
- Salt and pepper to taste
How to make it
- Place the fresh basil, toasted pine nuts, and garlic cloves into a food processor and pulse several times until the ingredients are coarsely chopped.
- Add the lemon zest and half of the lemon juice to the processor, which will help preserve the bright green color of the basil and provide an immediate flavor base.
- With the processor running on low, slowly drizzle in the extra virgin olive oil in a steady stream to emulsify the sauce into a smooth yet slightly textured paste.
- Stop the processor and fold in the grated Parmesan cheese by hand or with a quick pulse to maintain some of the cheese’s texture.
- Taste the pesto and add more lemon juice, salt, or pepper as needed, ensuring the acidity balances the richness of the oil and nuts.
- Store in a glass jar with a thin layer of olive oil on top to prevent oxidation, and serve at room temperature for the best flavor profile.
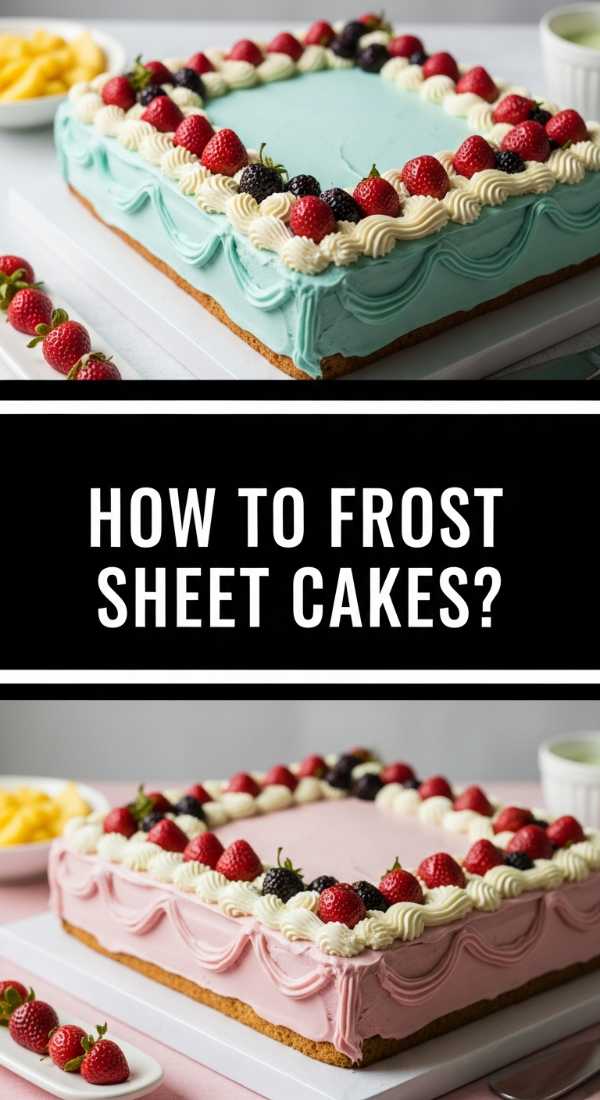
How to frost graduation sheet cakes

Why we love this
The sheet cake is the unsung hero of large celebrations, providing a massive, delicious canvas that can feed a whole crowd with ease. We love the satisfying process of gliding a palette knife over the surface, creating smooth, clean plains of frosting that are ready for decoration. It is a nostalgic staple that feels generous and communal, and when frosted with a rich, silky buttercream, it becomes a decadent treat that brings everyone together for a shared moment of celebration.
Ingredients
- 1 baked 9×13 inch sheet cake, cooled
- 4 cups vanilla or chocolate buttercream
- Offset spatula
- Graduation-themed sprinkles
- Piping bag with a round tip for writing
How to make it
- Ensure your sheet cake is completely cool to the touch, as any residual warmth will melt the fats in the buttercream and cause the frosting to slide off.
- Place a large dollop of frosting in the center of the cake and use an offset spatula to spread it outward toward the edges in long, sweeping motions.
- To achieve a perfectly smooth top, dip your spatula in warm water, wipe it dry, and lightly run it across the surface of the frosting to melt the very top layer into a glass-like finish.
- Fit a piping bag with a small round tip and fill it with a contrasting color of frosting to write ‘Congrats Class of 2024’ or the graduate’s name in the center.
- Pipe a simple bead border around the edge of the cake by applying consistent pressure to the bag and releasing quickly to create small, uniform dots.
- Scatter graduation-themed sprinkles or edible glitter over the remaining areas to add a festive sparkle before the frosting crusts over.
How to bake rhubarb scones
[IMAGE_10]
Why we love this
Rhubarb scones are the epitome of an elegant brunch, offering a tender, biscuit-like crumb that is studded with tart, juicy pieces of fruit. The aroma of cold butter and baking flour is deeply comforting, while the sugar-crusted tops provide a delightful crunch that gives way to a soft, flaky interior. We love how the rhubarb softens and bleeds slightly into the dough, creating beautiful pink swirls that make these scones look as lovely as they taste when served with a dollop of clotted cream.
Ingredients
- 2 cups all-purpose flour
- 1/3 cup granulated sugar
- 1 tbsp baking powder
- 1/2 tsp salt
- 1/2 cup cold unsalted butter, grated
- 1 cup fresh rhubarb, finely diced
- 2/3 cup heavy cream
- 1 tsp vanilla extract
- Coarse sparkling sugar for topping
How to make it
- Preheat your oven to 400°F (200°C) and line a heavy baking sheet with parchment paper to prevent the bottoms from browning too quickly.
- In a large bowl, whisk together the flour, sugar, baking powder, and salt; then, use a pastry blender to incorporate the grated cold butter until the mixture looks like coarse meal.
- Gently fold in the finely diced rhubarb, ensuring each piece is coated in flour to prevent them from sinking or clumping together.
- Make a well in the center and pour in the heavy cream and vanilla extract, stirring with a fork just until the dough begins to come together—do not overmix!
- Turn the dough onto a lightly floured surface, pat it into a 1-inch thick circle, and cut it into 8 wedges using a sharp knife or bench scraper.
- Brush the tops with a little extra cream, sprinkle generously with coarse sparkling sugar, and bake for 18-22 minutes until the edges are golden and the centers are firm.
Conclusion
Creating a viral-worthy food board is truly about embracing the seasons and the special moments that define our lives. Whether you are leaning into the tart, springy goodness of rhubarb or the joyful, decorated sweetness of graduation day, the key is to present your food with love and a bit of creative flair. These recipes are more than just instructions; they are the building blocks for a gathering that your friends and family will talk about for years to come. So, clear off your biggest wooden board, get your prep bowls ready, and let the magic happen in your kitchen!