

5 Simple Food Boards That Are Taking Over TikTok Right Now
There is something undeniably magical about the way a shared plate brings people together, isn’t there? Lately, my TikTok feed has been an endless scroll of vibrant, aesthetic food boards that make my heart (and stomach) skip a beat. Whether it is the milestone of a graduation or the simple, tart joy of the first rhubarb harvest, we are collectively moving away from stiff, formal dinners and embracing the messy, beautiful art of the ‘board.’
In this post, I am sharing my favorite ways to celebrate these fleeting moments. From the zesty zing of homemade pesto to the nostalgic crumble of a fruit pie, these ideas are designed to be shared, photographed, and most importantly, enjoyed with the ones you love. Let’s dive into these viral trends and get some flour on our hands!
How to bake stunning graduation cakes?
Why we love this
There is nothing quite like the scent of a vanilla-bean infused sponge wafting through the house to signal a major life milestone. This cake is all about the contrast between a moist, velvet-like crumb and a silky Swiss meringue buttercream that melts on the tongue like a dream. Imagine the soft white layers stacked high, representing a blank canvas for the graduate’s bright future, finished with a celebratory flair that feels both sophisticated and deeply personal. It is the centerpiece that demands a pause, a photo, and a very large slice.
Ingredients
- 2 1/2 cups cake flour
- 1 1/2 cups granulated sugar
- 1 tbsp baking powder
- 1/2 tsp salt
- 3/4 cup unsalted butter, softened
- 1 cup whole milk, room temperature
- 4 large egg whites
- 2 tsp vanilla bean paste
How to make it
- Preheat your oven to 350°F (175°C) and meticulously grease two 8-inch round cake pans, lining the bottoms with parchment paper to ensure a clean release.
- In a large stand mixer fitted with the paddle attachment, cream the softened butter and sugar on medium-high speed for at least 5 minutes until the mixture is pale and significantly increased in volume.
- Sift your dry ingredients—flour, baking powder, and salt—into a separate bowl to remove any lumps and ensure a fine, airy texture in the final bake.
- In a measuring jug, whisk together the room-temperature milk, egg whites, and vanilla bean paste until well combined.
- Turn the mixer to low and alternate adding the dry ingredients and the liquid mixture, starting and ending with the dry; mix only until just combined to avoid overworking the gluten.
- Divide the batter evenly between the pans and bake for 25-30 minutes; look for the edges pulling slightly away from the sides and a toothpick coming out with just a few moist crumbs.
- Cool completely on a wire rack before applying a thin crumb coat of frosting, then chill for 20 minutes to set before the final aesthetic decorating phase.
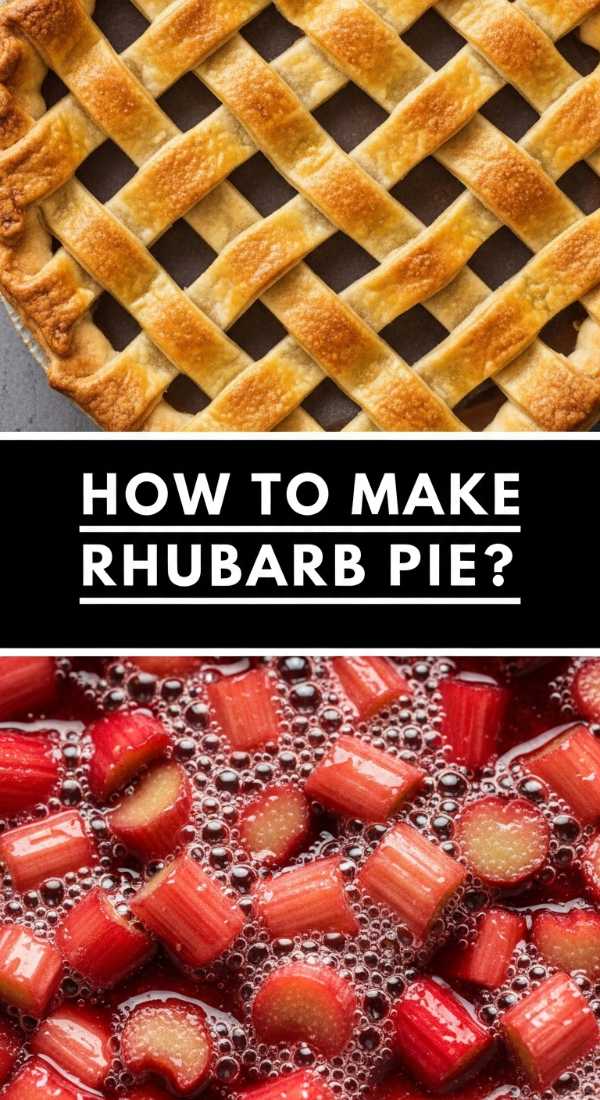
How to make classic rhubarb pie?

Why we love this
This pie is a masterclass in the balance of flavors, where the sharp, assertive tartness of ruby-red rhubarb meets a buttery, flaky crust that shatters with every forkful. As it bakes, the kitchen fills with an earthy, fruity aroma that feels like the very essence of late spring, promising a filling that is jammy and bright. It is the kind of dessert that feels nostalgic and rustic, especially when served warm with a melting scoop of vanilla bean ice cream that seeps into the lattice vents. Every bite is a reminder of garden harvests and the simple perfection of seasonal baking.
Ingredients
- 4 cups fresh rhubarb, cut into 1/2 inch pieces
- 1 1/4 cups granulated sugar
- 1/4 cup cornstarch
- 1/2 tsp ground ginger
- Double crust pie pastry, chilled
- 1 tbsp cold butter, cubed
- 1 egg beaten with 1 tbsp water (egg wash)
How to make it
- Roll out half of your chilled pastry on a lightly floured surface and fit it into a 9-inch pie plate, leaving an inch overhang, then chill the base while you prepare the filling.
- In a large mixing bowl, toss the fresh rhubarb pieces with sugar, cornstarch, and ground ginger; the cornstarch is vital here to thicken the juices as they release during the high-heat bake.
- Pour the filling into the prepared base and dot the top with the small cubes of cold butter to add a rich, silky mouthfeel to the fruit sauce.
- Roll out the second half of the dough and cut into strips to create a classic lattice top, weaving them over and under to allow steam to escape efficiently.
- Crimp the edges tightly to seal, then brush the entire top with the egg wash for a glossy, professional-looking golden-brown finish.
- Bake at 425°F (220°C) for the first 15 minutes to set the crust, then reduce the heat to 375°F (190°C) and bake for another 40-45 minutes until the filling is bubbling thick and slow.
- Allow the pie to cool for at least 3-4 hours; this patience is critical to letting the filling set so you get clean, beautiful slices.
How to decorate graduation cupcakes?
Why we love this
Cupcakes are the ultimate social food—perfectly portioned and endlessly customizable for a graduation crowd. We love this specific approach because it turns a simple handheld treat into a miniature work of art, featuring tiny edible mortarboards and tassels that always elicit ‘oohs’ and ‘aahs’ from guests. The texture of the smooth frosting against the crunch of a chocolate cap creates a playful sensory experience that is as fun to eat as it is to look at. They are the perfect addition to a graduation board, adding height, color, and a sense of whimsy to the celebration.
Ingredients
- 12 pre-baked cupcakes (any flavor)
- 2 cups stiff vanilla buttercream
- 12 chocolate squares (like Ghirardelli)
- 12 miniature peanut butter cups
- Sour belt candy or fruit leather (for tassels)
- Small round candies or M&Ms
How to make it
- Fit a piping bag with a large round or star tip and pipe a generous, stable swirl of buttercream onto each cooled cupcake to serve as the ‘head’ for the cap.
- To create the graduation caps, unwrap the miniature peanut butter cups and place them upside down onto the center of the frosting swirl.
- Apply a small dot of melted chocolate or stiff frosting to the top of the peanut butter cup and press a chocolate square firmly on top to form the mortarboard.
- Cut your sour belt or fruit leather into very thin strips, then make small fringe-like cuts at one end to mimic the look of a graduation tassel.
- Attach the tassel to the center of the chocolate square using another tiny dot of icing, and finish by placing a small candy ‘button’ right where the tassel meets the center.
- Chill the decorated cupcakes for 15 minutes in the refrigerator to ensure the chocolate components are securely ‘glued’ before transporting or serving.
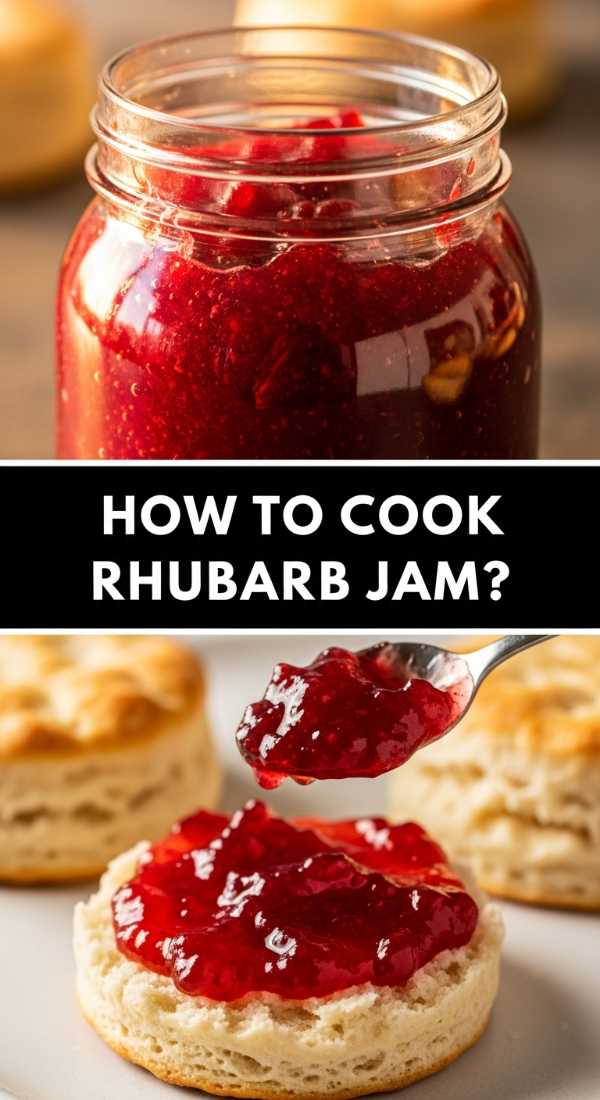
How to cook fresh rhubarb jam?

Why we love this
There is a unique satisfaction in capturing the fleeting rhubarb season in a glass jar, creating a vibrant, fuchsia-colored spread that glows when the light hits it. This jam is thick, spreadable, and packs a punch of concentrated fruit flavor that balances sweetness with a sophisticated acidity that wakes up the palate. The aroma during the cooking process is intoxicating—a mix of sugar and tart fruit that lingers in the air like a warm hug. Spread on a warm scone or swirled into yogurt, it is a luxurious way to start any morning with a burst of garden-fresh flavor.
Ingredients
- 5 cups chopped rhubarb
- 4 cups granulated sugar
- 2 tbsp lemon juice
- 1 tsp lemon zest
- 1/2 tsp pure vanilla extract
How to make it
- In a large, heavy-bottomed pot (stainless steel is best), combine the chopped rhubarb and sugar, letting them sit for about 30 minutes until the sugar starts to draw out the natural juices.
- Add the lemon juice and zest, then place the pot over medium heat, stirring constantly until the sugar has completely dissolved to prevent scorching.
- Bring the mixture to a full rolling boil—one that cannot be stirred down—and maintain this heat for about 10-15 minutes, stirring frequently to ensure the bottom doesn’t burn.
- Use a candy thermometer to check for the setting point of 220°F (104°C), or perform the ‘wrinkle test’ by placing a small spoonful on a chilled plate; if it wrinkles when pushed with a finger, it’s ready.
- Stir in the vanilla extract at the very end to preserve its delicate aroma, then remove the pot from the heat and skim off any foam that has risen to the top.
- Carefully ladle the hot jam into sterilized glass jars, leaving about 1/4 inch of headspace at the top.
- Wipe the rims clean, seal with lids, and process in a boiling water bath for 10 minutes if you plan on long-term shelf storage, or simply let cool and refrigerate for immediate use.
How to style graduation cookies?
Why we love this
Styling graduation cookies is where baking meets graphic design, and the results are incredibly satisfying to behold on a platter. We love the crisp snap of a well-baked sugar cookie paired with the smooth, matte finish of royal icing that allows for intricate detailing like diplomas and year dates. The process is meditative, focusing on clean lines and a cohesive color palette that matches the school colors, making the cookies feel like personalized gifts. When arranged on a board, they provide a structured, elegant look that ties the whole graduation theme together beautifully.
Ingredients
- Batch of firm sugar cookies (cut into squares and circles)
- Royal icing (stiff and flood consistencies)
- Gel food coloring (school colors)
- Fine-tipped edible markers
- Gold luster dust (optional)
How to make it
- Ensure your cookies are completely flat and cooled; any residual heat will cause the royal icing to run and lose its definition.
- Prepare your icing in two consistencies: ‘outline’ (like toothpaste) and ‘flood’ (like honey).
- Using the outline icing and a small round tip, pipe a border around the edge of the cookie to create a dam that will hold the thinner icing in place.
- Immediately fill in the center with the flood icing, using a toothpick or scribe tool to pop any tiny air bubbles and move the icing into the corners for a seamless finish.
- Let the base layer dry for at least 6-8 hours until it is hard to the touch; this prevents the next layer of colors from ‘bleeding’ into each other.
- Use the stiff icing to pipe details like a rolled diploma with a ribbon or the graduation year, then allow to dry completely.
- For an extra touch of luxury, mix a tiny bit of gold luster dust with vodka and use a fine brush to paint metallic accents onto the dried icing.
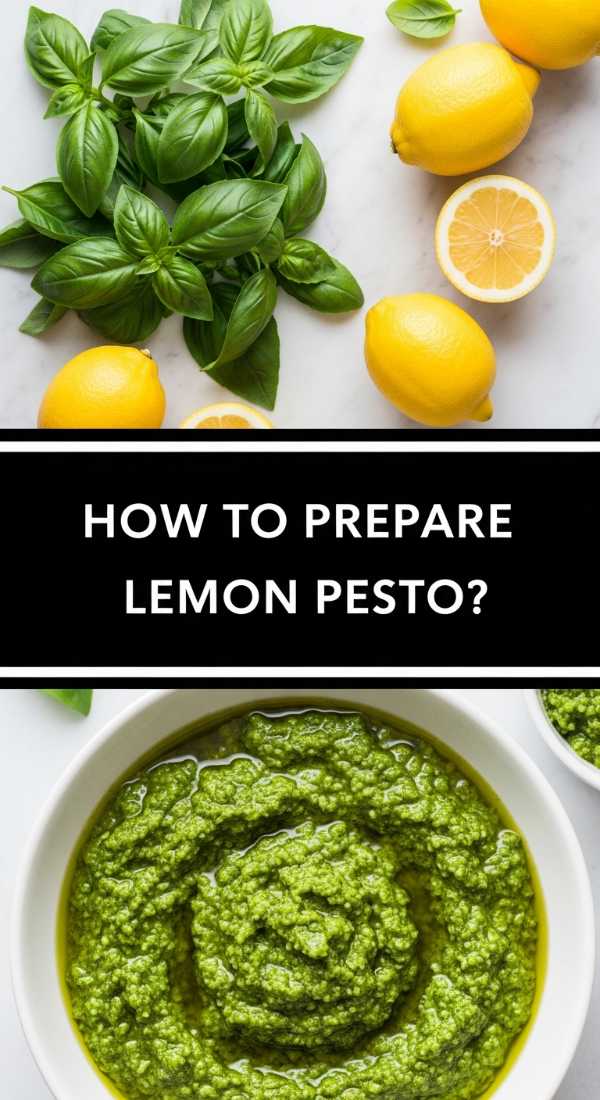
How to prepare lemon pesto?
Why we love this
Lemon pesto is like bottled sunshine; it is a bright, herbaceous, and zingy twist on the classic Genovese version that instantly elevates any dish it touches. The texture is a delightful mix of creamy toasted nuts and the slight graininess of high-quality Parmesan, all bound together by the liquid gold of extra virgin olive oil. As you pulse the ingredients, the smell of fresh basil and lemon zest fills the room, creating an olfactory experience that is incredibly refreshing. It adds a sophisticated, acidic bite to graduation boards, working perfectly as a dip or a drizzle over fresh mozzarella.
Ingredients
- 2 cups fresh basil leaves, packed
- 1/2 cup freshly grated Parmesan cheese
- 1/3 cup pine nuts or walnuts (toasted)
- 2 cloves garlic, minced
- 1/2 cup extra virgin olive oil
- Zest and juice of 1 large lemon
- 1/2 tsp sea salt
How to make it
- Begin by toasting your nuts in a dry skillet over medium-low heat for 3-5 minutes, tossing frequently until they are fragrant and golden; this step is crucial for a deep, nutty base flavor.
- In a food processor, combine the toasted nuts, peeled garlic, and sea salt, pulsing until they are finely ground but not yet a paste.
- Add the fresh basil leaves and the lemon zest, pulsing again until the greens are chopped and well incorporated into the nut mixture.
- With the processor running on low, slowly drizzle in the extra virgin olive oil in a thin, steady stream to create a perfect emulsion that won’t separate later.
- Add the fresh lemon juice and the grated Parmesan cheese, pulsing just a few more times to combine; keeping the cheese at the end preserves some of its texture.
- Taste and adjust the seasoning, adding more lemon juice for acidity or salt to bring out the herbal notes.
- Store in a jar with a thin layer of olive oil on top to prevent oxidation, which keeps the pesto looking vibrant and green.
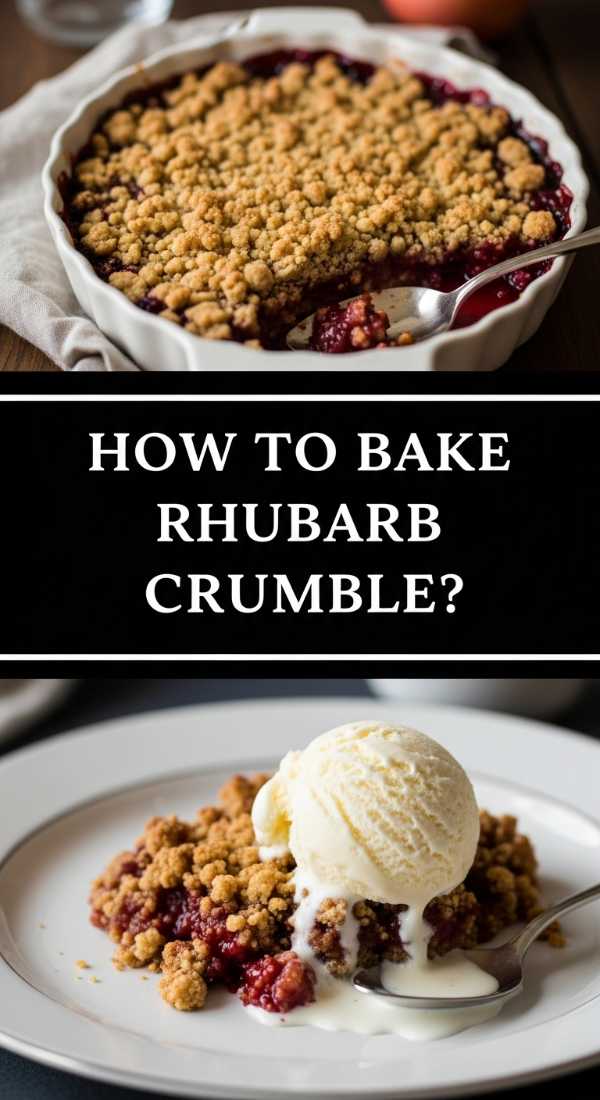
How to bake rhubarb crumble?

Why we love this
The rhubarb crumble is the ultimate ‘low-effort, high-reward’ dessert that feels like a warm embrace on a breezy afternoon. We love the contrast between the molten, bubbling fruit layer that turns a beautiful translucent pink and the heavy, buttery crunch of the oat topping. It is a textural playground—soft, tart fruit meeting sweet, crispy clusters of cinnamon-spiced flour and butter. There is a rustic charm to serving this straight from the baking dish, with the juices still sizzling at the edges, making it a perfect, unfussy addition to a casual summer gathering.
Ingredients
- Filling: 6 cups rhubarb (1-inch pieces), 3/4 cup sugar, 1 tbsp flour, 1 tsp cinnamon
- Topping: 1 cup all-purpose flour, 1 cup rolled oats, 1 cup brown sugar, 1/2 cup cold salted butter (cubed)
How to make it
- Preheat your oven to 375°F (190°C) and lightly butter a 9×13 inch baking dish to ensure the fruit juices don’t stick to the sides.
- In a large bowl, toss the rhubarb pieces with the sugar, flour, and cinnamon until every piece is evenly coated; the flour will help thicken the juices into a sauce.
- Spread the rhubarb mixture evenly across the bottom of the prepared baking dish.
- In a separate bowl, combine the flour, oats, and brown sugar for the topping, mixing well to ensure no large clumps of sugar remain.
- Using your fingertips or a pastry cutter, work the cold, cubed butter into the dry mixture until it resembles coarse crumbs with some pea-sized pieces of butter still visible.
- Sprinkle the crumble topping generously over the rhubarb, making sure to cover it completely for an even bake.
- Bake for 35-40 minutes; you are looking for the topping to be a deep golden brown and the fruit juices to be thick and bubbling vigorously around the edges of the pan.
How to mix summer drinks?

Why we love this
Summer drinks are all about visual appeal and effervescence, acting as the refreshing ‘cool-down’ for any outdoor board. We love the way ice cubes clink against glass and the way botanical garnishes like mint or cucumber slices make a simple beverage feel like a spa-day luxury. These drinks are light, crisp, and designed to hydrate while offering a sophisticated flavor profile that isn’t overly sugary. Whether it is a sparkling rhubarb fizz or a lemon-herb spritzer, the bright colors and fizzy bubbles add a dynamic, celebratory energy to the table that guests gravitate toward.
Ingredients
- Sparkling water or club soda
- Fresh mint leaves and lemon slices
- Rhubarb syrup (homemade or store-bought)
- Crushed ice
- Optional: Gin or Elderflower liqueur
How to make it
- Start by chilling your glassware in the freezer for 10 minutes; a frosted glass keeps the drink colder for longer and looks incredibly refreshing.
- Muddle 4-5 fresh mint leaves in the bottom of each glass with a splash of lemon juice to release the essential oils without shredding the leaves.
- Fill the glass to the brim with crushed ice; the increased surface area of crushed ice chills the drink almost instantly compared to large cubes.
- Pour in 2 ounces of rhubarb syrup (and your spirit of choice if making a cocktail), then stir gently with a long spoon to incorporate the flavors from the bottom up.
- Top the glass with sparkling water, pouring slowly to maintain as much carbonation as possible.
- Garnish with a long ribbon of rhubarb (peeled with a veggie peeler) or a sprig of fresh mint for a professional, TikTok-worthy presentation.
- Serve immediately with a straw so guests can stir as they sip, ensuring every mouthful is perfectly balanced.
How to design graduation boards?
Why we love this
Designing a graduation board is about telling a story of achievement through a curated selection of textures and colors. We love the ‘organized chaos’ of a well-styled board, where savory snacks like cheeses and nuts mingle with themed sweets like the graduation cupcakes and cookies we discussed. It creates a grazing experience that encourages guests to linger and talk, making the food an interactive part of the party rather than just a meal. The visual impact of school colors woven through the board using fruits and napkins makes it a stunning focal point for any graduation celebration.
Ingredients
- Large wooden board or marble slab
- Assorted cheeses (brie, sharp cheddar, manchego)
- Fresh fruits (grapes, berries, sliced apples)
- Themed cookies and cupcakes
- Crackers, nuts, and lemon pesto dip
How to make it
- Begin by placing your ‘anchors’—these are the small bowls for dips like the lemon pesto or jam—to create structure and focal points on the board.
- Add your largest items next, such as the graduation cupcakes or wedges of cheese, spacing them out evenly to balance the weight of the board.
- Create ‘rivers’ of crackers or sliced baguettes that meander between the anchors, guiding the eye across the display.
- Fill in the larger gaps with clusters of grapes or piles of berries, using colors that either complement or match the school theme.
- Tuck in the smaller details like themed sugar cookies and handfuls of Marcona almonds or walnuts to fill any remaining ‘white space.’
- Add a final touch of greenery or edible flowers for a fresh, organic look that makes the board feel lush and abundant.
- Place small tongs or cheese knives near the respective items to make it easy for guests to serve themselves without disrupting the beautiful layout.
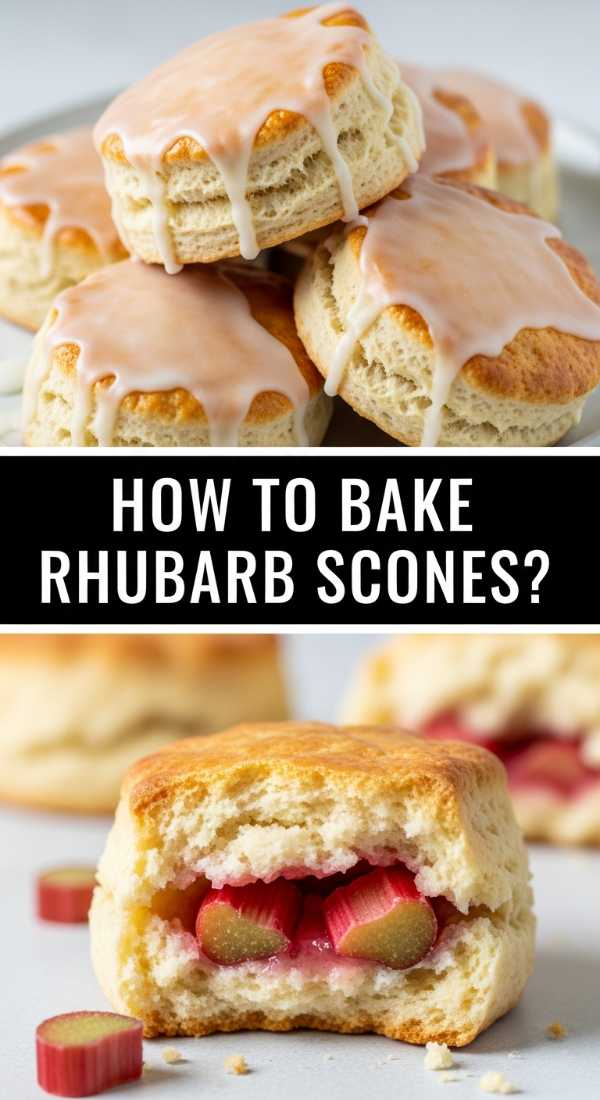
How to bake rhubarb scones?
[IMAGE_10]
Why we love this
Rhubarb scones are the height of tea-time elegance, offering a tender, buttery crumb that is punctuated by the sharp, juicy zing of fruit. We love how the bits of rhubarb soften into little pockets of jam within the dough, creating a beautiful pink-flecked appearance when the scone is pulled apart. The texture is key—crunchy on the outside from a dusting of coarse sugar, but soft and flaky on the inside. They are the perfect vessel for more rhubarb jam or a dollop of clotted cream, making them a sophisticated addition to any brunch board or graduation breakfast.
Ingredients
- 2 cups all-purpose flour
- 1/3 cup sugar plus more for sprinkling
- 1 tbsp baking powder
- 1/2 cup cold unsalted butter, grated
- 1/2 cup fresh rhubarb, finely diced
- 1/2 cup heavy cream (plus extra for brushing)
- 1 large egg
How to make it
- Whisk together the flour, sugar, and baking powder in a chilled bowl; keeping your ingredients and equipment cold is the secret to a flaky scone.
- Use a box grater to shred the cold butter into the flour mixture, then toss gently with a fork until the butter is coated; this ensures even distribution without overworking the dough.
- Stir in the finely diced rhubarb; cutting the pieces small is important so they don’t release too much moisture and make the dough soggy.
- In a separate measuring cup, whisk the heavy cream and egg together, then pour into the center of the dry ingredients.
- Mix with a fork until a shaggy dough forms, then turn it out onto a lightly floured surface and gently fold it over itself 3-4 times to create layers.
- Pat the dough into a 1-inch thick circle and cut into 8 wedges, then place them on a parchment-lined baking sheet and chill in the fridge for 20 minutes to firm up the butter.
- Brush the tops with a little extra cream, sprinkle with coarse sugar for crunch, and bake at 400°F (200°C) for 18-22 minutes until the tops are golden and the scones have lifted beautifully.
The Final Spread
Creating these boards is more than just a culinary task; it is a way to celebrate the milestones that define our lives and the seasonal flavors that ground us. Whether you are honoring a graduate or simply enjoying the tart snap of fresh rhubarb, I hope these recipes inspire you to get creative in the kitchen and share something beautiful with your community. Tag me in your TikTok creations—I can’t wait to see your boards!