
The 5-Minute Viral Food Board Everyone Is Obsessed With
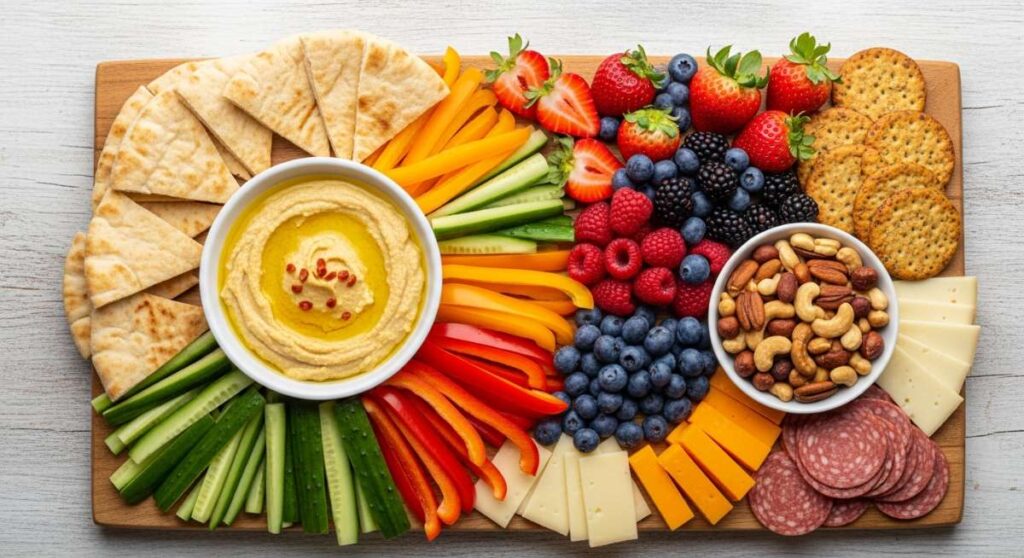
There is something magical about the way food brings us together, especially when it is presented as a vibrant, communal masterpiece. I remember the first time I set a massive, overflowing board on my kitchen island; the room instantly transformed from a quiet gathering into a buzzing hive of laughter and shared stories. It’s not just about the snacks; it’s about the permission to linger, to graze, and to celebrate the big and small moments of life with something beautiful and tactile.
Lately, my social media feed has been exploding with these ‘Viral Simple Food Boards,’ and for good reason. They are the ultimate low-stress, high-impact way to host. Whether you are celebrating a graduation, a seasonal harvest, or just a Tuesday that needs a little extra sparkle, this guide will show you how to master the elements that make these boards truly legendary. From zesty pestos to the tart sweetness of rhubarb, let’s dive into the art of the perfect spread.
How to design graduation cakes?
Why we love this
A graduation cake is more than just a dessert; it is a centerpiece that symbolizes years of hard work, late-night study sessions, and the bittersweet transition into a new chapter. There is a profound satisfaction in slicing into a perfectly leveled tier, revealing a moist crumb that contrasts beautifully with a silky, velvet-smooth buttercream. The aroma of vanilla bean and toasted sugar fills the kitchen, creating an atmosphere of pure celebration that lingers long after the last guest has left with a sticky, happy smile.
Ingredients
- Three 8-inch round vanilla sponges
- 4 cups Swiss meringue buttercream
- Black fondant for the mortarboard
- Gold edible luster dust
- Support dowels for stacking
How to make it
- Level your cakes using a serrated knife or a wire cake leveler to ensure each layer is perfectly flat, which prevents the cake from leaning or collapsing later.
- Place your first layer on a cardboard cake round and apply a generous dollop of buttercream, spreading it evenly to the edges with an offset spatula for a consistent filling thickness.
- Repeat the stacking process, then apply a thin ‘crumb coat’ of frosting over the entire exterior to lock in stray crumbs; chill the cake for 30 minutes until the frosting is firm to the touch.
- Apply the final thick layer of buttercream using a bench scraper held at a 45-degree angle against the rotating cake stand to achieve those crisp, professional edges.
- Hand-model a small graduation cap from black fondant, attach a gold-painted tassel made of thin fondant strips, and secure it to the top center of the cake using a wooden skewer.
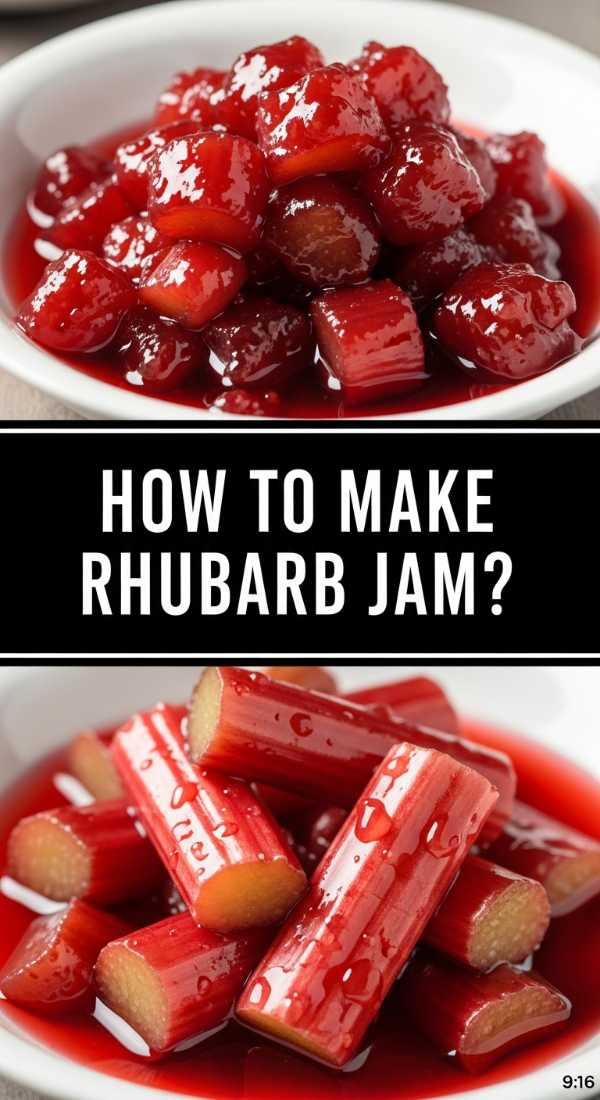
How to make rhubarb jam?

Why we love this
Rhubarb jam is the essence of spring captured in a jar, offering a striking ruby-red hue that looks stunning on any breakfast board. Its flavor profile is a sophisticated dance between sharp acidity and mellow sweetness, providing a bright wake-up call for the palate. The texture is thick and luscious, with soft ribbons of fruit that melt into warm, buttered toast, releasing an earthy, floral fragrance that reminds you of sun-drenched gardens and slow, cozy weekend mornings.
Ingredients
- 2 lbs fresh rhubarb stalks, chopped
- 3 cups granulated sugar
- 1/4 cup lemon juice
- 1 tsp vanilla bean paste
- A pinch of salt
How to make it
- Combine the chopped rhubarb and sugar in a heavy-bottomed pot and let it sit for at least two hours (macerating), allowing the sugar to draw out the natural juices and create a built-in syrup.
- Place the pot over medium-high heat and add the lemon juice, stirring constantly until the mixture reaches a rolling boil that cannot be stirred down.
- Reduce the heat slightly and continue to simmer, skimming off any foam that rises to the surface with a metal spoon to ensure a clear, jewel-toned finished product.
- Test for the setting point by placing a small spoonful on a chilled plate; if the jam wrinkles when pushed with your finger after a minute, it is ready to be removed from the heat.
- Stir in the vanilla bean paste and salt, then carefully ladle the hot jam into sterilized glass jars, leaving a quarter-inch of headspace before sealing tightly with lids.
How to bake graduation cupcakes?

Why we love this
Cupcakes are the ultimate grab-and-go treat for a busy graduation party, allowing guests to mingle without the need for forks and plates. Each little cake is a canvas for creativity, topped with a high swirl of frosting that feels indulgent and festive. The contrast between the light, airy sponge and the dense, creamy topping provides a perfect bite every time, while the addition of tiny edible graduation caps adds a whimsical, personalized touch that makes every graduate feel like the guest of honor.
Ingredients
- 12 pre-baked chocolate cupcakes
- 2 cups vanilla frosting
- Square chocolate pieces (Ghirardelli works well)
- Miniature chocolate peanut butter cups
- Sour belt candies for tassels
How to make it
- Prepare your cupcakes using a high-quality cocoa powder and bake until a toothpick inserted in the center comes out clean with just a few moist crumbs attached.
- Fit a piping bag with a large open star tip (like a 1M) and pipe a tall, three-tier swirl of frosting onto each completely cooled cupcake, starting from the outside and moving inward.
- Invert a miniature peanut butter cup and place it in the center of the frosting swirl to act as the base of the graduation mortarboard.
- Use a tiny dot of melted chocolate or frosting to ‘glue’ a square chocolate piece onto the flat bottom of the peanut butter cup, creating the top of the hat.
- Cut a thin strip of sour belt candy or a piece of licorice, fringe the end with scissors to mimic a tassel, and secure it to the center of the chocolate square with another dot of frosting.
How to brew fun coffee?
Why we love this
Coffee shouldn’t just be a caffeine delivery system; it should be an experience that delights the senses and perks up your mood. A truly ‘fun’ coffee involves layers of texture—from the dark, robust intensity of a well-pulled espresso shot to the cloud-like fluffiness of a flavored cold foam. The visual gradient of milk swirling into coffee is hypnotic, and the addition of unique syrups and spices creates a complex aroma that turns your kitchen into a high-end artisanal café for the morning.
Ingredients
- 2 shots of dark roast espresso
- 1 cup oat milk or whole milk
- 2 tbsp salted caramel or lavender syrup
- Heavy cream and sugar for cold foam
- Dried flower petals or cinnamon for garnish
How to make it
- Brew two shots of high-quality espresso and immediately stir in your chosen syrup while the liquid is hot to ensure the flavors are fully integrated and the sugar is dissolved.
- Fill a tall glass with large ice cubes (which melt slower and prevent dilution) and pour the flavored espresso over the ice, leaving about two inches of space at the top.
- Pour your milk of choice over the coffee, watching as the liquids marble together in a beautiful, swirling pattern that is the hallmark of a professional iced latte.
- In a separate small jar, froth together 1/4 cup heavy cream and a teaspoon of sugar using a handheld milk frother until the mixture is thick, glossy, and holds soft peaks.
- Gently spoon the cold foam over the top of the drink and finish with a dusting of cinnamon or a few dried lavender buds for a sophisticated aesthetic and aroma.
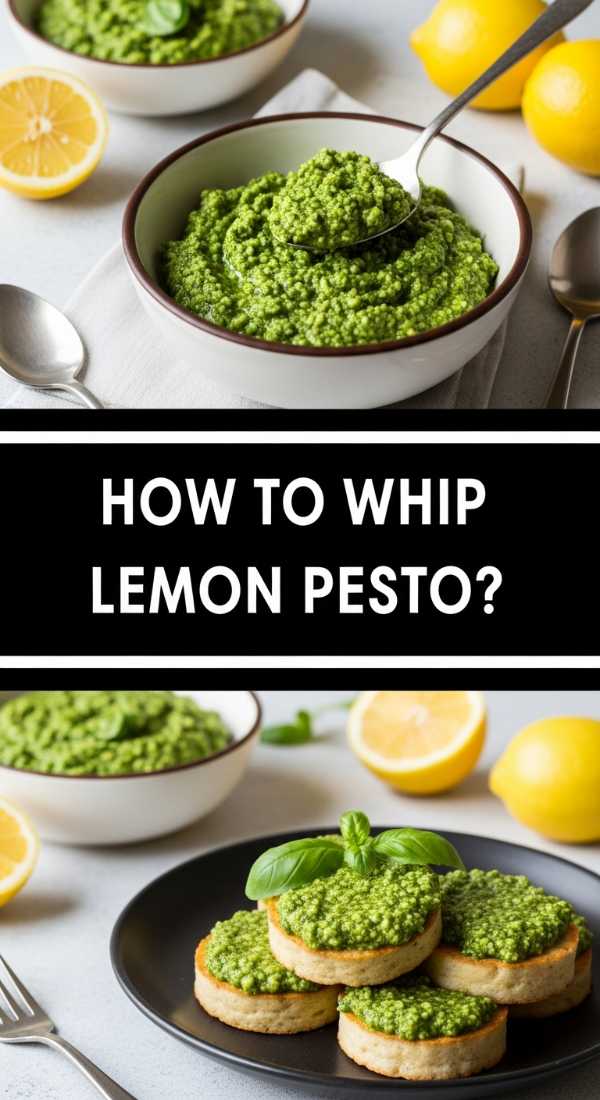
How to whip lemon pesto?
Why we love this
Lemon pesto is a vibrant, sunshine-filled twist on the classic Genovese version, bringing a zesty brightness that cuts through the richness of pasta or grilled meats. The smell of fresh basil leaves being crushed alongside tangy lemon zest is intoxicating, filling the air with a peppery, citrusy perfume. It has a beautiful, grainy texture from the parmesan and pine nuts, balanced by the silky smoothness of high-quality olive oil, making it an essential, refreshing component for any Mediterranean-inspired food board.
Ingredients
- 2 cups fresh basil leaves, packed
- 1/2 cup grated Parmesan cheese
- 1/3 cup toasted pine nuts or walnuts
- Zest and juice of one large lemon
- 1/2 cup extra-virgin olive oil
- 2 cloves of garlic
How to make it
- Toast your pine nuts in a dry skillet over medium heat for 2-3 minutes, tossing constantly until they are golden brown and fragrant to release their natural oils and deepen the flavor.
- Place the basil, garlic, and toasted nuts into a food processor and pulse 5-7 times until the ingredients are coarsely chopped but not yet a paste.
- Add the lemon zest, lemon juice, and Parmesan cheese to the processor; the acidity of the lemon will help preserve the bright green color of the basil leaves.
- With the processor running on a low setting, slowly drizzle in the olive oil in a steady stream to emulsify the sauce, creating a thick, cohesive texture.
- Taste the pesto and adjust with a pinch of sea salt or more lemon juice if needed, then transfer to a bowl and top with a thin layer of oil to prevent oxidation before serving.
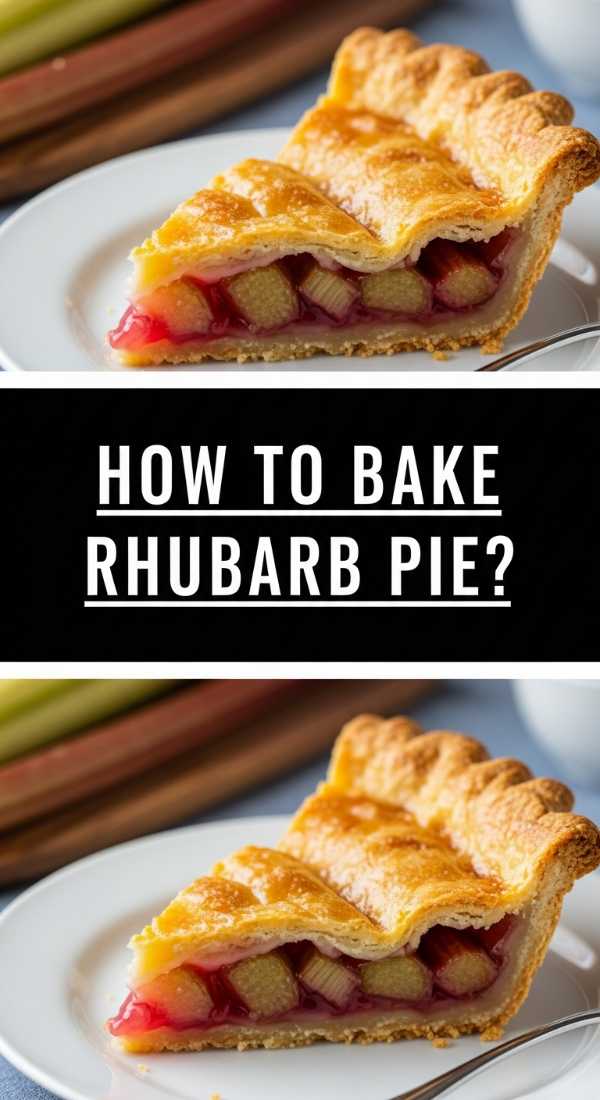
How to bake rhubarb pie?
Why we love this
A rhubarb pie is the ultimate testament to the beauty of seasonal baking, featuring a golden, flaky crust that shatters delightfully with every bite. Inside, the rhubarb chunks soften into a jam-like consistency that is unapologetically tart, balanced by just enough sugar to make your mouth water. The steam rising from a freshly baked pie carries the scent of buttery pastry and cooked fruit, creating a rustic, homely vibe that makes it the perfect centerpiece for a shared dessert board with friends.
Ingredients
- Double pie crust (homemade or store-bought)
- 5 cups sliced rhubarb (1/2 inch thick)
- 1 1/4 cups granulated sugar
- 1/4 cup cornstarch (to thicken the juices)
- 1 tbsp cold butter, cubed
- 1 egg (for egg wash)
How to make it
- Roll out your bottom pie crust and fit it into a 9-inch pie plate, trimming the edges so they overhang by about half an inch; chill the crust while you prepare the filling.
- In a large bowl, toss the sliced rhubarb with the sugar and cornstarch until every piece is evenly coated, allowing the mixture to sit for 10 minutes to create a natural syrup.
- Pour the filling into the prepared crust and dot the top with the small cubes of cold butter, which will melt and create a rich, glossy sauce inside the pie.
- Roll out the second crust and cut into strips to create a lattice top, weaving them over and under to allow steam to escape while the fruit bubbles and thickens.
- Brush the lattice with a beaten egg wash, sprinkle with coarse sugar, and bake at 400°F for 20 minutes, then reduce to 350°F and bake for another 30-35 minutes until the crust is deep golden and the filling is bubbling through the gaps.
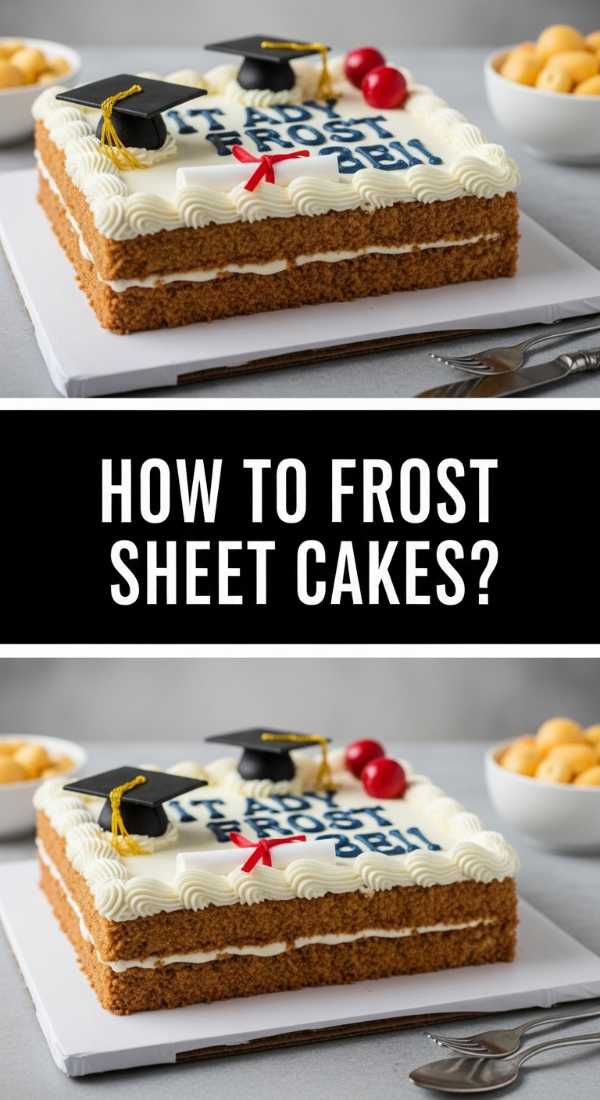
How to frost sheet cakes?

Why we love this
Sheet cakes are the unsung heroes of large gatherings because they are easy to transport and even easier to decorate. There is something deeply nostalgic about a thick layer of fluffy frosting spread edge-to-edge, adorned with simple but elegant swirls or festive sprinkles. The wide surface area allows for a perfect ratio of cake to icing in every square, ensuring that every guest gets a bite of that creamy, sugary goodness that makes sheet cakes a perennial favorite at graduation parties and family reunions.
Ingredients
- One 9×13 inch cooled cake
- 3 cups American buttercream or cream cheese frosting
- Offset spatula
- Decorative sprinkles or edible glitter
- Piping bag with a star tip (optional)
How to make it
- Ensure your cake is completely cool to the touch—even a slight warmth will melt the base of the frosting, causing it to slide off or become greasy and unappealing.
- Scoop all of your frosting onto the center of the cake in one large mound; this prevents you from having to dip back into the bowl and accidentally pulling up crumbs into your clean icing.
- Use an offset spatula to push the frosting outward toward the edges in a back-and-forth sweeping motion, maintaining a consistent thickness of about half an inch across the entire surface.
- For a professional ‘swooped’ look, use the tip of the spatula to create ‘C’ shaped motions in the frosting, which adds texture and catches the light beautifully.
- Finish by immediately adding your sprinkles while the frosting is still ‘wet’ so they adhere properly, then use a sharp knife dipped in hot water to cut clean, even squares for serving.
How to make rhubarb crumble?

Why we love this
Rhubarb crumble is the definition of comfort food—unpretentious, warm, and soul-satisfying. The contrast between the bubbling, molten fruit base and the crunchy, buttery oat topping is a textural playground for the tongue. As it bakes, the kitchen is filled with the scent of toasted grains and caramelized sugar, promising a dessert that feels like a warm hug. It’s best enjoyed with a melting scoop of vanilla bean ice cream that mingles with the tart rhubarb juices to create a creamy, dreamy sauce.
Ingredients
- 6 cups chopped rhubarb
- 3/4 cup sugar
- 1 cup all-purpose flour
- 1 cup rolled oats
- 1 cup brown sugar, packed
- 1/2 cup cold salted butter, cubed
How to make it
- Toss the chopped rhubarb with the 3/4 cup of granulated sugar and spread it into an even layer in a 9×9 inch baking dish or a deep pie plate.
- In a separate bowl, combine the flour, rolled oats, and brown sugar, mixing with a fork to break up any large clumps of sugar for a uniform topping.
- Using your fingertips or a pastry cutter, rub the cold butter cubes into the dry mixture until it resembles coarse breadcrumbs with some pea-sized lumps of butter remaining.
- Squeeze handfuls of the crumble mixture together to create larger ‘clumps’ before scattering it over the rhubarb; this ensures you get those sought-after crunchy bits after baking.
- Bake at 375°F for 35 to 40 minutes, or until the fruit juices are bubbling vigorously around the edges and the topping is a deep, golden brown and firm to the touch.
How to decorate graduation cookies?

Why we love this
Graduation cookies are like edible pieces of art that celebrate a milestone in the most delicious way possible. The smooth, matte finish of royal icing provides a sophisticated backdrop for intricate details like diplomas, years, and mortarboards. There is a meditative quality to the piping process, and the final result is a platter of cookies that look almost too good to eat, though the buttery, shortbread-like snap of the cookie ensures they won’t last long on any dessert board.
Ingredients
- Batch of firm sugar cookies (cut into caps and diplomas)
- Royal icing in multiple colors
- Fine-tip piping bags
- Scribe tool or toothpick
- Edible gold marker
How to make it
- Outline the edge of your cookie with a thick-consistency royal icing (stiff peaks) to create a ‘dam’ that will hold the thinner icing in place.
- Fill the center of the outlined area with ‘flood’ consistency icing (which should take about 10 seconds to disappear back into itself when stirred), using a scribe tool to pop bubbles.
- For a diploma cookie, use white flood icing and, while still wet, pipe two thin red or blue lines across the middle to represent the ribbon, allowing them to sink in for a ‘wet-on-wet’ look.
- Let the base layer of icing dry completely for at least 6-8 hours; this is crucial to prevent the colors from bleeding when you add the final decorative details on top.
- Use your stiff icing to pipe the year of graduation or a small tassel on the dried base, then use an edible gold marker to add metallic highlights to the edges for a luxury finish.
How to host italian dinners?
[IMAGE_10]
Why we love this
An Italian dinner is less about the specific menu and more about the philosophy of ‘la dolce vita’—the sweet life. It’s about long, lingering courses, bottles of wine that seem to never empty, and the warmth of candlelight reflecting off the faces of your favorite people. The air is thick with the scent of garlic, toasted bread, and simmering tomato sauce, creating an inviting atmosphere where the world slows down and the only thing that matters is the conversation and the community around the table.
Ingredients
- Assorted antipasti (cured meats, olives, cheeses)
- Freshly made pasta or high-quality dried bronze-cut pasta
- Quality olive oil and balsamic vinegar
- Fresh herbs (basil, parsley, oregano)
- Multiple bottles of Italian wine (Chianti or Pinot Grigio)
How to make it
- Start with an antipasti board featuring different textures: soft mozzarella, hard pecorino, salty prosciutto, and crunchy breadsticks to wake up the palate without filling guests up too quickly.
- Prepare a simple but high-quality ‘primi’ course, such as pasta with a slow-cooked ragu or the lemon pesto mentioned earlier, ensuring the pasta is cooked ‘al dente’ for that perfect bite.
- Serve the main course family-style on large platters to encourage sharing and movement around the table, which fosters a sense of intimacy and connection among your guests.
- Keep the lighting low and use plenty of candles; the amber glow mimics the evening sun in Tuscany and makes the setting feel cozy and timeless.
- End the meal slowly with a ‘dolce’ (like rhubarb pie or crumble) and a round of espresso, allowing the evening to fade out naturally rather than rushing guests away from the table.
Conclusion
Creating a viral food board is about more than just the ingredients; it’s about the intention of bringing joy to your table. Whether you’re celebrating a graduate with themed cupcakes or hosting an Italian feast for your closest friends, these elements combine to create memories that last far longer than the food itself. So grab a board, start prepping, and let your creativity shine!
Frequently Asked Questions
Got questions? We’ve got answers to help you master your next hosting event!