
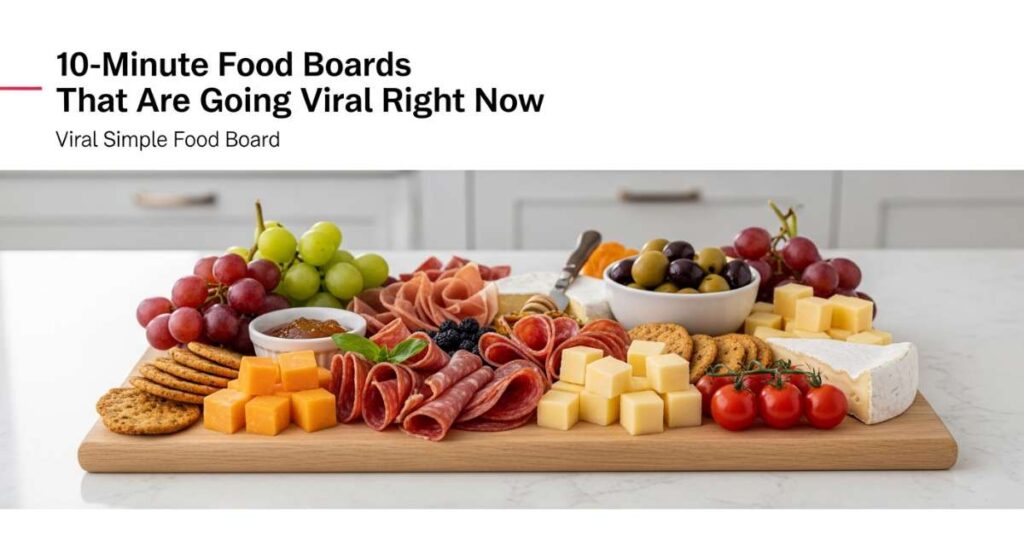
I don’t know about you, but whenever I host a gathering, I want it to look effortless yet absolutely breathtaking. We’ve all seen those stunning food boards on social media that look like they took hours to curate, but the secret is that the best ones come together in a flash. There is something so deeply satisfying about gathering friends around a table filled with vibrant colors and textures, where every bite is a conversation starter.
Today, I’m sharing my absolute favorite viral food board ideas and seasonal treats that are taking the internet by storm. From the tart, nostalgic scent of fresh rhubarb to the sophisticated sparkle of a graduation celebration, these ideas are designed to help you create moments that feel special without the stress. Grab a cup of coffee and let’s dive into these 10-minute wonders that will make you the star of your next get-together.
How to style graduation cakes?
Why we love this
There is nothing quite like the sight of a towering graduation cake, draped in velvet-smooth buttercream and shimmering with metallic accents. The aroma of sweet vanilla bean and rich cocoa fills the room, promising a celebration of hard work and new beginnings. When you style these cakes, you aren’t just making dessert; you’re creating a centerpiece that feels like a triumph, complete with the delicate crunch of edible gold leaf and the softness of fresh, floral garnishes.
Ingredients
- Pre-baked multi-layer sponge cake
- Silky Swiss meringue buttercream
- Edible gold leaf or metallic dust
- Fresh, organic flowers (roses or peonies)
- Custom acrylic cake topper
- High-quality chocolate ganache for drips
How to make it
- Begin by placing your chilled cake on a rotating turntable to ensure even access. Apply a generous crumb coat of buttercream, smoothing it with a bench scraper until the surface is level and any stray crumbs are locked in. Chill for 20 minutes.
- Apply the final layer of frosting using an offset spatula. Use a firm, steady hand with the bench scraper while spinning the turntable to achieve those crisp, professional edges and a glass-smooth finish.
- Prepare your chocolate ganache by melting high-quality chocolate with heavy cream at a 1:1 ratio over a double boiler. Once it reaches a lukewarm, slightly thickened consistency, use a squeeze bottle to create controlled drips down the sides of the cake.
- Carefully apply edible gold leaf using a dry, soft-bristled brush. Press the leaf gently onto the frosting in organic clusters to create a high-end, textured look.
- Trim the stems of your flowers and wrap them in floral tape for food safety. Arrange them in a crescent shape on top of the cake, then finish by inserting the custom cake topper at a slight angle for maximum visual impact.
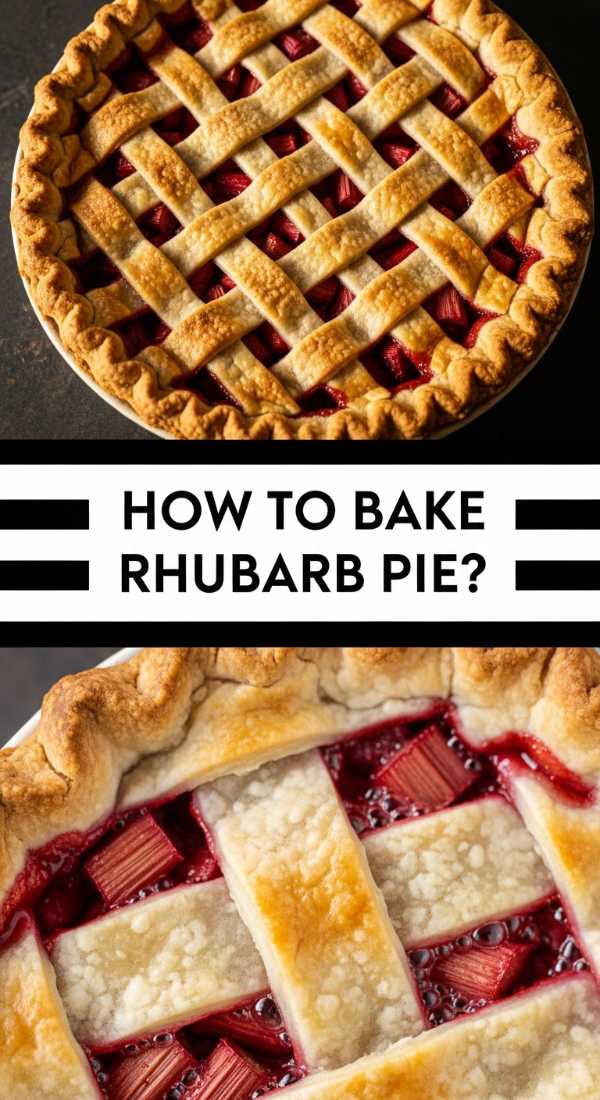
How to bake rhubarb pie?

Why we love this
Baking a rhubarb pie is like capturing the essence of early summer in a flaky, buttery crust. The scent of the tart, crimson stalks softening into a jammy filling, mingled with the warmth of cinnamon and sugar, is enough to make any kitchen feel like a sanctuary. Each slice offers a perfect balance of puckering tartness and sugary sweetness, with a golden, shattered-glass texture on the crust that crumbles beautifully under a fork.
Ingredients
- Double pie crust (chilled)
- 5 cups fresh rhubarb, sliced into 1-inch pieces
- 1 1/4 cups granulated sugar
- 1/4 cup cornstarch
- 1/2 teaspoon ground cinnamon
- 1 tablespoon cold butter, cubed
- 1 egg (for egg wash)
- Coarse sanding sugar
How to make it
- Preheat your oven to 400°F (200°C) and place a baking sheet on the bottom rack to catch any juices. Roll out your bottom crust and fit it into a 9-inch pie plate, leaving an inch of overhang.
- In a large mixing bowl, toss the sliced rhubarb with sugar, cornstarch, and cinnamon. Ensure every piece of fruit is evenly coated; the cornstarch is vital for thickening the juices into a glossy, pourable filling rather than a watery mess.
- Pour the rhubarb mixture into the prepared crust and dot the top with the small cubes of cold butter. This adds a luxurious richness to the filling as it bubbles.
- Roll out the second crust and cut into strips to create a lattice top. Weave the strips over and under each other, then crimp the edges tightly to seal. Brush the entire surface with a beaten egg wash for a deep golden shine.
- Sprinkle generously with sanding sugar and bake for 45-55 minutes. You are looking for the crust to be a deep mahogany gold and the juices to be bubbling vigorously in the center, indicating the cornstarch has fully activated.
How to decorate graduation cookies?
Why we love this
There is a whimsical joy in decorating graduation cookies, transforming simple sugar dough into edible art. The smooth, matte finish of royal icing provides a perfect canvas for intricate details, from tiny tassels to miniature diplomas. As you pipe the delicate lines, the kitchen fills with the scent of almond extract and powdered sugar, creating a sensory experience that is both meditative and deeply rewarding for any celebration.
Ingredients
- Baked sugar cookies in shapes of caps and diplomas
- Royal icing (stiff and flooding consistencies)
- Gel food coloring in school colors
- Fine-tip piping bags
- Edible gold luster dust
- Scribe tool or toothpick
How to make it
- Separate your royal icing into bowls and tint them with gel colors. You will need a “stiff” consistency (like toothpaste) for outlining and a “flood” consistency (like honey) for filling in the shapes.
- Using the stiff icing and a small round tip, outline the perimeter of the graduation cap and diploma. This creates a dam that prevents the thinner icing from spilling over the edges.
- Immediately fill the center with the flood icing. Use a scribe tool to move the icing into the corners and pop any tiny air bubbles that rise to the surface for a perfectly flat finish.
- Let the base layer dry completely for at least 6 hours in a cool, dry place. This prevents the colors from bleeding when you add the secondary details.
- Once dry, pipe a small dot in the center of the cap and a long, flowing line for the tassel using the stiff icing. If desired, mix gold luster dust with a drop of vodka and paint the tassel for a metallic pop.
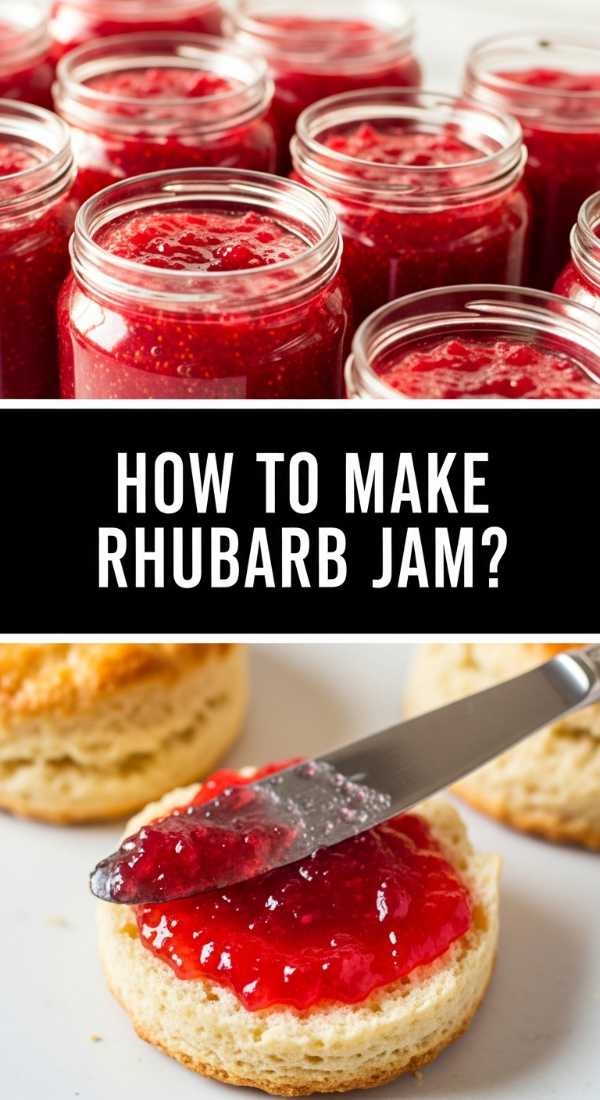
How to make rhubarb jam?

Why we love this
Rhubarb jam is a vibrant, ruby-red treasure that brings a zingy brightness to your morning toast. The process of slow-simmering the stalks until they break down into a thick, glistening preserve is incredibly aromatic, filling the house with a bright, fruity scent. It feels like a labor of love, resulting in a spread that is intensely flavored, slightly floral, and perfectly balanced between sharp acidity and mellow sweetness.
Ingredients
- 2 lbs fresh rhubarb, trimmed and chopped
- 3 cups granulated sugar
- 1/4 cup fresh lemon juice
- 1 teaspoon vanilla bean paste
- 1 tablespoon fruit pectin (optional)
How to make it
- In a heavy-bottomed Dutch oven, combine the chopped rhubarb, sugar, and lemon juice. Stir well and let the mixture sit for at least 30 minutes; this macerating process draws out the natural juices and helps the fruit retain its color.
- Place the pot over medium heat and bring to a gentle simmer. Stir frequently with a wooden spoon to prevent the sugar from scorching on the bottom of the pan as it dissolves.
- Increase the heat to medium-high and bring the mixture to a rolling boil. If using pectin, whisk it in now. Continue to boil for 10-15 minutes, stirring constantly. You’ll notice the foam subsiding and the mixture taking on a deep, translucent red hue.
- Perform the “plate test” by placing a small spoonful of jam on a chilled saucer. Let it sit for a minute, then push it with your finger. If it wrinkles, it has reached the setting point.
- Stir in the vanilla bean paste for a touch of warmth, then ladle the hot jam into sterilized jars, leaving a quarter-inch of headspace. Seal tightly and let cool at room temperature until the lids pop.
How to brew fun coffee?
Why we love this
Elevating your morning coffee into a “fun” experience is all about the layers of texture and the art of presentation. Imagine the sight of dark, robust espresso swirling into velvety, cold-frothed milk, topped with a dusting of cinnamon or a drizzle of salted caramel. The aroma is an intoxicating blend of toasted beans and sweet cream, turning a simple caffeine fix into a luxurious ritual that rivals any high-end cafe experience.
Ingredients
- 2 shots of high-quality espresso or strong cold brew
- 1/2 cup oat milk or whole milk
- 1 tablespoon flavored syrup (lavender or toasted marshmallow)
- Ice cubes (coffee-infused ice is a plus!)
- Whipped cream or cold foam topping
- Garnish: Cocoa powder or dried rose petals
How to make it
- Start by chilling your glassware in the freezer for five minutes. This ensures your layered drink stays cold and the foam maintains its structure for longer.
- Pour your flavored syrup into the bottom of the glass, followed by a handful of ice. If you want a visual “gradient” effect, pour the espresso shots very slowly over the back of a spoon so they settle on top of the syrup.
- In a separate frother or a jar, shake your cold milk vigorously until it doubles in volume and becomes thick and micro-foamed. Gently pour this over the espresso.
- To create the “viral” look, top the drink with a thick layer of cold foam. You can make this by frothing heavy cream with a splash of syrup until it reaches a soft-peak consistency.
- Finish with your garnishes. A light dusting of cocoa or a few dried petals adds an aesthetic touch that makes the drink feel intentional and celebratory.
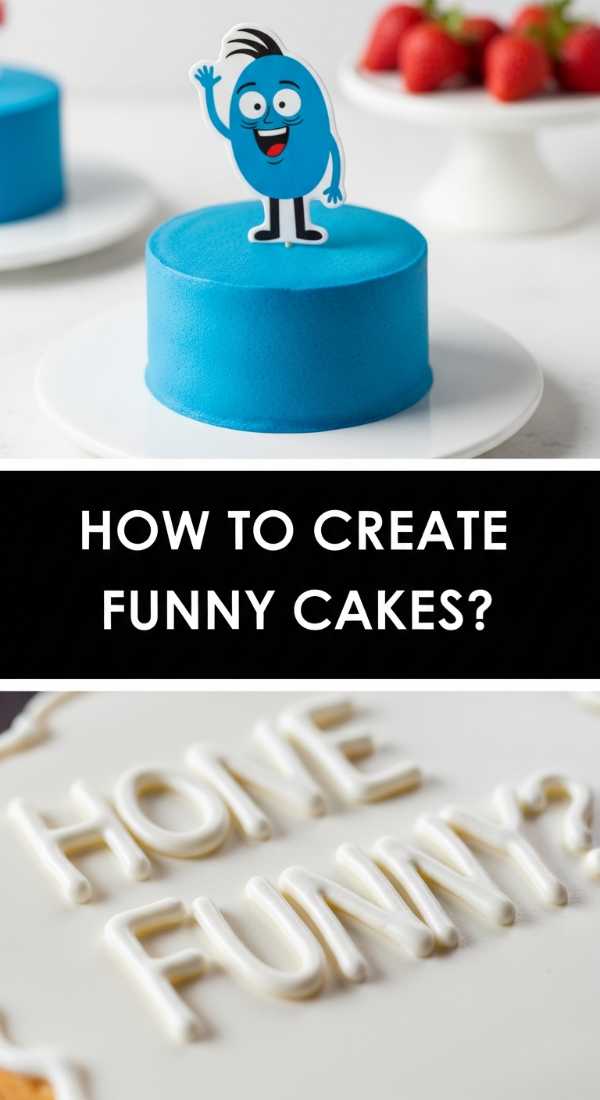
How to create funny cakes?
Why we love this
Funny cakes are the ultimate way to bring personality and laughter to the table. These aren’t your typical pristine desserts; they are kitschy, colorful, and often a little bit chaotic in the best way possible. From “ugly” vintage piping to hilarious edible messages, these cakes celebrate the joy of not taking life too seriously, all while maintaining a delicious, moist crumb and a rich, buttery frosting that keeps everyone coming back for more.
Ingredients
- Single or double layer round cake
- Brightly colored American buttercream
- Multi-colored sprinkles
- Fondant for sculpting small figures
- Edible ink markers
- A variety of piping tips (star, leaf, and round)
How to make it
- Frost your cake with a thick layer of brightly colored buttercream. Don’t worry about making it perfectly smooth; sometimes a slightly “rustic” or textured look adds to the charm of a funny cake.
- Use a small round piping tip to write a humorous or self-deprecating message on top. Use a contrasting color so the text pops, and don’t be afraid of a little “shaky” handwriting—it adds to the aesthetic!
- Utilize various piping tips to create a border that is intentionally over-the-top. Mix star tips for ruffles and round tips for “blobs” or dots in clashing, vibrant colors.
- If you’re feeling adventurous, sculpt a small, goofy figure out of fondant, like a “derpy” animal or a cartoonish version of a friend. Place it prominently on the cake.
- Finish with a chaotic dusting of sprinkles. Instead of a neat placement, literally toss them at the sides of the cake for that perfectly imperfect “party” vibe.
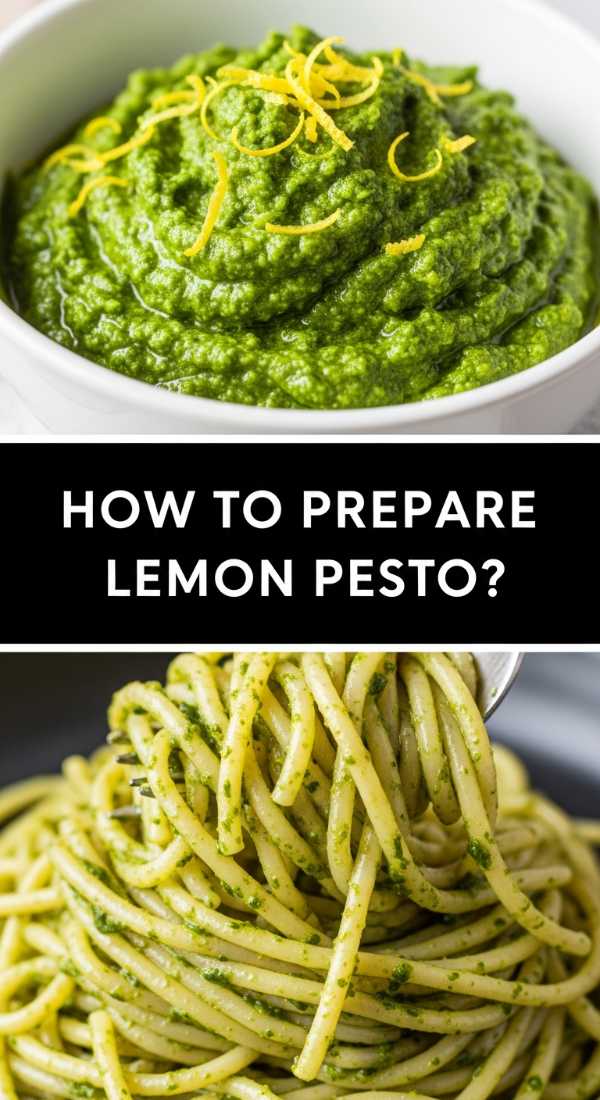
How to prepare lemon pesto?
Why we love this
Lemon pesto is a zesty, herbaceous revelation that wakes up the palate with its bright, citrusy notes and the deep, earthy punch of fresh basil. The texture is a delightful mix of smooth olive oil and the slight grit of toasted pine nuts and aged Parmesan. As you pulse the ingredients, the air fills with a fragrance that is intensely clean and summery, making it the perfect accompaniment for pasta, grilled chicken, or a crusty piece of sourdough.
Ingredients
- 2 cups fresh basil leaves, packed
- Zest and juice of 2 organic lemons
- 1/2 cup extra virgin olive oil (high quality)
- 1/3 cup pine nuts, toasted
- 1/2 cup grated Parmesan cheese
- 2 cloves garlic, smashed
- Sea salt and cracked black pepper to taste
How to make it
- Begin by toasting your pine nuts in a dry skillet over medium-low heat. Shake the pan constantly for 3-4 minutes until they are golden and fragrant. Be careful, as they can burn in seconds.
- In a food processor, combine the fresh basil, toasted pine nuts, smashed garlic, and lemon zest. Pulse about 10-12 times until the mixture is coarsely chopped but not yet a paste.
- With the processor running on low, slowly drizzle in the olive oil through the feed tube. This emulsifies the sauce, ensuring the oil and solids stay integrated rather than separating into a greasy mess.
- Add the lemon juice and grated Parmesan. Pulse just a few more times to combine. You want to maintain a bit of texture from the nuts and cheese for a more rustic mouthfeel.
- Taste and adjust the seasoning with sea salt and black pepper. The lemon juice provides the acid, so ensure you have enough salt to balance the tartness. Store in a jar with a thin film of oil on top to prevent browning.
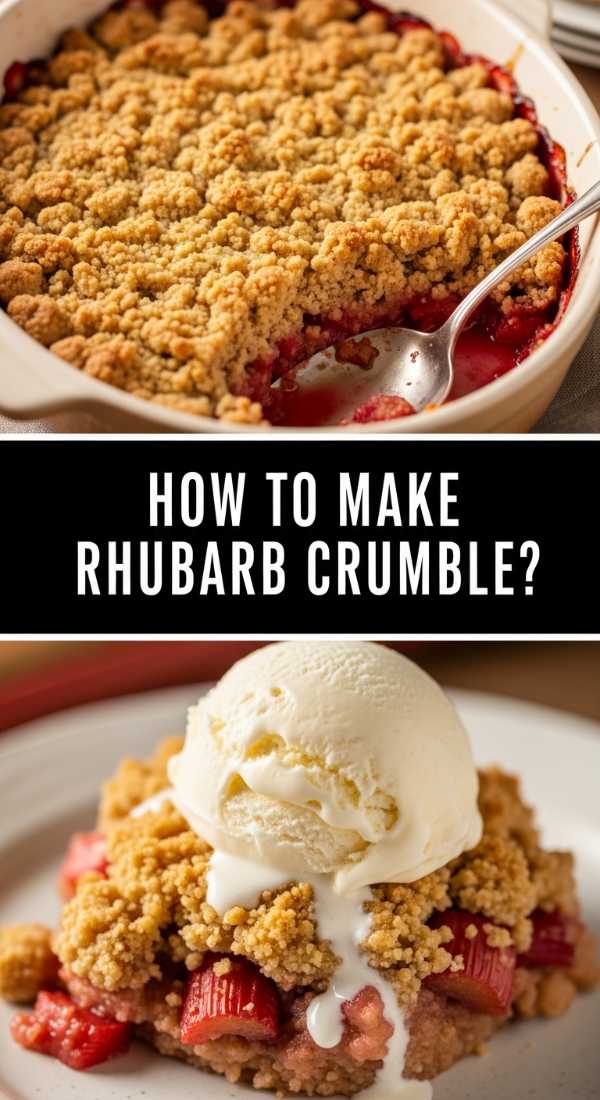
How to make rhubarb crumble?
Why we love this
The rhubarb crumble is the ultimate comfort food, striking a divine balance between the bubbling, tart fruit base and a heavy, buttery oat topping. When it comes out of the oven, the edges are caramelized and chewy, while the center is a soft, warm medley of pink rhubarb juices. Served with a melting scoop of vanilla bean ice cream, it creates a sensory contrast of hot and cold that is absolutely irresistible.
Ingredients
- Filling: 6 cups sliced rhubarb, 3/4 cup sugar, 1 tsp vanilla
- Topping: 1 cup rolled oats, 1 cup all-purpose flour
- 1 cup packed brown sugar
- 1/2 cup cold unsalted butter, cubed
- 1 teaspoon ground cinnamon
- 1/2 teaspoon salt
How to make it
- Preheat your oven to 375°F (190°C). In a 9×9 inch baking dish, toss the rhubarb with the granulated sugar and vanilla until the fruit is well-coated. Spread it out into an even layer.
- In a medium bowl, whisk together the oats, flour, brown sugar, cinnamon, and salt. This ensures the dry ingredients are perfectly blended before the fat is added.
- Add the cold, cubed butter to the dry mixture. Use your fingers or a pastry cutter to rub the butter into the oats until the mixture resembles coarse crumbs with some pea-sized chunks of butter remaining.
- Gently squeeze handfuls of the topping to create larger clumps, then sprinkle it evenly over the rhubarb. These clumps will become the crunchy “nuggets” that define a great crumble.
- Bake for 35-40 minutes. The topping should be a deep golden brown and the rhubarb juices should be thick and bubbling up around the edges. Let it cool for 10 minutes to allow the juices to set slightly before serving.
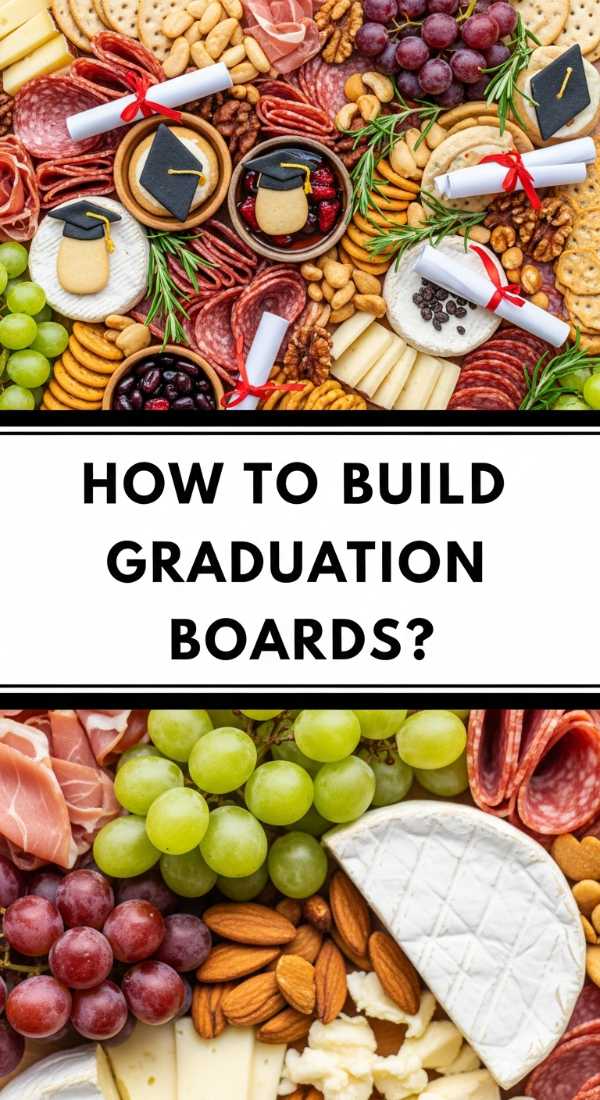
How to build graduation boards?
Why we love this
Graduation boards are the “hero” of any party, offering a grazing experience that is as visual as it is delicious. By mixing savory cheeses and charcuterie with festive, themed treats, you create a social hub where guests can linger and snack. The board becomes a tapestry of colors—rich salamis, creamy brie, bright berries, and perhaps even some cap-shaped chocolates—all arranged to look like an effortless explosion of celebration and joy.
Ingredients
- Assorted cheeses (Brie, Sharp Cheddar, Manchego)
- Cured meats (Prosciutto, Salami rosettes)
- Graduation-themed snacks (Chocolate caps, diploma-rolled wafers)
- Fresh fruit (Grapes, strawberries, blueberries)
- Crackers and artisanal breadsticks
- Nuts and dried apricots for filling gaps
How to make it
- Select a large wooden board or marble slab. Start by placing your “anchor” items, which are your small bowls for honey or olives, and your larger cheeses. Space them out diagonally to create balance.
- Build “rivers” of crackers and breadsticks that flow through the center of the board. This guides the eye and creates a structural skeleton for the rest of the ingredients.
- Add your meats. For a viral look, fold salami into halves and fourths to create “fans” or roll them tightly into roses. Tuck these against the cheeses for support.
- Fill the large remaining gaps with fresh fruits and themed graduation treats like Pirouline cookies tied with a small ribbon to look like diplomas.
- Finally, use the smallest items—nuts, berries, and sprigs of rosemary—to fill every single tiny hole on the board. A truly viral food board has zero visible space on the bottom, giving it a lush, abundant appearance.
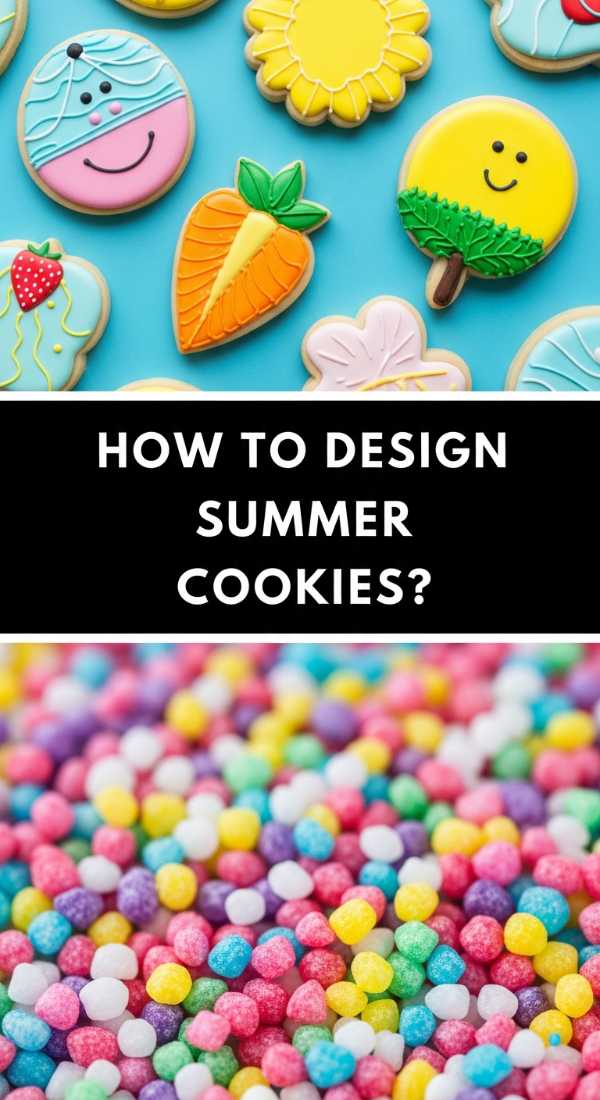
How to design summer cookies?
[IMAGE_10]
Why we love this
Summer cookies are all about sunshine, citrus, and seaside vibes. Designing them allows you to play with a palette of pastels and neon pops, creating shapes like lemon slices, sunglasses, or tiny watermelons. The smell of fresh lemon zest in the dough and the crisp snap of the icing make these a refreshing treat for a poolside party, evoking the feeling of long, warm afternoons and salty summer air.
Ingredients
- Lemon-infused sugar cookies
- Royal icing in yellow, green, pink, and white
- Edible glitter or sanding sugar
- Piping bags with small round tips
- Fine-tip edible markers for detail work
How to make it
- Roll out your lemon sugar cookie dough to a 1/4 inch thickness. Use seasonal cutters like circles (for fruit slices) or stars. Chill the cut shapes for 15 minutes before baking to ensure they hold their sharp edges.
- Once baked and completely cooled, outline your cookies with stiff royal icing. For a lemon slice, outline the outer rind in bright yellow.
- Flood the sections with a slightly thinner icing. For the lemon, fill the “segments” individually, leaving a small white gap between them to mimic the look of real citrus fruit.
- While the flood icing is still wet, you can drop in small dots of a different color (the “wet-on-wet” technique) to create patterns like polka dots or stripes without any added texture.
- Allow the cookies to dry for at least 8 hours. Once hard, use an edible marker to add tiny details like seeds or reflections on “sunglass” lenses, and add a touch of edible glitter for a sun-kissed shimmer.
Wrapping It All Up
Creating beautiful, viral-worthy food doesn’t have to be a daunting task. Whether you are celebrating a big milestone like a graduation or simply enjoying the bounty of the season with a rhubarb crumble, the key is to focus on quality ingredients and a few simple styling techniques. These 10-minute ideas are meant to spark your creativity and help you enjoy the process of hosting as much as the event itself. So go ahead, build that board, bake that pie, and enjoy the delicious results!