
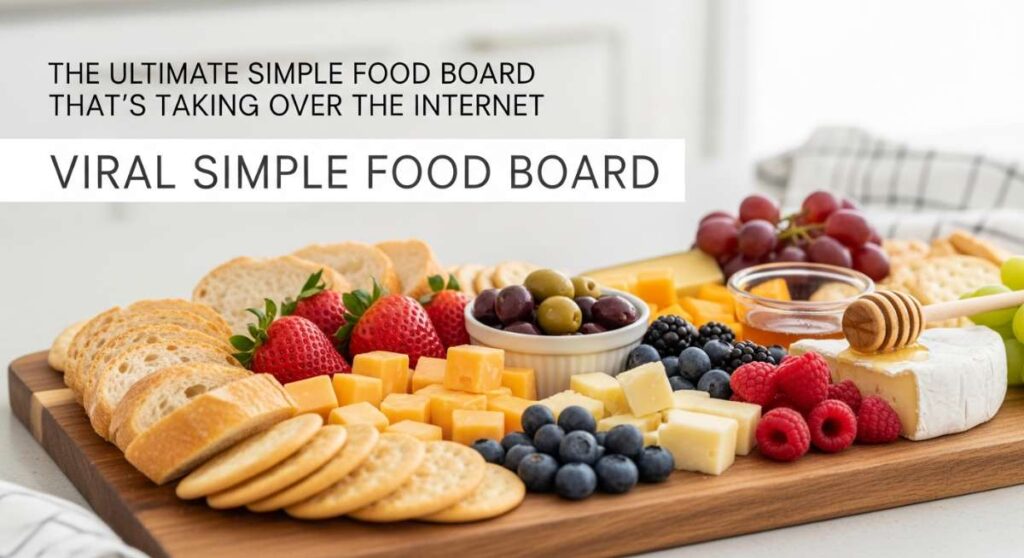
There’s a certain kind of magic that happens when you set down a massive, beautifully curated board in the middle of a table. It’s the instant collective gasp from your guests, the way hands immediately reach for a nibble, and the soft hum of conversation that flows so much easier when there’s good food to share. Lately, I’ve been obsessed with the ‘Simple Food Board’ trend because it proves you don’t need a culinary degree to create something that looks like it belongs in a magazine.
As we head into a season of big transitions—especially with the Class of 2026 gearing up for their big moments—I find myself leaning into recipes that feel celebratory yet grounded. From the tart, nostalgic scent of rhubarb bubbling in the oven to the zesty, bright aroma of fresh lemon pesto, these ideas are designed to make your home feel like the ultimate gathering spot. Whether you’re hosting a graduation brunch or a quiet summer dinner, let these ideas inspire you to slow down and savor the season.
Stunning graduation cake ideas for the class of 2026
Why we love this
There is nothing quite like the sight of a towering, multi-layered cake to signal a truly monumental achievement. For the Class of 2026, we love designs that incorporate elegant metallics and deep, sophisticated hues that represent a bright future ahead. Imagine cutting into a moist, velvet-crumbed sponge and inhaling the sweet, comforting aroma of Madagascar vanilla bean and rich Swiss meringue buttercream. The texture is a dream—pillowy and light, yet substantial enough to hold the weight of your celebratory dreams and the perfect sugar-spun decorations.
Ingredients
- 3 cups all-purpose flour
- 2 cups granulated sugar
- 1 cup unsalted butter, softened
- 4 large eggs
- 1 cup whole milk
- 1 tbsp vanilla extract
- 2 tsp baking powder
- 1/2 tsp salt
- Edible gold leaf and graduation toppers
How to make it
- Preheat your oven to 350°F (175°C) and grease three 8-inch round cake pans with butter and a dusting of flour to ensure a clean release.
- In a large stand mixer fitted with the paddle attachment, cream together the softened butter and sugar on medium-high speed for at least 5 minutes until the mixture is pale and incredibly fluffy.
- Add the eggs one at a time, beating well after each addition and scraping down the sides of the bowl to ensure a homogenous emulsion.
- In a separate bowl, whisk together the dry ingredients; then, alternate adding the dry mixture and the milk to the butter mixture, starting and ending with the flour.
- Divide the batter evenly between the pans and bake for 30-35 minutes, or until a wooden skewer inserted into the center comes out clean with just a few moist crumbs.
- Allow the cakes to cool in the pans for 10 minutes before transferring to a wire rack to cool completely; once cold, wrap in plastic wrap and chill for 2 hours to make leveling easier.
- Trim the domes off the cakes with a serrated knife, stack them with generous layers of buttercream, and apply a thin ‘crumb coat’ before the final thick layer of frosting and gold leaf accents.
Best strawberry rhubarb pie recipe for summer

Why we love this
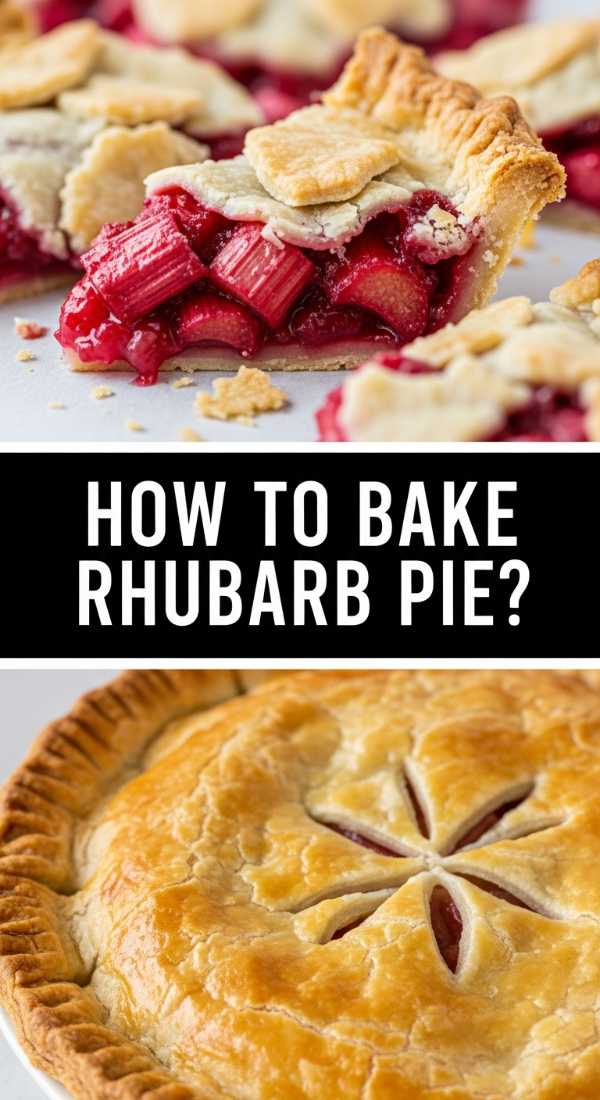
This pie is the quintessential taste of early summer, offering a masterclass in the balance between tart and sweet. The rhubarb provides a sharp, bright zing that cuts through the jammy sweetness of sun-ripened strawberries, all encased in a crust so flaky it shatters at the touch of a fork. When it’s baking, your entire kitchen will be filled with the intoxicating scent of caramelized fruit and buttery pastry. Eating a slice warm, perhaps with a melting scoop of vanilla bean ice cream, feels like a warm hug on a sunny afternoon.
Ingredients
- 2 1/2 cups all-purpose flour
- 1 cup cold unsalted butter, cubed
- 1 tsp salt
- 1/2 cup ice water
- 3 cups sliced rhubarb
- 3 cups sliced strawberries
- 3/4 cup sugar
- 1/4 cup cornstarch
- 1 tsp orange zest
How to make it
- Prepare the crust by pulsing the flour, salt, and cold butter cubes in a food processor until it resembles coarse crumbs the size of peas.
- Slowly drizzle in ice water one tablespoon at a time while pulsing just until the dough begins to clump together; do not overwork the gluten or the crust will be tough.
- Divide the dough into two discs, wrap in plastic, and refrigerate for at least one hour to allow the butter to firm up and the flour to hydrate.
- In a large bowl, toss the rhubarb, strawberries, sugar, cornstarch, and zest; let it sit for 15 minutes so the juices start to release and the cornstarch can begin its work.
- Roll out the bottom crust and fit it into a 9-inch pie plate, then fill with the fruit mixture, ensuring the pieces are evenly distributed.
- Roll out the second disc and cut into strips for a lattice top, weaving them carefully over the fruit and crimping the edges to seal.
- Brush the top with an egg wash and sprinkle with coarse sugar, then bake at 400°F for 20 minutes before lowering the heat to 375°F for another 35-40 minutes until the filling is bubbling thick.
Creative graduation cupcakes ideas for high school
Why we love this
Cupcakes are the perfect vessel for creativity, especially when you’re celebrating a high school milestone where individuality shines. We love these because they allow for a variety of flavors—from zesty lemon to deep chocolate—all topped with miniature edible mortarboards and diplomas. The visual of a tiered cupcake tower creates a stunning focal point, and the texture of a perfectly piped swirl of frosting is pure decadence. Each bite is a mix of moist sponge and creamy topping that feels both nostalgic and exciting for what’s to come.
Ingredients
- Standard cupcake batter (chocolate or vanilla)
- Batch of stiff buttercream frosting
- Ghirardelli chocolate squares
- Mini peanut butter cups
- Sour belt candy (for tassels)
- Edible ink markers
- White fondant strips
How to make it
- Bake your favorite cupcakes and let them cool completely on a wire rack; any warmth will cause the decorative elements to slide off or melt.
- Pipe a flat, even circle of buttercream on top of each cupcake to act as the ‘glue’ for your graduation caps.
- To make the caps, place a mini peanut butter cup upside down in the center of the frosting, then top it with a thin chocolate square using a tiny dab of frosting.
- Cut a small piece of sour belt or fruit leather to create the tassel, and secure it to the center of the chocolate square with a small dot of icing or edible glue.
- For the ‘diplomas,’ roll small pieces of white fondant into cylinders, tie them with a tiny piece of red string (or use an edible marker to draw a line), and place them next to the caps.
- Arrange the cupcakes on a multi-level stand, grouping them by flavor or school colors for a professional, high-impact look.
Easy homemade rhubarb jam recipe tutorial

Why we love this
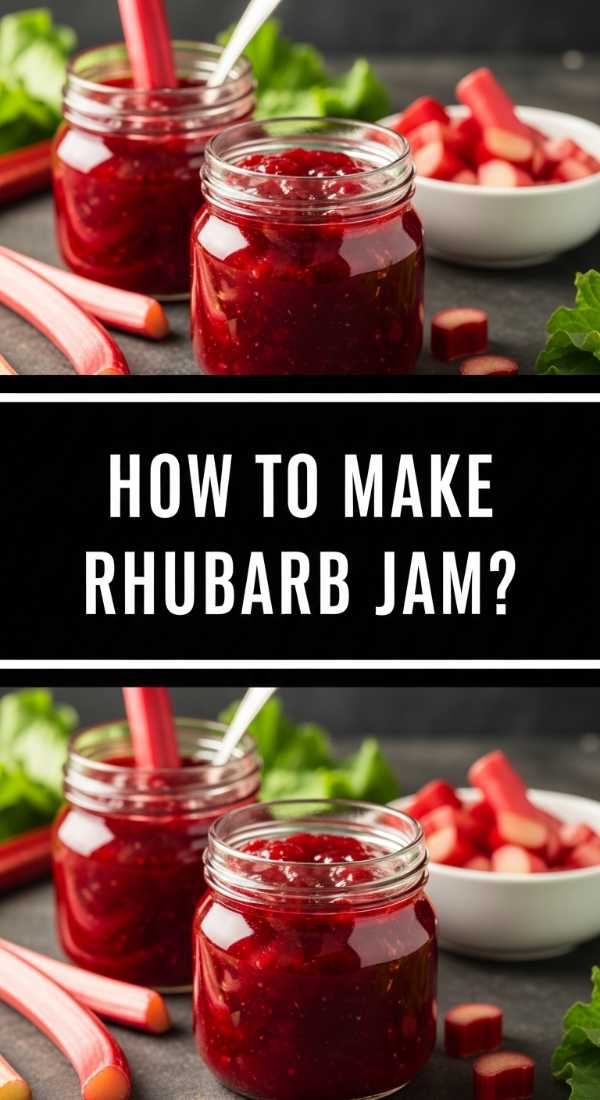
There is something deeply satisfying about the process of canning, turning raw, fibrous stalks of rhubarb into a glowing, ruby-red jewel of a jam. This recipe captures the essence of spring and summer in a jar, offering a flavor profile that is beautifully complex—bright, acidic, and perfectly sweetened. The aroma as it simmers on the stove is fresh and grassy, slowly transforming into a deep, fruity fragrance. Spread on a warm piece of sourdough, it provides a delightful contrast of textures: the crunch of the toast and the smooth, thick spread of the jam.
Ingredients
- 5 cups chopped rhubarb (1/2 inch pieces)
- 3 cups granulated sugar
- 2 tbsp lemon juice
- 1 tsp vanilla bean paste
- 1/4 tsp salt
- Optional: 1 tsp grated ginger
How to make it
- In a large, heavy-bottomed pot (stainless steel is best), combine the rhubarb, sugar, and lemon juice; let this mixture sit for 2 hours at room temperature to ‘macerate’ and draw out the liquid.
- Place the pot over medium heat and stir constantly until the sugar has completely dissolved and the mixture begins to reach a boil.
- Increase the heat to medium-high and bring the jam to a rolling boil that cannot be stirred down, stirring frequently to prevent the bottom from scorching.
- Cook for approximately 15-20 minutes, using a thermometer to check for the ‘gel point’ at 220°F (104°C) or performing the ‘plate test’ with a frozen saucer.
- Once the jam has thickened, stir in the vanilla bean paste and salt, which will enhance the natural brightness of the fruit.
- Ladle the hot jam into sterilized glass jars, leaving 1/4 inch of headspace at the top to allow for a proper vacuum seal.
- Wipe the rims clean, apply the lids and bands, and process in a boiling water bath for 10 minutes to ensure long-term shelf stability.
Fun coffee drinks for your next brunch
Why we love this
Coffee is more than just a morning jolt; it’s an experience, and for brunch, it should be as much a treat as the food. We love these fun variations because they play with temperature and texture—think velvety cold foam, aromatic spiced syrups, and the visual beauty of layered liquids. The scent of freshly ground beans mixed with hints of lavender or salted caramel creates an inviting atmosphere. Sipping a cold brew topped with a thick, sweet cream while the sun streams through the window is the ultimate lifestyle vibe.
Ingredients
- Concentrated cold brew coffee
- Whole milk or oat milk
- Lavender or vanilla syrup
- Heavy cream (for cold foam)
- Ice cubes (coffee-flavored cubes are best)
- Dried edible flowers or cinnamon sticks
How to make it
- For a layered iced latte, fill a tall glass with coffee ice cubes to prevent the drink from becoming watered down as it sits.
- Pour in 2 ounces of flavored syrup (lavender is wonderful for summer) followed by 6 ounces of cold milk of your choice.
- Gently pour 4 ounces of cold brew concentrate over the back of a spoon to create a beautiful separation of layers between the milk and the coffee.
- To make the cold foam, combine 2 tablespoons of heavy cream and 1 tablespoon of milk in a separate jar; use a handheld frother to whisk until thick and pillowy.
- Spoon the foam over the top of the coffee and garnish with a sprinkle of cinnamon or a few dried edible flower petals for that ‘coffee shop’ aesthetic.
- Serve immediately with a reusable straw to allow guests to stir and enjoy the merging of flavors.
Delicious rhubarb crumble recipe with oats
Why we love this
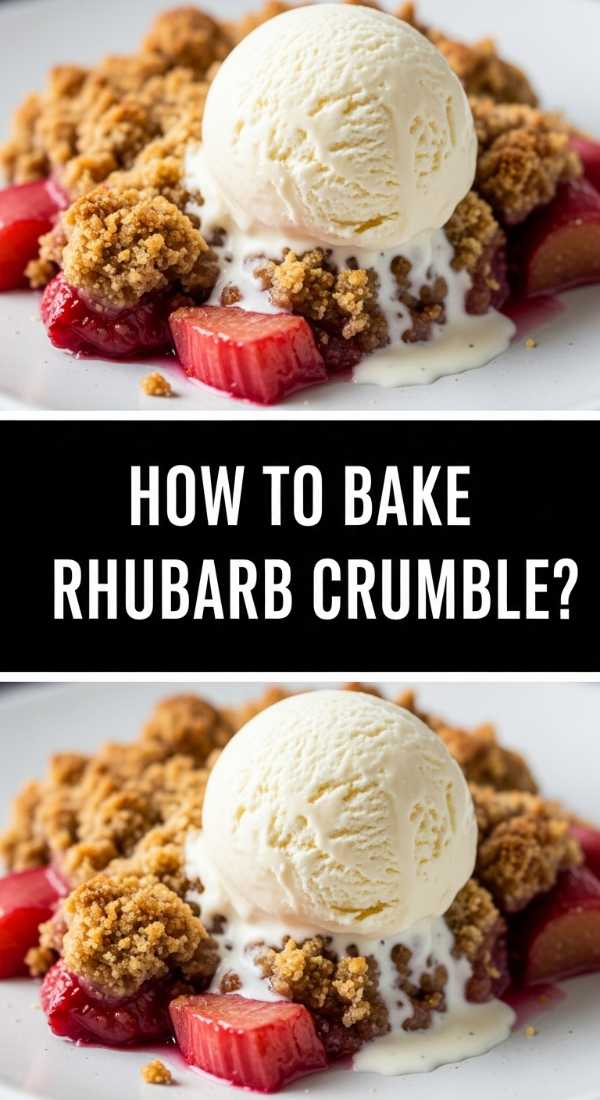
The rhubarb crumble is the ultimate ‘low-effort, high-reward’ dessert that everyone craves. We love the sensory contrast between the bubbling, molten rhubarb filling and the crunchy, buttery oat topping that provides a rustic, toasted flavor. As it bakes, the kitchen fills with the scent of cinnamon and warm butter, creating a sense of cozy anticipation. It’s the kind of dish that begs for a big spoon and a crowd of friends, offering a comforting texture that is both soft and crisp in every single bite.
Ingredients
- 6 cups chopped rhubarb
- 3/4 cup sugar
- 1 tbsp cornstarch
- 1 cup rolled oats
- 1 cup all-purpose flour
- 1/2 cup brown sugar
- 1/2 cup cold salted butter, cubed
- 1 tsp cinnamon
How to make it
- Preheat your oven to 375°F (190°C) and lightly grease a 9×9 inch baking dish or a cast-iron skillet for extra-crispy edges.
- In a large bowl, toss the rhubarb with the granulated sugar and cornstarch until the pieces are evenly coated, then spread them in an even layer in the prepared dish.
- In a separate medium bowl, whisk together the oats, flour, brown sugar, and cinnamon to distribute the spices evenly.
- Add the cold, cubed butter to the oat mixture; use your fingertips or a pastry cutter to rub the butter into the dry ingredients until it forms large, moist clumps.
- Scatter the crumble topping generously over the rhubarb, making sure to cover all the fruit to protect it from drying out in the oven.
- Bake for 35-45 minutes until the fruit juices are thick and bubbling up around the edges and the topping is a deep golden brown.
- Let the crumble cool for at least 15 minutes before serving to allow the juices to set slightly, making it easier to scoop.
Healthy toddler lunch recipes for picky eaters

Why we love this
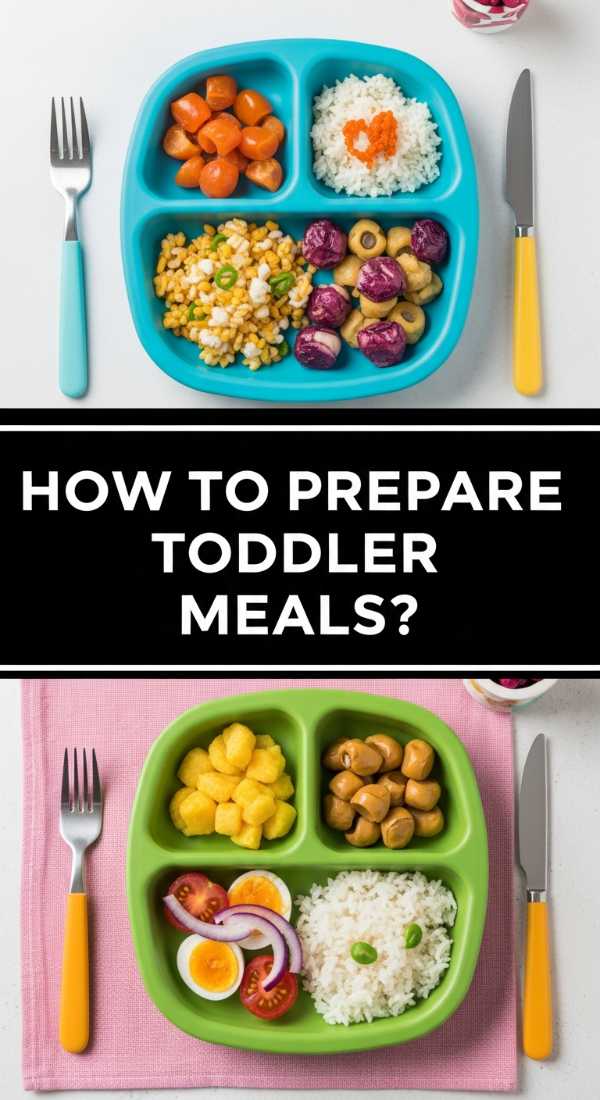
Feeding a picky toddler can feel like a high-stakes negotiation, which is why we love recipes that prioritize both nutrition and visual appeal. These lunch ideas focus on bite-sized, colorful components that encourage ‘grazing’ and self-feeding. We aim for textures that are soft and safe, like steamed broccoli ‘trees’ or creamy avocado mash. The goal is to make healthy food feel like a fun discovery, using bright colors and interesting shapes to entice the eyes before the first taste even happens, taking the stress out of mealtime for both parent and child.
Ingredients
- Whole grain bread or wraps
- Cookie cutters in fun shapes
- Shredded organic chicken or chickpeas
- Mild cheddar cheese slices
- Steamed carrots and broccoli
- Greek yogurt for dipping
- Berries or sliced melon
How to make it
- Start by using small cookie cutters (stars, hearts, or dinosaurs) to cut the whole grain bread and cheese into shapes that are easy for tiny hands to grip.
- Prepare a ‘deconstructed’ sandwich by laying out the bread shapes, cheese, and protein separately on a sectioned plate to avoid ‘food touching’ issues.
- Steam the vegetables until they are very soft—easily pierced with a fork—and then cut them into thin strips or small cubes to prevent any choking hazards.
- Create a simple dipping sauce by mixing Greek yogurt with a touch of honey or lemon juice; toddlers love the sensory experience of dipping their food.
- Incorporate one ‘safe’ food they already love alongside one ‘new’ food to encourage curiosity without overwhelming their palate.
- Keep portions small and manageable; a crowded plate can be intimidating for a small child, so focus on variety over volume.
Beautiful graduation sugar cookies ideas

Why we love this
Sugar cookies are the ultimate canvas for celebration, and for the Class of 2026, we love the precision and elegance of royal icing art. There is a satisfying ‘snap’ when you bite into a perfectly baked sugar cookie, followed by the smooth, sweet melt of the icing. The designs—ranging from diploma scrolls to graduation gowns—are as beautiful as they are delicious. The scent of buttery almond extract and sweet sugar creates a festive air, and these cookies serve as the perfect personalized party favors that guests will actually want to take home and enjoy.
Ingredients
- 3 cups all-purpose flour
- 1 cup unsalted butter, cold and cubed
- 1 cup granulated sugar
- 1 egg, cold
- 1 tsp almond extract
- Batch of Royal Icing (powdered sugar, meringue powder, water)
- Gel food coloring
How to make it
- Cream the cold butter and sugar together until just combined; using cold butter prevents the cookies from spreading too much in the oven, keeping the shapes sharp.
- Add the egg and almond extract, mixing until just incorporated, then slowly add the flour on low speed until the dough clumps together.
- Roll the dough out between two sheets of parchment paper to a 1/4 inch thickness and chill in the freezer for 15 minutes before cutting.
- Cut out your graduation shapes (caps, gowns, diplomas) and bake at 350°F for 10-12 minutes until the edges are just barely starting to turn golden.
- Prepare your royal icing: one batch at ‘flooding’ consistency (like honey) and one at ‘piping’ consistency (stiff peaks).
- Outline the cookie with the stiff icing first, then ‘flood’ the center with the thinner icing; use a toothpick or scribe tool to pop any tiny air bubbles for a glass-smooth finish.
- Allow the base layer to dry for at least 6 hours before adding detailed decorations like the year ‘2026’ or fine lines on the diploma with a small piping tip.
Epic graduation charcuterie board for parties
Why we love this
This is the ‘Simple Food Board’ at its finest—a sprawling, lavish display of textures and flavors that serves as the heart of any graduation party. We love the variety here: the saltiness of prosciutto, the creaminess of brie, the crunch of candied pecans, and the sweetness of fresh grapes. It’s a tactile experience where guests can customize every bite. The visual impact of a well-organized board, with its cascades of crackers and ‘rivers’ of cheese, is a guaranteed conversation starter that makes your hosting feel effortless and grand all at once.
Ingredients
- 3-4 types of cheese (Brie, Sharp Cheddar, Manchego, Goat)
- 3 types of cured meats (Salami, Prosciutto, Capicola)
- Fresh fruits (Grapes, Berries, Fig halves)
- Dried fruits and nuts
- Assorted crackers and a sliced baguette
- Honey and whole grain mustard
- Fresh rosemary for garnish
How to make it
- Start by placing your ‘anchors’ on a large wooden board—these are usually small bowls for honey, mustard, or olives, and your largest cheeses like a whole wheel of Brie.
- Create ‘cheese rivers’ by slicing the harder cheeses (like cheddar) and fanning them out in a curved line across the board to guide the eye.
- Fold your meats into interesting shapes; for example, fold salami into triangles or ribbons, and drape the prosciutto loosely to create height and texture.
- Fill in the large remaining gaps with clusters of grapes and piles of crackers, ensuring you have a variety of shapes (rounds, squares, and long breadsticks).
- Use smaller items like nuts, dried cranberries, and berries to fill in every single tiny ‘hole’ on the board; the goal is for none of the wood to be visible for that ‘epic’ look.
- Garnish the edges with sprigs of fresh rosemary or edible flowers to add a pop of green and a fresh, herbaceous scent to the display.
- Provide small tongs or cheese knives for each section to make it easy for guests to serve themselves without creating a mess.
Fresh lemon pesto recipe for summer dinners
[IMAGE_10]
Why we love this
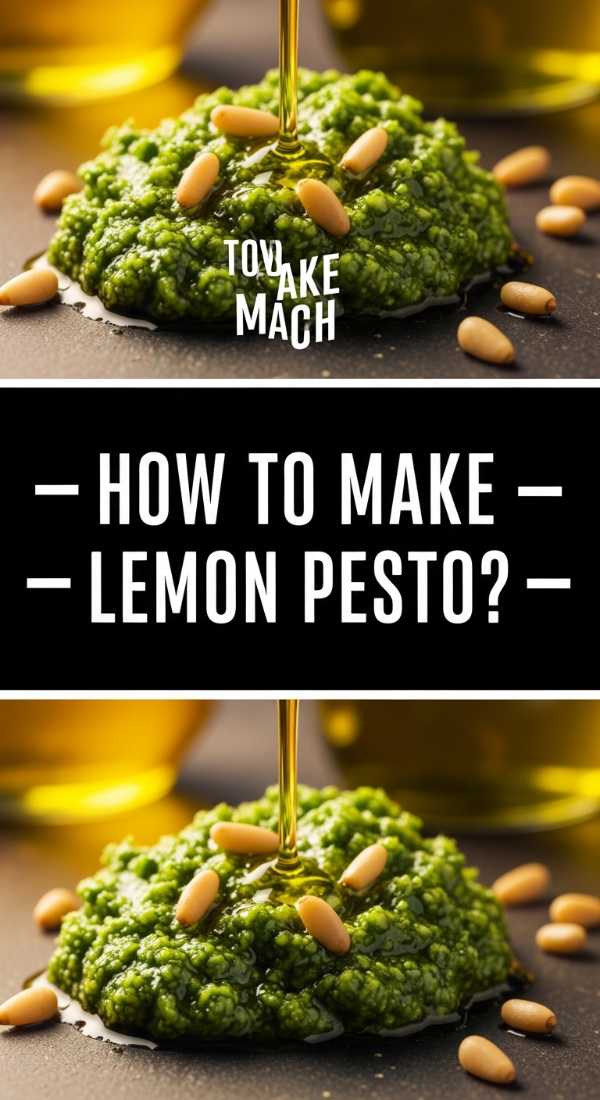
Lemon pesto is like summer in a bowl—it’s lighter, brighter, and more vibrant than its traditional counterpart. We love the way the sharp acidity of fresh lemon zest cuts through the rich, earthy flavors of basil and toasted pine nuts. The aroma is incredibly uplifting, and the texture is a beautiful coarse paste that clings perfectly to al dente pasta. It feels sophisticated yet takes only minutes to prepare, making it the perfect solution for those warm summer evenings when you want a high-quality meal without spending hours in a hot kitchen.
Ingredients
- 2 cups fresh basil leaves, packed
- 1/2 cup freshly grated Parmesan cheese
- 1/3 cup pine nuts, toasted
- 2 cloves garlic, minced
- 1/2 cup extra virgin olive oil
- Zest of 2 lemons
- 2 tbsp fresh lemon juice
- Salt and cracked black pepper to taste
How to make it
- Begin by toasting your pine nuts in a dry skillet over medium-low heat for 3-5 minutes, tossing frequently until they are golden and fragrant; this releases the oils and deepens the flavor.
- In a food processor, combine the fresh basil, toasted pine nuts, minced garlic, and lemon zest; pulse a few times until the mixture is coarsely chopped.
- While the processor is running on low, slowly drizzle in the extra virgin olive oil in a steady stream to create a creamy, emulsified texture.
- Add the Parmesan cheese and lemon juice, then pulse just 2 or 3 more times to incorporate; you want to keep some of the texture of the cheese rather than blending it into a smooth liquid.
- Taste the pesto and season with salt and freshly cracked black pepper; remember that the cheese is already salty, so adjust carefully.
- Serve immediately over hot pasta, using a splash of the pasta cooking water to thin the sauce so it coats every strand beautifully.
- Store any leftovers in a jar with a thin layer of olive oil on top to prevent the basil from oxidizing and turning brown.
Conclusion
Creating these beautiful food boards and seasonal dishes is about more than just the ingredients; it’s about the memories you build while sharing them. Whether you’re honoring the Class of 2026 with a custom cake or simply enjoying the tart snap of a summer rhubarb crumble, these recipes bring people together in the best way possible. I hope these ideas inspire you to embrace the ‘Simple Food Board’ lifestyle and find joy in the art of hosting. Happy cooking!