
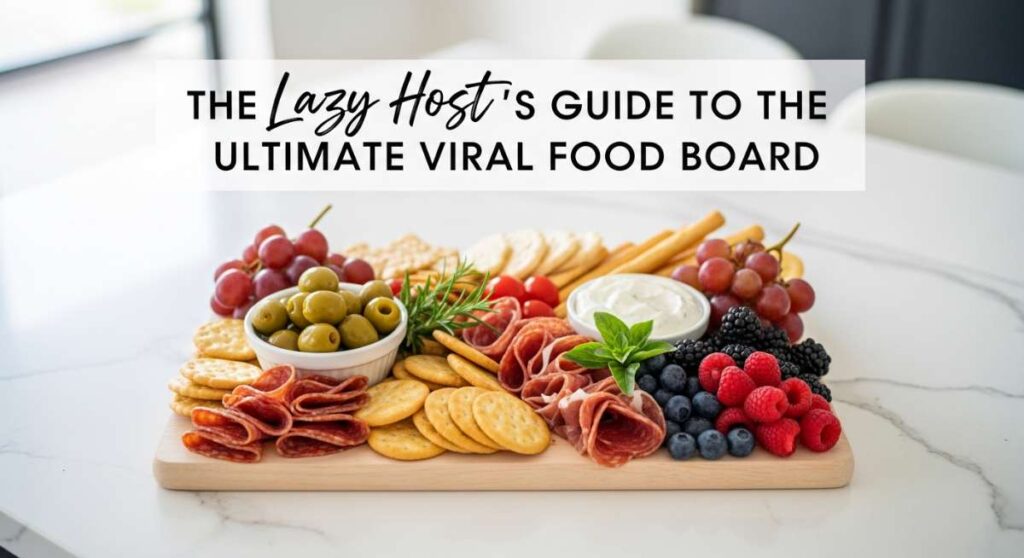
I used to be the person who would spend three days prep-cooking before a party, only to be so exhausted that I’d fall asleep into the spinach dip before the first guest even arrived. We’ve all been there, right? The stress of trying to make everything look like a Pinterest board while managing the stovetop, the oven, and our sanity is enough to make anyone want to cancel their hosting duties forever. But then, I discovered the magic of the ‘Viral Food Board’—a chaotic yet beautiful assembly of flavors that requires more assembly than actual cooking, and let me tell you, it changed everything.
The secret to the ultimate host lifestyle isn’t about being a professional chef; it’s about being a master of the ‘spread.’ By combining sweet treats, savory dips, and seasonal fruits onto one massive wooden board, you create an interactive experience that guests can’t stop photographing. It’s colorful, it’s bountiful, and it allows you to actually sit down and enjoy a glass of wine with your friends instead of hovering over a hot stove.
In this guide, we are diving deep into some of the most requested, viral-worthy components to add to your next big spread. From celebration-themed sweets for graduation season to the tart, vibrant flavors of early summer rhubarb, these recipes are designed to be the stars of your board. Let’s get into how you can make your next gathering the talk of the town without breaking a sweat!
How to bake the perfect celebratory grad cake?
Why we love this
There is something profoundly nostalgic and celebratory about a classic vanilla sponge cake, especially when it’s the centerpiece of a graduation spread. We love this recipe because it strikes the perfect balance between a dense, moist crumb and a light, airy finish that melts on the tongue. The aroma of high-quality Madagascar vanilla bean wafting through the kitchen creates an immediate sense of warmth and accomplishment. It’s a versatile canvas that holds up beautifully to heavy frosting while remaining delicate enough to enjoy as a simple slice alongside a cup of coffee.
Ingredients
- 2 1/2 cups all-purpose flour
- 1 1/2 cups granulated sugar
- 1 cup unsalted butter, softened
- 4 large eggs, room temperature
- 1 cup whole milk
- 1 tablespoon vanilla extract
- 2 1/2 teaspoons baking powder
- 1/2 teaspoon salt
How to make it
- Preheat your oven to 350°F (175°C) and grease two 8-inch round cake pans thoroughly with butter, then dust with flour to ensure a clean release.
- In a large mixing bowl, sift together the flour, baking powder, and salt to aerate the dry ingredients and remove any clumps.
- Using a stand mixer with a paddle attachment, cream the softened butter and sugar on medium-high speed for at least 5 minutes until the mixture is pale, fluffy, and doubled in volume.
- Add the eggs one at a time, beating well after each addition to ensure the emulsion doesn’t break; scrape down the sides of the bowl frequently.
- Reduce the mixer to low speed and alternate adding the dry ingredients and the milk in three batches, starting and ending with the flour mixture.
- Gently fold in the vanilla extract by hand to preserve the air bubbles, then divide the batter evenly between the prepared pans.
- Bake for 30-35 minutes or until a wooden skewer inserted into the center comes out clean with just a few moist crumbs.
- Allow the cakes to cool in the pans for 10 minutes before transferring them to a wire rack to cool completely before frosting.
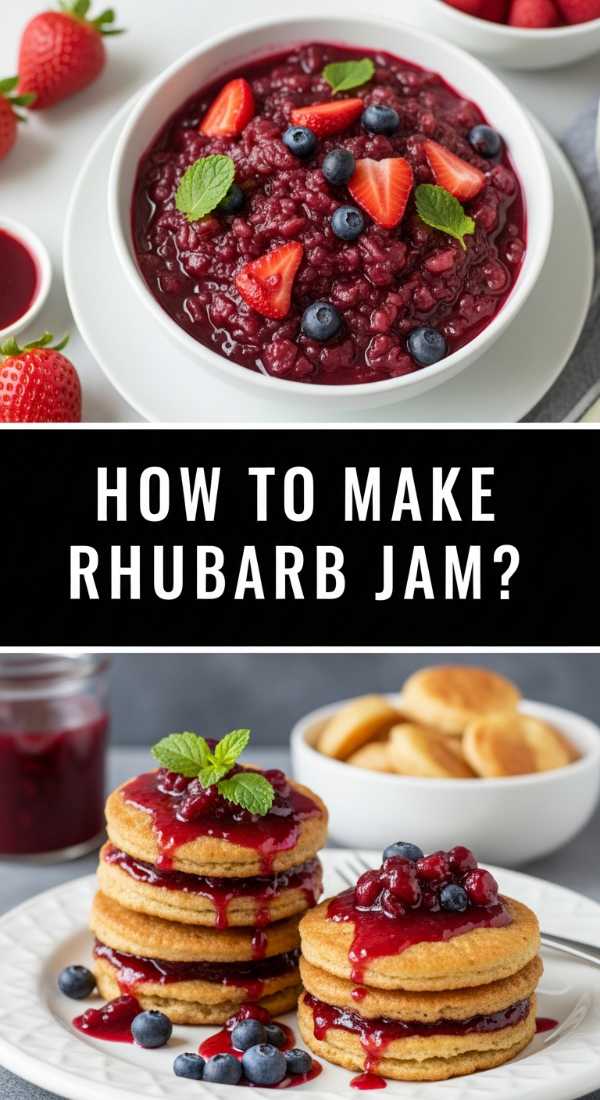
How to make tangy rhubarb jam in minutes?
Why we love this
Rhubarb jam is like capturing the essence of spring in a jar, offering a sharp, zesty brightness that cuts through the richness of any cheese board. We love the way the fibrous stalks break down into a luscious, ruby-red silkiness that glows under the light. The flavor is a sophisticated dance of tartness and sweetness, providing a sensory pop that wakes up the palate and pairs perfectly with creamy bries or sharp cheddars. It’s a simple luxury that makes even a plain piece of toast feel like a gourmet experience at a high-end bistro.
Ingredients
- 4 cups chopped rhubarb (1/2 inch pieces)
- 1 1/2 cups granulated sugar
- 2 tablespoons fresh lemon juice
- 1 teaspoon lemon zest
- 1/4 teaspoon ground ginger (optional)
How to make it
- In a large, heavy-bottomed saucepan, combine the chopped rhubarb, sugar, lemon juice, and lemon zest, stirring until the fruit is well-coated.
- Let the mixture sit for about 15 minutes at room temperature to allow the sugar to draw out the natural juices from the rhubarb.
- Place the pan over medium heat and bring the mixture to a gentle boil, stirring constantly with a wooden spoon to prevent the sugar from scorching.
- Lower the heat to a simmer and cook for 15-20 minutes, skimming off any foam that rises to the surface with a metal spoon.
- To check for doneness, use the ‘wrinkle test’: place a small spoonful of jam on a chilled plate, let it sit for a minute, and push it with your finger; if it wrinkles, it’s set.
- Remove from heat and stir in the ginger if using, then let it cool slightly before transferring into sterilized glass jars.
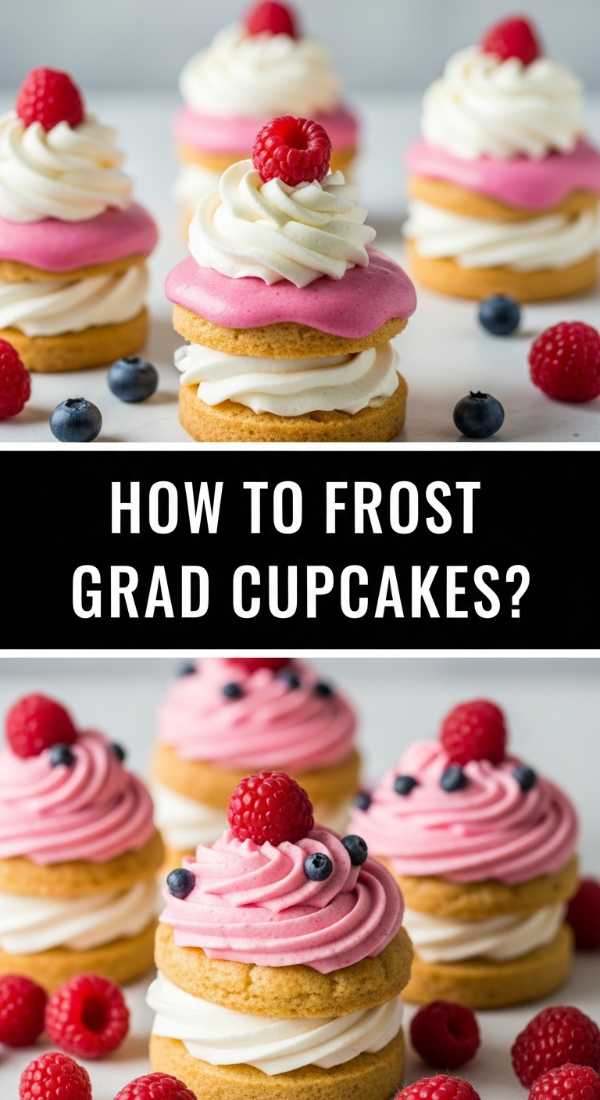
How to whip up graduation cap cupcakes?
Why we love this
These cupcakes are the ultimate conversation starter because they are just so incredibly cute and whimsical. We love how they transform a standard dessert into a personalized tribute to success, with the smooth chocolate squares acting as the perfect ‘cap’ atop a cloud of buttercream. The combination of textures—the soft cake, the creamy frosting, and the snap of the chocolate—creates a satisfying bite every time. They bring a sense of playfulness to your food board that guests of all ages will find irresistible and totally ‘Instagrammable.’
Ingredients
- 12 pre-baked chocolate cupcakes
- 2 cups vanilla buttercream frosting
- 12 Ghirardelli chocolate squares
- 12 miniature peanut butter cups (inverted)
- Fruit roll-ups or sour belts (for tassels)
- M&Ms or small candy pearls
How to make it
- Prepare your cupcakes and ensure they are completely cool to the touch so the frosting doesn’t melt and slide off.
- Pipe a generous swirl of vanilla buttercream onto each cupcake using a star tip to create a sturdy base for the ‘cap.’
- Unwrap the miniature peanut butter cups and place them upside down in the center of the frosting swirl, pressing down slightly so they are secure.
- Place a tiny dot of frosting on the top of the inverted peanut butter cup and gently press a chocolate square onto it to form the mortarboard.
- Cut thin strips from the fruit roll-ups or sour belts to create the ‘tassel’ and use a tiny dab of frosting to attach it to the center of the chocolate square.
- Finish the look by placing an M&M or candy pearl over the end of the tassel in the center of the square to mimic the button on a graduation cap.
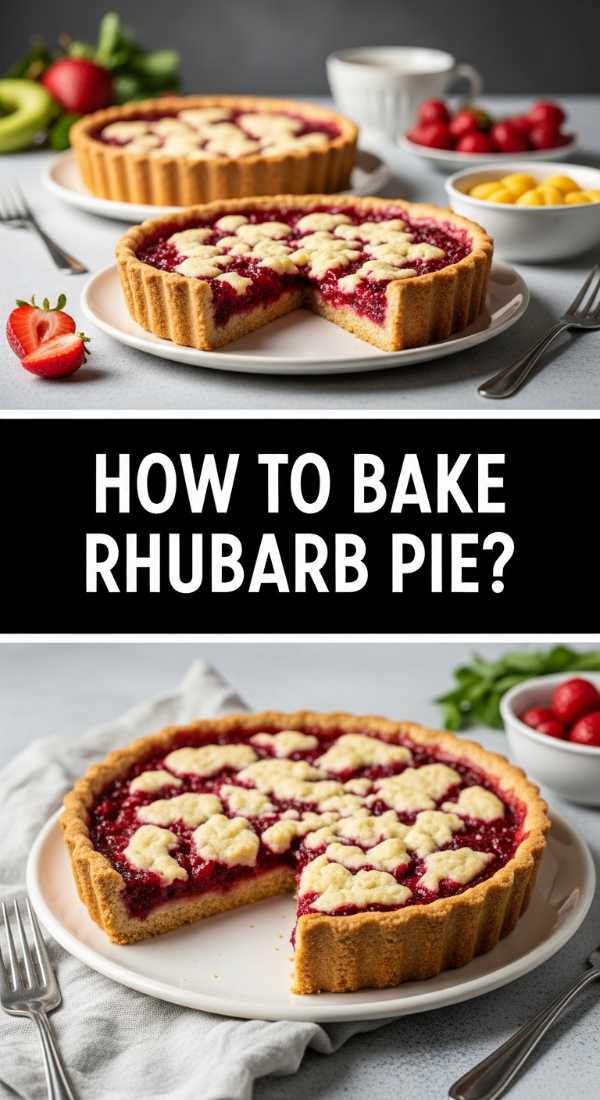
How to bake a classic lattice rhubarb pie?
Why we love this
There is nothing quite like the architectural beauty of a lattice-top pie, especially when the vibrant pink juices of the rhubarb are bubbling through the gaps. We love the contrast between the incredibly flaky, buttery crust and the bold, mouth-puckering tang of the rhubarb filling. As it bakes, the aroma of caramelizing sugar and toasted butter fills the house, creating a cozy, welcoming atmosphere. It’s a rustic masterpiece that looks like it came straight out of a professional bakery, making it the perfect focal point for a large dessert board.
Ingredients
- Double pie crust (homemade or store-bought)
- 6 cups sliced rhubarb
- 1 1/4 cups granulated sugar
- 1/3 cup cornstarch
- 1 tablespoon lemon juice
- 1 teaspoon vanilla extract
- 1 egg (for wash) and coarse sugar for topping
How to make it
- Roll out the bottom pie crust and fit it into a 9-inch pie plate, leaving an overhang, and chill in the refrigerator while you prepare the filling.
- In a large bowl, toss the sliced rhubarb with the sugar, cornstarch, lemon juice, and vanilla until the stalks are evenly coated and the sugar begins to dissolve.
- Pour the filling into the chilled crust, mounding it slightly in the center to account for shrinkage during the baking process.
- Roll out the second crust and cut into 1-inch wide strips using a pastry wheel or a sharp knife.
- Weave the strips over the filling in a lattice pattern, folding back alternating strips to create the over-under effect.
- Trim the excess dough, crimp the edges tightly to seal, and brush the entire lattice with a beaten egg wash before sprinkling generously with coarse sugar.
- Bake at 425°F for the first 15 minutes, then reduce the heat to 375°F and bake for another 45-50 minutes until the crust is deep golden brown and the filling is thick and bubbling.
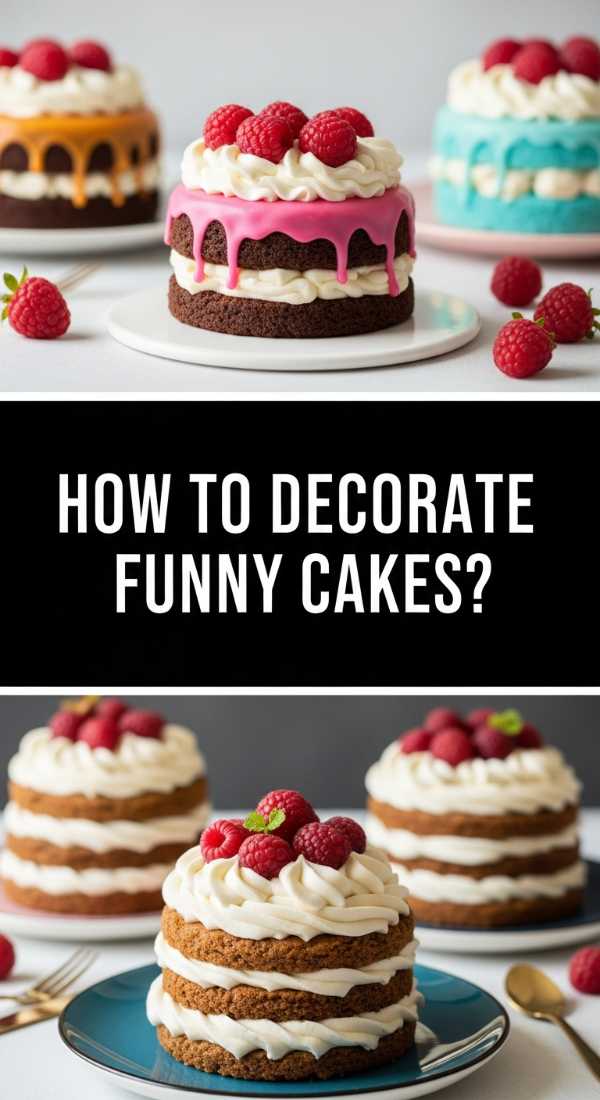
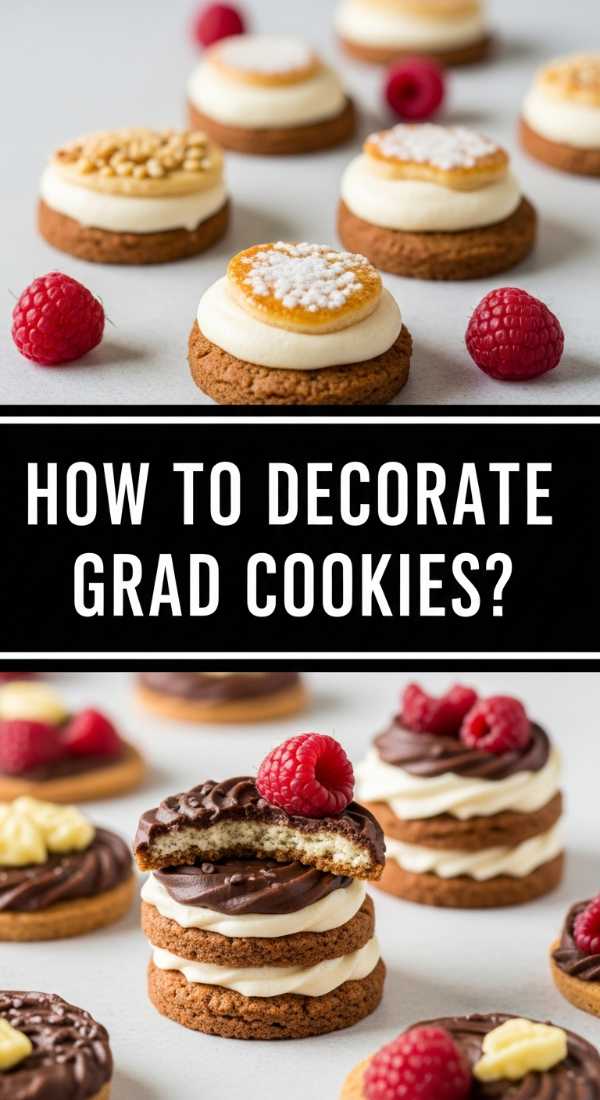
How to design a hilariously relatable grad cake?
Why we love this
Humor is the best way to break the ice at a party, and a ‘funny’ graduation cake does exactly that by acknowledging the struggle of the academic journey. We love using ‘relatable’ quotes or minimalist designs that poke fun at the ‘adulting’ that is about to begin. It’s a way to make the graduate feel seen beyond just their grades, celebrating their personality and resilience. Whether it’s a cake that says ‘I’m done’ or ‘Hire me,’ the witty presentation adds a layer of human connection that traditional cakes often lack.
Ingredients
- 9×13 inch sheet cake (flavor of choice)
- 4 cups white crusting buttercream
- Black gel food coloring
- Piping bags and a small round tip (#3)
- Fondant for small decorative accents
How to make it
- Crumb coat your sheet cake with a thin layer of buttercream and chill for 30 minutes to lock in any loose crumbs.
- Apply a smooth final layer of white buttercream, using a bench scraper to achieve perfectly flat surfaces and sharp corners for a clean ‘canvas’ look.
- Sketch your funny phrase (e.g., “Hotter by one degree” or “Now what?”) lightly onto the chilled frosting using a toothpick as a guide.
- Mix the black gel coloring into a small portion of buttercream and load it into a piping bag fitted with the small round tip.
- Trace over your toothpick sketch with steady pressure, keeping the tip slightly above the surface to ensure smooth, continuous lines without ‘dragging.’
- Add small fondant accents, like a tiny ‘diploma’ or a ‘grad cap,’ to the corners of the cake to tie the theme together while keeping the focus on the text.
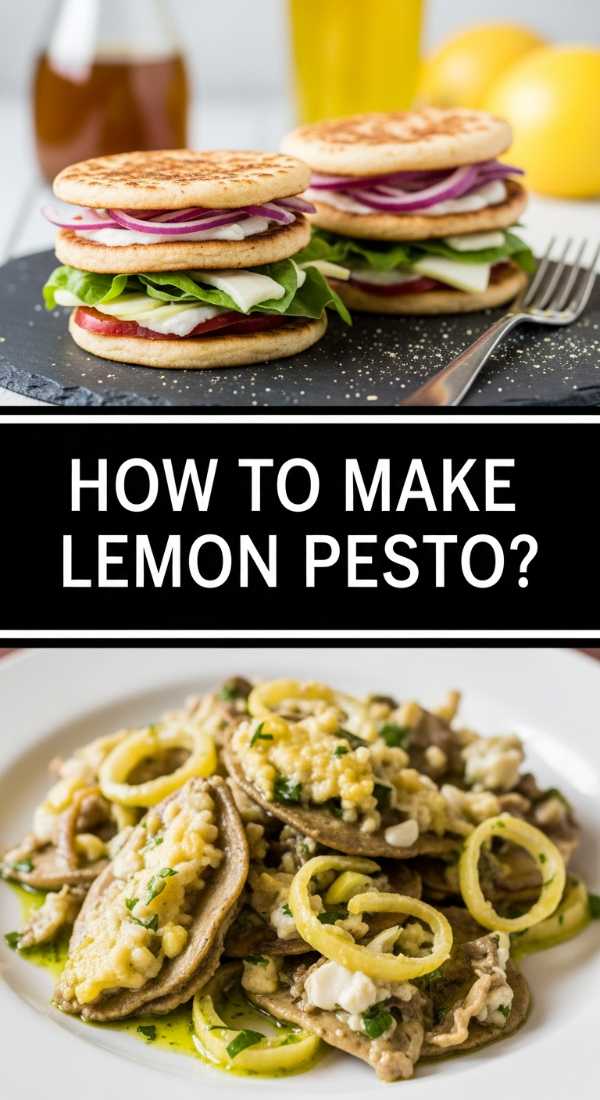
How to create a zesty lemon pesto board dip?
Why we love this
This lemon pesto is the ultimate ‘lazy host’ hack because it’s incredibly fast to make but tastes like you spent hours sourcing ingredients from an Italian market. We love the electric green color it adds to a food board and the way the citrus oil cuts through the savory, nutty richness of the parmesan and pine nuts. The texture is intentionally coarse and rustic, providing a satisfying mouthfeel that works just as well on a cracker as it does drizzled over fresh mozzarella. It’s a breath of fresh air for your palate amidst heavier appetizers.
Ingredients
- 2 cups fresh basil leaves, packed
- 1/2 cup grated Parmesan cheese
- 1/3 cup toasted pine nuts
- 2 cloves garlic, minced
- 1/2 cup extra-virgin olive oil
- Zest and juice of 1 large lemon
- 1/2 teaspoon sea salt
How to make it
- Toast the pine nuts in a dry skillet over medium heat for 2-3 minutes until they are fragrant and golden brown, then let them cool completely.
- Place the basil, cooled pine nuts, garlic, parmesan, lemon zest, and salt into a food processor.
- Pulse the mixture 10-12 times until it forms a coarse paste; avoid over-processing, as you want to maintain some texture from the nuts.
- With the processor running on low, slowly stream in the olive oil and lemon juice through the feed tube until the pesto is emulsified but still has a bit of body.
- Taste and adjust the seasoning with more salt or lemon juice if needed to achieve a bright, zesty profile.
- Transfer to a small serving bowl and top with a final sprinkle of lemon zest and a drizzle of olive oil before placing it on your food board.
How to craft barista-style iced coffee at home?
Why we love this
A food board isn’t just about food; it’s about the beverage pairings, and a beautifully layered iced coffee is the ultimate chic companion. We love the visual of the dark, rich coffee swirling into the creamy white milk, creating an ombre effect that looks professional and inviting. The flavor is clean and energizing, especially when made with a cold brew concentrate that eliminates any bitterness. It’s the perfect mid-party pick-me-up that keeps the energy high and the guests feeling pampered with a custom-made drink.
Ingredients
- 1 cup strong cold brew coffee or 2 shots of espresso
- 1 cup milk of choice (oat milk works beautifully for creaminess)
- 1-2 tablespoons simple syrup or vanilla syrup
- Large ice cubes (clear ice is best for the ‘viral’ look)
- A pinch of sea salt (optional, to enhance the coffee notes)
How to make it
- If using espresso, brew your shots and let them cool slightly so they don’t immediately melt all your ice.
- Fill a tall glass to the very brim with large ice cubes; the more ice you use, the slower it melts, keeping your drink cold without diluting it.
- Pour your syrup of choice into the bottom of the glass, followed by the cold brew or cooled espresso.
- If you want the layered look, slowly pour the milk over the back of a spoon held just above the surface of the coffee to break the fall.
- Add a tiny pinch of sea salt to the top to sharpen the flavor profile and cut through the sweetness of the syrup.
- Serve with a reusable straw and encourage guests to stir only when they are ready to drink to preserve the beautiful layers.
How to use fresh mulberries in a summer spread?
Why we love this
Mulberries are the hidden gems of the berry world, and including them on a board feels like sharing a secret from an enchanted garden. We love their unique, elongated shape and the deep, ink-purple juice that stains everything it touches in the most beautiful way. Their flavor is complex—less tart than a blackberry but more earthy than a raspberry—providing a sophisticated sweetness that pairs exquisitely with goat cheese or honey. They add an air of ‘foraged elegance’ to your spread that guests will find intriguing and delicious.
Ingredients
- 2 cups fresh mulberries, rinsed and patted dry
- 1 tablespoon honey
- 1 teaspoon fresh thyme leaves
- 8 oz log of goat cheese
- Crackers or baguette slices
How to make it
- Select the ripest mulberries, which should be dark purple or black; avoid any that are still pale pink, as they will be quite sour.
- In a small bowl, gently toss the berries with the honey and thyme, being careful not to crush them, as they are very delicate.
- Place the goat cheese log on a serving platter and use a spoon to create a shallow ‘well’ or indentation along the top of the cheese.
- Spoon the honeyed mulberries into the well, allowing some of the juice and berries to spill over the sides for a rustic, abundant look.
- Let the dish sit at room temperature for about 15 minutes before serving to allow the goat cheese to soften and the flavors to meld.
- Serve with crusty baguette slices, ensuring each guest gets a mix of the creamy cheese and the macerated berries.
How to frost stylish diploma graduation cookies?
Why we love this
Diploma cookies are a testament to the idea that simple shapes can have a massive impact when executed with a little bit of style. We love the satisfying ‘snap’ of a well-baked sugar cookie combined with the smooth, matte finish of royal icing. These cookies are perfectly portable and act as the ideal ‘filler’ for the gaps on your food board, bringing the whole graduation theme together. They are elegant, customizable with school colors, and provide a sweet, buttery finish to any celebratory meal.
Ingredients
- 1 batch of rectangular sugar cookies
- 3 cups royal icing (stiff consistency for outlining, thin for flooding)
- Food coloring (to match school colors)
- Small ribbon (optional, for physical accents)
How to make it
- Bake your rectangular cookies and ensure they are perfectly flat; if they puff up, gently press them down with a flat spatula immediately after they come out of the oven.
- Using the stiff royal icing, pipe a thin border around the edge of each rectangle to create a ‘dam’ for the flood icing.
- Thin out a portion of the icing with a few drops of water until it reaches ‘honey’ consistency, then ‘flood’ the center of the cookies within the borders.
- Use a toothpick to pop any air bubbles and ensure the icing is spread into all the corners for a seamless finish.
- Allow the base icing to dry for at least 4-6 hours (or overnight) until it is completely hard to the touch.
- Using the stiff icing in a contrasting color, pipe a small ‘ribbon’ detail across the center of the rectangle to make it look like a rolled diploma.
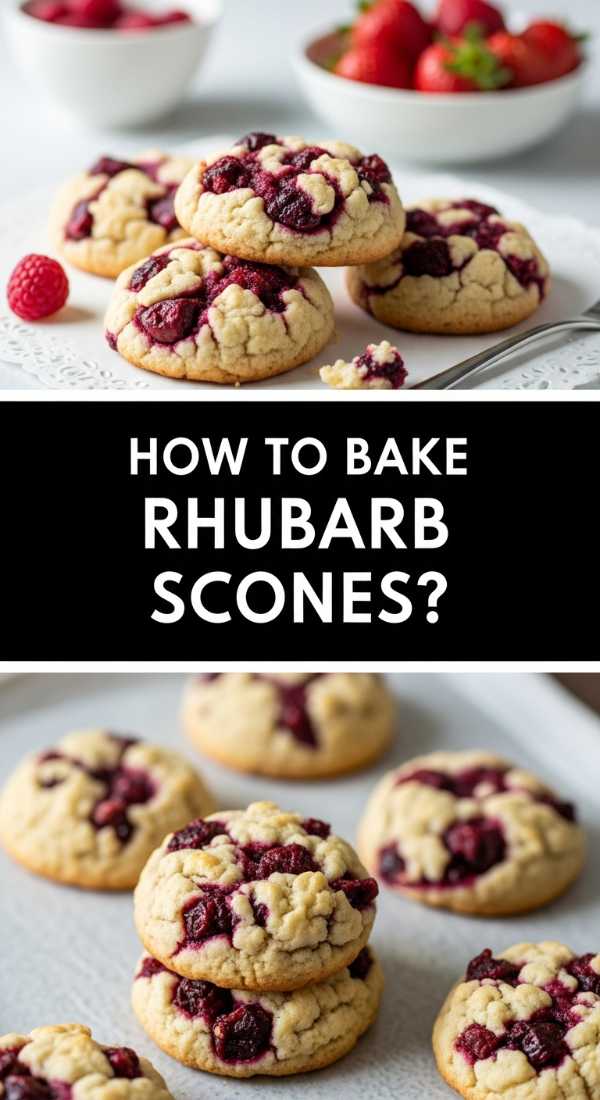
How to make buttery rhubarb scones for brunch?
[IMAGE_10]
Why we love this
Scones are the ultimate comfort food, and adding tart rhubarb transforms them into a gourmet brunch treat. We love the texture of these scones—crispy and golden on the outside, but tender, flaky, and layered on the inside. The little pockets of rhubarb soften in the oven, creating bursts of jammy tartness that contrast perfectly with the rich, buttery dough. Sprinkled with coarse sugar, they have a delightful crunch that makes them feel like a decadent indulgence worthy of a slow, sun-drenched Sunday morning.
Ingredients
- 3 cups all-purpose flour
- 1/2 cup granulated sugar
- 1 tablespoon baking powder
- 1/2 teaspoon salt
- 3/4 cup cold unsalted butter, cubed
- 1 1/2 cups chopped rhubarb
- 1 cup heavy cream (plus extra for brushing)
- Coarse sanding sugar for topping
How to make it
- In a large bowl, whisk together the flour, sugar, baking powder, and salt.
- Use a pastry cutter or your fingertips to ‘cut’ the cold butter into the dry ingredients until the mixture resembles coarse crumbs with some pea-sized chunks of butter remaining.
- Gently fold in the chopped rhubarb, ensuring the pieces are coated in flour so they don’t clump together.
- Make a well in the center and pour in the heavy cream, stirring with a fork just until a shaggy dough begins to form; do not overwork the dough.
- Turn the dough onto a lightly floured surface and pat it into a 1-inch thick circle, then cut into 8 wedges using a sharp knife or bench scraper.
- Place the wedges on a parchment-lined baking sheet and chill in the freezer for 15 minutes to firm up the butter, which ensures maximum flakiness.
- Brush the tops with a little extra cream, sprinkle generously with coarse sugar, and bake at 400°F for 18-22 minutes until the edges are deep golden brown.
Conclusion
Hosting doesn’t have to be a high-stress performance. By focusing on a few ‘hero’ items like a stunning rhubarb pie or some whimsical graduation cupcakes and arranging them thoughtfully on a board, you create an environment that is both impressive and relaxed. Remember, the best part of any gathering is the connection you share with your guests, so take the ‘lazy’ route where you can, prep ahead, and let the food board do the heavy lifting for you. Happy hosting!