
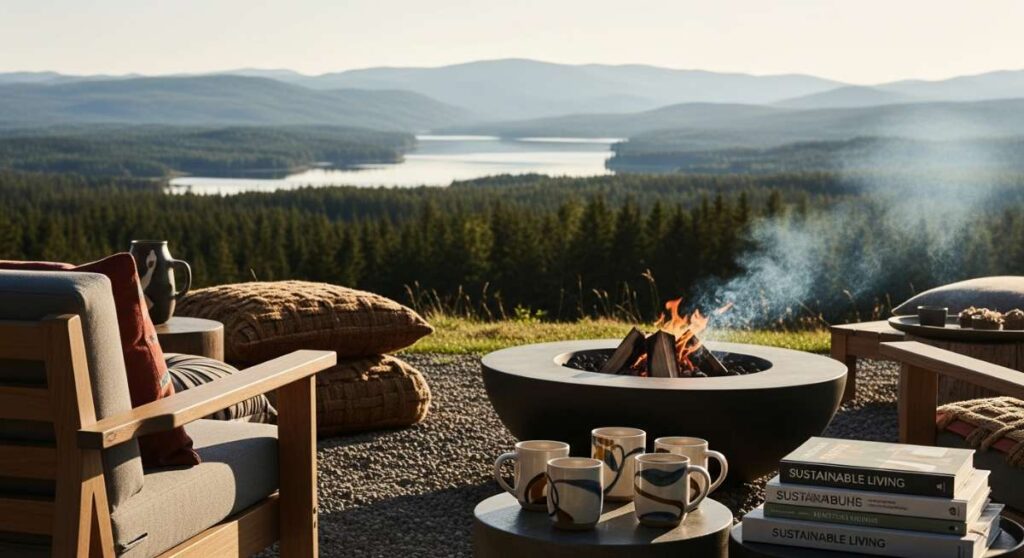
Have you ever had one of those mornings where the world feels like it’s moving at a thousand miles per hour, but you just want to freeze time? I found myself there last Tuesday, clutching a lukewarm coffee and staring out my back window. That’s when it hit me: the ‘Slow Living’ movement isn’t just a Pinterest aesthetic; it’s a survival strategy for the modern soul. We are all collectively exhaling, stepping away from the digital noise, and reclaiming our physical spaces as sanctuaries of peace and presence.
There is something deeply grounding about the scent of sun-warmed cedar, the rhythmic creak of a porch swing, or the simple joy of watching a bumblebee navigate a lavender sprig. This shift toward outdoor living and intentional home design is about more than just ‘curb appeal.’ It’s about creating a lifestyle where we actually have the time to notice the way the light filters through the trees at dusk. It’s about building a life we don’t feel the need to escape from.
In this post, I’m sharing ten transformative ways to bring that slow-living magic into your world. Whether you have a sprawling backyard or a tiny apartment balcony, these projects are designed to help you slow down, breathe deep, and fall in love with your surroundings all over over again.
How to Design a Patriotic Front Porch for Ultimate Summer Curb Appeal

Why we love this
There is a timeless, comforting nostalgia in the classic red, white, and blue color palette that feels like a warm hug from childhood. Walking up to a porch adorned with crisp bunting and the gentle flutter of a flag immediately evokes the aroma of charcoal grills and the sweetness of strawberry shortcake. It creates a welcoming, community-focused vibe that invites neighbors to stop for a chat, turning a simple entryway into a vibrant celebration of summer heritage and shared joy.
Essential Elements:
- Vintage-style pleated cotton bunting
- Heavy-duty flag kit with a brass bracket
- Navy blue outdoor rug with white patterns
- Overhead wooden rocking chairs
- Classic red geraniums in white ceramic pots
- Galvanized metal buckets for ice and drinks
How to make it
- Measure your porch railing to determine how many pleated buntings you need; space them evenly for a professional, symmetrical look.
- Install the flag bracket at a 45-degree angle on a structural pillar, ensuring it is at eye level for maximum visibility.
- Layer your textiles by placing a large jute rug down first, then topping it with a smaller, patterned navy rug for that designer ‘layered’ texture.
- Arrange your furniture in a conversational grouping, placing rocking chairs at a slight angle toward each other with a small side table in between.
- Plant high-impact red geraniums in oversized white pots, ensuring you use a high-quality potting mix with perlite for drainage.
- Add finishing touches like a navy blue door wreath and a vintage-inspired welcome mat to anchor the space.
How to Build a Cheap Pool Deck for an Oasis Experience

Why we love this
Nothing says ‘slow living’ like the feeling of sun-warmed wood beneath your bare feet and the shimmering reflection of water nearby. Creating a pool deck on a budget transforms a standard above-ground pool into a high-end resort experience, providing a dedicated space for lounging with a book or drying off after a long soak. The aroma of treated lumber mixed with the fresh scent of water creates a sensory retreat right in your own backyard, making every weekend feel like a staycation.
Essential Elements:
- Pressure-treated 2×4 and 2×6 lumber
- Decking screws (weather-resistant)
- Concrete deck blocks for foundations
- Leveling sand or gravel
- Transparent or semi-transparent cedar stain
- Outdoor solar-powered deck lights
How to make it
- Clear the area around your pool and lay down a layer of leveling gravel to prevent moisture buildup and ensure a stable base.
- Set your concrete deck blocks in a grid pattern, checking each one with a 4-foot level to ensure the entire foundation is perfectly flat.
- Construct the outer frame using 2×6 pressure-treated boards, securing them with galvanized lag bolts for structural integrity.
- Install joists every 16 inches on center; this prevents the deck boards from sagging over time and ensures a ‘stiff’ feel underfoot.
- Lay your decking boards across the joists, using a 1/8-inch spacer between each board to allow for wood expansion and water drainage.
- Sand any rough edges with 80-grit sandpaper and apply two coats of high-quality weatherproofing stain once the wood has ‘cured’ (usually after a few weeks of dry weather).
How to Create Simple Landscaping for a Dreamy Front Yard
![]()
Why we love this
A well-landscaped front yard is like a visual deep breath that greets you the moment you pull into the driveway. We love this approach because it focuses on ‘undone’ elegance—think wispy ornamental grasses and fragrant perennials that dance in the breeze. The sensory experience of soft petals, the earthy scent of fresh mulch, and the sight of butterflies darting between blooms creates a serene environment that signals to your brain that it’s time to leave the stress of the day behind.
Essential Elements:
- Black or dark brown organic mulch
- Low-maintenance perennials (Lavender, Coneflowers, Hostas)
- Natural stone or brick edging
- Fountain or small birdbath
- Solar path lighting
- A focal point tree (like a Japanese Maple or Dogwood)
How to make it
- Define your bed lines using a garden hose to map out organic, sweeping curves; avoid harsh straight lines for a more ‘natural’ and slow-living look.
- Use an edger or a sharp spade to cut a 3-inch deep trench along your mapped line to keep grass from encroaching on your beds.
- Amend the soil with organic compost, mixing it in at least 6 inches deep to give your new plants the nutrients they need to thrive.
- Place your ‘anchor’ plants (larger shrubs or trees) first, then fill in with mid-sized perennials, and finally add groundcover at the front of the bed.
- Spread a 3-inch layer of mulch across the entire bed, being careful not to pile it up against the stems or trunks of the plants (this prevents rot).
- Install solar-powered path lights at staggered intervals to create a warm, inviting glow that guides guests to your front door.
How to Transform a Work Cubicle for the Ultimate Office Vibe

Why we love this
Slow living isn’t just for the weekend; it’s a mindset we can carry into the 9-to-5 grind. By transforming a sterile cubicle into a lush, personalized sanctuary, you create a pocket of peace amidst the office chaos. The soft glow of a desk lamp replaces harsh fluorescent lights, and the presence of living greenery provides a tactile connection to nature that boosts productivity and lowers cortisol levels. It turns a place of ‘work’ into a place of ‘inspiration.’
Essential Elements:
- Peel-and-stick ‘linen’ or ‘brick’ wallpaper
- Small potted plants (Snake plants or Pothos thrive in low light)
- Warm-toned LED desk lamp
- Framed personal photos or art prints
- A small essential oil diffuser
- Textured desk mat (felt or vegan leather)
How to make it
- Clean your cubicle walls thoroughly before applying peel-and-stick wallpaper; choose a soft, neutral texture like linen to instantly ‘warm’ the space.
- Swap out the overhead lighting by turning off the fluorescent bulb directly above you and using a dedicated desk lamp with a ‘warm white’ bulb (2700K).
- Introduce ‘life’ by placing at least three small plants at varying heights; use a riser or a stack of books to create visual interest.
- Organize your tech by using a felt desk mat and cable management clips to hide unsightly cords, which reduces visual clutter and mental stress.
- Hang art or photos using magnetic clips or damage-free hooks, ensuring they are at eye level when you are seated.
- Set up a small ‘wellness corner’ with an oil diffuser and a high-quality hand cream to engage your senses throughout the workday.
How to Achieve a Whimsical Apartment Aesthetic for a Magical Home Life

Why we love this
There is something inherently healing about infusing your home with a sense of wonder and whimsy. This aesthetic is all about breaking the ‘rules’ of traditional design in favor of things that make your heart skip a beat—fairy lights that look like captured starlight, velvet textures that feel luxurious against the skin, and a curated collection of treasures that tell your unique story. It creates a ‘magic-hour’ glow in your living space that makes every evening feel special and cozy.
Essential Elements:
- Warm-toned fairy lights or ‘curtain’ lights
- Assorted velvet throw pillows in jewel tones
- Vintage brass candlesticks and taper candles
- Botanical prints and gold-framed mirrors
- Macramé or woven wall hangings
- Abundant indoor greenery and hanging planters
How to make it
- Start with your lighting; drape fairy lights along curtain rods or bookshelves to create multiple layers of soft, ambient light throughout the room.
- Layer your textiles by mixing textures—place a chunky knit throw over a velvet sofa and add a high-pile Moroccan rug over hard floors.
- Create a ‘gallery of curiosities’ on a main wall, mixing vintage thrift store finds with modern art and botanical sketches.
- Use height to your advantage by hanging trailing plants (like String of Pearls or Heartleaf Philodendron) from the ceiling or high shelves.
- Set a permanent ‘vignette’ on your coffee table using a tray, a stack of vintage books, a brass candle, and a small vase of dried wildflowers.
- Incorporate scent by using beeswax candles or a diffuser with woody, grounding scents like cedarwood and sandalwood to anchor the whimsical vibe.
How to Style Full Sun Containers for a Vibrant Entryway Display

Why we love this
Full sun containers are the ‘jewels’ of an entryway, offering a burst of saturated color and life that thrives in the heat of the day. We love the way the vibrant petals of petunias and the architectural spikes of dracaena catch the midday light, creating a high-energy welcome for anyone who visits. The ritual of deadheading spent blooms and feeling the damp soil during a morning watering session is a quintessential slow-living practice that connects you directly to the seasons.
Essential Elements:
- Large, frost-resistant ceramic or resin planters
- High-quality potting soil with moisture-retaining crystals
- ‘Thriller’ plants (Purple Fountain Grass or Canna Lilies)
- ‘Filler’ plants (Lantana, Geraniums, or Zinnias)
- ‘Spiller’ plants (Sweet Potato Vine or Calibrachoa)
- Slow-release granular fertilizer
How to make it
- Select a container with at least one large drainage hole; if it’s missing one, carefully drill it yourself to prevent root rot.
- Fill the bottom third of large pots with crushed soda cans or plastic bottles to save on soil and keep the pot lighter and easier to move.
- Follow the ‘Thriller, Filler, Spiller’ method: place your tallest, most dramatic plant in the center (the Thriller).
- Surround the center plant with rounded, mounding flowers (the Fillers) to create a lush, full appearance.
- Plant your trailing vines (the Spillers) around the very edge of the pot so they can gracefully cascade over the sides.
- Water deeply until water runs out of the bottom of the pot, and apply a liquid fertilizer every two weeks to keep the colors vibrant throughout the summer heat.
How to Master the Vintage Grandma House Aesthetic for a Cozy Nostalgic Feel
Why we love this
Commonly known as ‘Grandmacore,’ this trend is the ultimate homage to slow living. It’s about the comfort of a handmade quilt, the charm of mismatched floral china, and the warmth of a kitchen that always smells like cinnamon. We love it because it rejects the ‘fast’ nature of modern furniture in favor of pieces with history and soul. It encourages us to sit down with a cup of tea, embroidery in hand, and appreciate the craftsmanship of a bygone era.
Essential Elements:
- Crocheted or lace doilies and tablecloths
- Floral-patterned wallpaper or textiles
- Dark wood antique furniture
- Display cabinets for ‘treasures’ and tea sets
- Dried flower bouquets and herbs
- Copper kitchenware and cast iron
How to make it
- Scour local thrift stores and estate sales for solid wood furniture with character; look for ‘spindle’ legs and intricate carvings.
- Layer your linens—drape a lace runner over a wooden dining table and place a handmade crochet throw over the back of a floral armchair.
- Create a ‘clutter-core’ shelf display by grouping vintage teacups, brass figurines, and old leather-bound books together in an intentional way.
- Switch your modern hardware (knobs and pulls) for antique brass or ceramic versions to instantly age your kitchen or dresser.
- Hang bundles of dried lavender or eucalyptus in the kitchen to add both a visual and aromatic ‘vintage’ touch.
- Incorporate ‘old-world’ hobbies into your decor, like leaving a wooden embroidery hoop or a half-finished puzzle out on a side table.
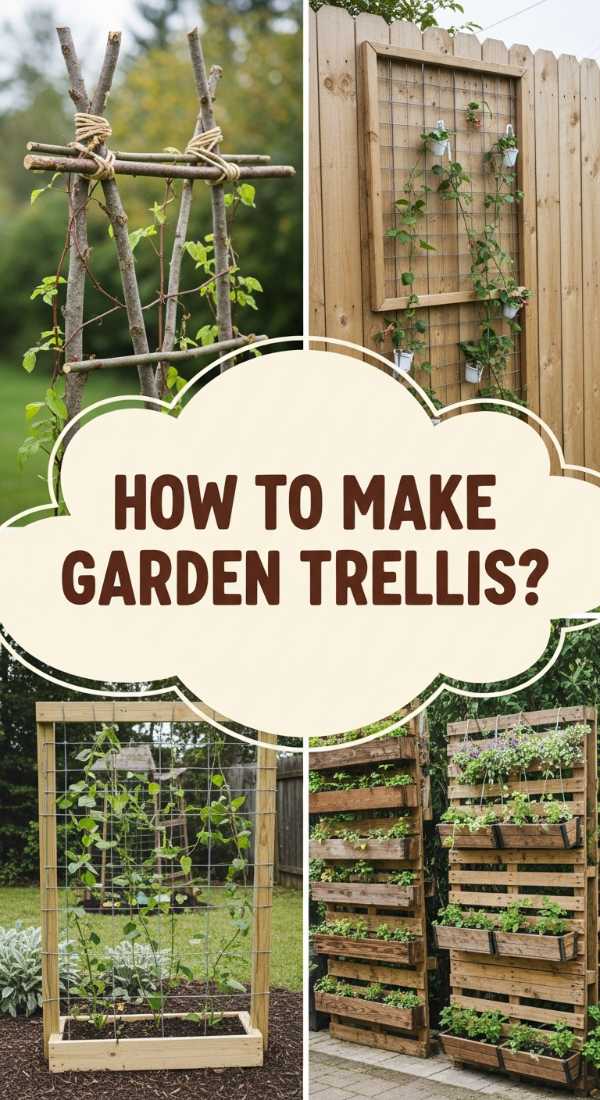
How to Build Homemade Trellis Systems for a Lush Garden Sanctuary
Why we love this
Vertical gardening is a game-changer for creating a ‘secret garden’ feel, even in small spaces. A trellis provides a ladder for nature to climb, turning flat walls into living tapestries of green and bloom. There is a profound sense of satisfaction in training a vine to grow and watching it slowly reclaim a structure. The sight of climbing roses or jasmine overhead provides shade, privacy, and an intoxicating fragrance that defines the outdoor slow-living experience.
Essential Elements:
- Cedar lath or copper piping
- Exterior-grade wood glue and finish nails
- Heavy-duty wire or twine
- Climbing plants (Clematis, Honeysuckle, or Climbing Roses)
- Post-hole digger (for free-standing versions)
- Weatherproof wood sealant
How to make it
- Design your grid pattern on the ground first; a classic diamond or simple square lattice works best for most climbing plants.
- Cut your cedar lath to the desired height and width, ensuring all vertical pieces are equal and all horizontal pieces are equal.
- Secure the joints with a drop of wood glue and a small finish nail; for a modern look, use copper T-joints and piping instead of wood.
- Apply a coat of sealant to protect the structure from the elements, as it will be constantly exposed to moisture from the plants.
- Mount the trellis to a wall using spacers (like small blocks of wood) to allow air circulation between the wall and the plants.
- Gently weave the first few tendrils of your climbing plant through the bottom of the trellis, securing them loosely with garden twine until they ‘take hold.’
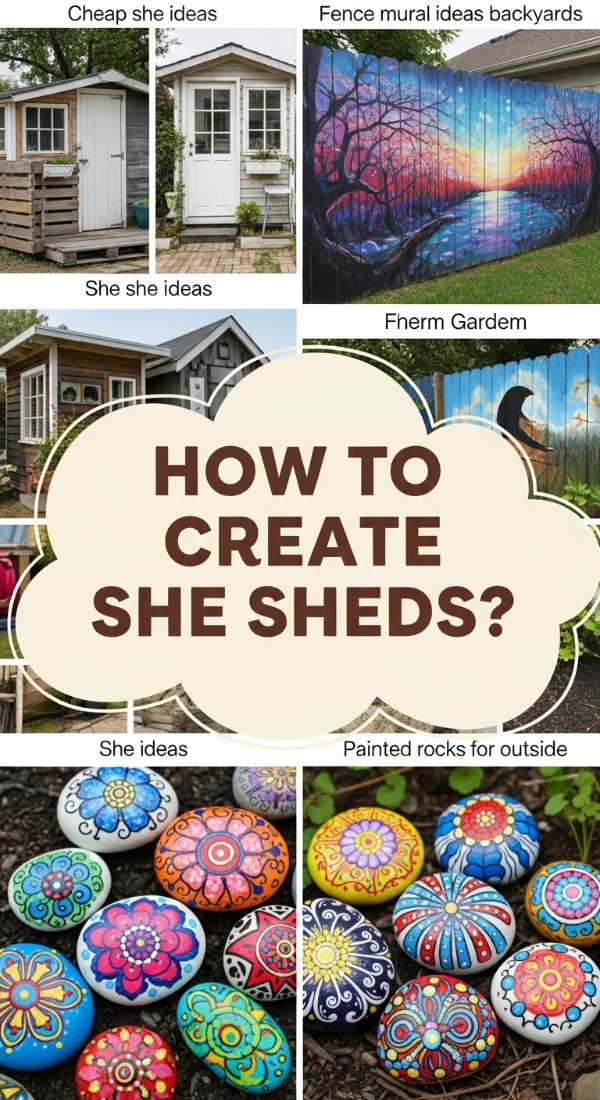
How to Design a Cheap She Shed for the Ultimate Backyard Retreat
Why we love this
The ‘She Shed’ is the ultimate slow-living manifesto—a physical boundary that says ‘this time is for me.’ We love this because it doesn’t require a massive budget or a professional contractor; it’s about reclaiming a small corner of the yard for creativity, meditation, or just a nap. The scent of fresh paint and the sound of rain on a shed roof create a cocoon-like environment that fosters deep relaxation and creative flow.
Essential Elements:
- A basic pre-fab shed or an old garden shed
- Light-colored exterior paint (Sage green or Dusty Blue)
- Comfortable seating (a daybed or cozy armchair)
- Battery-powered or solar lighting
- Inexpensive rug and sheer curtains
- Wall-mounted shelving for books or crafts
How to make it
- Clear out any old garden tools and give the interior and exterior a thorough cleaning with a power washer or scrub brush.
- Apply a fresh coat of ‘happy’ paint; light colors will make the small interior feel much larger and more airy.
- Seal the floor with a porch paint or lay down interlocking foam tiles and top them with a large, cozy area rug.
- Install ‘window’ treatments using simple tension rods and sheer white fabric to let in soft, filtered light while maintaining privacy.
- Add a ‘power source’ without wiring by using high-quality rechargeable LED lanterns and a portable power bank for your phone or laptop.
- Personalize the exterior with a small flower box under the window and a cute ‘private’ sign on the door to establish your sanctuary.
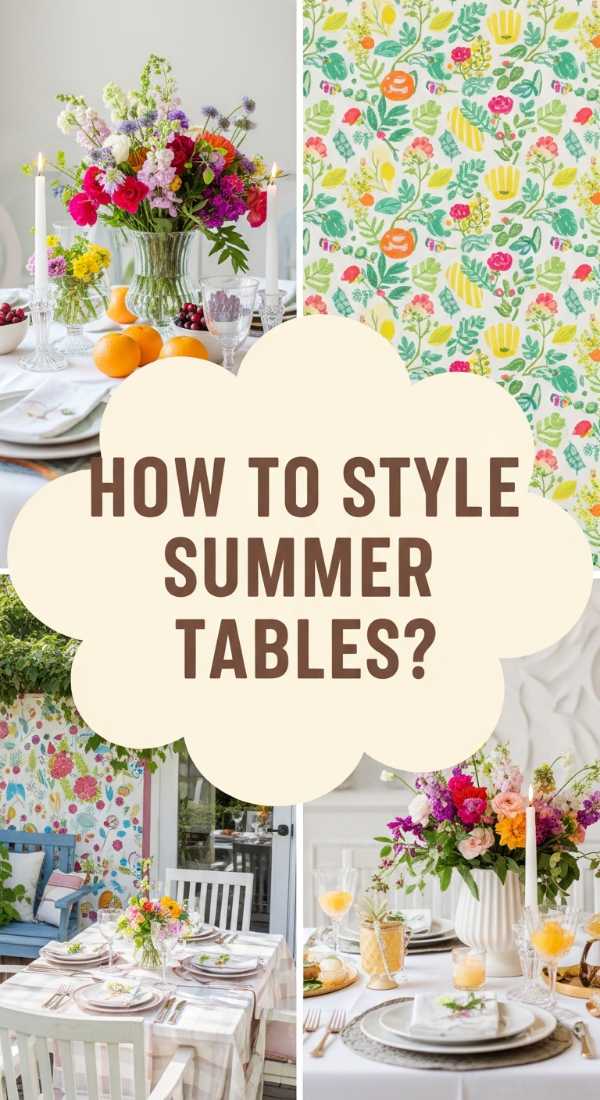
How to Create Summer Table Centerpieces for a Sunshine Filled Gathering
[IMAGE_10]
Why we love this
A beautiful centerpiece is the heartbeat of a summer gathering. It transforms a simple meal into an ‘event’ and encourages guests to linger long after the food is gone. We love using natural elements like sliced citrus, freshly cut garden herbs, and wildflowers because they look effortless and smell incredible. It’s a tactile reminder to slow down, savor the flavors of the season, and enjoy the company of those we love in the golden evening light.
Essential Elements:
- Clear glass vases or mason jars of varying heights
- Fresh citrus fruits (Lemons, Limes, Oranges)
- Seasonal flowers (Sunflowers, Dahlias, or Queen Anne’s Lace)
- Fresh herbs (Mint, Rosemary, or Eucalyptus)
- Unscented tea lights or floating candles
- A linen or burlap table runner
How to make it
- Lay down your runner to create a ‘stage’ for your centerpiece; a slightly wrinkled linen runner adds to the relaxed, slow-living vibe.
- Slice lemons or limes into thin rounds and press them against the inside of a clear glass vase before filling it with water and flowers.
- Incorporate ‘living’ elements by tucking sprigs of rosemary or mint into the floral arrangement for an unexpected and refreshing scent.
- Use the ‘rule of three’ by grouping vases in odd numbers and varying their heights to create visual movement across the table.
- Scatter extra citrus fruits and loose petals directly onto the runner between the vases for an ‘overflowing abundance’ look.
- Light your candles just as the sun starts to set to transition the atmosphere from a bright lunch to a cozy, intimate dinner.
The Art of the Slow Down
Slow living isn’t a destination you reach; it’s a series of small, intentional choices you make every single day. Whether you’re building a deck, planting a pot, or simply hanging a string of lights in your cubicle, you are choosing to prioritize your peace over the pressure of the outside world. I hope these projects inspire you to create a space that doesn’t just look beautiful on camera, but feels beautiful to live in. Now, go grab a cold drink, head outside, and enjoy the sanctuary you’ve built.