
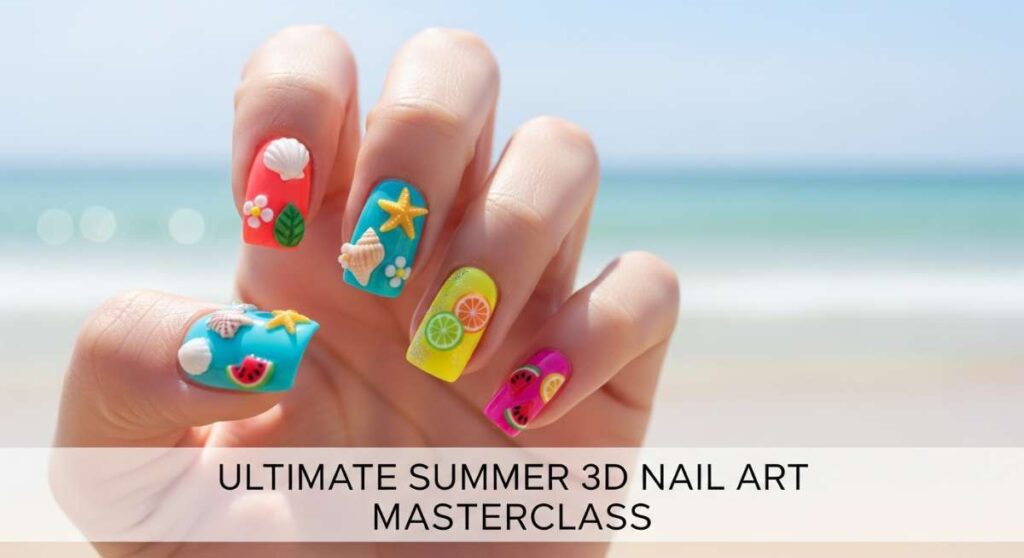
Pop Your Manicure: The Ultimate Summer 3D Nail Art Masterclass for Beginners
Hello, my loves! Can you feel it? The air is getting warmer, the days are stretching out like a long, honey-colored dream, and there is a certain magic dancing in the sunlight. Summer isn’t just a season; it’s a feeling of pure, unadulterated joy. It’s about sun-kissed skin, the salt in your hair, and the way a bright, playful manicure makes you feel like you’re carrying a little piece of paradise right at your fingertips.
I know many of you have been admiring those stunning 3D nail designs from afar, thinking they were too intricate for your sweet hands to master. But today, I’m wrapping you in a soft, encouraging embrace and telling you: you can do this. We are going to turn your nails into tiny canvases of summer art together. Grab a glass of iced tea, find a cozy spot where the light hits just right, and let’s dive into this masterclass designed just for you.
Think of this as our little creative sanctuary. No pressure, no perfection—just the soft hum of creativity and the excitement of trying something new. Whether you’re heading to a beach bonfire or just want to feel extra special during your morning coffee, these 3D designs are going to make your summer glow just a little bit brighter. Let’s get started, shall we?
5 Simple Steps for 3D Water Droplets
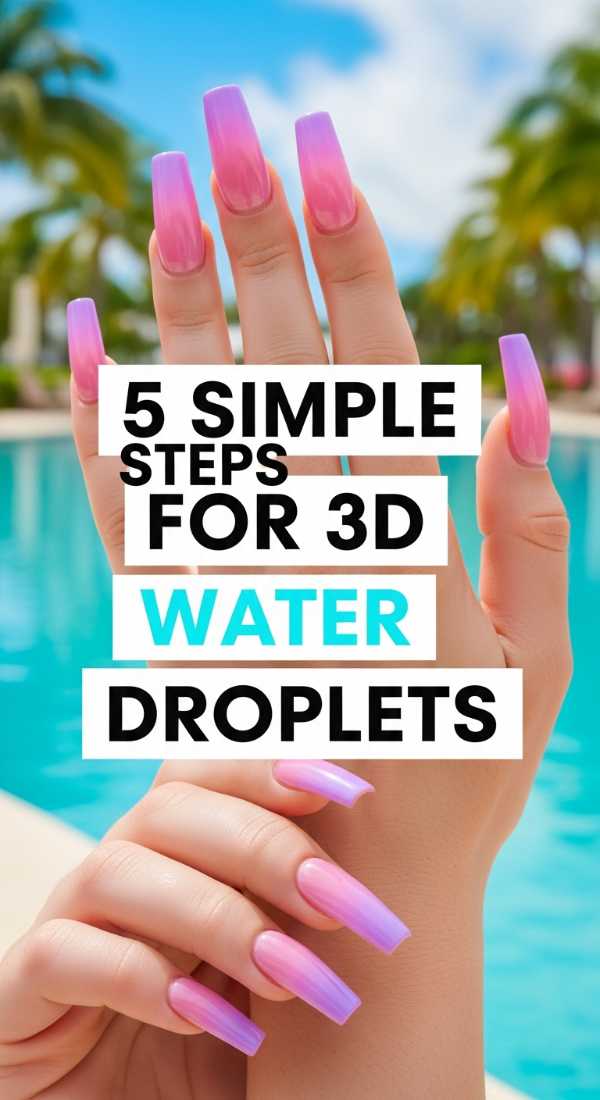
Why to love this Design:
There is something so incredibly refreshing about the look of fresh dew on a summer morning. These 3D water droplets bring that crisp, poolside magic right to your fingertips, making your nails look perpetually dipped in a cool oasis. It’s subtle, yet so sophisticated.
Essential Elements:
- High-shine non-wipe top coat
- Thick viscosity builder gel (clear)
- A fine detailing brush or dotting tool
- A UV/LED lamp
How to Prepare:
- Apply your base color (a soft blue or teal works beautifully) and cure.
- Apply a matte top coat and cure to create a contrast for the shiny drops.
- Dip your dotting tool into the thick builder gel.
- Place random “droplets” of varying sizes onto the matte surface.
- Flash cure immediately for 10 seconds to keep the height, then a full cure at the end.
Budget Range
- Beetles Builder Gel ($8.99)
- Modelones Dotting Tool Set ($5.99)
- SAVILAND Matte Top Coat ($6.99)
4 Techniques to Blend Neon Gradients
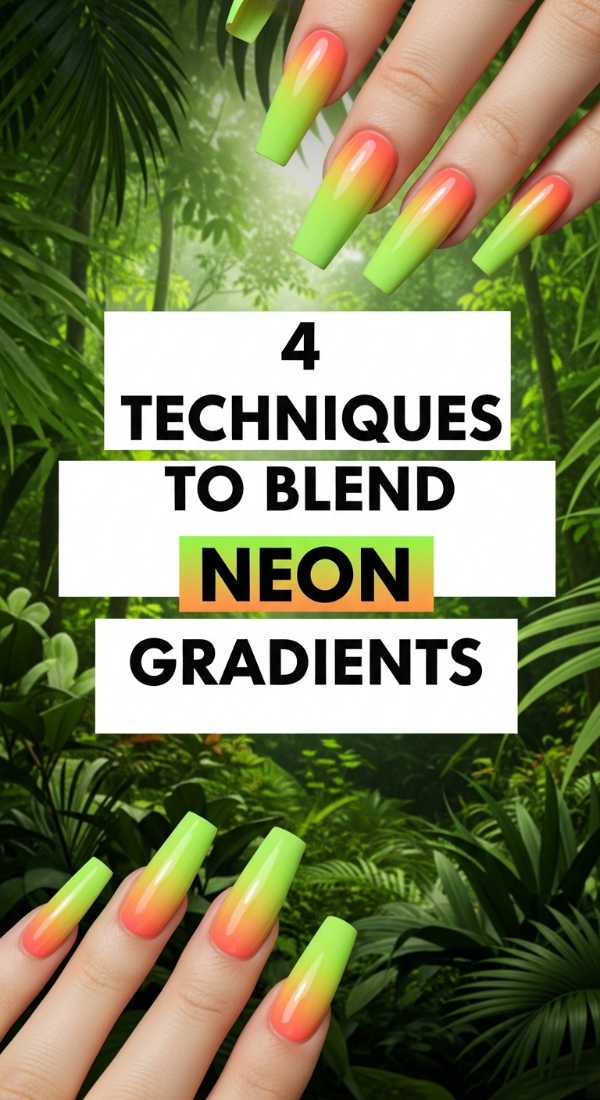
Why to love this Design:
Oh, my loves, is there anything more iconic than a neon sunset? Blending those high-voltage colors feels like capturing the very essence of a July evening. It’s loud, it’s proud, and it radiates nothing but positive energy.
Essential Elements:
- Neon gel polishes (pink, orange, yellow)
- Makeup sponges (latex-free)
- Liquid latex or cuticle guard
- White gel polish (for a bright base)
How to Prepare:
- Apply a white base coat and cure; this makes the neons truly “pop.”
- Apply liquid latex around your cuticles to keep things tidy.
- Paint stripes of your neon colors directly onto a makeup sponge.
- Dab the sponge onto the nail, moving it slightly up and down to blur the lines. Repeat for intensity.
Budget Range
- Gellen Neon Gel Set ($12.99)
- Pueen Latex Tape ($8.50)
- Wedge Makeup Sponges ($3.00)
6 Ways to Apply Tropical Flower Charms
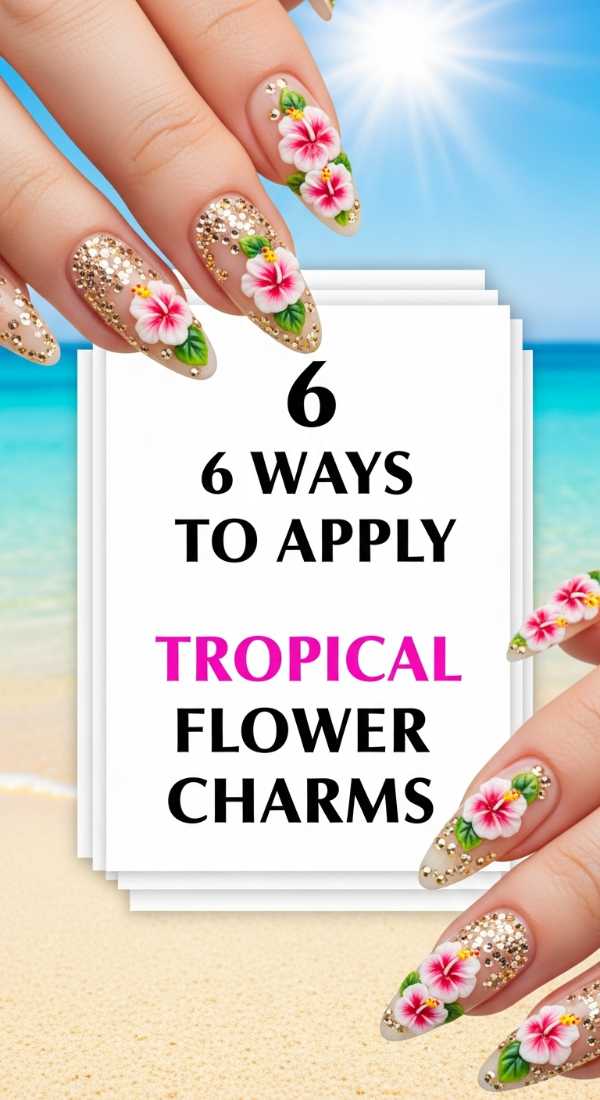
Why to love this Design:
Walking through a tropical garden is like a soft hug for the soul. Adding flower charms to your manicure is like wearing a permanent lei. These little 3D accents add a whimsical, feminine touch that feels so light and airy.
Essential Elements:
- Resin flower charms (Plumeria or Hibiscus shapes)
- Nail glue or specialized charm gel
- Tweezers or a wax picker tool
- Clear top coat
How to Prepare:
- Complete your base color and cure.
- Decide on your placement—one large flower or a cluster of tiny ones.
- Apply a small bead of charm gel to the nail.
- Pick up the charm with your wax tool and press it gently into the gel.
- Cure thoroughly and seal the edges with a thin brush and top coat.
- Avoid getting top coat on top of the petals to keep the matte 3D texture.
Budget Range
- 3D Acrylic Flower Charms ($7.99/pack)
- Makartt Rhinestone Glue Gel ($9.99)
- Wax Rhinestone Picker ($4.99)
3 Steps to Create 3D Texture Swirls
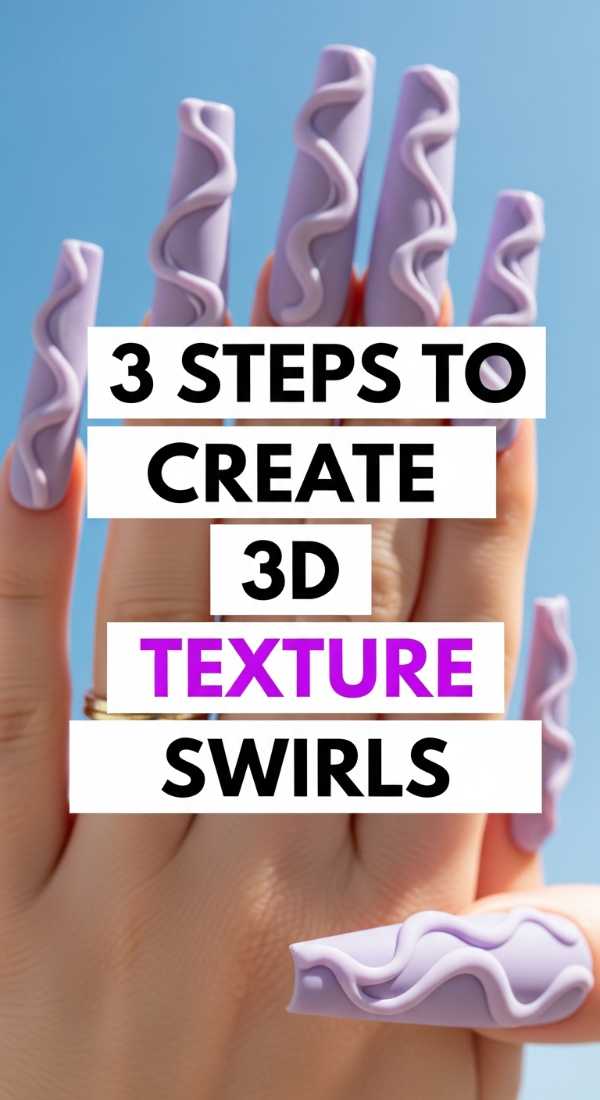
Why to love this Design:
Texture is the secret ingredient to a modern manicure. These 3D swirls remind me of soft waves on the sand or the movement of a summer breeze. It’s a tactile experience that you won’t be able to stop touching!
Essential Elements:
- Hard gel or 3D “pudding” gel
- Liner brush
- Chrome powder (optional for extra glow)
How to Prepare:
- Apply your base color and a non-wipe top coat, then cure.
- Use your liner brush to draw thick, swirling lines with the 3D gel.
- Cure for 60 seconds to set the raised texture firmly in place.
Budget Range
- Born Pretty 3D Pudding Gel ($6.50)
- Saviland Liner Brushes ($7.99)
8 Rules for the Perfect Summer Ombré
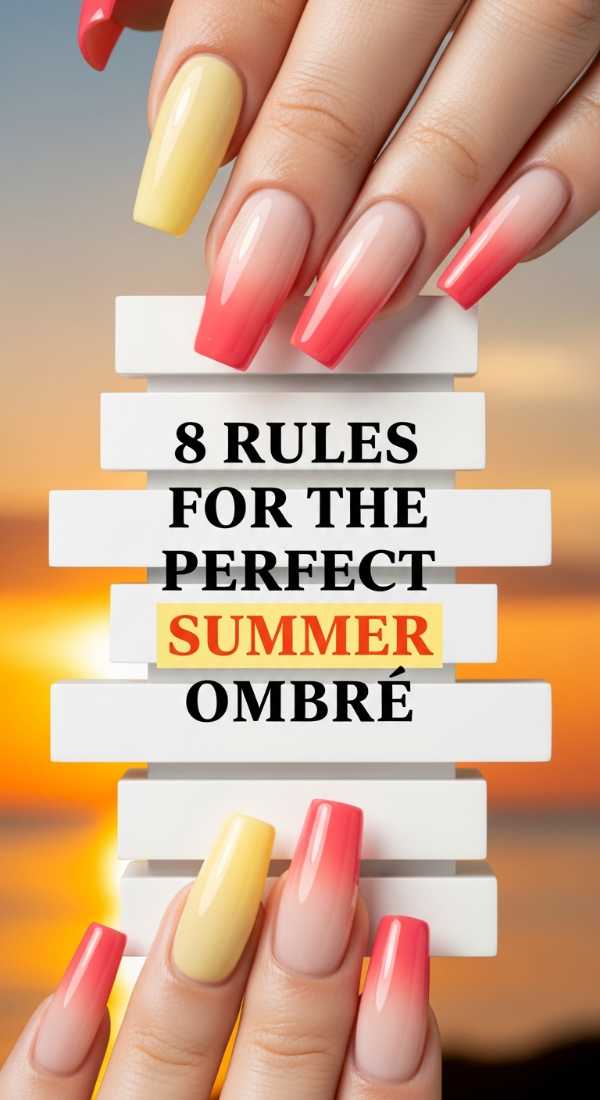
Why to love this Design:
The ombré is a classic for a reason—it’s seamless, elegant, and reminds me of the horizon where the sea meets the sky. Getting it perfect takes a little patience, but the result is a cloud-soft transition that is simply divine.
Essential Elements:
- Two coordinating summer shades
- Ombré brush (fan brush or slanted)
- Mixing palette
How to Prepare:
- Rule 1: Always use a white or light base for vibrancy.
- Rule 2: Keep your layers thin.
- Rule 3: Use a light touch with the brush.
- Rule 4: Blend while the polish is wet.
- Rule 5: Wipe your brush between strokes.
- Rule 6: Cure between every two layers of blending.
- Rule 7: Use a high-quality top coat to smooth out any bumps.
- Rule 8: Work on one nail at a time.
Budget Range
- Vishine Gel Polish Duo ($9.00)
- Professional Fan Brush ($5.00)
5 Secrets to Apply Gold Starfish Charms
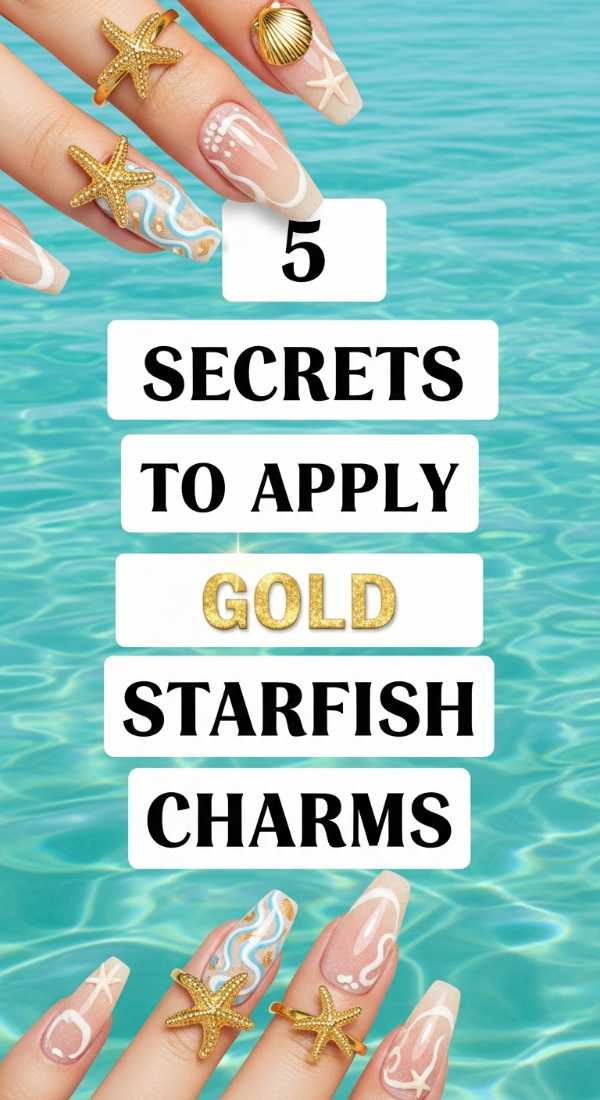
Why to love this Design:
There is a hidden treasure quality to gold starfish. They feel like little trinkets found on a morning beach walk. Adding these to your nails gives you an instant “mermaid-core” vibe that is so trendy yet timeless.
Essential Elements:
- Metal starfish charms
- Curving pliers (small)
- Strong nail adhesive
How to Prepare:
- Secret 1: Gently curve the charm with pliers to fit the natural arch of your nail.
- Secret 2: Buff the back of the charm slightly for better grip.
- Secret 3: Use a “sandwich” of glue—glue on the nail, and a tiny bit on the charm.
- Secret 4: Hold it in place with a tool for 15 seconds before curing.
- Secret 5: Encase the edges with builder gel to prevent snagging on your summer knits.
Budget Range
- Ocean Theme Metal Studs ($6.99)
- Mini Jewelry Pliers ($4.50)
4 Tips for Long-Lasting Vacation Nails
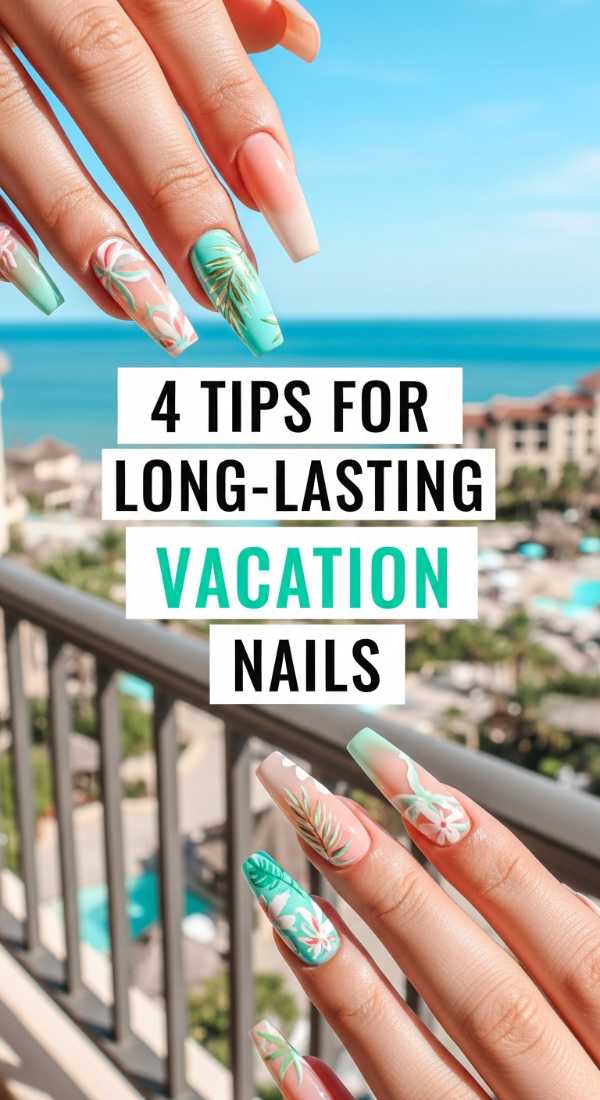
Why to love this Design:
The last thing you want to worry about while sipping a coconut on the beach is a chipped nail! These tips are your insurance policy for a flawless manicure that lasts from your flight out to your journey home.
Essential Elements:
- Dehydrator and Primer
- High-quality Base Coat
- Top coat with UV protection
How to Prepare:
- Tip 1: Never skip the dehydrator; it removes oils that cause lifting.
- Tip 2: “Cap the free edge” by swiping polish across the very tip of the nail.
- Tip 3: Apply thinner coats rather than one thick one.
- Tip 4: Use a top coat that resists yellowing from sun and sunscreen.
Budget Range
- Modelones Primer and Dehydrator Duo ($13.99)
- No-Wipe UV Protect Top Coat ($8.99)
7 Steps for High-Gloss Tropical Art
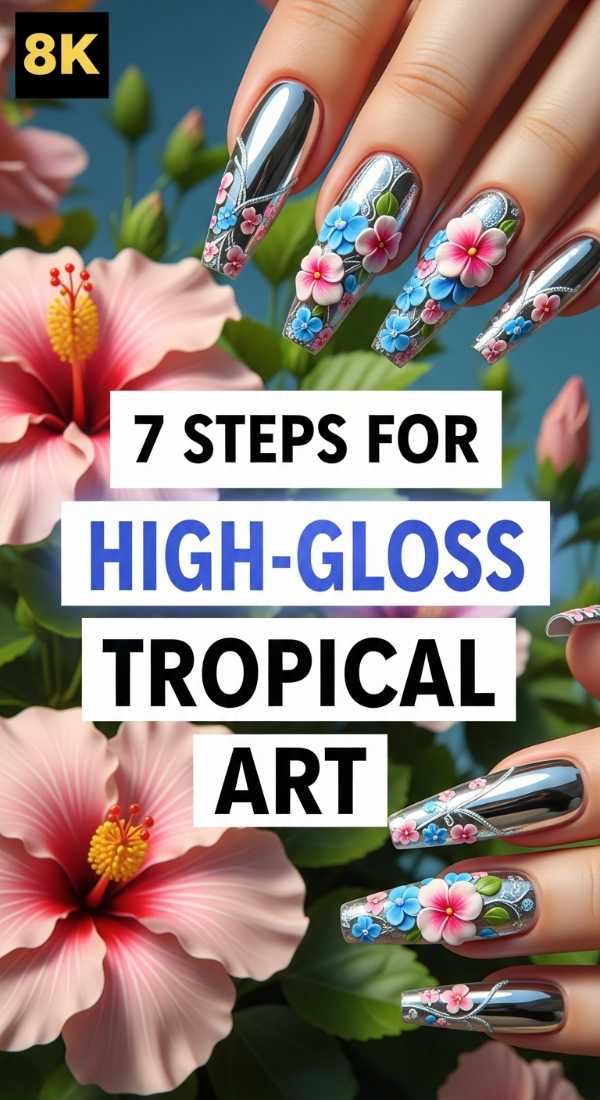
Why to love this Design:
Tropical art—think palm leaves and bright fruit—is the ultimate summer statement. Adding a high-gloss finish makes the colors look juicy and vibrant, like they’re under a layer of glass. It’s pure sunshine!
Essential Elements:
- Green and yellow gel polishes
- Ultra-glossy top coat
- Detailing brush
How to Prepare:
- Paint a base of soft sandy beige.
- Draw a thin line for a palm stem.
- Flick out small, delicate leaves from the stem.
- Add a pop of yellow for a “pineapple” accent.
- Cure the design.
- Apply a generous layer of high-gloss top coat.
- Massage cuticle oil after curing for that extra glow.
Budget Range
- Lavender Violets Tropical Set ($15.99)
- Cuccio Revitalize Cuticle Oil ($7.00)
6 Ways to Paint Tiger Print Accents
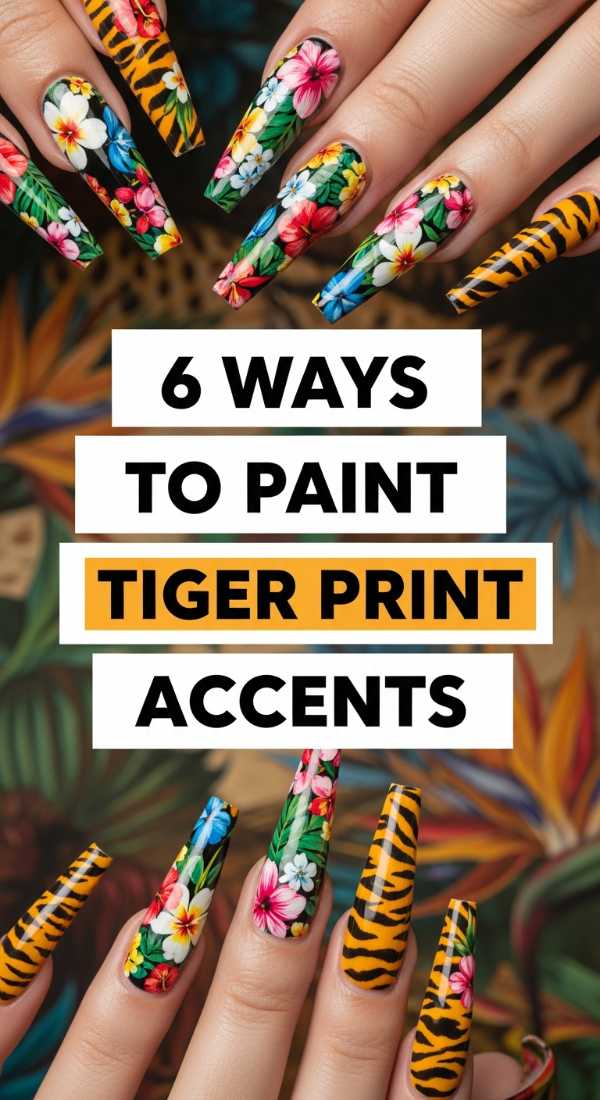
Why to love this Design:
Release your wild side, my loves! Tiger print in summer colors (like neon orange and black) is fierce and fun. It adds a bit of edge to an otherwise sweet summer look. It’s for the nights when you feel bold and adventurous.
Essential Elements:
- Black liner gel
- Neon orange base color
- Steady hand!
How to Prepare:
- Apply the orange base and cure.
- Wipe the tacky layer so the lines don’t bleed.
- Draw “Y” shapes and wavy lines of different thicknesses.
- Keep the lines tapered at the ends.
- Vary the spacing for a natural look.
- Cure and finish with a matte or glossy top coat.
Budget Range
- Saviland Black Liner Gel ($6.99)
- Beatles Orange Gel Polish ($7.50)
3 Methods for Flawless 3D Gel Petals
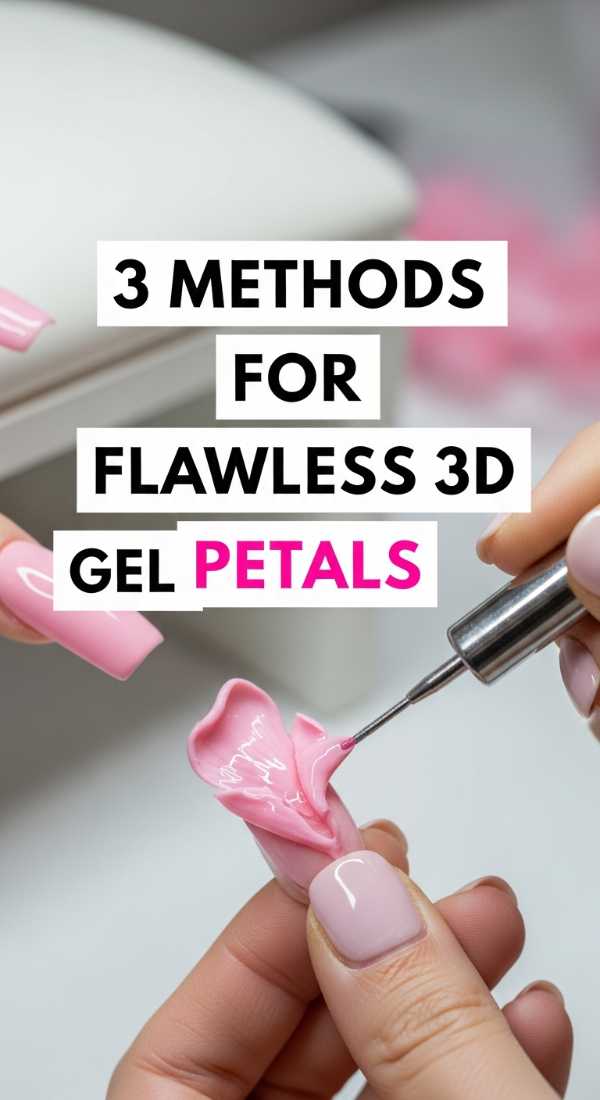
Why to love this Design:
Sculpted petals are the height of nail artistry. They look like real flowers are blooming right out of your manicure. It’s elegant, sophisticated, and surprisingly meditative to create once you find your rhythm.
Essential Elements:
- Sculpting gel (4D gel)
- Silicone carving tool
- Slip solution or alcohol
How to Prepare:
- Method 1: Roll a tiny ball of 4D gel and place it on the nail, then flatten it into a teardrop shape.
- Method 2: Use the silicone tool to press a “vein” into the center of the petal.
- Method 3: Layer the petals slightly overlapping to create a full bloom effect.
Budget Range
- Makartt 4D Sculpture Gel ($10.99)
- Silicone Nail Art Tool Set ($6.50)
Embrace Your Summer Glow
And there you have it, my beautiful souls! A complete guide to making your nails as vibrant and lovely as a summer sunset. Remember, nail art is a journey, not a destination. Your first water droplet might be a little wonky, or your first flower might look more like a happy little cloud—and that is perfectly okay! The joy is in the creation, the quiet time you spend pampering yourself, and the confidence you feel when you look down at your hands.
Go forth and play with color, texture, and all the 3D magic your heart desires. You are an artist, and your nails are your masterpiece. I can’t wait to see what you create! Stay sun-kissed and inspired.