
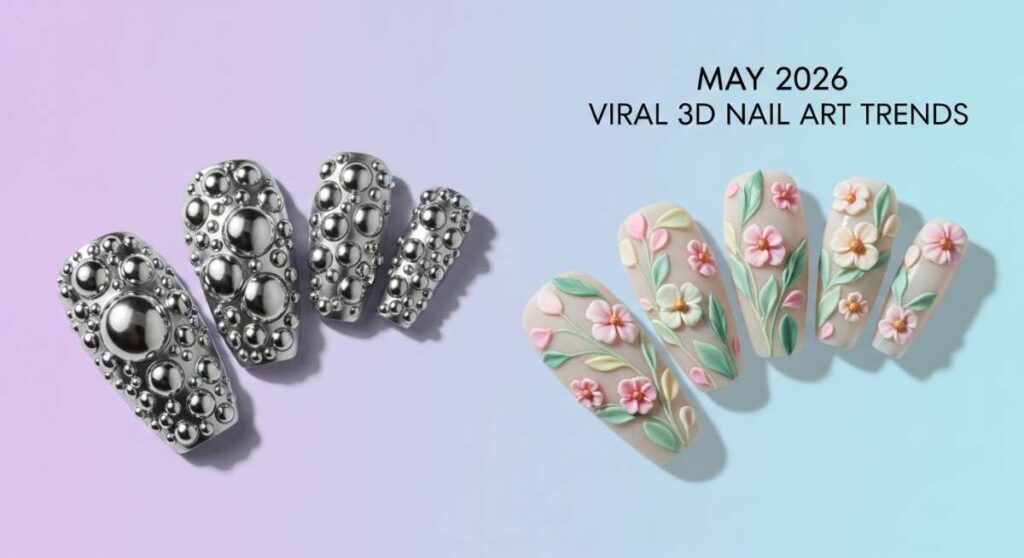
From Chrome Bubbles to Sculpted Flora: The Viral 3D Nail Trends of May
Hello, my loves! Can you feel it? That soft, golden warmth is finally filtering through the windows, promising the sweetness of early summer. May is always such a bridge for me—a time where we transition from the delicate buds of spring to the full, vibrant bloom of the sun-drenched months ahead. It’s a moment to exhale, to adorn ourselves in colors that feel like a hug, and to let our creativity dance right at our fingertips.
Lately, I’ve been completely mesmerized by how we’re turning our nails into tiny, wearable galleries. From the tactile magic of sculpted petals to the ethereal glow of chrome, this month is all about texture and light. I’ve gathered the most viral trends making waves right now, and I can’t wait to share these little rituals of beauty with you. Let’s dive into this cloud-soft world of art together, shall we?
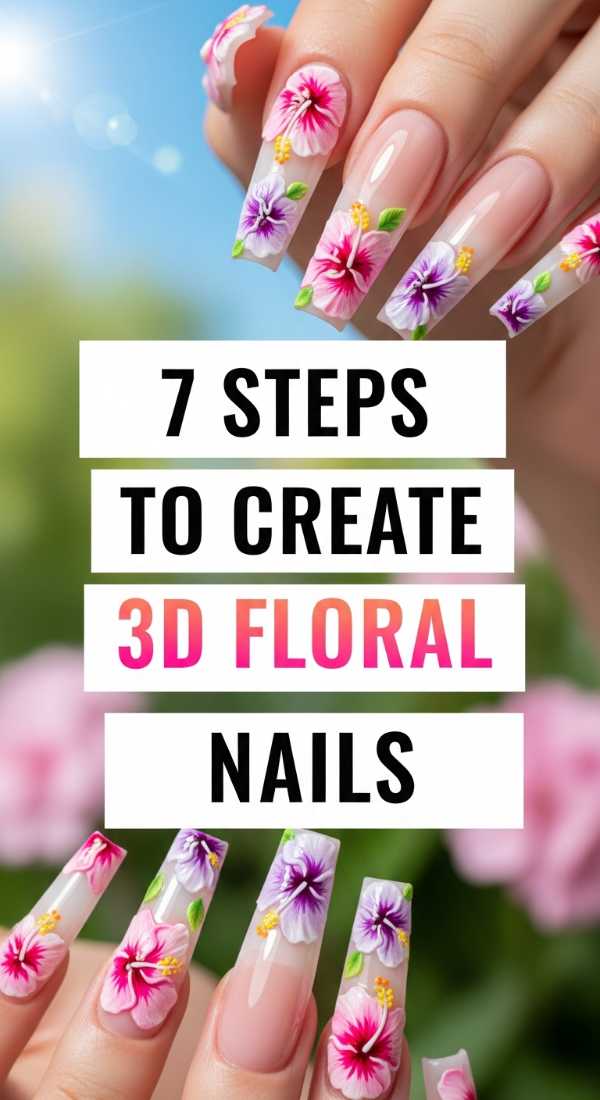
7 Steps to Create 3D Floral Nails
Why to love this recipe:
There is something so deeply romantic about carrying a garden with you. These sculpted flowers aren’t just art; they are a tactile reminder of growth and beauty. They add a sophisticated, couture feel to even the simplest outfit, making you feel like a literal fairy queen.
Essential Ingredients:
- Clear 3D builder gel or acrylic powder
- A fine detailing brush
- Nude or pale pink base polish
- Non-wipe top coat
- UV/LED Lamp
- Silicone tool for shaping
- Gold micro-beads for the flower centers
How to Prepare:
- Apply your base color and cure fully.
- Place a small bead of 3D builder gel in the center of the nail.
- Use your silicone tool to pull the gel outward into five delicate petal shapes.
- Gently press the detailing brush into the center of each petal to create realistic ridges.
- Cure the petals for 60 seconds.
- Apply a tiny dot of gel in the center and place your gold micro-beads; cure again.
- Seal the base of the nail (not the 3D art) with a glossy top coat.
Budget Range
- Modelones 3D Sculpture Gel
- Saviland Acrylic Nail Kit
- Beetles Gel Polish Liner Brush Set
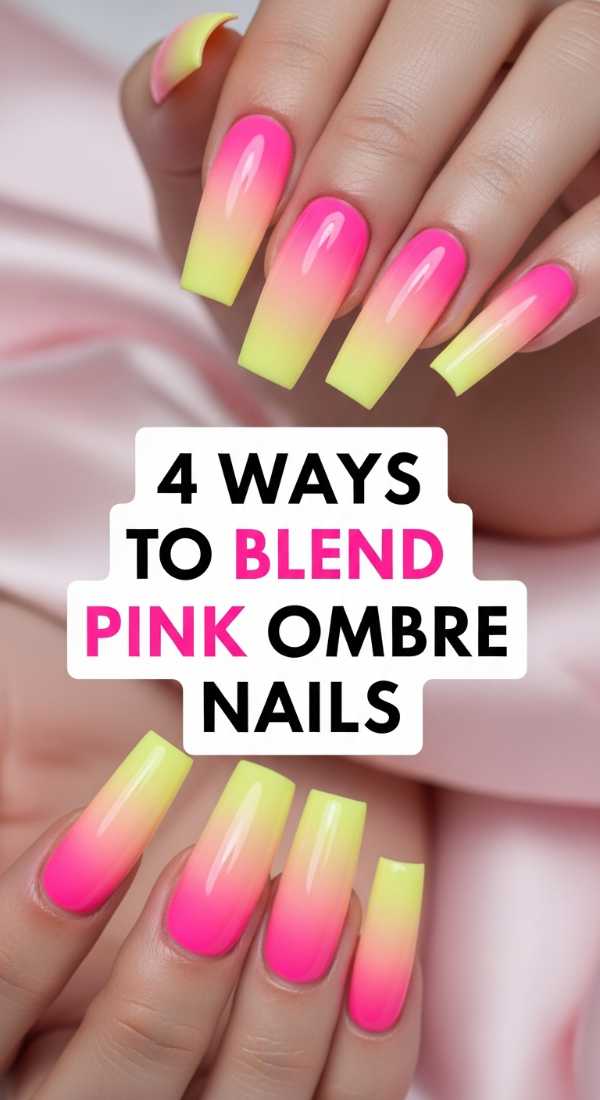
4 Ways to Blend Pink Ombre Nails
Why to love this recipe:
Pink ombre is the ultimate ‘clean girl’ aesthetic with a playful twist. It mimics the natural flush of a sunset or a rose petal, giving your hands a soft, elongated, and incredibly healthy look. It’s a timeless classic that never fails to feel fresh.
Essential Ingredients:
- Soft baby pink polish
- Vibrant magenta or hot pink polish
- Makeup sponge (wedge shape)
- Liquid latex or cuticle guard
- High-shine top coat
How to Prepare:
- Apply the lighter pink as a base and let it dry or cure completely.
- Apply liquid latex around your cuticles to catch any mess.
- Paint horizontal stripes of both pink shades directly onto the makeup sponge.
- Dab the sponge repeatedly onto the nail, moving it slightly up and down to create a seamless, soft blur.
Budget Range
- Essie ‘Slippers’ and ‘Watermelon’
- Sally Hansen Insta-Dri Ombre Sponge Kit
- OPI ‘Bubble Bath’ Gel
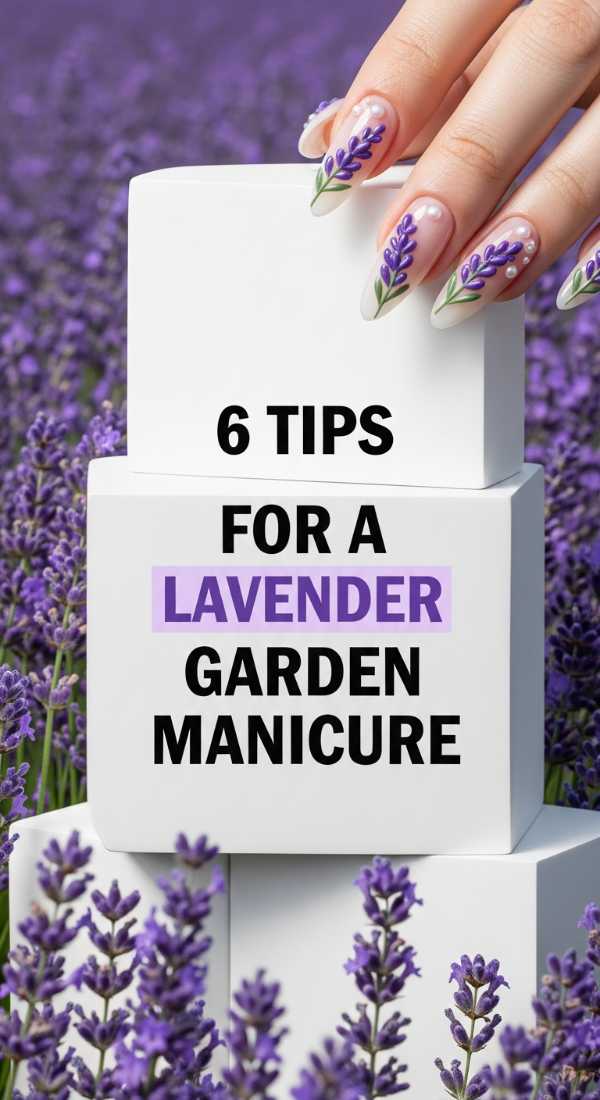
6 Tips for a Lavender Garden Manicure
Why to love this recipe:
Lavender is the color of calm, my darlings. This look is like a deep breath for your soul. It’s understated, elegant, and perfect for those mid-May afternoons spent sipping iced tea on the porch. It brings a sense of serenity to your busy days.
Essential Ingredients:
- Lavender crème polish
- Deep purple jelly polish
- Matte top coat
- Pressed dried flowers (miniature)
- Tweezers
- Clear encapsulation gel
How to Prepare:
- Start with two thin coats of lavender polish.
- Apply a thin layer of clear gel but don’t cure yet.
- Carefully place your dried flowers using tweezers into the wet gel.
- Cure to lock the flowers in place.
- Add a second layer of clear gel to encapsulate the texture for a smooth finish.
- Finish with a matte top coat for that soft, velvet-garden feel.
Budget Range
- Zoya ‘Abby’ Polish
- Born Pretty Dried Flower Set
- Gelish Matte Top It Off
5 Steps to Achieve Early Summer Glow

Why to love this recipe:
We are all chasing that sun-kissed radiance, aren’t we? This look isn’t just a color; it’s an aura. It uses light-reflecting pigments to make your hands look luminous, like you’ve been spending your mornings in the Mediterranean sun.
Essential Ingredients:
- Peach or apricot base color
- Fine gold shimmer powder
- Iridescent flakes
- Sponge applicator
- Glossy top coat
How to Prepare:
- Apply your peach base and cure.
- While the gel is slightly tacky, buff the gold shimmer into the center of the nail.
- Scatter a few iridescent flakes near the cuticle for extra dimension.
- Seal everything with a thick, plush layer of top coat.
- Massage cuticle oil generously to enhance the skin’s natural glow.
Budget Range
- Holo Taco ‘Solar Unicorn Skin’
- Kupa Gelfinity Top Coat
- Lights Lacquer ‘Paper Snow’
8 Tricks for Fresh Minty Spring Nails
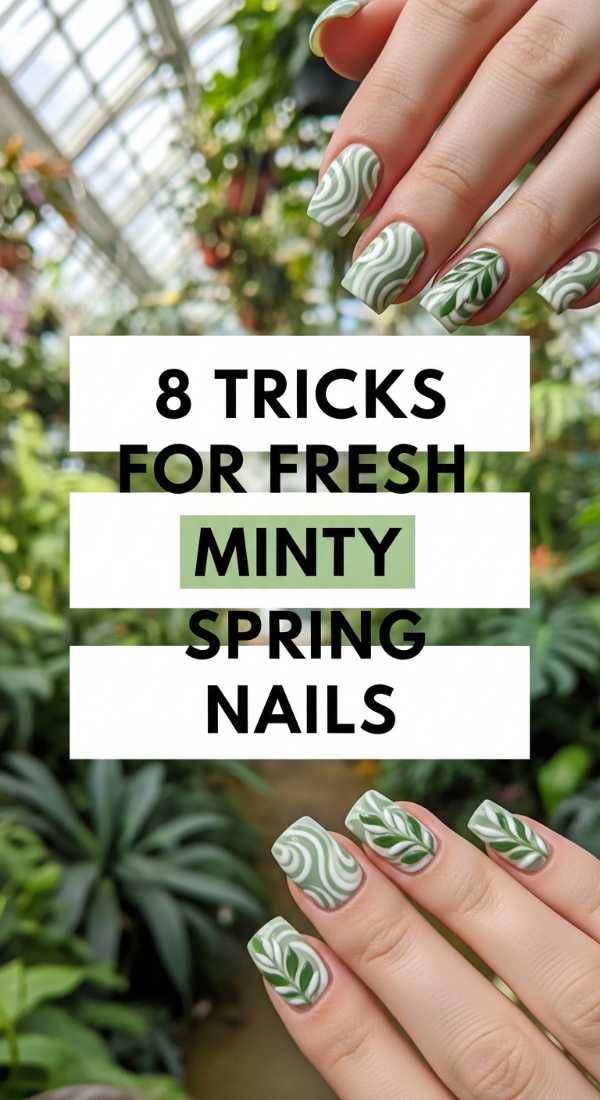
Why to love this recipe:
Mint is like a splash of cold water on a warm day—so crisp and revitalizing! It’s the perfect pop of color that remains sophisticated. These tricks ensure your mint mani looks expensive and fresh, rather than chalky.
Essential Ingredients:
- Pastel mint polish
- White base color
- Chrome powder (white pearl)
- Fine liner brush
- Silver foil scraps
How to Prepare:
- Always use a white base first to make the mint pop without needing five coats.
- Apply mint polish in very thin, even layers.
- Add a swipe of white pearl chrome for a ‘frozen’ effect.
- Use a liner brush to add tiny white botanical lines.
- Apply silver foil at the tips for a ‘dewy’ look.
- Always wrap the free edge to prevent chipping.
- Use a cool-toned top coat.
- Clean up edges with a brush dipped in acetone for crisp lines.
Budget Range
- Olive & June ‘Minty’
- Apres Gel-X Tips
- Daily Charme White Pearl Powder
3 Methods to Apply 3D Pearl Accents
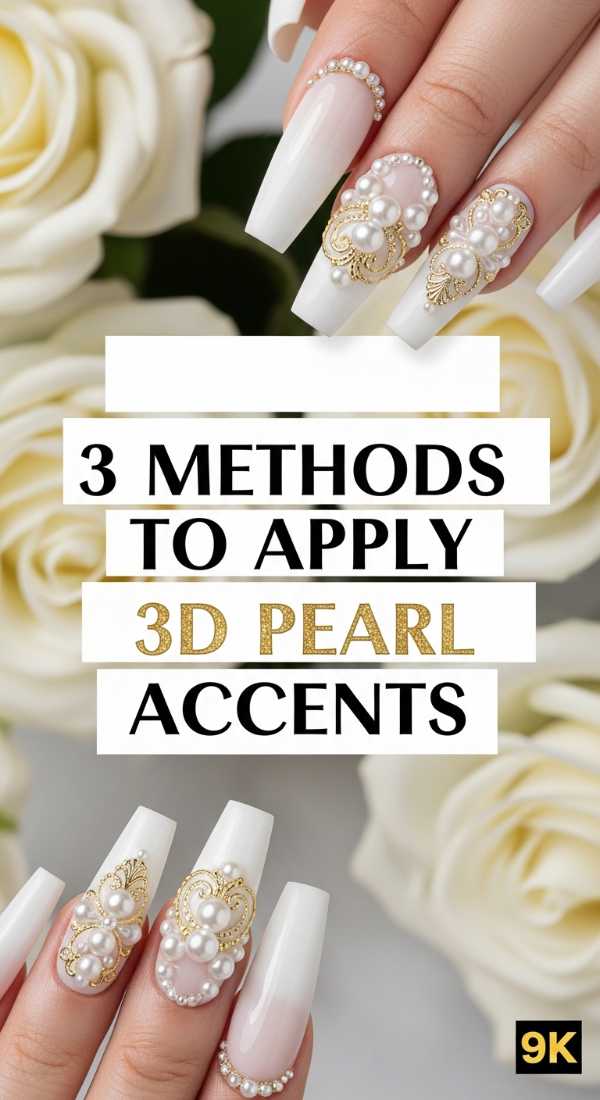
Why to love this recipe:
Pearls represent wisdom and grace. Adding them to your nails feels like wearing a strand of vintage jewelry. It’s the ultimate ‘coquette’ aesthetic that adds a touch of classic femininity to a modern silhouette.
Essential Ingredients:
- Flat-back pearls (various sizes)
- Strong jewelry glue or gem gel
- Pick-up tool (wax pencil)
- Sheer milky white polish
How to Prepare:
- Method 1: The Cluster—Apply a glob of gem gel and nestle three different sized pearls together.
- Method 2: The Line—Place tiny pearls vertically down the center of the nail for an elongating effect.
- Method 3: The Frame—Place pearls only along the cuticle line for a subtle, regal crown look.
Budget Range
- Makartt Rhinestone Glue
- Niidor Nail Art Pearl Kit
- Cirque Colors ‘Chiffon’
5 Easy Steps for Viral Aura Nails
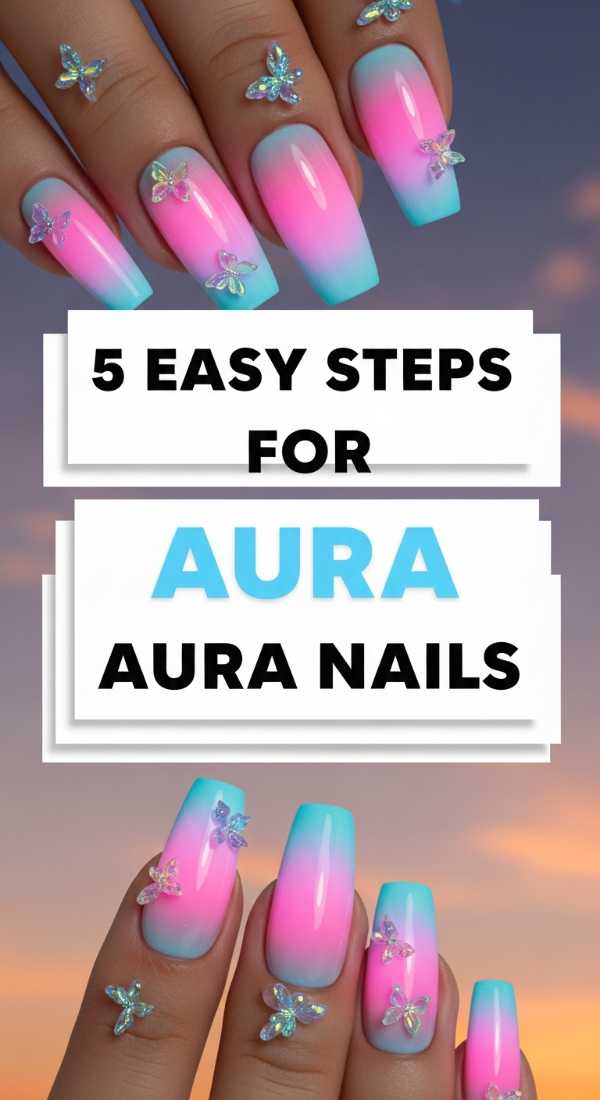
Why to love this recipe:
Aura nails are all about your inner energy! This trend is sweeping social media because it’s deeply personal. You choose the colors that match your mood, creating a soft, misty gradient that looks like it’s glowing from within.
Essential Ingredients:
- Two contrasting gel colors (e.g., violet and soft blue)
- Eyeshadow applicator or sponge
- Clear mixing gel
- High-gloss top coat
How to Prepare:
- Apply your primary aura color as the base.
- Mix your second color with a bit of clear gel to sheer it out.
- Dab the second color only in the very center of the nail, blending the edges outward.
- Cure, then repeat the center dabbing for more intensity.
- Finish with a glossy top coat to blend the ‘mist’ into a perfect glow.
Budget Range
- Daily Charme Aura Gel Palette
- Kiara Sky Gelly Tips
- Amazon Makeup Sponges
4 Ideas for Classy Wedding Guest Nails

Why to love this recipe:
Wedding season is officially here! These ideas are designed to be respectful and elegant—complementing your dress without stealing the spotlight from the bride. It’s all about soft textures and expensive-looking finishes.
Essential Ingredients:
- Champagne chrome powder
- Sheer nude polish
- Gold leaf
- Matte and gloss top coat combo
How to Prepare:
- The ‘Champagne Toast’: A sheer nude base with a light dusting of champagne chrome.
- The ‘Hidden Floral’: A matte nude nail with one glossy, hand-painted white flower.
- The ‘Gold Rim’: A classic French tip using gold leaf instead of white polish.
- The ‘Silk Ribbon’: A soft pink base with a single 3D gel line resembling a ribbon.
Budget Range
- Vbeauty Pure Gel Polish
- Tino Vo Gold Leaf Flakes
- Deborah Lippmann ‘Baby Love’
6 Steps to Paint Perfect Daisy Nails
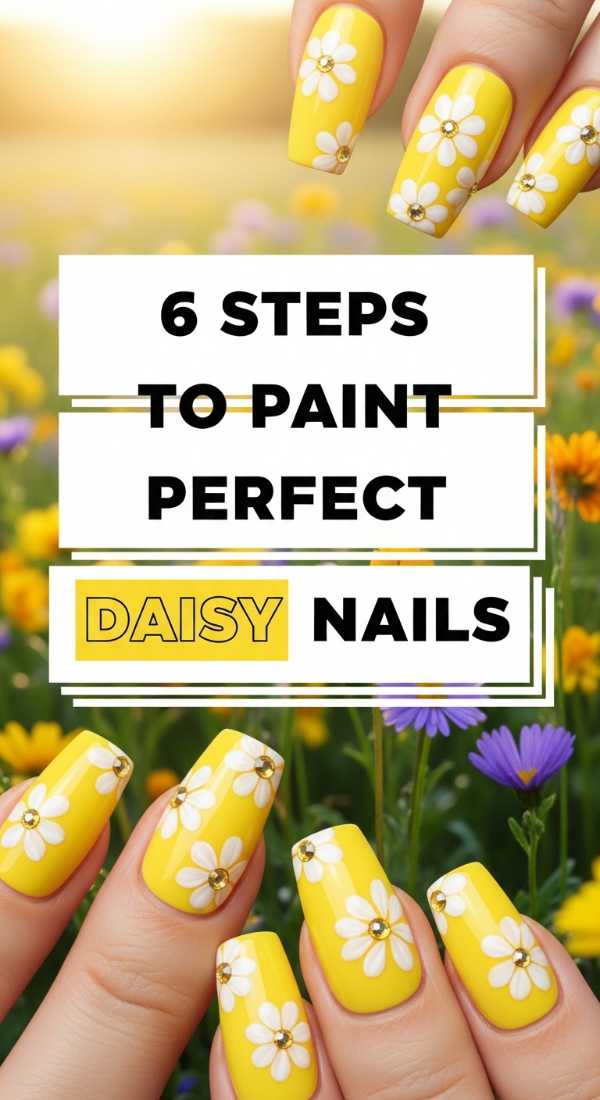
Why to love this recipe:
Daisies are the ultimate symbol of innocence and joy. They are incredibly easy to paint but look so intentional and sweet. Every time you look down at your hands, you can’t help but smile!
Essential Ingredients:
- Dotting tool (large and small)
- White acrylic paint or gel
- Yellow gel polish
- Sage green polish for the base
How to Prepare:
- Paint your nails with a soft sage green.
- Using the large end of the dotting tool, place a yellow dot for the center.
- Using the small end, place five white dots around the yellow center.
- Use a thin brush to slightly drag the white dots toward the yellow to create petal shapes.
- Add tiny green leaves if you’re feeling fancy.
- Cure and seal with a glossy top coat.
Budget Range
- Dotting Tool Set from Sally Beauty
- DND Gel Polish ‘White Rabbit’
- Orly ‘Sagebrush’
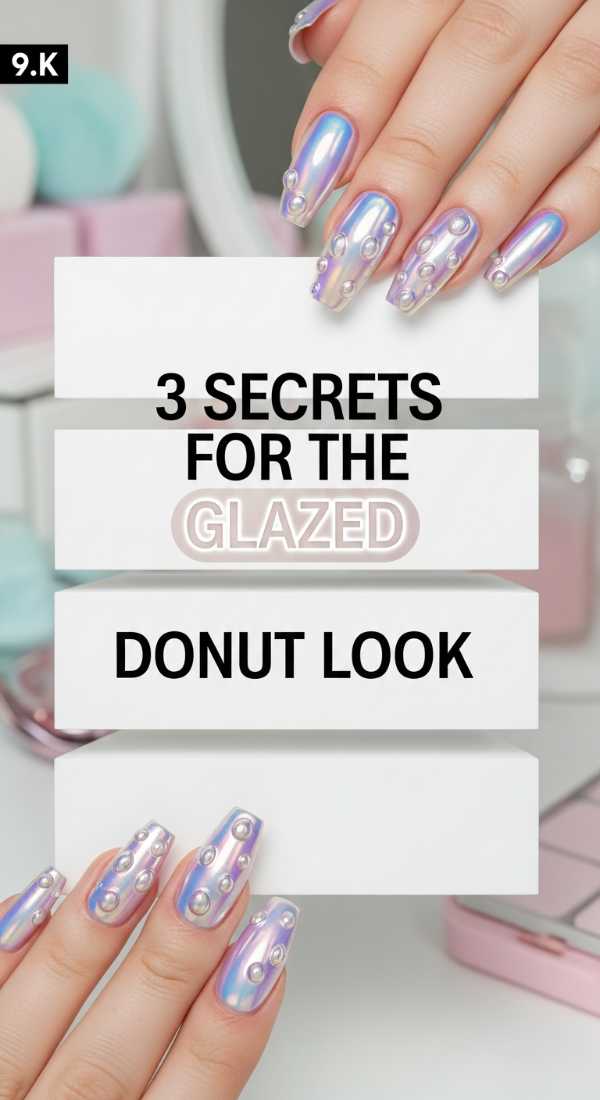
3 Secrets for the Glazed Donut Look
Why to love this recipe:
We have Hailey Bieber to thank for this one, and it’s still the queen of trends. It makes your nails look like they’ve been dipped in sugar. It’s clean, it’s high-fashion, and it works on every single nail shape.
Essential Ingredients:
- OPI ‘Funny Bunny’ or similar milky white
- Tin Man Can or white pearl chrome powder
- Non-wipe top coat
- Rubbing alcohol
How to Prepare:
- Secret 1: Use only one thin coat of ‘Funny Bunny’—it must remain translucent to let the ‘glaze’ shine.
- Secret 2: Apply the chrome powder immediately after curing the top coat while it’s still warm for the smoothest finish.
- Secret 3: Wipe away excess powder with a lint-free wipe and rubbing alcohol before your final top coat to prevent ‘glitter speckles.’
Budget Range
- OPI GelColor ‘Funny Bunny’
- Artdone Pearl Chrome Powder
- Young Nails Stain Resistant Top Coat
A Soft Farewell to Spring
As we wrap up our little journey through the trends of May, I hope you feel inspired to take a moment for yourself. Whether you’re sculpting tiny 3D petals or simply enjoying the clean glow of a glazed donut finish, remember that these small acts of beauty are a way of honoring yourself. You are the canvas, my loves, and life is far too short for boring nails! Go out there and shine as brightly as the May sun. I’ll see you in the next one, with even more magic to share. Stay soft, stay creative.