
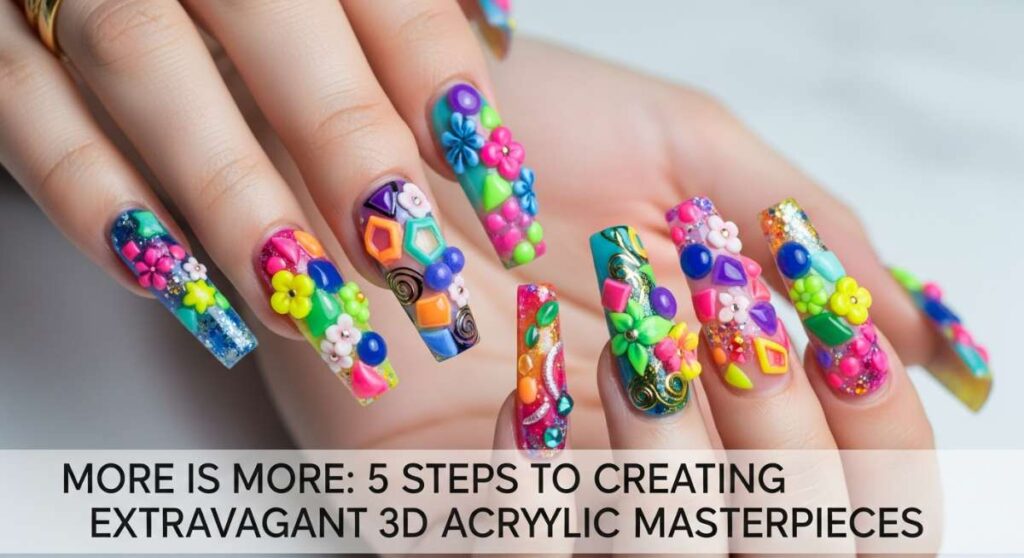
More is More: 5 Steps to Creating Extravagant 3D Acrylic Masterpieces
Hello my loves, and welcome back to our little corner of creativity and color. Today, I want to wrap you in a cloud-soft embrace and talk about something that makes my heart flutter every time I look at my hands: the unapologetic joy of maximalism. There is something so deeply healing about expressing ourselves through every inch of our being, and right now, our canvas is the tips of our fingers.
We live in a world that often tells us to be smaller, quieter, and more subdued. But here, we believe in the magic of the ‘extra.’ We are diving deep into the world of 3D acrylics—where colors don’t just sit on the nail, they dance, they bloom, and they tell a story. This isn’t just a manicure; it is a wearable sculpture, a little piece of your soul reaching out to touch the world.
Grab a warm cup of tea, find your favorite cozy chair, and let’s explore these ten ways to bring a little more ‘more’ into your life. Whether you are a seasoned pro or just starting your journey with acrylics, remember that there are no mistakes here—only beautiful discoveries.
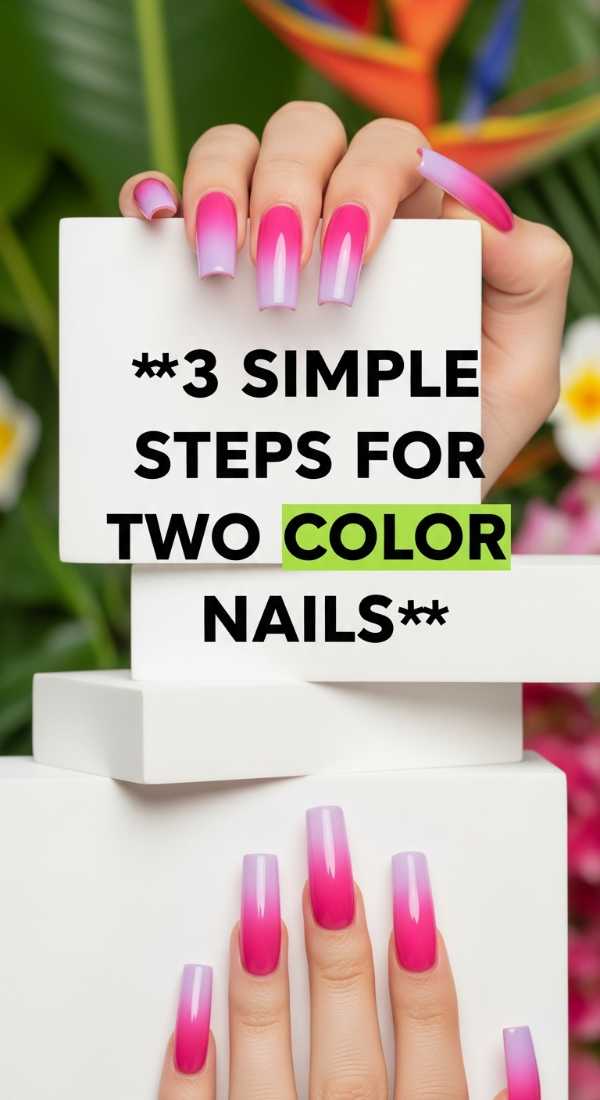
The Sweet Duo: Perfecting Two-Tone Bliss
Why to love this recipe:
This approach is like a soft sunset caught in a bottle. It’s the perfect way to dip your toes (or fingers!) into the world of colorful blending without feeling overwhelmed. It creates a gentle harmony that feels both sophisticated and playful.
Essential Ingredients:
- Soft Peach Polish
- Dreamy Lavender Polish
- Latex Makeup Sponge
- Clear Top Coat
How to Prepare:
- Paint your base with the lighter of the two colors and let it dry completely.
- Apply both colors side-by-side on a small sponge.
- Gently dab the sponge onto the nail until the colors melt into each other like a soft dream.
Budget Range
- Essie Glossy Shine ($10)
- OPI Nail Lacquer ($11)
- Beauty Blender Wedges ($5)
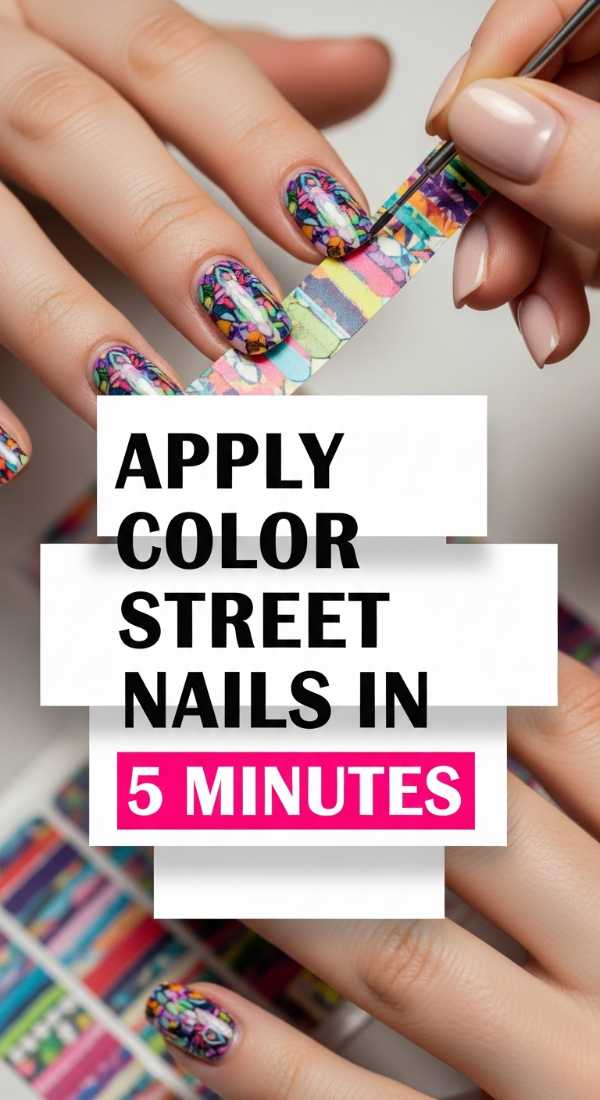
Instant Magic: The Color Street Glow-Up
Why to love this recipe:
My loves, sometimes life moves a little faster than we do, and that is okay. This is for those days when you need beauty in a heartbeat—a quick way to feel polished and powerful without the long wait time.
Essential Ingredients:
- Color Street Nail Strips
- Alcohol Prep Pad
- Glass Nail File
How to Prepare:
- Cleanse your natural nails with the prep pad to remove any oils.
- Peel the strip, align it with your cuticle, and press down firmly with love.
- Fold the excess over the tip and gently file downward to remove the extra.
Budget Range
- Color Street Design Sets ($13 – $15)
- Czech Glass Nail File ($8)
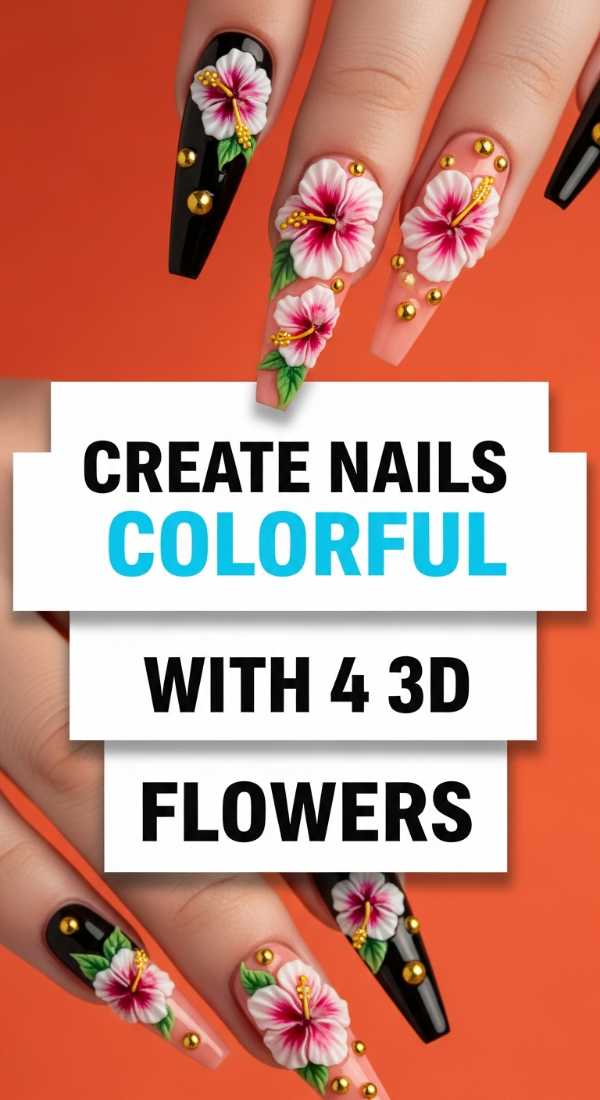
Blooming Fingertips: The 4-Flower Garden
Why to love this recipe:
There is nothing quite like the tactile joy of 3D flowers. It turns your hand into a living garden that you can feel under your fingertips. It adds a layer of depth that literally stands out from the crowd.
Essential Ingredients:
- White Acrylic Powder
- Vibrant Pink Acrylic Powder
- Monomer Liquid
- Size 4 Kolinsky Brush
How to Prepare:
- Pick up a tiny bead of pink acrylic and place it where you want your first flower.
- Press the center with your brush and use the white powder to create four delicate petals around it.
- Repeat this process until you have a cluster of four flowers dancing across the nail.
- Add a tiny gold bead to the center of each for a touch of royalty.
Budget Range
- Mia Secret Acrylic Powder ($9)
- Saviland Acrylic Nail Brush ($12)
The Rainbow Cloud: Blending with Ease
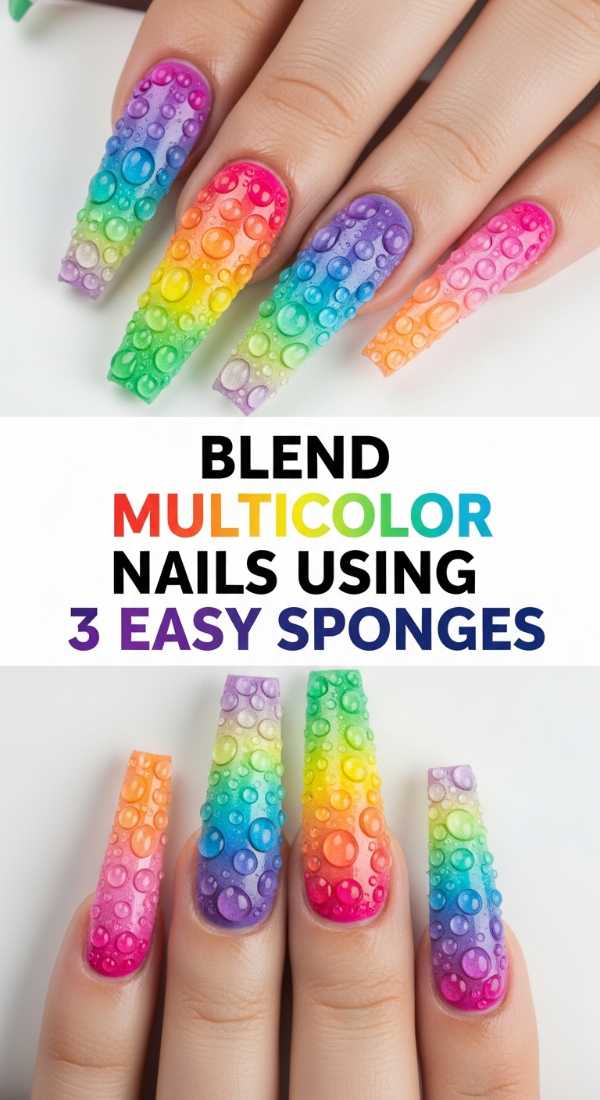
Why to love this recipe:
This is like wearing a watercolor painting on your hands. It’s soft, ethereal, and allows multiple colors to live together in a beautiful, messy, wonderful harmony.
Essential Ingredients:
- 3 Mini Sponges
- Teal, Magenta, and Yellow polishes
- Liquid Latex (for easy cleanup)
How to Prepare:
- Apply liquid latex around your cuticles to keep things tidy.
- Dab each of the three sponges into a different color.
- Lightly press the sponges onto different sections of the nail, overlapping them slightly to create new, magical shades.
Budget Range
- Pueen Liquid Latex ($9)
- Sally Hansen Xtreme Wear ($4 each)
The Vision Board: 6 Stages to Your Dream Mani
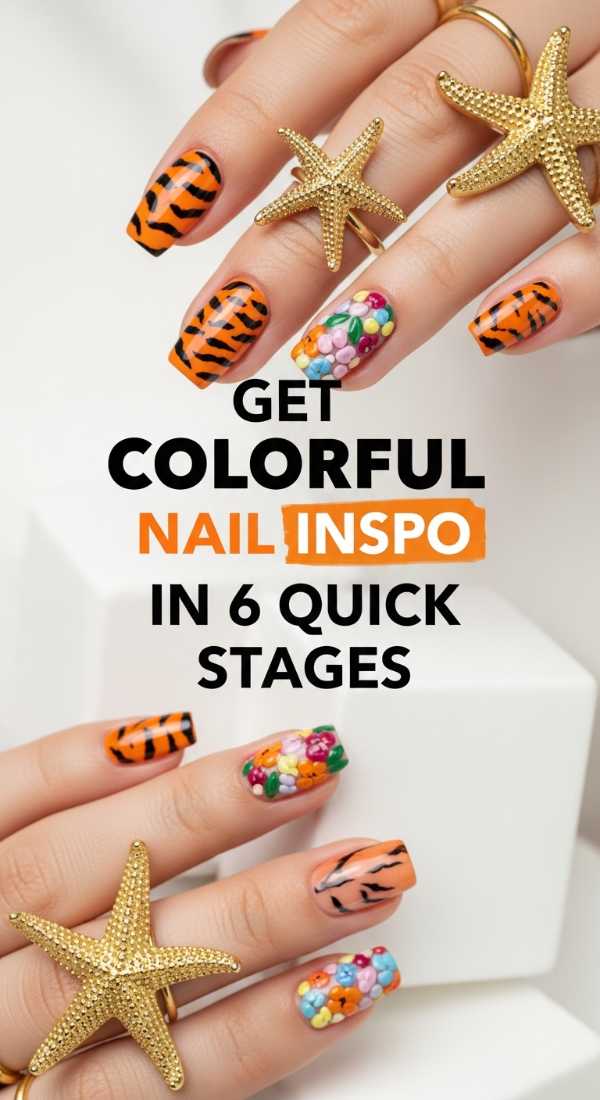
Why to love this recipe:
This is for the dreamers. It’s about the process of finding what makes your heart sing and translating that into a colorful masterpiece through a thoughtful, creative journey.
Essential Ingredients:
- Pinterest Inspo Board
- Sketchbook and Pens
- Full Color Palette of Acrylics
How to Prepare:
- Stage 1: Gather images that make you feel happy.
- Stage 2: Choose your 5 core colors.
- Stage 3: Sketch your design on paper.
- Stage 4: Apply your base acrylic layers.
- Stage 5: Add your 3D textures and charms.
- Stage 6: Seal it all with a high-shine gloss.
Budget Range
- Modelones 36 Color Acrylic Set ($30)
- Hardbound Sketchbook ($12)
Structural Art: Sculpting Your Masterpiece
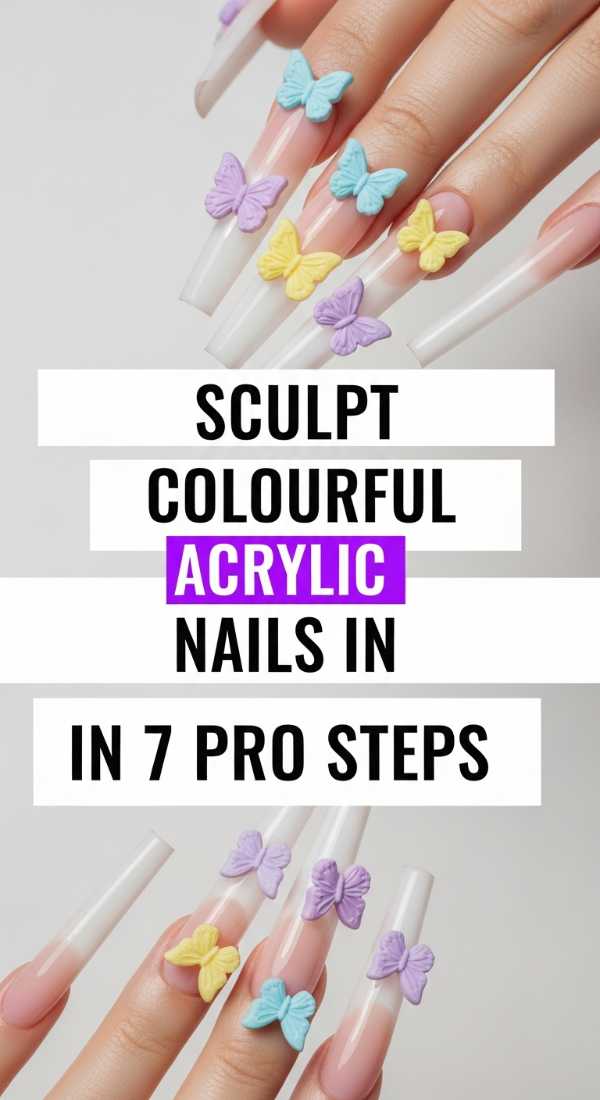
Why to love this recipe:
Sculpting is where the true transformation happens. It’s about building something strong and beautiful from scratch, giving you the length and shape that makes you feel most like yourself.
Essential Ingredients:
- Nail Forms
- Professional Monomer
- Cover Pink Acrylic Powder
- Electric Nail Drill
How to Prepare:
- Fit the form snugly under your natural nail.
- Apply the first bead to create the free edge.
- Place the second bead at the apex for strength.
- Smooth the third bead toward the cuticle.
- Refine the side walls.
- Buff until smooth.
- Finish with a vibrant colorful top coat.
Budget Range
- Young Nails Core Kit ($50)
- MelodySusie E-File ($25)
Sharp and Sweet: The Perfect Stiletto Shape
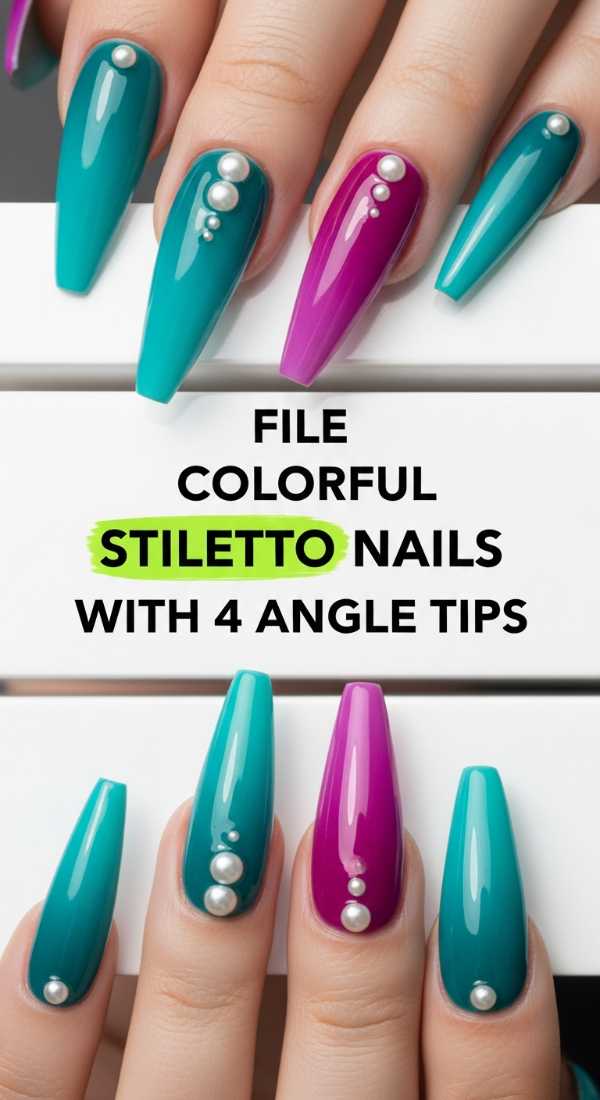
Why to love this recipe:
Stiletto nails are a statement of confidence. They elongate the fingers and provide the perfect long canvas for all those maximalist 3D details we love so much.
Essential Ingredients:
- 100/180 Grit Nail File
- Buffing Block
- Nail Dust Brush
How to Prepare:
- File the first side wall at a sharp 45-degree angle toward the center.
- Mirror the angle on the second side wall.
- File the tip to a point, then slightly round it so it isn’t ‘vampire’ sharp.
- Smooth the underside to ensure a clean, professional finish.
Budget Range
- Kupa Precision Files ($6)
- Makartt Buffer Blocks ($8)
Liquid Dreams: 5 Steps to Water Marbling
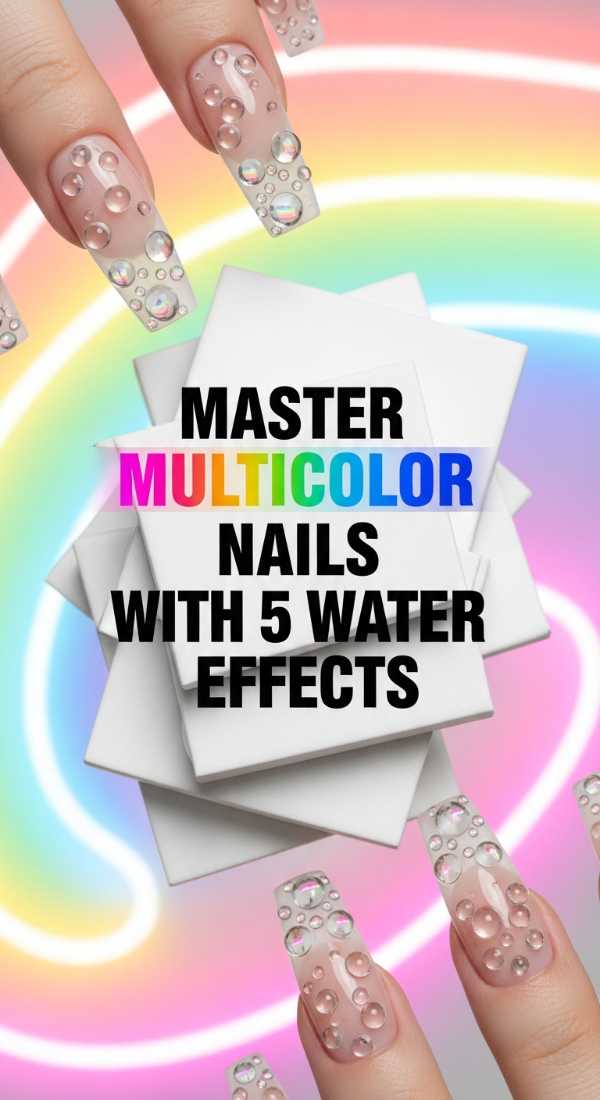
Why to love this recipe:
Water marbling is pure magic. No two nails are ever the same, just like no two souls are ever the same. It creates organic, flowing patterns that look incredibly complex but are so fun to make.
Essential Ingredients:
- Room Temperature Filtered Water
- 3 Contrasting Polishes
- Toothpicks
How to Prepare:
- Drop a single bead of polish into the center of the water bowl.
- Repeat with other colors to create concentric circles.
- Use a toothpick to draw a design through the rings.
- Dip your nail flat onto the surface of the water.
- Slowly lift and clear the excess with a cotton bud.
Budget Range
- Orly Color Pass ($12 per bottle)
- Disposable Water Cups ($2)
The Minimalist’s Maximalism: The 2-Stroke Swipe
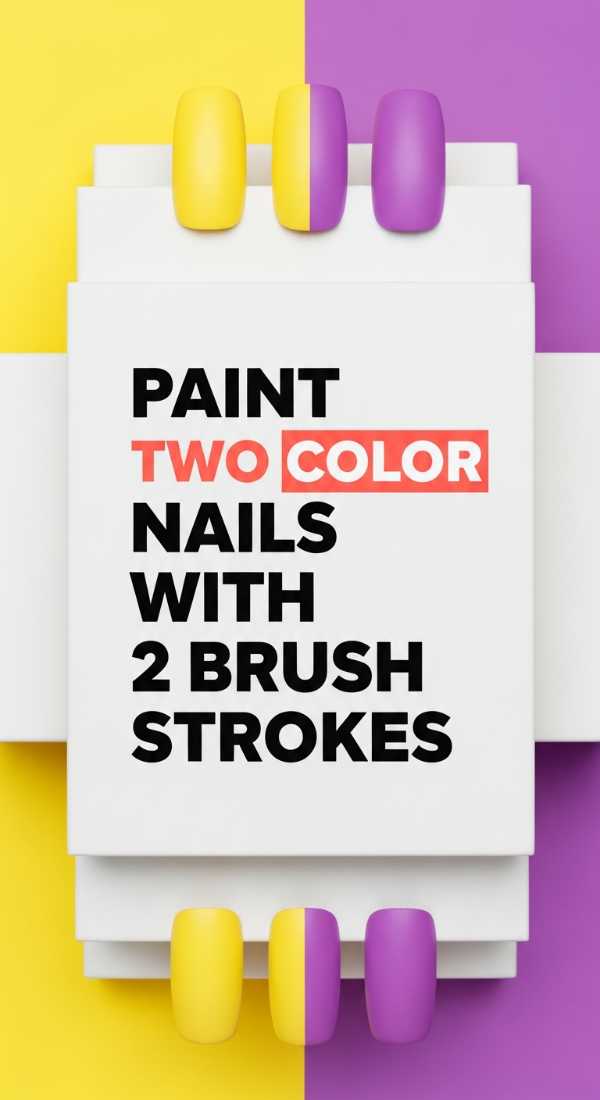
Why to love this recipe:
Sometimes ‘more’ is about the intensity of the color rather than the complexity of the design. This technique is about bold, decisive movements that create a striking, modern look.
Essential Ingredients:
- Wide-brush Neon Polish
- Highly Pigmented Contrast Polish
How to Prepare:
- Load your brush with a generous amount of the first color and swipe down the left side.
- Immediately take the second color and swipe down the right side, letting them slightly overlap in the center.
Budget Range
- Holo Taco Linear Holo ($14)
- Mooncat Lacquer ($13)
Golden Royalty: Adorning with 8 Charms
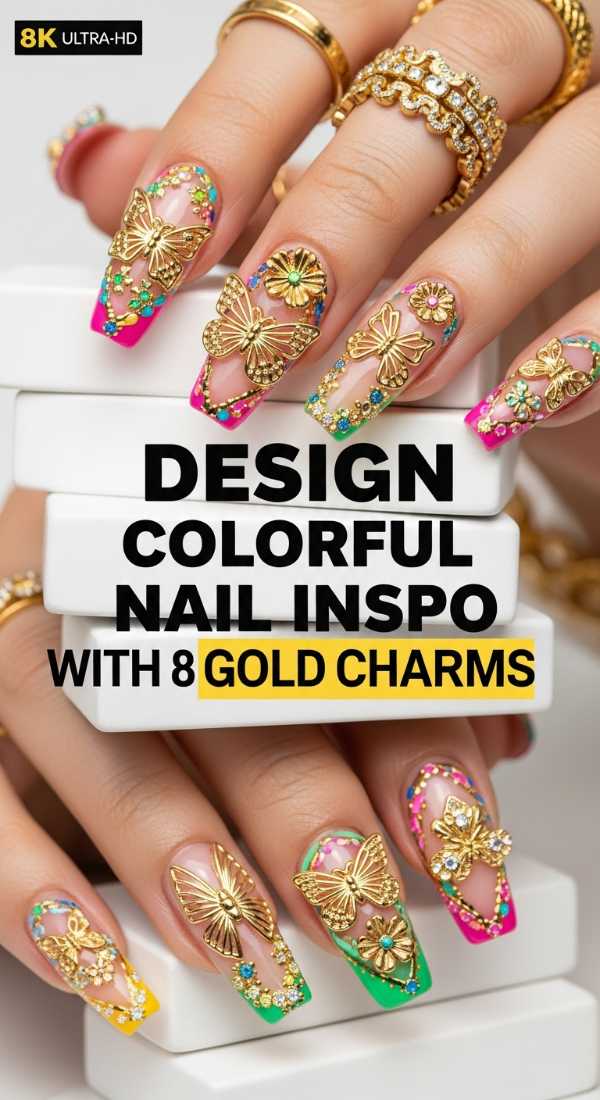
Why to love this recipe:
This is the literal ‘crowning’ of your masterpiece. Adding charms is like putting jewelry on your jewelry. It’s the ultimate expression of maximalist luxury and shine.
Essential Ingredients:
- Assorted Gold Charms (Hearts, Stars, Butterflies)
- Nail Jewelry Glue or Rhinestone Gel
- Wax Picker Tool
How to Prepare:
- Apply your base color and a matte top coat (it makes the gold pop!).
- Place 8 small dots of glue in a scattered, intentional pattern.
- Use your wax tool to place a different charm on each glue dot.
- Cure under the lamp to lock in the sparkle.
Budget Range
- Amazon Nail Charm Bulk Pack ($10)
- Makartt Rhinestone Glue ($9)
Embrace Your Inner Artist
My sweet friends, I hope these steps have inspired you to look at your nails as a gateway to joy. Remember, maximalism isn’t just about ‘stuff’—it’s about the abundance of heart, the richness of color, and the courage to show the world exactly who you are. Don’t be afraid to mix and match these techniques. Put a 3D flower on a marbled nail, or add gold charms to your two-tone blend. Your hands are the tools with which you create your life—make them look as beautiful as the dreams you’re building. Until next time, stay colorful and keep shining!