
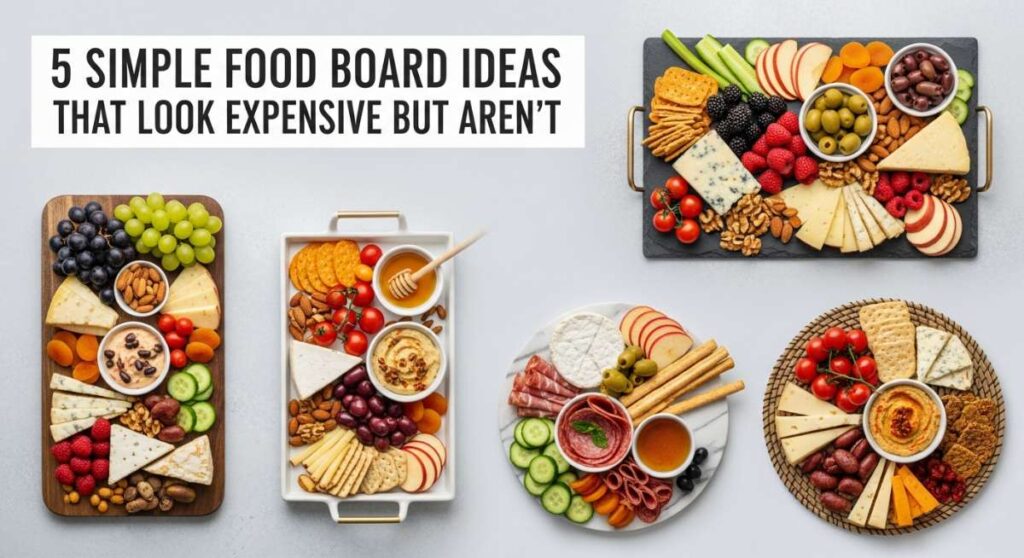
There is something truly magical about walking into a room and seeing a spread that looks like it was plucked straight from a high-end editorial shoot. We’ve all been there—scrolling through social media, mesmerized by those perfectly curated food boards that seem to whisper of effortless elegance and expensive tastes. But here is a little secret from my kitchen to yours: you don’t need a professional stylist or a massive budget to create that ‘wow’ factor. It’s all about the art of the arrangement and choosing ingredients that punch way above their weight class in terms of color and texture.
Food is my love language, and nothing makes me happier than seeing my friends’ faces light up when I set down a wooden board overflowing with vibrant colors and aromatic treats. Whether it’s a lazy Sunday brunch or a spontaneous backyard gathering, these boards turn a simple meal into an experience. Today, I’m sharing my favorite viral-inspired food board components that will make your guests think you spent hours (and a small fortune) when, in reality, you were just having fun with fresh, accessible ingredients.
Easy Mini Slider Recipe

Why we love this
There is something undeniably comforting about the aroma of toasted brioche mingling with the savory, caramelized scent of seasoned beef. These sliders are the ultimate crowd-pleaser, offering a luxurious mouthfeel thanks to the buttery bun and the silky melt of high-quality cheddar. Every bite is a harmonious blend of textures—the slight crunch of the toasted bread, the juicy tenderness of the patty, and the tangy zip of a signature sauce. They look like gourmet appetizers from a boutique bistro, yet they come together with such humble ease.
Ingredients
- 12-pack of mini brioche rolls
- 1 lb lean ground beef (80/20 mix for juice)
- Sliced sharp cheddar cheese
- Caramelized onions
- Melted butter with garlic salt
- Pickle chips and microgreens for garnish
How to make it
- Preheat your oven to 350°F (175°C). Keeping the rolls connected, slice the entire block of brioche rolls in half horizontally using a long serrated knife to ensure a clean, even cut.
- In a large cast-iron skillet over medium-high heat, press the ground beef into a flat rectangle that matches the size of the roll block. Sear until a deep brown crust forms, about 4 minutes per side, ensuring the internal temperature reaches 160°F.
- Place the bottom half of the rolls on a parchment-lined baking sheet. Layer the cooked beef slab, then the cheddar slices, and then a generous layer of caramelized onions.
- Place the top half of the rolls back on. Brush the tops generously with melted garlic butter, using a pastry brush to get into every nook and cranny.
- Bake for 10-12 minutes until the cheese is bubbling and the tops are golden brown. Slice into individual sliders and top each with a pickle and a pinch of microgreens for that ‘expensive’ finishing touch.
Fresh Summer Fruit Skewers

Why we love this
Nothing says luxury quite like a vibrant spectrum of colors that mimic a summer sunset. These skewers are a masterclass in sensory delight; the cold, crisp snap of watermelon followed by the velvety sweetness of a ripe mango creates a refreshing explosion on the palate. The subtle, herbal fragrance of fresh mint leaves tucked between the fruit adds an aromatic layer that elevates the entire board. It’s a clean, bright, and visually stunning addition that provides a healthy yet indulgent feel to any gathering.
Ingredients
- Fresh watermelon cubes
- Ripe mango chunks
- Honeydew melon balls
- Fresh blueberries
- Large mint leaves
- Honey and lime zest for drizzling
How to make it
- Begin by prepping your fruit into uniform shapes. Use a melon baller for the honeydew to create perfect spheres and a sharp chef’s knife to cut the watermelon and mango into 1-inch cubes. Uniformity is the secret to an expensive look.
- Thread the fruit onto bamboo skewers in a repeating color pattern: watermelon, a mint leaf folded in half, mango, honeydew, and a blueberry at the tip.
- Arrange the skewers on a white marble or dark wood board, overlapping them slightly to create a sense of abundance.
- In a small bowl, whisk together two tablespoons of local honey and the zest of one lime until thin and pourable.
- Just before serving, use a spoon to delicately drizzle the honey-lime mixture over the skewers, ensuring the lime zest is visible for a gourmet aesthetic.
Grilled Corn BBQ Side

Why we love this
This isn’t just corn; it’s a smoky, charred masterpiece that brings a rustic-chic vibe to your food board. The smell of corn husks charring over an open flame evokes memories of high-end summer garden parties and artisanal BBQs. The contrast between the golden, sweet kernels and the salty, creamy crumbles of cotija cheese is absolutely addictive. When topped with a dusting of smoked paprika and fresh cilantro, it looks like a dish served at a coastal Mexican resort, full of complex flavors and textures.
Ingredients
- 4 ears of fresh sweet corn, shucked
- 1/4 cup Mexican crema or sour cream
- 1/2 cup crumbled cotija cheese
- Smoked paprika and chili powder
- Fresh cilantro, finely chopped
- Lime wedges for serving
How to make it
- Preheat your grill to medium-high heat (about 400°F). Lightly oil the grates to prevent sticking.
- Place the corn directly on the grates. Grill for about 10-12 minutes, turning every 2-3 minutes. Look for even char marks—you want those black spots as they provide the smoky flavor and visual appeal.
- Once charred and tender, remove from the grill. While still hot, use a silicone brush to coat each ear with a thin, even layer of Mexican crema.
- Roll the coated corn in the crumbled cotija cheese, pressing slightly so the cheese adheres to the creamy base.
- Dust with a pinch of smoked paprika and chili powder. Arrange on your board with lime wedges and a heavy sprinkle of cilantro to create a professional, layered presentation.
Magnesium Rich Breakfast

Why we love this
This board is for the wellness lovers who still want to indulge in something that looks like it belongs in a Five-Star hotel spa. The combination of dark, rich cacao, crunchy roasted almonds, and creamy Greek yogurt creates a texture profile that is both satisfying and sophisticated. The deep, earthy scent of the nuts paired with the bright tang of fresh berries makes for a morning ritual that feels incredibly special. It’s functional food disguised as a decadent treats, providing a boost of energy and minerals in the most beautiful way possible.
Ingredients
- Thick Greek yogurt or coconut yogurt
- Dark chocolate chunks (70% cacao or higher)
- Roasted pumpkin seeds (pepitas)
- Sliced almonds
- Fresh raspberries and blackberries
- A sprinkle of hemp hearts
How to make it
- Select a shallow ceramic bowl or a small wooden platter. Spoon large dollops of yogurt across the base, using the back of the spoon to create ‘swirls’ and ‘valleys’ for the toppings to sit in.
- Toast the pumpkin seeds and almonds in a dry pan over low heat for 3-5 minutes until they release a nutty aroma and turn slightly golden. Watch closely as they can burn quickly.
- Artfully scatter the roasted nuts and seeds into the yogurt swirls. This creates a focused, intentional look rather than a messy pile.
- Add the dark chocolate chunks and berries in clusters. Clustering ingredients rather than scattering them randomly is a professional plating technique that makes boards look more expensive.
- Finish with a light dusting of hemp hearts and a tiny pinch of flaky sea salt to enhance the chocolate and nut flavors.
Authentic Street Tacos

Why we love this
There is a vibrant, electric energy to a taco board that immediately starts a conversation. The scent of warm corn tortillas and zesty lime is intoxicating, promising a meal that is as fun to assemble as it is to eat. The textures range from the soft, pillowy tortilla to the crunch of radishes and the creamy richness of avocado. It’s a celebration of bold flavors and fresh garnishes that, when arranged neatly, looks like a high-end catering spread from an authentic taqueria.
Ingredients
- Small corn tortillas
- Slow-cooked shredded beef or pork
- Finely diced white onion
- Fresh cilantro
- Thinly sliced radishes
- Sliced jalapeños and lime halves
How to make it
- Prepare your protein (beef or pork) until it is tender enough to shred with two forks. Keep it warm in its own juices to ensure it stays moist on the board.
- Heat a dry cast-iron skillet over high heat. Warm each corn tortilla for 30 seconds per side until they develop small charred spots but remain pliable. Store them in a clean kitchen towel to keep them soft.
- To assemble the board, place the warm meat in a central bowl. Arrange the tortillas in an overlapping fan shape around the bowl.
- Place the diced onions, cilantro, and radishes in small, matching ramekins to create a sense of order and cleanliness.
- Fill the empty spaces on the board with lime halves and jalapeño slices. This ‘filling the gaps’ method is what gives the board its lush, expensive appearance.
Elegant Brunch Bites

Why we love this
Brunch is the ultimate time for elegance, and these bites are the crown jewel of any morning gathering. The combination of silky smoked salmon, sharp capers, and airy cream cheese on a crisp base is a classic for a reason—it feels inherently fancy. The delicate pink hues of the fish against the bright green of fresh dill make for a stunning visual display. It’s light, sophisticated, and perfectly portioned, allowing your guests to feel pampered without the heavy feeling of a massive meal.
Ingredients
- Mini toasted bagels or cucumber rounds
- Premium smoked salmon
- Whipped cream cheese
- Capers and thinly sliced red onion
- Fresh dill sprigs
- Lemon slices
How to make it
- If using mini bagels, toast them until the edges are golden and crisp. If using cucumber, slice them into 1/2 inch thick rounds for a gluten-free, light option.
- Apply a generous ‘swoosh’ of whipped cream cheese to each base. Using a small offset spatula or the back of a teaspoon will give you a smoother, more professional finish than a butter knife.
- Drape a ribbon of smoked salmon over the cream cheese. Fold the salmon loosely to give it height and volume, which looks much more appetizing than laying it flat.
- Top with three capers, one ring of red onion, and a small sprig of fresh dill. The dill acts as a garnish that provides an expensive, finished look.
- Arrange the bites in neat rows on a slate or ceramic board, garnished with lemon wedges that guests can squeeze over the salmon just before eating.
Outdoor Camping Snacks
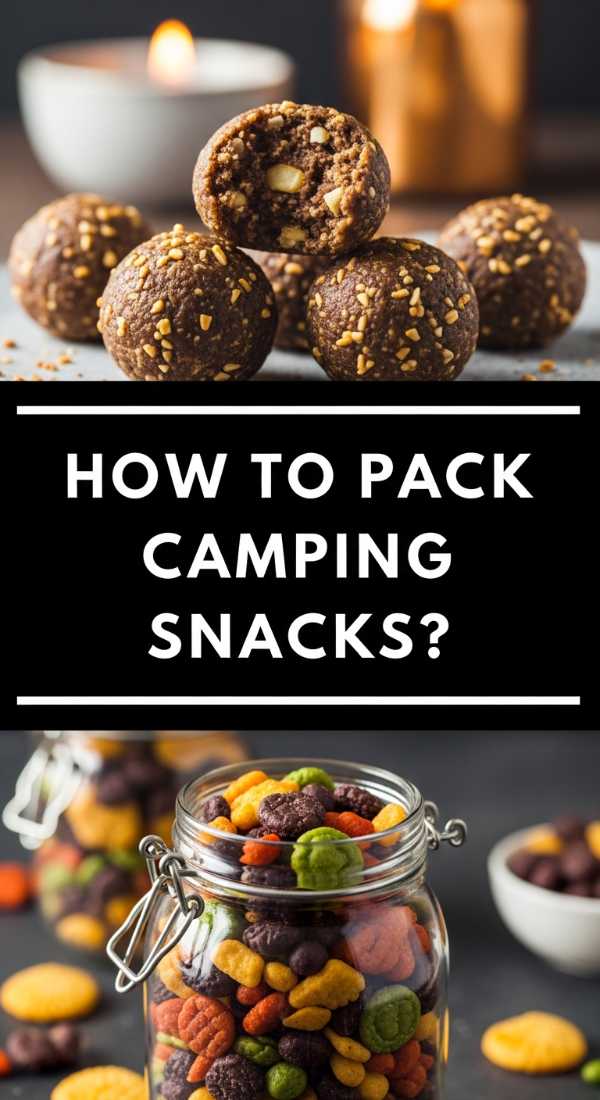
Why we love this
Just because you’re outdoors doesn’t mean you can’t have a curated dining experience. This board brings a touch of ‘glamping’ to any trail or campsite. It’s all about hearty textures and salty-sweet combinations that provide a much-needed energy boost. The earthy aroma of beef jerky and the crunch of high-quality nuts feel grounded and satisfying. When presented on a rustic wooden slab, these simple snacks look like an artisanal charcuterie spread designed for the modern adventurer.
Ingredients
- Artisanal beef or turkey jerky
- Dried apricots and cranberries
- Salted almonds and cashews
- Pretzel snaps or sticks
- Hard cheese (like aged cheddar) cut into cubes
How to make it
- Select a sturdy, portable wooden board or even a clean flat rock for that authentic outdoor aesthetic.
- Start by placing the jerky in the center. If the pieces are large, tear them into bite-sized strips to make them easier to grab.
- Create small piles of dried fruit next to the jerky. The orange of the apricots provides a beautiful color contrast against the dark meat.
- Fill small gaps with the almonds and cashews. Ensure the nuts are toasted for maximum flavor and crunch.
- Add the cheese cubes and pretzels last. To keep the cheese looking fresh, don’t cut it until you are ready to assemble the board. The variety of shapes—strips, cubes, and rounds—creates visual interest.
Homemade Sushi Rolls

Why we love this
Sushi is often seen as an expensive delicacy, but making it at home is a rewarding and surprisingly simple process that looks incredibly impressive. The contrast of the dark, crisp nori against the pearly white rice and vibrant fillings is pure art. The scent of seasoned vinegar and fresh cucumber is clean and inviting. Serving a board filled with uniform, colorful rolls tells your guests that you’ve mastered a craft, giving the entire meal a sense of occasion and high-end flair.
Ingredients
- Sushi grade rice (short-grain)
- Nori sheets (seaweed)
- Rice vinegar, sugar, and salt for seasoning
- Fillings: Avocado, cucumber, imitation crab or fresh tuna
- Soy sauce, ginger, and wasabi for serving
How to make it
- Rinse your sushi rice until the water runs clear. Cook it perfectly, then while warm, fold in a mixture of rice vinegar, sugar, and salt. Fan the rice as you mix to give it that signature glossy, ‘expensive’ sheen.
- Place a nori sheet on a bamboo rolling mat. Spread a thin, even layer of rice over the nori, leaving 1 inch at the top edge.
- Lay your thinly sliced fillings in a horizontal line across the bottom third of the rice. Consistency in slicing your vegetables is key for a professional look.
- Using the mat, roll tightly from the bottom, applying even pressure to ensure a firm cylinder. Wet the top edge of the nori with a bit of water to seal the roll.
- Use a very sharp, slightly damp knife to slice the roll into 8 even pieces. Clean the knife between every cut to ensure the rice doesn’t stick and the edges remain perfectly smooth. Arrange on a dark platter with neat mounds of ginger and wasabi.
Crispy Picnic Potatoes

Why we love this
These are not your average roasted potatoes; they are golden, craggy gems that offer a satisfying crunch followed by a fluffy, cloud-like interior. The aroma of roasted rosemary and garlic is absolutely intoxicating and instantly makes a space feel warm and welcoming. Presented on a board with a side of creamy dipping sauce, they look like a high-end gastropub side dish. They are the ultimate comfort food, elevated through technique and beautiful presentation.
Ingredients
- Baby yellow or red potatoes
- Olive oil or duck fat
- Fresh rosemary and thyme
- Garlic cloves, smashed
- Flaky sea salt
- Chive-infused sour cream for dipping
How to make it
- Boil the whole baby potatoes in salted water for 10-12 minutes until they are just fork-tender. Drain and let them steam-dry for 5 minutes; this dryness is the secret to a crispy exterior.
- Place the potatoes on a baking sheet and use the bottom of a glass to gently ‘smash’ them until they are about 1/2 inch thick. This creates more surface area for crisping.
- Drizzle generously with olive oil or duck fat. Toss with smashed garlic and fresh herbs. Ensure every potato is well-coated.
- Roast at 425°F (220°C) for 25-30 minutes, flipping halfway through, until the edges are deep golden brown and shattered-glass crispy.
- Arrange the hot potatoes on a board around a bowl of chive sour cream. Sprinkle with a final layer of flaky sea salt and fresh herbs for a professional, rustic finish.
Classic Deviled Eggs
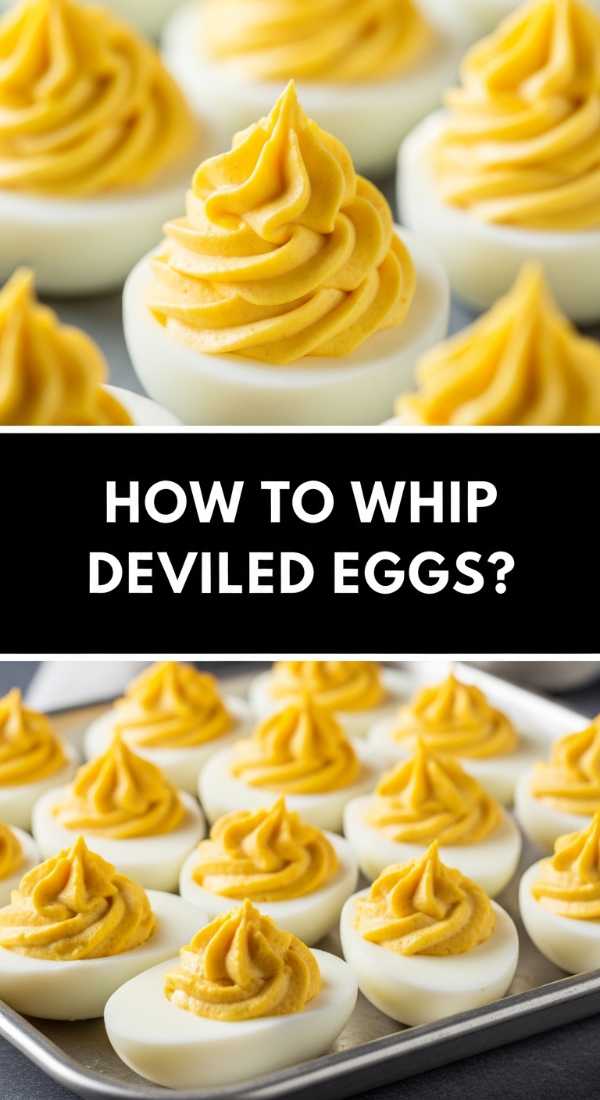
Why we love this
The deviled egg is a vintage classic that has made a massive comeback in the world of high-end appetizers. When done correctly, the filling is as smooth as silk and flavored with a sophisticated balance of tang and spice. The sight of perfectly piped, golden mounds dusted with vivid red paprika is iconic. They are the perfect ‘bite,’ offering a rich, creamy texture that feels indulgent and elegant, making them a centerpiece of any vintage-inspired food board.
Ingredients
- 6 large eggs
- 1/4 cup high-quality mayonnaise
- 1 tsp Dijon mustard
- 1 tsp apple cider vinegar
- Smoked paprika and fresh chives for garnish
How to make it
- Place eggs in a single layer in a saucepan and cover with water. Bring to a boil, then immediately remove from heat, cover, and let sit for 12 minutes exactly. Transfer to an ice bath for 10 minutes to ensure easy peeling and no gray rings around the yolk.
- Peel the eggs and slice them in half lengthwise. Remove the yolks and place them in a fine-mesh sieve. Push the yolks through the sieve with a spoon; this ‘ricing’ technique ensures a completely lump-free, professional filling.
- Mix the sieved yolks with mayonnaise, mustard, and vinegar until smooth. For an extra expensive look, use a piping bag with a star tip to fill the egg white shells.
- Pipe the filling in a high, swirling motion to give each egg volume and height.
- Finish with a light dusting of smoked paprika from high above (to avoid clumps) and a single, perfectly placed chive baton on each egg. Arrange in neat rows on your board.
Conclusion
Creating a food board that looks expensive doesn’t require a culinary degree or a huge budget. It’s all about the small details: the uniform cuts, the vibrant garnishes, and the intentional arrangement of colors and textures. By taking these simple recipes and presenting them with care, you turn an ordinary meal into an extraordinary memory. So, grab your favorite board, pick a few of these ideas, and start building your own viral-worthy masterpiece!