
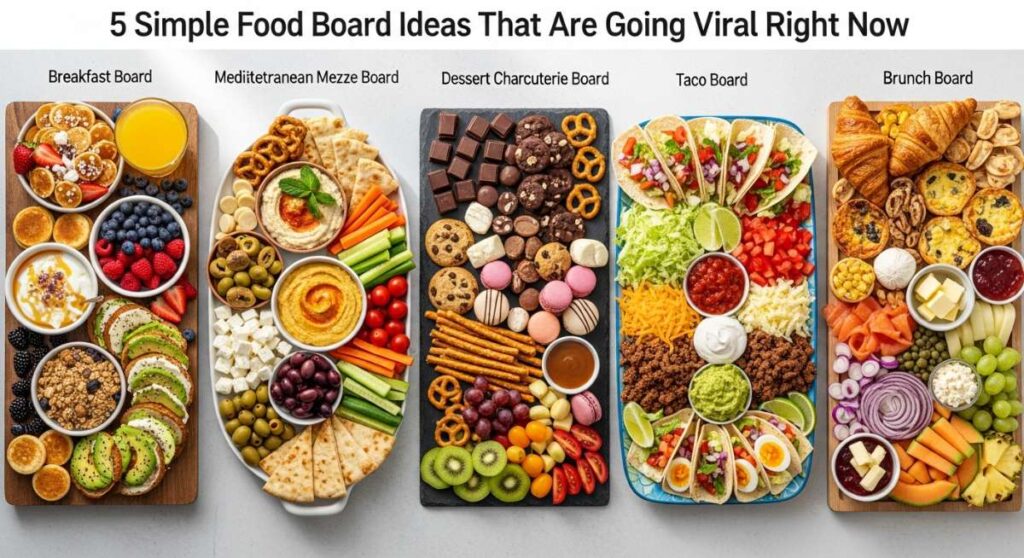
There is something inherently magical about a gathering where the food looks just as good as it tastes. We have all seen them—those sprawling, vibrant boards that take over our social media feeds, promising a relaxed yet sophisticated way to feed a crowd. Whether it’s a sun-drenched afternoon on the patio or a cozy evening in with your closest friends, a themed food board turns a simple meal into an interactive experience that invites everyone to lean in, share stories, and sample a bit of everything.
As someone who spends a lot of time in the kitchen, I’ve realized that the secret to a viral-worthy board isn’t just about the expensive ingredients; it’s about the soul you put into the presentation. It’s the way the colors of fresh herbs pop against a rustic wooden surface and the way the aroma of grilled proteins fills the air. Today, I’m sharing my favorite ways to take classic summer favorites and elevate them into stunning, board-style presentations that will have your guests reaching for their phones before they even take a bite.
10 Easy Summer Crockpot Recipes You Need to Try
Why we love this
Imagine the succulent, melt-in-your-mouth texture of proteins that have been slow-simmering for hours, soaking up every drop of a rich, aromatic glaze. When presented on a board, these crockpot masterpieces offer a rustic, comfort-food vibe that contrasts beautifully with crisp, cold sides. The aroma of slow-cooked garlic and savory spices fills the room, creating an atmosphere of warmth and abundance that makes every guest feel immediately at home and ready to feast.
Ingredients
- Slow-cooked pulled pork or shredded beef
- Brioche sliders or mini tortillas
- Creamy applewood-smoked coleslaw
- Pickled red onions and jalapeños
- A variety of artisanal BBQ sauces
- Cilantro and lime wedges for garnish
How to make it
- Begin by selecting a high-quality cut of meat, such as a pork butt or chuck roast, and season it aggressively with a dry rub of smoked paprika, brown sugar, and cumin. Sear the meat in a hot cast-iron skillet for 3-4 minutes per side to achieve a deep Maillard reaction crust before transferring to the crockpot.
- Set your slow cooker to the ‘Low’ setting. This is crucial as high heat can toughen the protein fibers; a low, steady temperature over 8 hours ensures the collagen breaks down into a silky, tender texture.
- Once the meat is fork-tender (reaching an internal temperature of about 205°F), shred it directly in its juices to prevent it from drying out. Let it rest in the warm liquid for at least 15 minutes to reabsorb the flavors.
- Assemble your board by placing the warm meat in a central stoneware bowl. Arrange the toasted sliders and cold toppings around it in flowing curves. Tip: Toast the slider buns with a brush of melted butter just before serving to add a crunch that balances the soft texture of the meat.
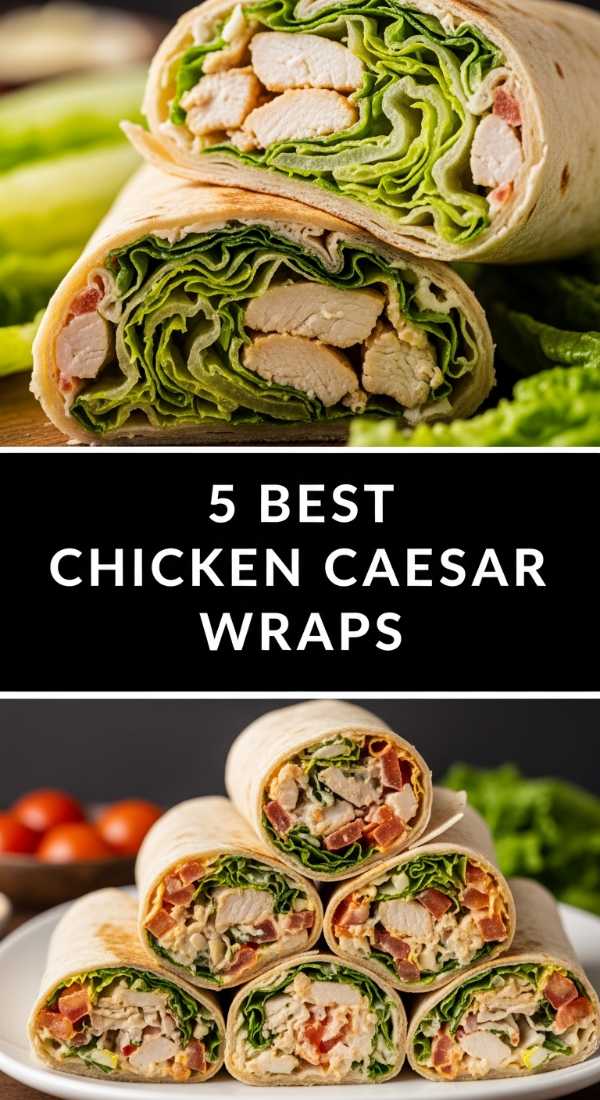
5 Best Chicken Caesar Wraps for Quick Lunch

Why we love this
There is a rhythmic perfection to the crunch of cold romaine lettuce paired with the savory, salty punch of a high-quality Caesar dressing. This board is all about the interplay of temperatures—warm, juicy grilled chicken sliced thin, wrapped in a soft, pliable tortilla that has been lightly toasted. It’s a clean, vibrant, and incredibly satisfying lunch option that feels light enough for a hot day but indulgent enough to satisfy those savory cravings.
Ingredients
- Sliced grilled chicken breast (lemon-herb marinated)
- Large flour tortillas
- Romaine lettuce hearts, chopped fine
- Shaved Parmigiano-Reggiano
- House-made Caesar dressing with extra anchovy paste
- Garlic-butter croutons for added crunch
How to make it
- Marinate your chicken breasts in olive oil, lemon zest, and cracked black pepper for 30 minutes. Grill over medium-high heat (approx. 400°F) until the internal temperature hits 165°F. Rest the meat for 10 minutes before slicing into thin strips to keep the juices locked in.
- Toss the chopped romaine with just enough dressing to coat, ensuring every leaf is glistening but not soggy. Add the shaved parmesan and crushed croutons at the very last second to maintain their structural integrity.
- Warm the tortillas on a dry griddle for 15 seconds per side. This makes them more elastic and prevents tearing. Layer the salad and chicken in the center, fold in the sides, and roll tightly.
- For the board, cut each wrap on a sharp diagonal. This exposes the beautiful layers of green and gold. Arrange them in a shingled pattern on a long board, interspersed with extra lemon wedges and small bowls of dipping dressing.
7 Top Summer Pasta Salads for Your Cookout

Why we love this
Pasta salad is the ultimate canvas for summer’s bounty, and when served as a ‘flight’ on a large board, it becomes a gourmet tasting experience. We love the variety of shapes—from rotini to farfalle—that trap zesty vinaigrettes and creamy sauces in their crevices. The sensory experience is a medley of textures: the snap of fresh bell peppers, the creaminess of feta cheese, and the chew of perfectly al dente pasta, all tied together by the fragrance of fresh basil and oregano.
Ingredients
- Assorted pasta shapes (Tri-color rotini, Orzo, Tortellini)
- Sundried tomatoes and kalamata olives
- Fresh mozzarella pearls
- Red wine vinaigrette and pesto sauce
- Blanched asparagus tips and cherry tomatoes
- Toasted pine nuts for garnish
How to make it
- Boil your pasta in heavily salted water (it should taste like the sea). Cook the pasta for exactly one minute less than the package directions for ‘al dente’. Immediately shock the pasta in an ice bath to stop the cooking process and preserve the firm texture.
- Drain the pasta thoroughly. Excess water is the enemy of a good salad as it dilutes the dressing. Toss the pasta with a small amount of oil to prevent sticking while you prep the vegetables.
- Whisk your vinaigrettes using a 3-to-1 oil-to-acid ratio. Emulsify the dressing vigorously with a whisk or in a jar until it is thick and creamy. Pour over the pasta and let it marinate in the fridge for at least 2 hours to allow the flavors to penetrate the starch.
- On a large circular board, place small bowls filled with different varieties of pasta salads. Fill the gaps between the bowls with fresh ingredients like clusters of grapes or sprigs of rosemary to create a lush, overflowing look.
8 Refreshing Summer Cocktails to Cool Down
Why we love this
A cocktail board is the ultimate sign of a host who knows how to have fun. It’s a sensory explosion of bright citrus scents, the clinking of ice against crystal, and the vibrant hues of muddled berries and mint. There’s something so sophisticated about seeing a spread of fresh garnishes and colorful mixers, allowing guests to customize their drinks while enjoying the visual beauty of sparkling liquids and frosted glassware under the summer sun.
Ingredients
- Freshly squeezed lime, lemon, and grapefruit juices
- Muddled berries (strawberries, blackberries)
- Fresh mint, basil, and rosemary sprigs
- Artisanal syrups (agave, elderflower, spicy honey)
- Sparkling water and premium spirits
- Dehydrated citrus wheels for a professional finish
How to make it
- Prepare your ‘base’ mixers by juicing fresh citrus and straining out the pulp for a clear, elegant look. Create a simple syrup by dissolving equal parts sugar and water over low heat, infusing it with herbs like mint while it cools.
- For the board, use a variety of glassware—coupes, highballs, and tumblers. Place a large, ornate bowl of crystal-clear ice in the center. Use ‘clear ice’ if possible, as it melts slower and looks more premium.
- Arrange small dishes of garnishes: salts for rims, fresh herbs, and fruit slices. Pro tip: Slap the mint leaves against your hand before placing them on the board to release the essential oils and enhance the aroma.
- Provide a small instructional card or a ‘signature mix’ suggestion to guide your guests. Ensure you have plenty of non-alcoholic sparkling options so everyone can participate in the beautiful aesthetic.
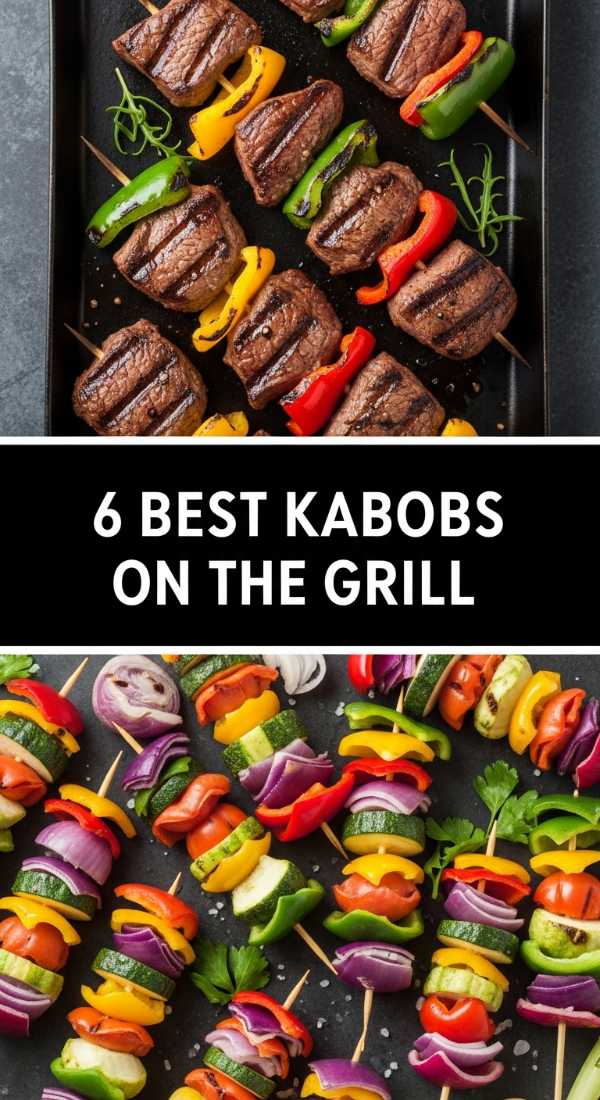
6 Best Kabobs on the Grill for Summer
Why we love this
The char-grilled aroma of a kabob board is enough to make anyone’s mouth water. We love the charred edges of the vegetables that provide a smoky sweetness, contrasting with the savory, juice-dripping protein in the center. It’s a rustic, tactile way to eat that feels primal yet refined. The vibrant colors of charred peppers, purple onions, and golden pineapple create a rainbow of flavors that scream summer cookout perfection.
Ingredients
- Cubed sirloin steak or chicken thighs
- Large shrimp (peeled and deveined)
- Bell peppers, red onions, and zucchini slices
- Fresh pineapple chunks
- Glaze: Soy sauce, ginger, garlic, and honey
- Bamboo or stainless steel skewers
How to make it
- If using bamboo skewers, soak them in water for at least 30 minutes to prevent them from burning on the grill. Cut all your proteins and vegetables into uniform 1.5-inch cubes to ensure they cook at the same rate.
- Thread the skewers, alternating between protein and vegetables. Don’t pack them too tightly; leaving a tiny bit of space between items allows the heat to circulate and creates those sought-after charred edges.
- Preheat your grill to high heat (450°F). Sear the kabobs for 3-4 minutes per side. Only apply your glaze during the last 2 minutes of cooking. The sugars in the glaze caramelize quickly, and applying too early will cause it to burn rather than coat.
- Present the skewers on a flat wooden board lined with flatbreads or a bed of jasmine rice. The bread or rice will soak up any stray juices, becoming a delicious part of the meal itself. Garnish with a final sprinkle of sea salt and fresh parsley.
Conclusion
Creating a food board is more than just a culinary task; it’s an act of hospitality that turns a standard meal into a memorable event. By focusing on high-quality ingredients, thoughtful textures, and a bit of artistic flair, you can create a viral-worthy spread that tastes even better than it looks. So, grab your favorite board, pick a theme, and start assembling—your guests (and your Instagram feed) will thank you!
Frequently Asked Questions
How do I keep my food board fresh if I’m serving outdoors?
To keep ingredients fresh in the heat, place your serving board on top of a larger tray filled with crushed ice. This works particularly well for pasta salads and cocktail garnishes. Also, keep the board in a shaded area and bring out small portions at a time rather than the whole spread at once.
What is the best type of wood for a food board?
Non-porous hardwoods like maple, walnut, or cherry are best. They are durable, less likely to harbor bacteria, and provide a beautiful, dark contrast to colorful foods. Always ensure your board is food-safe and treated with mineral oil.
Can I prepare these boards in advance?
Absolutely! Most components like chopped veggies, marinated meats, and dressings can be prepared 24 hours in advance. However, I recommend doing the final assembly and adding fresh herbs just before serving to ensure everything looks vibrant and hasn’t wilted.