
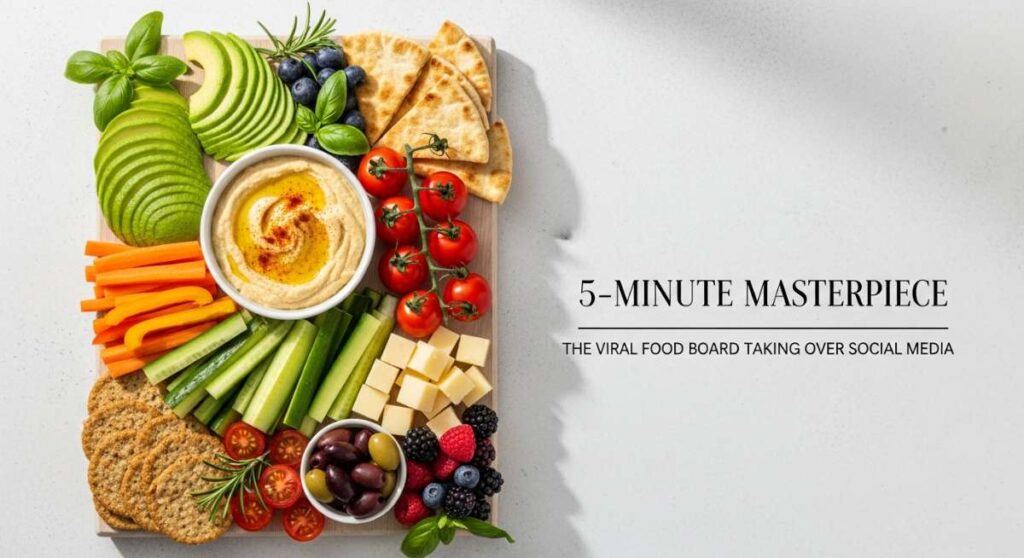
5-Minute Masterpiece: The Viral Food Board Taking Over Social Media
We’ve all been there—the doorbell is about to ring, friends are gathered in the living room, and you’re stuck in the kitchen sweating over a stove while the laughter happens elsewhere. It’s that familiar tug-of-war between wanting to be the perfect host and actually wanting to enjoy the company you’ve invited over. But what if I told you that the secret to a memorable gathering isn’t a four-course meal, but a beautifully curated, effortless board that invites everyone to dig in together?
The ‘Viral Food Board’ isn’t just a trend; it’s a lifestyle shift toward intentional simplicity. It’s about taking those nostalgic favorites, fresh seasonal produce, and simple staples, then arranging them with a bit of soul. This approach celebrates the beauty of raw ingredients and the joy of ‘picky bits,’ turning a mundane Tuesday night or a sun-drenched Saturday afternoon into a sensory celebration. Let’s dive into the components that make these boards legendary.
How to make Shoneys strawberry pie

Why we love this
There is something deeply nostalgic about a Shoney’s-style strawberry pie, with its glossy, ruby-red glaze hugging plump, sun-ripened berries. As you slice into the buttery, flaky crust, the aroma of sweet sugar and fresh fruit fills the air, promising a texture that is both crisp and delightfully gooey. It is the quintessential taste of summer—cool, refreshing, and just sweet enough to make your heart skip a beat. Every bite feels like a warm hug from the past, reminding us of simpler times and shared dessert spoons.
Ingredients
- 1 pre-baked 9-inch pie crust
- 2 lbs fresh strawberries, hulled
- 1 cup granulated sugar
- 1 cup water
- 3 tbsp cornstarch
- 3 tbsp strawberry flavored gelatin (dry mix)
- Whipped cream for topping
How to make it
- Begin by blind-baking your pie crust according to package instructions until it is a deep golden brown; allow it to cool completely to ensure it stays crisp under the glaze.
- Thoroughly wash and hull your strawberries, keeping them whole or slicing them in half if they are exceptionally large; pat them completely dry with a paper towel so the glaze adheres perfectly.
- In a medium saucepan over medium-high heat, whisk together the sugar, cornstarch, and water until the mixture is smooth and the lumps have vanished.
- Bring the liquid to a rolling boil, stirring constantly with a whisk; you will notice it transforming from a cloudy liquid to a thick, translucent syrup.
- Remove the pan from the heat immediately and stir in the dry strawberry gelatin until it is fully dissolved and the color is a vibrant, neon red.
- Allow the glaze to cool for about 10-15 minutes—it should still be pourable but not piping hot, which prevents the berries from wilting.
- Arrange your strawberries snugly in the cooled pie crust, then slowly pour the glaze over them, ensuring every single berry is coated in that signature red sheen.
- Refrigerate the pie for at least 3-4 hours until the glaze is firmly set, then serve with a generous dollop of whipped cream.
How to cook rotel dip
Why we love this
Rotel dip is the ultimate crowd-pleaser, a velvety river of molten cheese spiked with the zesty kick of green chilies and tomatoes. The aroma is instantly recognizable—savory, slightly spicy, and deeply comforting—wafting through the room and drawing everyone toward the chip bowl. Its texture is incredibly smooth, providing the perfect contrast to a salty, crunchy tortilla chip that holds up under the weight of the dip. It is the soul of any game day or casual get-together, proving that sometimes the simplest ingredients create the most legendary memories.
Ingredients
- 16 oz Velveeta or processed cheese, cubed
- 1 can (10 oz) RoTel diced tomatoes and green chilies
- 1 lb ground beef or breakfast sausage
- 1 tsp taco seasoning (optional)
- Fresh cilantro for garnish
How to make it
- In a large skillet over medium-high heat, crumble and brown the ground beef or sausage, using a wooden spoon to break it into very small, uniform pieces.
- Cook the meat until no pink remains and it has developed a slightly crispy, browned exterior; drain the excess fat thoroughly to ensure the dip isn’t greasy.
- Reduce the heat to low and add the cubed processed cheese to the skillet; stirring frequently to prevent the bottom from scorching.
- Once the cheese begins to soften and melt, pour in the entire can of RoTel (do not drain the liquid, as it provides essential flavor and thinning).
- Continue to stir the mixture gently until the cheese is completely melted and the tomatoes and chilies are evenly distributed throughout the golden sauce.
- If the dip feels too thick, you can add a splash of milk or a tablespoon of heavy cream to reach your desired consistency.
- Transfer the dip to a small slow cooker on the ‘warm’ setting to keep it silky and scoopable throughout your event.
- Garnish with fresh cilantro and serve immediately with sturdy corn chips.
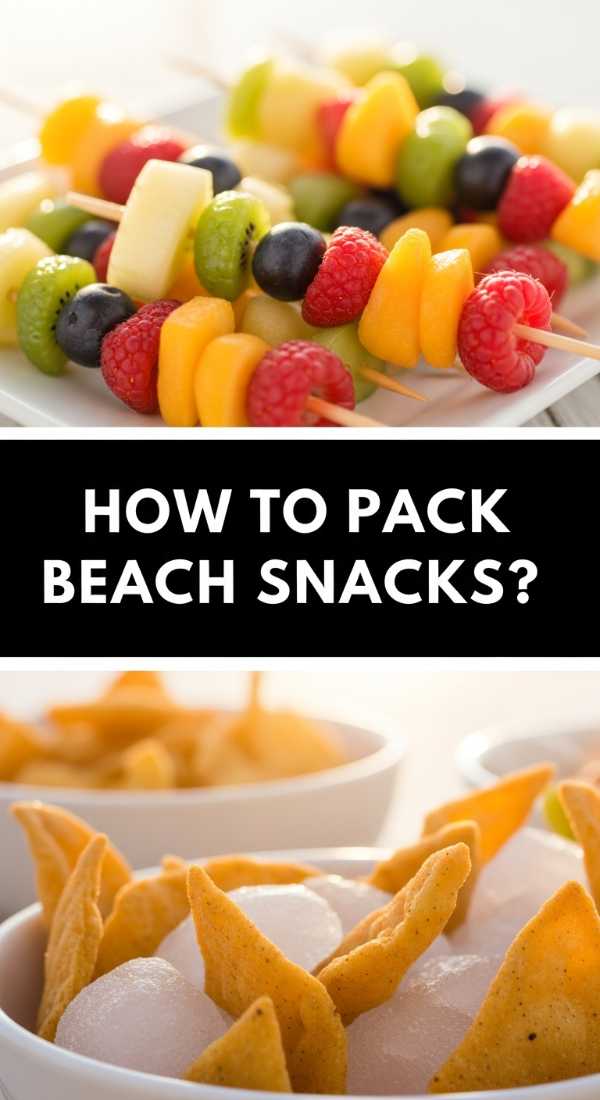
How to pack beach snacks
Why we love this
Packing beach snacks is an art form that balances the need for hydration with the desire for something crisp and salty against the backdrop of the ocean breeze. Imagine the feeling of a cold, firm grape bursting with sweetness while your toes are buried in the sand, or the satisfying crunch of a perfectly chilled cucumber slice. The sensory experience is all about temperature control—finding that refreshing relief from the sun in every bite. A well-packed beach cooler transforms a simple day by the water into a luxurious alfresco picnic where everything tastes better seasoned with sea air.
Ingredients
- Grapes (frozen for best results)
- Hard cheeses (cheddar or gouda)
- Pre-cut cucumbers and bell peppers
- Individual hummus pods
- Salted almonds or trail mix
- Seltzer or infused water
How to make it
- The night before your trip, wash and dry your grapes, then place them in a single layer in a freezer bag and freeze them solid; they act as edible ice packs.
- Slice your hard cheeses into thick cubes or batons; avoid soft cheeses like brie or camembert as they will become unappealingly oily in the heat.
- Prep your vegetables by cutting them into long sticks and storing them in airtight containers with a damp paper towel to maintain their crispness.
- Use a high-quality insulated cooler bag and place a layer of reusable ice packs at the very bottom to create a foundation of cold air.
- Pack your heaviest items and drinks at the bottom, then layer the delicate snacks like sandwiches or fruit on top to prevent crushing.
- Place the frozen grapes and hummus pods in the center of the cooler where the temperature is most stable.
- Seal all snacks in watertight containers to prevent the inevitable melting ice from soaking into your crackers or sandwiches.
- Always pack a separate small bag for ‘dry’ snacks like nuts and chips so they stay away from moisture and maintain their crunch.
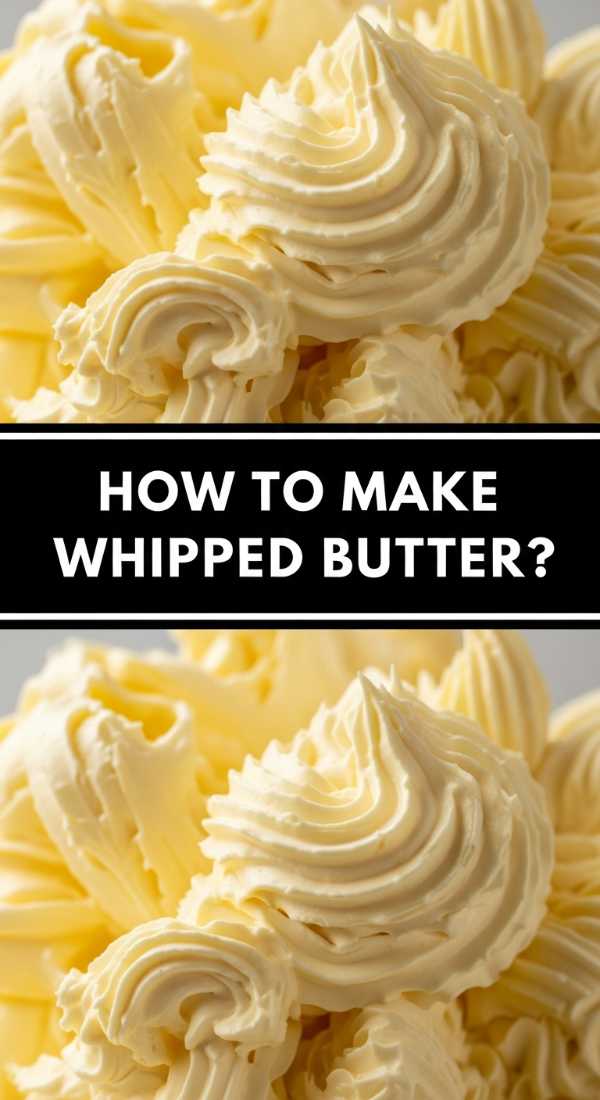
How to make whipped butter
Why we love this
Whipped butter is a revelation, turning a humble pantry staple into a cloud-like, ethereal spread that melts the moment it hits warm bread. The texture is impossibly light and airy, almost like a savory mousse, making it feel far more indulgent than standard butter. When you spread it, it glides effortlessly without tearing the bread, releasing a rich, creamy aroma that is heightened by a touch of flaky sea salt. It transforms a simple breakfast into a gourmet experience, adding a touch of elegance to any board with its beautiful, soft peaks.
Ingredients
- 1 cup (2 sticks) high-quality salted butter
- 2 tbsp heavy cream
- Optional: Honey, cinnamon, or fresh herbs
How to make it
- Ensure your butter is properly softened but not oily; it should yield easily to pressure but still hold its shape (leave it out for at least 1-2 hours).
- Place the softened butter into the bowl of a stand mixer fitted with the whisk attachment, or use a large bowl with a hand mixer.
- Start the mixer on low speed to break up the butter, then gradually increase the speed to medium-high.
- Whip the butter for a full 2-3 minutes; you will see it change from a yellow color to a pale, almost white shade as air is incorporated.
- Slowly drizzle in the heavy cream while continuing to whip; this adds a luxurious richness and helps achieve that ultra-light texture.
- Continue whipping for another 2 minutes until the butter has nearly doubled in volume and looks like stiff-peaked whipped cream.
- If you are making a sweet version, fold in honey or cinnamon now; for savory, fold in finely minced chives or roasted garlic.
- Transfer to a decorative ramekin and serve at room temperature for the best spreadable consistency.
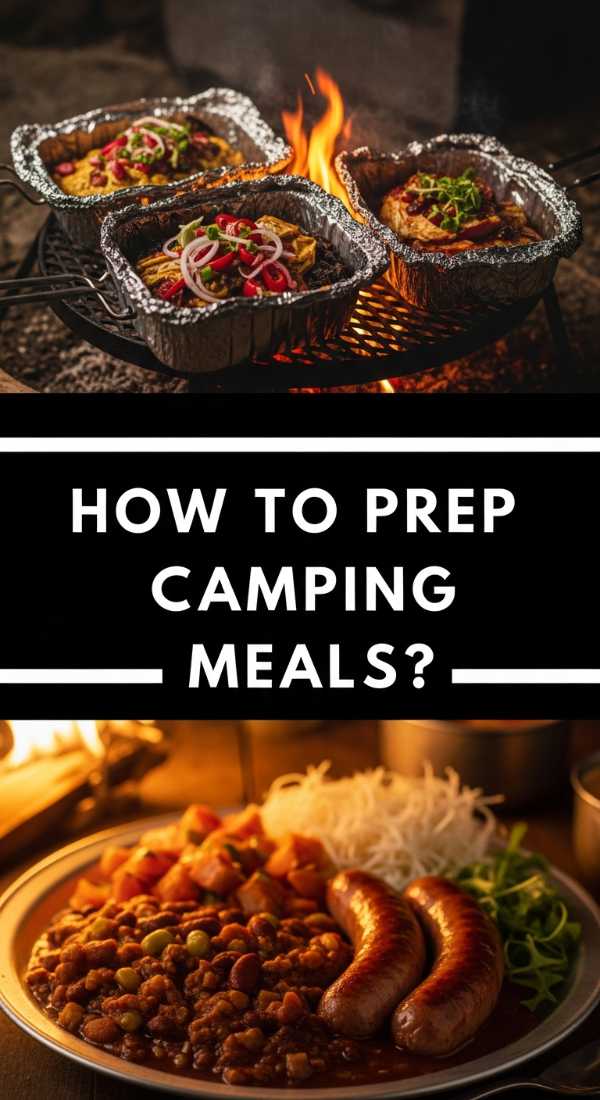
How to prep camping meals

Why we love this
There is a primal joy in eating a meal prepped under the open sky, where the smell of woodsmoke seasons every bite and the forest provides the perfect dining room. Camping meals are all about hearty, rustic flavors—potatoes that get crispy in foil packets and meats that soak up the essence of the campfire. The texture of a well-prepped camping meal is often a mix of tender, slow-cooked vegetables and charred, savory proteins that satisfy a deep hunger born from a day of adventure. It’s about the ritual of preparation, turning simple ingredients into a feast that tastes like freedom.
Ingredients
- Heavy-duty aluminum foil
- Pre-chopped potatoes and carrots
- Protein of choice (steak tips, sausage, or chicken)
- Olive oil and garlic butter
- Dry spice rub (paprika, garlic powder, salt, pepper)
How to make it
- Complete all your chopping and marinating at home; dice potatoes and carrots into small, 1/2-inch cubes to ensure they cook at the same rate as the meat.
- Place your proteins in a separate leak-proof bag with your marinade or dry rub to allow the flavors to penetrate for at least 24 hours before you head out.
- Prepare ‘foil packets’ by laying out a large square of heavy-duty foil and coating the center with a thin layer of olive oil or non-stick spray.
- Mound a portion of vegetables and protein in the center, then top with a generous dollop of garlic butter and an extra sprinkle of seasoning.
- Fold the foil over the food and crimp the edges tightly to create a sealed steam chamber; double-wrap the packet if you plan to cook directly on coals.
- When you arrive at the campsite, wait for your fire to burn down to hot, glowing coals rather than active flames, which can scorch the foil.
- Place the packets on a grill grate or carefully nestled in the edge of the coals for 20-30 minutes, flipping halfway through the cooking time.
- Carefully open the packets (watch for the steam!) and check that the potatoes are fork-tender and the meat has reached its safe internal temperature.
How to make cucumber salad

Why we love this
A fresh cucumber salad is the ultimate palate cleanser, offering a crisp, cooling crunch that cuts through the richness of any summer spread. The vibrant green slices swimming in a tangy, vinegary dressing create a visual and sensory pop that feels incredibly revitalizing on a hot afternoon. As you bite into a slice, the initial snap is followed by a burst of herb-infused brightness from the dill and red onion. It’s a dish that manages to be both humble and sophisticated, providing a light, hydrating element that balances out the heavier items on your food board.
Ingredients
- 2 large English cucumbers (hothouse)
- 1/2 small red onion, thinly sliced
- 1/2 cup white wine vinegar or apple cider vinegar
- 2 tbsp sugar
- 1 tsp salt
- 1/4 cup fresh dill, chopped
How to make it
- Use a mandoline or a very sharp chef’s knife to slice the cucumbers into paper-thin rounds; English cucumbers are preferred because their skins are thin and seeds are minimal.
- Place the cucumber slices in a colander and sprinkle with a teaspoon of salt; let them sit for 15 minutes to draw out excess moisture, which prevents a soggy salad.
- While the cucumbers drain, whisk together the vinegar, sugar, and a pinch of black pepper in a large bowl until the sugar has completely dissolved.
- Slice the red onion into thin slivers and soak them in cold water for 5 minutes if you prefer a milder onion flavor, then drain and pat dry.
- Gently squeeze the cucumbers to remove any remaining liquid, then transfer them into the bowl with the vinegar dressing.
- Add the onions and the fresh dill, tossing everything together with tongs until every slice is thoroughly coated.
- Cover and refrigerate for at least 30 minutes before serving; this allows the cucumbers to ‘pickle’ slightly and the flavors to marry.
- Give the salad one last toss before placing it in a serving bowl to ensure the dressing is well-distributed.
How to grill summer vegetables
Why we love this
Grilling summer vegetables coaxes out a hidden sweetness that you simply can’t achieve with any other cooking method, thanks to the magic of caramelization and char. The sight of vibrant bell peppers, emerald zucchini, and charred asparagus arranged on a platter is a feast for the eyes before the first bite is even taken. The texture is a beautiful contrast between a tender, succulent interior and those smoky, slightly crisp edges that carry the essence of the grill. It feels like the very best of the season—earthy, sweet, and deeply satisfying, making even the simplest vegetable feel like a gourmet treat.
Ingredients
- Assorted vegetables (zucchini, bell peppers, asparagus, red onion)
- 3 tbsp olive oil
- 2 tbsp balsamic glaze
- 2 cloves garlic, minced
- Kosher salt and cracked black pepper
How to make it
- Preheat your grill to medium-high heat (about 400°F) and ensure the grates are scrubbed clean and lightly oiled to prevent sticking.
- Cut your vegetables into large, flat pieces—slice zucchini into long planks and peppers into wide strips—to maximize surface area for those beautiful grill marks.
- In a large bowl, toss the vegetables with olive oil, minced garlic, salt, and pepper until they are glistening; do not over-oil, or you’ll cause flare-ups on the grill.
- Place the vegetables on the grill in a single layer, starting with the heartiest items like onions and peppers, which take slightly longer to cook.
- Grill the vegetables for about 3-5 minutes per side; look for clear char marks and a slight softening of the texture while maintaining a ‘bite.’
- For smaller items like asparagus or cherry tomatoes, use a grill basket to prevent them from falling through the grates.
- Once removed from the heat, immediately drizzle with a high-quality balsamic glaze to add a tangy, sweet finish.
- Serve warm or at room temperature; grilled vegetables are incredibly versatile and hold their flavor beautifully as they cool.
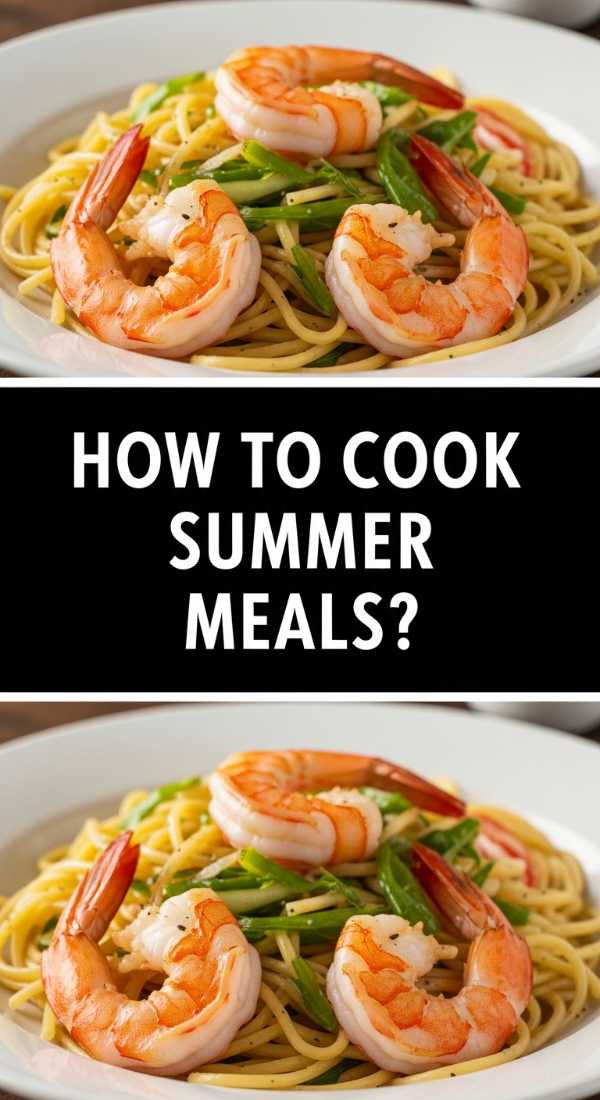
How to cook easy summer meals
Why we love this
Easy summer meals are about reclaiming your time and leaning into the abundance of fresh, vibrant ingredients that require very little interference. These dishes usually feature a harmony of textures—smooth mozzarella, juicy burst tomatoes, and the rough-hewn edges of a crusty baguette. The aroma is dominated by fresh herbs like basil and mint, creating a scent profile that is as refreshing as a cool breeze. Eating this way feels light and energetic, avoiding the heavy ‘food coma’ of winter stews and instead fueling you for long, golden hour evenings spent outdoors.
Ingredients
- 1 lb short pasta (fusilli or penne)
- 2 cups cherry tomatoes, halved
- 8 oz fresh mozzarella pearls
- 1/2 cup fresh basil leaves, torn
- Extra virgin olive oil
How to make it
- Boil a large pot of heavily salted water—it should taste like the sea—and cook your pasta until it is just al dente, usually 1-2 minutes less than the package suggests.
- While the pasta cooks, prep your ‘no-cook’ sauce by combining halved cherry tomatoes, mozzarella pearls, and torn basil in a very large mixing bowl.
- Drain the pasta, reserving about half a cup of the starchy pasta water, which is the secret to a silky sauce.
- Immediately toss the hot pasta into the bowl with the fresh ingredients; the residual heat will slightly soften the cheese and cause the tomatoes to release their juices.
- Drizzle generously with high-quality extra virgin olive oil and add a splash of the reserved pasta water to emulsify the flavors.
- Season aggressively with flaky sea salt and freshly cracked black pepper to bring out the sweetness of the tomatoes.
- For an extra layer of flavor, add a spoonful of prepared pesto or a squeeze of fresh lemon juice at the very end.
- Serve in large, shallow bowls and enjoy immediately while the contrast between the hot pasta and cool cheese is at its peak.
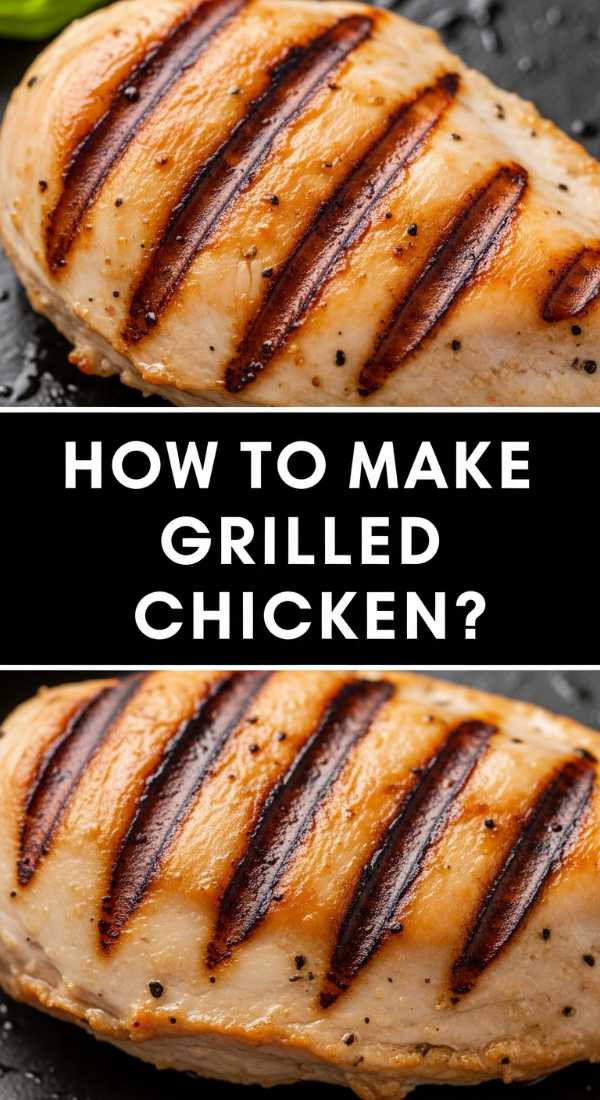
How to make grilled chicken

Why we love this
Perfectly grilled chicken is the cornerstone of any great summer board, offering a savory, protein-rich anchor that smells of lemon, garlic, and smoke. When done right, the skin is golden and crackling, while the meat inside remains incredibly succulent and juice-filled, releasing a savory aroma that makes your mouth water instantly. The char from the grill adds a sophisticated bitterness that balances the natural sweetness of a good marinade. It’s a versatile masterpiece that feels both healthy and decadent, especially when sliced and fanned out beautifully for everyone to share.
Ingredients
- 2 lbs chicken thighs (bone-in or boneless)
- 1/4 cup olive oil
- Juice of 1 lemon
- 4 cloves garlic, smashed
- 1 tbsp dried oregano or thyme
How to make it
- Whisk together the olive oil, lemon juice, garlic, and herbs in a bowl to create a bright, acidic marinade that will tenderize the meat.
- Place the chicken in a zip-top bag, pour in the marinade, and massage it into the meat; refrigerate for at least 2 hours, but no more than 6, to avoid the lemon juice ‘cooking’ the chicken.
- Remove the chicken from the fridge 20 minutes before grilling to take the chill off, which ensures more even cooking throughout the piece.
- Preheat your grill to medium heat; if using charcoal, create a ‘two-zone’ fire with coals on one side and a cool spot on the other.
- Place the chicken skin-side down (if applicable) on the hot side of the grill and sear for 5-6 minutes without moving it to develop a crust.
- Flip the chicken and move it to the cooler side of the grill to finish cooking through; this prevents the outside from burning before the inside is done.
- Use a meat thermometer to check for an internal temperature of 165°F for breasts or 175°F for thighs, which stay juicier at a higher temp.
- Crucially, let the chicken rest on a cutting board for at least 10 minutes before slicing; this allows the juices to redistribute so they don’t run out when you cut it.
How to prep picnic food
[IMAGE_10]
Why we love this
Picnic food is the ultimate expression of leisurely living, where the journey to the park or beach is just as important as the meal itself. It’s about finger foods that are easy to handle—creamy brie paired with a crisp baguette, salty prosciutto, and sweet, juicy fruit. The texture is a delightful mix of soft, crunchy, and chewy elements that invite you to linger over your meal. There is a specific charm to opening a picnic basket and finding a treasure trove of carefully wrapped bites, each one a little gift of flavor designed to be enjoyed under the sun.
Ingredients
- 1 crusty baguette, sliced
- Selection of cured meats (prosciutto, salami)
- Soft cheese (Brie or Camembert)
- Fresh berries and grapes
- Small jar of fig jam or honey
How to make it
- Focus on ‘portability’ by prepping your ingredients into bite-sized pieces so no knives are required once you are seated on your picnic blanket.
- Wrap your baguette in a clean kitchen towel rather than plastic to keep the crust crisp and prevent it from becoming chewy or tough.
- Pre-slice your meats and roll them into small cylinders; this prevents them from sticking together and makes for a more attractive presentation.
- Place soft cheeses in a small, reusable container to prevent them from getting squashed or leaking onto other food items.
- Wash your fruit and dry it thoroughly before packing; use rigid containers for berries to prevent them from being crushed by heavier items.
- Pack condiments like jam or honey in small, leak-proof jars and include a small wooden spoon for easy serving.
- Use a dedicated picnic basket or structured tote bag, placing heavy items at the bottom and keeping cold items together near a small ice pack.
- Don’t forget the ‘extras’—pack a set of cloth napkins and a lightweight cutting board to serve as a stable surface for your spread.
The Final Flourish: Bringing Your Board to Life
As you can see, creating a viral-worthy food board isn’t about professional culinary training; it’s about the heart you put into the presentation and the quality of the simple ingredients you choose. Whether you’re layering a Shoney’s-inspired pie for a weekend brunch or assembly-lining foil packets for a camping trip, the goal is always the same: connection. These boards remove the barriers between the host and the guest, turning a meal into an interactive experience. So, grab your favorite platter, gather your ingredients, and start building your own masterpiece. Your social media feed—and your friends—will thank you!