

Have you ever stepped into a space and felt your entire soul take a deep, cleansing breath? That’s the magic we’re chasing this year. Our homes have become more than just four walls; they are our sanctuaries, our vacation spots, and our creative outlets. I’ve spent months scouring the latest viral trends to find the ones that don’t just look good on a screen but actually change the way you feel when you walk through the door. It’s about creating a lifestyle that mirrors your wildest dreams, right in your own zip code.
From the sun-drenched vibes of a tropical island to the sleek, sophisticated lines of a modern terrace, we are embracing aesthetics that tell a story. Whether you have a sprawling backyard or a cozy studio apartment, there is a way to infuse your personality into every corner. This year is all about tactile textures, bold color choices, and functional beauty. Let’s dive into these ten viral trends that are currently taking the design world by storm and learn exactly how to bring them into your own home.
How to Create an Island Theme Escape for Your Backyard Oasis

Why we love this
There is something inherently healing about the rhythm of the tropics, where the air smells of blooming jasmine and the ground feels like warm sand beneath your feet. Creating an island escape in your backyard isn’t just about decor; it’s about capturing that effortless, sun-soaked feeling of a permanent vacation. We love the way natural bamboo textures play against vibrant green foliage, creating a sensory retreat where the rustle of leaves sounds like distant waves. It’s a lush, immersive experience that transforms a simple patch of grass into a private paradise where time seems to slow down.
Essential Elements:
- Weather-resistant bamboo fencing or screening
- Potted palm trees (Areca or Majesty palms)
- String lights with Edison bulbs for warm evening glows
- Tropical floral accents like Hibiscus or Bird of Paradise
- Natural fiber outdoor rugs in jute or sisal
- A water feature or small fountain for ambient sound
How to make it
- Assess your sun exposure and clear a designated 10×10 area, ensuring the ground is level to prevent furniture wobbling.
- Install bamboo screening along existing fences using heavy-duty zip ties or galvanized wire, ensuring the vertical poles are flush for a professional look.
- Position your largest palms in the corners to create a ‘canopy’ effect, using heavy terracotta pots to anchor them against wind gusts.
- Layer your outdoor rug in the center, smoothing out any ripples to create a defined ‘living room’ space on your patio or grass.
- String your lights in a ‘zigzag’ pattern overhead, securing them to poles or eaves at a height of at least 8 feet to allow for easy movement underneath.
- Incorporate colorful perennials in the foreground, grouping them in odd numbers (3 or 5) to mimic the natural, disorganized beauty of a jungle.
How to Master Smart Drainage Ideas for a Lush Garden Sanctuary
Why we love this
Nothing ruins the aesthetic of a lush sanctuary faster than standing water and muddy patches that drown your favorite blooms. Smart drainage is the unsung hero of garden design, blending engineering with artistry to keep your soil perfectly hydrated but never oversaturated. We love the way a well-designed dry creek bed looks—smooth river stones shimmering under the rain, guiding water away with a purposeful, rhythmic grace. It adds a structural element to the landscape while ensuring that your garden remains a vibrant, healthy haven regardless of the season’s downpours.
Essential Elements:
- Non-woven geotextile landscape fabric
- Perforated PVC drainage pipes (French drain style)
- Varied sizes of river rock and decorative gravel
- Deep-rooting water-loving plants like Sedges or Iris
- A slight natural slope or manual trenching
How to make it
- Identify the lowest point of your yard where water naturally pools and mark a path toward a safe discharge area, like a street or rain garden.
- Dig a trench approximately 12 inches deep and 10 inches wide, maintaining a consistent downward slope of 1 inch for every 10 feet of length.
- Line the entire trench with geotextile fabric, leaving enough overhanging the sides to fold over the top later, which prevents soil from clogging your system.
- Pour a 2-inch ‘bedding’ layer of washed gravel into the bottom of the trench to support the pipe and facilitate initial water flow.
- Lay your perforated pipe with the holes facing downward; this allows water to rise into the pipe and be carried away more efficiently than top-facing holes.
- Fill the remaining space with river rocks of varying sizes, folding the fabric over the top before adding a final decorative layer of stones to blend with the garden.
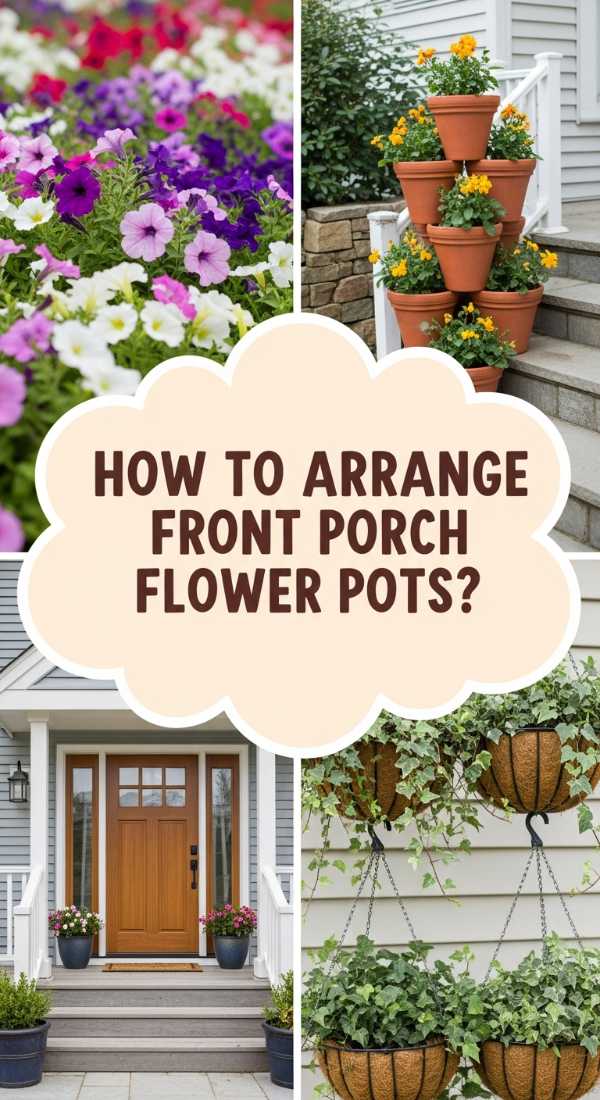
How to Arrange Front Porch Flower Pots for Instant Curb Appeal

Why we love this
Your front porch is the handshake of your home, and nothing says ‘welcome’ quite like a curated collection of vibrant flower pots. This trend focuses on the ‘thriller, filler, spiller’ method, creating a multi-dimensional explosion of color and texture that catches the eye from the street. We love the intoxicating scent of petunias mixed with the architectural elegance of spiked grasses, all housed in vessels that reflect your home’s unique personality. It’s an instant mood booster every time you pull into the driveway, offering a tactile connection to nature right at your doorstep.
Essential Elements:
- Trio of pots in varying heights (Large, Medium, Small)
- ‘Thriller’ plants: Dracaena, Canna Lily, or Ornamental Grass
- ‘Filler’ plants: Geraniums, Lantana, or Begonias
- ‘Spiller’ plants: Sweet Potato Vine, Creeping Jenny, or Lobelia
- High-quality moisture-retentive potting mix
How to make it
- Select three pots that share a common color palette but vary in height by at least 6 inches each to create a dynamic visual ‘staircase.’
- Fill the pots 3/4 full with potting soil, mixing in a slow-release granular fertilizer to ensure consistent nutrient delivery throughout the growing season.
- Plant your ‘Thriller’ in the center of the largest pot, ensuring the root ball is level with the soil surface for optimal hydration.
- Surround the thriller with ‘Fillers,’ spacing them about 4 inches apart to allow for growth while maintaining a ‘full’ look from day one.
- Tuck the ‘Spillers’ near the edges of the pot, angling them slightly outward so they naturally cascade over the rim as they grow.
- Water thoroughly until liquid drains from the bottom, and place the pots in a clustered formation near your entryway to maximize visual impact.
How to Style a Blue Room Divider for a Chic Studio Layout

Why we love this
In a compact studio, a blue room divider acts as both a functional zone-maker and a stunning piece of vertical art. The color blue, ranging from deep navy to airy cerulean, brings a sense of calm and expansive depth to a small space, making the room feel larger than it actually is. We love the velvet-soft touch of a fabric screen or the sleek, lacquered finish of a wooden partition that catches the afternoon light. It provides a necessary boundary between work and rest, allowing you to tuck away the day’s chaos and retreat into a serene, blue-hued sanctuary.
Essential Elements:
- Three-panel or four-panel folding screen
- Rich blue paint or fabric (Navy, Indigo, or Teal)
- Brass or gold hardware for a touch of luxury
- Clip-on grow lights or decorative LED strips
- Floor-length mirror to place nearby for light reflection
How to make it
- Measure your studio height and width to ensure the divider provides privacy without blocking essential walkways or heating vents.
- If DIY-ing, sand your wooden panels with 220-grit sandpaper until the surface is buttery smooth, creating the perfect ‘tooth’ for the paint to grip.
- Apply a high-quality primer, followed by two coats of deep blue eggshell-finish paint, allowing 4 hours of drying time between phases to prevent tackiness.
- Attach heavy-duty brass hinges, ensuring they are spaced evenly (top, middle, and bottom) to allow the screen to fold in both directions (accordion style).
- Position the divider at a 45-degree angle relative to your bed or desk; this ‘angled’ placement creates a more natural flow than a harsh 90-degree corner.
- Style the divider by draping a lightweight silk throw over one panel or clipping on a small reading light to turn the divider into a functional task-lighting station.
How to Build a DIY Grill Station for Cheap Outdoor Entertaining

Why we love this
Outdoor entertaining shouldn’t require a professional contractor’s budget, and this viral DIY grill station proves that style and utility can be affordable. There is a rugged, rustic charm to a station built from cedar and stone, providing a sturdy surface for flipping burgers while keeping your tools within arm’s reach. We love the smell of charred wood and the sound of sizzling steaks combined with the pride of knowing you built this centerpiece yourself. It’s the ultimate gathering spot, where friends can lean against the counter with a cold drink while the chef works their magic under the open sky.
Essential Elements:
- Pressure-treated 4×4 posts and 2×4 framing lumber
- Food-safe butcher block or concrete countertop
- S-hooks for hanging utensils
- Weather-proof wood stain or sealant
- Built-in bottle opener
How to make it
- Construct a basic rectangular frame using your 4×4 posts for the legs and 2x4s for the horizontal supports, securing them with 3-inch exterior deck screws.
- Check for level on all sides; even a slight 1-degree tilt can cause oil to pool on your grill or countertop, leading to uneven cooking.
- Install a lower shelf using 1×4 slats spaced 1/2 inch apart; this allows for airflow and prevents moisture from rotting your charcoal or wood pellet bags.
- Attach your countertop—if using wood, ensure it is treated with food-grade mineral oil to withstand the elements while remaining safe for food prep.
- Mount a magnetic tool strip or a series of S-hooks along the front edge to keep spatulas and tongs organized and away from the heat of the grill.
- Apply a dark walnut or slate grey exterior stain to the frame to give it a high-end, ‘custom-built’ look that hides minor imperfections in the wood.
How to Choose Concrete Colors for an Outdoor Living Masterpiece

Why we love this
Gone are the days of boring, institutional grey; modern concrete is a canvas for sophisticated earth tones and moody charcoals. Choosing the right concrete color can ground your entire outdoor living space, creating a seamless transition from your interior floors to the great outdoors. We love the velvet-matte finish of a dark graphite patio that stays cool in the sun and hides the inevitable dust of garden life. It’s a foundational design choice that feels permanent, expensive, and incredibly tactile, providing a smooth, cool surface for bare feet on a mid-summer afternoon.
Essential Elements:
- Integral color pigments (mixed into wet concrete)
- Topical acid stains or water-based dyes
- High-gloss or matte concrete sealer
- Sample color chips for light-testing
- Border stamps or contrasting grout lines
How to make it
- Observe your home’s exterior brick or siding at different times of day to determine if you need a warm (tan/terracotta) or cool (grey/blue) undertone.
- Purchase small quantities of 3 different stains and apply them to a hidden ‘test patch’ of concrete to see how the porosity of your specific slab affects the final hue.
- Clean the surface thoroughly with a pressure washer and a degreasing agent, as any oil spots will prevent the color from ‘cooking’ into the concrete properly.
- Apply your chosen topical stain using a plastic garden sprayer in a circular motion, keeping the nozzle 12 inches from the ground to avoid ‘hot spots’ of concentrated color.
- Wait for the reaction time recommended by the manufacturer (usually 4-8 hours) before neutralizing the acid with a mixture of baking soda and water.
- Apply two thin coats of UV-resistant sealer once the concrete is bone-dry, which ‘pops’ the color and protects it from fading under the harsh sun.
How to Design an Island Theme Bedroom for Tropical Dreams

Why we love this
Imagine waking up every morning to the soft, filtered light of a tropical sunrise, surrounded by the textures of a high-end island resort. An island-themed bedroom is the ultimate escape from the hustle of daily life, focusing on breathable linens, natural rattan, and a palette of sandy beiges and ocean blues. We love the way a canopy bed with sheer white curtains catches a cross-breeze, creating a sanctuary that feels light, airy, and deeply romantic. It’s a sensory experience designed for rest, where the scent of coconut and the feel of high-thread-count cotton transport you to a shoreline a thousand miles away.
Essential Elements:
- Rattan or wicker headboard
- 100% linen bedding in ivory or pale blue
- Large-leaf indoor plants like a Fiddle Leaf Fig or Monstera
- Jute or seagrass area rug
- Bamboo window blinds or shutters
How to make it
- Start with a neutral base by painting the walls a soft, ‘sandy’ off-white to bounce light around the room and provide a clean backdrop for natural textures.
- Swap out your standard headboard for a fan-shaped rattan piece; this serves as the room’s ‘anchor’ and immediately establishes the tropical aesthetic.
- Layer your bed with a linen duvet cover and oversized pillows, opting for a ‘lived-in’ look rather than a stiff, formal arrangement.
- Place a large Monstera plant in a corner near a window; the ‘Swiss cheese’ leaves create beautiful shadows on the walls during the golden hour.
- Install bamboo shades that allow for privacy while still letting slivers of light peek through, mimicking the look of a beachside bungalow.
- Incorporate small brass accents through lamp bases or drawer pulls to add a ‘luxury resort’ shimmer to the otherwise organic materials.
How to Select Front Porch Flower Pots for Every Season

Why we love this
The beauty of the seasons is a fleeting gift, and seasonal porch pots allow you to celebrate each phase of the year with fresh energy. We love the transition from the neon brightness of spring tulips to the rich, spicy oranges of autumn chrysanthemums. It’s an ever-evolving art project that keeps your home’s exterior feeling fresh and intentional. There is a deep satisfaction in the ‘crunch’ of frost-hardy kale in the winter or the ‘snap’ of fresh potting soil in the spring, making your entryway a living calendar that greets guests with the best of what nature currently has to offer.
Essential Elements:
- Frost-proof resin or glazed ceramic pots
- Seasonal plant calendar (Bulbs, Annuals, Evergreens)
- Ornamental add-ins (Birch logs, pumpkins, or faux berries)
- Self-watering inserts for hot summer months
How to make it
- Invest in high-quality, frost-resistant pots that won’t crack when the soil freezes and expands during the winter months.
- For Spring, plant forced bulbs like daffodils and hyacinths 4 inches deep in late winter to ensure an early burst of fragrance and color.
- Transition to Summer by replacing spent bulbs with heat-loving lantana and vinca, which can withstand the ‘baking’ temperatures of a south-facing porch.
- In Fall, swap ‘spillers’ for ornamental peppers and kale, and nestle small pumpkins around the base of the pot for a harvest-ready aesthetic.
- For Winter, remove all annuals and insert cut evergreen branches (spruce or cedar) 6 inches into the soil; they will stay green and fragrant in the cold.
- Add ‘vertical interest’ during the dormant months by sticking decorative birch poles or red dogwood sticks into the center of the pot to maintain height.
How to Upgrade a DIY Grill Station for a Gourmet Experience

Why we love this
Taking your basic DIY grill station to a ‘gourmet’ level is all about the details that turn a weekend hobby into a culinary obsession. We love the addition of integrated lighting that allows you to monitor the sear on a steak long after the sun has gone down, and the convenience of a built-in herb garden right at your fingertips. It’s about the tactile joy of working on a granite surface and the professional feeling of having a dedicated ‘prep zone.’ This upgrade transforms your backyard into a five-star kitchen where the smoke smells like hickory and the results taste like pure luxury.
Essential Elements:
- Under-counter LED lighting strips (weather-rated)
- Granite or stainless steel prep surface
- Built-in spice rack and paper towel holder
- Small planter box for fresh rosemary and thyme
- Magnetic knife strip for professional tool access
How to make it
- Install a 12-inch overhang on your countertop to create a ‘breakfast bar’ feel where guests can sit on stools and interact with the chef.
- Attach battery-operated LED light strips under the lip of the counter; this provides a soft ‘glow’ that illuminates the storage area without blinding the cook.
- Cut a circular hole into your countertop and insert a stainless steel ‘drop-in’ trash chute to keep the prep area clean and free of scraps.
- Screw a small cedar planter box to the side of the station, filling it with a mix of potting soil and rosemary—the heat from the grill will naturally release the herb’s aroma.
- Upgrade your hardware to marine-grade stainless steel to ensure that hinges and handles remain rust-free and smooth-operating for years.
- Seal the entire structure with a high-end spar urethane, which provides a ‘thick’ protective coat that stands up to grease splatters and rain alike.
How to Apply Concrete Colors for a Sophisticated Terrace Refresh
[IMAGE_10]
Why we love this
A terrace refresh with concrete color is like giving your outdoor space a high-fashion makeover without the construction dust. This technique allows you to mimic the look of expensive slate or Italian travertine for a fraction of the cost. We love the way the light hits a multi-tonal stained surface, revealing hidden depths and marbling that look entirely natural. It creates a sophisticated, polished atmosphere where the floor feels like a piece of art. Walking onto a newly stained terrace feels like stepping into a Mediterranean villa, where the cool stone and rich colors invite you to linger over a long, sunset dinner.
Essential Elements:
- Muriatic acid or concrete etcher
- Dual-tone water-based stains (e.g., ‘Walnut’ and ‘Amber’)
- Sea sponge or microfiber applicator for marbling
- Pressure sprayer for base coat
- Solvent-based sealer for a ‘wet look’ finish
How to make it
- Etch the concrete surface with a diluted muriatic acid solution (1 part acid to 10 parts water) to open the pores, ensuring the color penetrates deep into the slab.
- Rinse the surface three times with clean water to ensure all acid is neutralized; any remaining residue will cause the stain to ‘flake’ off later.
- Spray your primary base color evenly across the terrace while the concrete is slightly damp; this helps the color ‘bloom’ and spread naturally.
- While the base coat is still wet, use a sea sponge to ‘dab’ a darker secondary color into the corners and edges to create a realistic, variegated stone effect.
- Allow the stain to dry for a full 24 hours—check the weather forecast to ensure no rain or high humidity interferes with the ‘curing’ phase.
- Apply the sealer using a long-handle roller in thin, overlapping passes; this ‘locks in’ the pigments and gives the terrace a sophisticated, high-gloss shine.
Creating Your Dream Home, One Trend at a Time
Transforming your home into a viral-worthy sanctuary doesn’t happen overnight, but each of these projects brings you one step closer to a space that truly reflects who you are. Whether you’re staining concrete to look like a Roman villa or planting a ‘spiller’ that cascades over your front porch, you are investing in your own daily joy. These trends are popular for a reason: they combine aesthetic beauty with the comfort of home. So, pick a project, roll up your sleeves, and get ready to fall in love with your living space all over again!