

10 Minutes to Viral: The Simplest Food Board You’ll Ever Make
We’ve all been there: the guest list is growing, the clock is ticking, and you want to serve something that feels like a warm hug but looks like it belongs on the front page of a glossy magazine. There is a specific kind of magic that happens when you gather friends around a table piled high with vibrant colors and textures. It’s about more than just food; it’s about the laughter that erupts between bites and the effortless beauty of a spread that didn’t require you to spend forty-eight hours straight in the kitchen.
The secret to a viral food board isn’t perfection—it’s abundance and soul. Whether you are celebrating a graduation or just the arrival of a sunny Saturday, creating a ‘simple’ board is all about choosing a few star elements and letting them shine. Today, I’m sharing my favorite components that turn a basic platter into a legendary feast. Let’s dive into the recipes and styling tips that will have your followers hitting that ‘save’ button faster than you can say ‘bon appétit!’
How to bake graduation cakes?
Why we love this
There is nothing quite like the aroma of a classic vanilla-bean sponge wafting through the house to signal a momentous occasion. This cake is light, airy, and carries a subtle buttery richness that melts on the tongue, providing the perfect canvas for celebratory decorations. When you slice into its tender crumb, you can feel the softness that only comes from careful mixing and quality ingredients. It’s a nostalgic, comforting flavor that brings everyone together to celebrate a major milestone with every sweet, velvety bite.
Ingredients
- 2 1/2 cups all-purpose flour
- 1 1/2 cups granulated sugar
- 1 tablespoon baking powder
- 1/2 teaspoon salt
- 3/4 cup unsalted butter, softened
- 1 cup whole milk, room temperature
- 2 teaspoons pure vanilla extract
- 4 large eggs
How to make it
- Preheat your oven to 350°F (175°C) and generously grease two 8-inch round cake pans, lining the bottoms with parchment paper for an easy release.
- In a large mixing bowl, sift together the flour, baking powder, and salt to ensure there are no lumps and the leavening agent is evenly distributed.
- Using a stand mixer fitted with the paddle attachment, cream the softened butter and sugar on medium-high speed for about 3-5 minutes until the mixture is pale, light, and fluffy.
- Reduce the mixer speed to low and add the eggs one at a time, beating well after each addition and scraping down the sides of the bowl to ensure a homogenous batter.
- Whisk the vanilla extract into the milk. Alternately add the dry ingredients and the milk to the butter mixture, starting and ending with the flour; mix just until combined to avoid overworking the gluten.
- Divide the batter evenly between the prepared pans and smooth the tops with a spatula. Bake for 30-35 minutes or until a toothpick inserted into the center comes out clean and the edges are slightly golden.
- Let the cakes cool in the pans for 10 minutes before inverting them onto a wire rack to cool completely to room temperature before frosting.
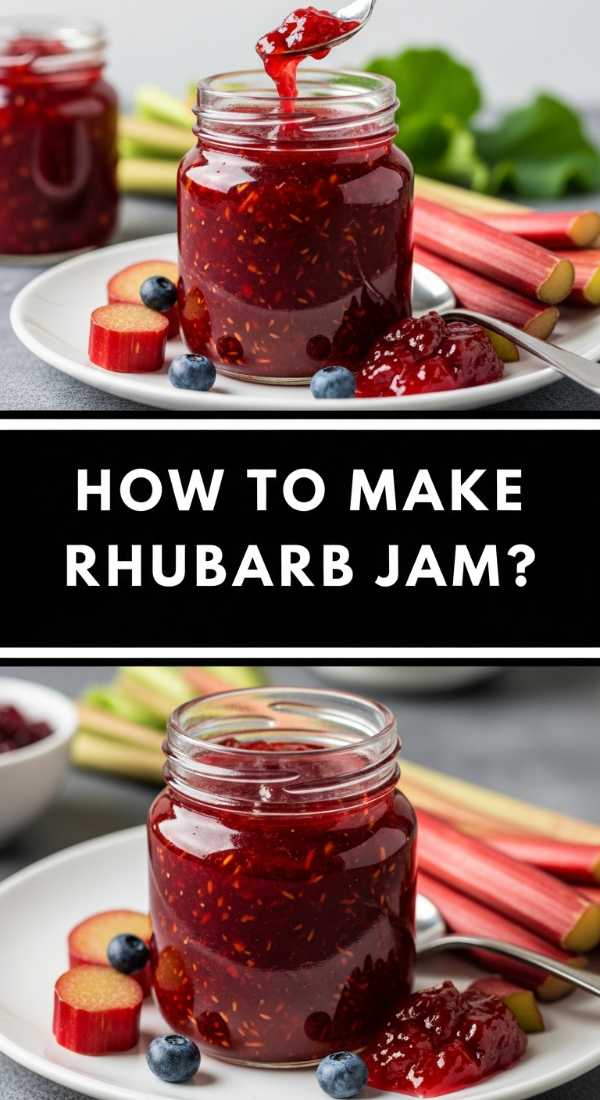
How to make rhubarb jam?

Why we love this
Rhubarb jam is a vibrant, ruby-red explosion of flavor that balances sharp tartness with a deep, honeyed sweetness. As it simmers on the stove, the house fills with a bright, tangy scent that promises a refreshing wake-up call for your taste buds. The texture is thick and luscious, with soft bits of fruit that spread beautifully over warm toast or a crisp cracker. It’s the ultimate seasonal condiment that adds a sophisticated, zesty pop of color to any food board or breakfast spread.
Ingredients
- 4 cups fresh rhubarb, chopped into 1/2-inch pieces
- 2 cups granulated sugar
- 2 tablespoons fresh lemon juice
- 1 teaspoon lemon zest
- 1/2 teaspoon pure vanilla bean paste
How to make it
- In a large, heavy-bottomed saucepan or Dutch oven, combine the chopped rhubarb, sugar, and lemon juice; stir well and let it sit for 30 minutes to macerate and release the juices.
- Place the pot over medium heat and bring the mixture to a gentle boil, stirring frequently with a wooden spoon to prevent the sugar from scorching on the bottom.
- Once boiling, reduce the heat to medium-low and let it simmer for 20-25 minutes. You will see the rhubarb break down and the liquid thicken into a syrupy consistency.
- To test for doneness, place a small plate in the freezer for a few minutes. Drop a spoonful of jam onto the cold plate; if it wrinkles when pushed with your finger, it is ready.
- Stir in the lemon zest and vanilla bean paste during the last minute of cooking to preserve their bright, aromatic notes.
- Remove from heat and skim off any foam from the surface. Pour the hot jam into sterilized glass jars, leaving 1/4 inch of headspace.
- Allow the jars to cool completely at room temperature before sealing and storing in the refrigerator for up to three weeks.
How to frost graduation cupcakes?
Why we love this
Frosting cupcakes is where the artistry happens, turning a simple baked good into a miniature masterpiece. The buttercream should be silk-smooth, carrying the scent of sweet cream and sugar, and hold its shape with a satisfying, stiff peak. When you bite through the swirl, the frosting should feel light as air, providing a luxurious contrast to the moist cake beneath. It’s the visual crowning glory of your board, signaling to guests that this is a truly special celebration worth savoring.
Ingredients
- 1 cup unsalted butter, softened
- 3-4 cups powdered sugar, sifted
- 2 tablespoons heavy cream
- 1 1/2 teaspoons vanilla extract
- Black and gold food coloring (optional)
- Miniature chocolate bars and sour belts (for the caps)
How to make it
- In a stand mixer, beat the softened butter on medium speed for 5 minutes until it is incredibly pale and creamy, which creates a stable base for the sugar.
- Add the powdered sugar one cup at a time on low speed, mixing until incorporated, then increase speed to medium-high to whip in air.
- Add the heavy cream and vanilla extract. Beat for another 2 minutes until the frosting is fluffy and has reached a pipeable consistency; add more sugar or cream as needed.
- Fit a piping bag with a large star tip (like a 1M or 2D) and fill it with the buttercream.
- Hold the bag vertically over the center of the cupcake. Starting from the outside edge, pipe a spiral moving inward and upward to create a classic bakery-style swirl.
- To create a ‘graduation cap,’ place a small square of dark chocolate on top of the frosting. Use a tiny dot of frosting to attach a thin strip of sour belt or a strand of licorice as the tassel.
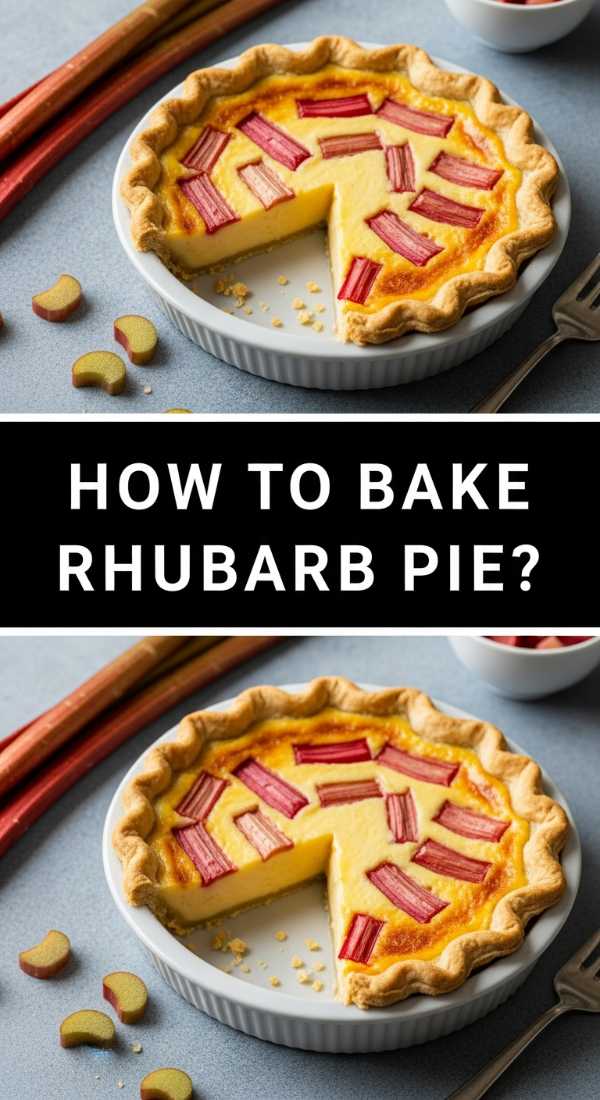
How to bake rhubarb pie?

Why we love this
A rhubarb pie is the epitome of rustic elegance, with its golden, flaky crust shattering under the fork to reveal a bubbling, jewel-toned filling. The aroma is a heavenly mix of toasted flour, butter, and the sharp, fruity tang of the rhubarb. It’s a sensory journey of contrasts: the warmth of the oven-baked pastry against the cool, tart center. Each bite offers a satisfying crunch followed by a lush, thickened sauce that feels like the very essence of early summer distilled into a dessert.
Ingredients
- Pastry for a double-crust 9-inch pie
- 5 cups rhubarb, cut into 1/2-inch pieces
- 1 1/4 cups granulated sugar
- 1/4 cup cornstarch
- 1/2 teaspoon ground cinnamon
- 1 tablespoon unsalted butter, cut into small pieces
- 1 egg, beaten (for egg wash)
- 1 tablespoon coarse sanding sugar
How to make it
- Preheat your oven to 400°F (200°C). Roll out half of your chilled pie dough and fit it into a 9-inch pie plate, leaving an overhang.
- In a large bowl, toss the rhubarb with the granulated sugar, cornstarch, and cinnamon until the fruit is thoroughly coated in the thickening mixture.
- Pour the rhubarb mixture into the prepared bottom crust and dot the surface evenly with the small pieces of butter to add richness to the sauce.
- Roll out the second half of the dough. You can place it over the top as a full crust (with slits for steam) or cut it into strips to weave a beautiful lattice pattern.
- Trim the excess dough and crimp the edges tightly to seal in the juices. Brush the top of the pastry with the beaten egg wash for a golden finish.
- Sprinkle the coarse sanding sugar over the top for texture. Bake for 45-50 minutes, or until the crust is deep golden brown and the filling is bubbling through the vents.
- Allow the pie to cool completely on a wire rack for at least 3-4 hours; this is crucial to let the filling set so it doesn’t run when sliced.
How to decorate graduation cookies?
Why we love this
Graduation cookies are more than just treats; they are edible keepsakes that celebrate hard work and new beginnings. The smooth, matte finish of royal icing feels sophisticated, while the snap of a perfectly baked sugar cookie provides a delightful tactile experience. Decorating these allows you to personalize your board with school colors, making every guest feel seen and celebrated. The faint scent of almond and vanilla lingering on the icing makes these an irresistible addition that looks just as good as they taste.
Ingredients
- Batch of chilled sugar cookie dough
- 4 cups powdered sugar
- 3 tablespoons meringue powder
- 1/2 cup warm water
- Gel food coloring (school colors)
- Fine-tip edible ink markers
How to make it
- Roll out your cookie dough to 1/4-inch thickness and use cookie cutters in the shapes of diplomas, mortarboards, and the year digits. Bake according to recipe and cool completely.
- Prepare the royal icing by whisking powdered sugar, meringue powder, and water together for 7-10 minutes until stiff peaks form. Divide and tint with gel colors.
- Thin a portion of the icing with a few drops of water to reach ‘flood’ consistency (it should disappear into itself in 10 seconds). Keep the ‘outline’ icing at a stiffer consistency.
- Pipe an outline around the edge of the cookie with the stiff icing. Let it set for 2 minutes.
- Fill the center with the flood icing, using a toothpick to pop bubbles and spread it into the corners. Let the cookies dry for at least 8-12 hours until completely hard.
- Once dry, use the edible markers or stiff icing to add details like the ‘tassel’ on the cap or the ‘ribbon’ on the diploma scroll for a professional, crisp look.
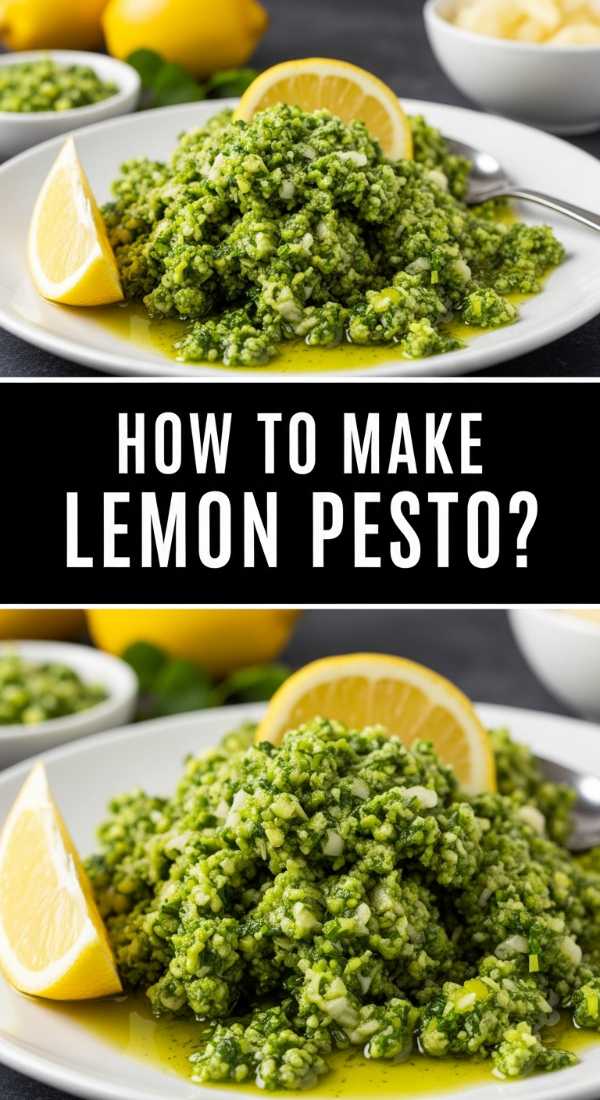
How to make lemon pesto?
Why we love this
Lemon pesto is a bright, sunshine-infused twist on the classic basil sauce that wakes up every element on your board. The fragrance is an intoxicating blend of peppery basil, toasted pine nuts, and the sharp, clean zing of fresh citrus zest. It feels incredibly fresh and light, with a coarse, rustic texture that clings beautifully to crackers or sliced baguette. It adds a sophisticated acidity that cuts through the richness of cheeses and meats, making it an essential, vibrant component of a viral-worthy spread.
Ingredients
- 2 cups packed fresh basil leaves
- 1/2 cup freshly grated Parmesan cheese
- 1/3 cup pine nuts, lightly toasted
- 2 large cloves garlic, minced
- 1/2 cup extra-virgin olive oil
- Zest and juice of 1 large lemon
- Salt and freshly cracked black pepper to taste
How to make it
- Place the fresh basil, toasted pine nuts, and minced garlic in the bowl of a food processor. Pulse several times until the ingredients are coarsely chopped but not yet a paste.
- Add the grated Parmesan cheese and the lemon zest. Pulse again for 5 seconds to incorporate the cheese and distribute the aromatic zest.
- With the processor running on low speed, slowly drizzle in the extra-virgin olive oil in a thin, steady stream. This emulsifies the sauce, creating a smooth yet textured consistency.
- Add the lemon juice, salt, and pepper. Pulse once more to combine. Taste and adjust the seasoning, adding more lemon juice if you prefer a sharper tang.
- Transfer the pesto to a small serving bowl. If not using immediately, pour a thin layer of olive oil over the top to prevent oxidation and keep the color vibrant green.
- Store in the refrigerator for up to 5 days, or freeze in ice cube trays for easy portions later on.
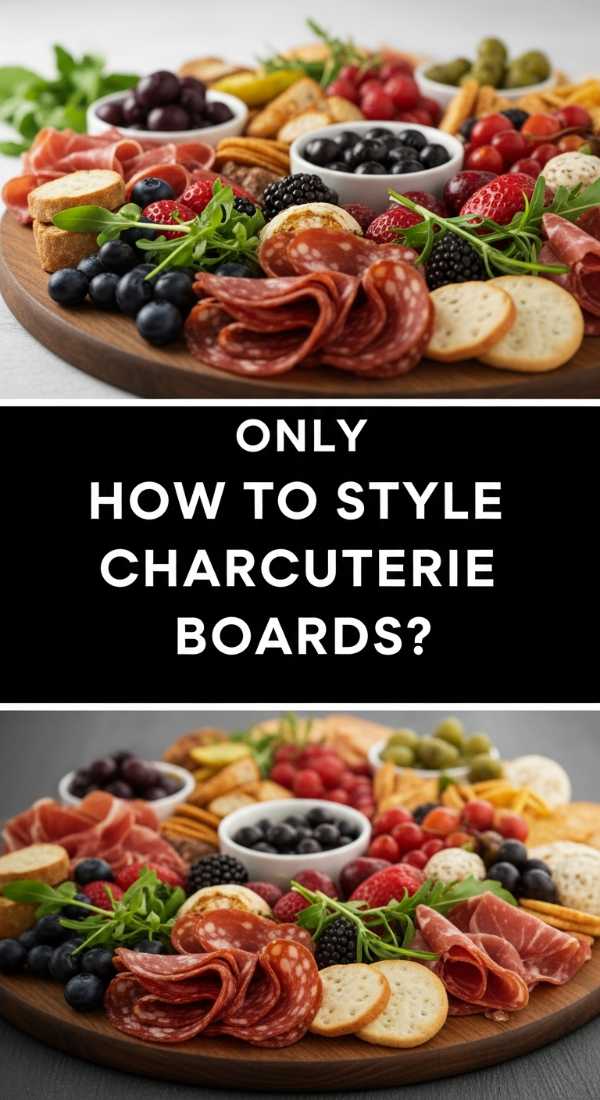
How to style charcuterie boards?
Why we love this
Styling a charcuterie board is an exercise in creative abundance—it’s where the ‘viral’ magic truly happens. There is a profound visual satisfaction in seeing ribbons of salty prosciutto nestled against creamy wedges of brie and piles of glistening berries. The board should feel overflowing and approachable, inviting guests to reach in and discover new flavor combinations. It’s a sensory playground of smooth, crunchy, salty, and sweet that acts as the stunning centerpiece of any gathering.
Ingredients
- Large wooden board or marble slab
- 3-4 types of cheese (Soft, Hard, Aged, Blue)
- 3 types of cured meats (Salami, Prosciutto, Mortadella)
- Assorted crackers and sliced baguette
- Fresh fruits (grapes, berries, figs)
- Nuts and olives
- Small bowls of honey, mustard, or lemon pesto
How to make it
- Start by placing your ‘anchors’—the small bowls for dips and honey—randomly across the board to create focal points.
- Place your cheeses. Keep some whole, slice others into triangles, and crumble harder cheeses like aged cheddar to create varied heights and shapes.
- Fold the meats to add volume. Ribbon the prosciutto by folding it loosely, and fan out salami slices or fold them into ‘roses’ by layering them over the rim of a wine glass.
- Add your crackers and breads, curving them around the bowls and cheeses to create a sense of movement across the board.
- Fill in the larger remaining gaps with bunches of grapes and handfuls of nuts. Use the fruit to add pops of color next to the more neutral tones of the cheese and bread.
- Finally, fill the tiny ‘micro-gaps’ with small berries, sprigs of fresh herbs (like rosemary or thyme), or edible flowers to give the board a lush, finished look.
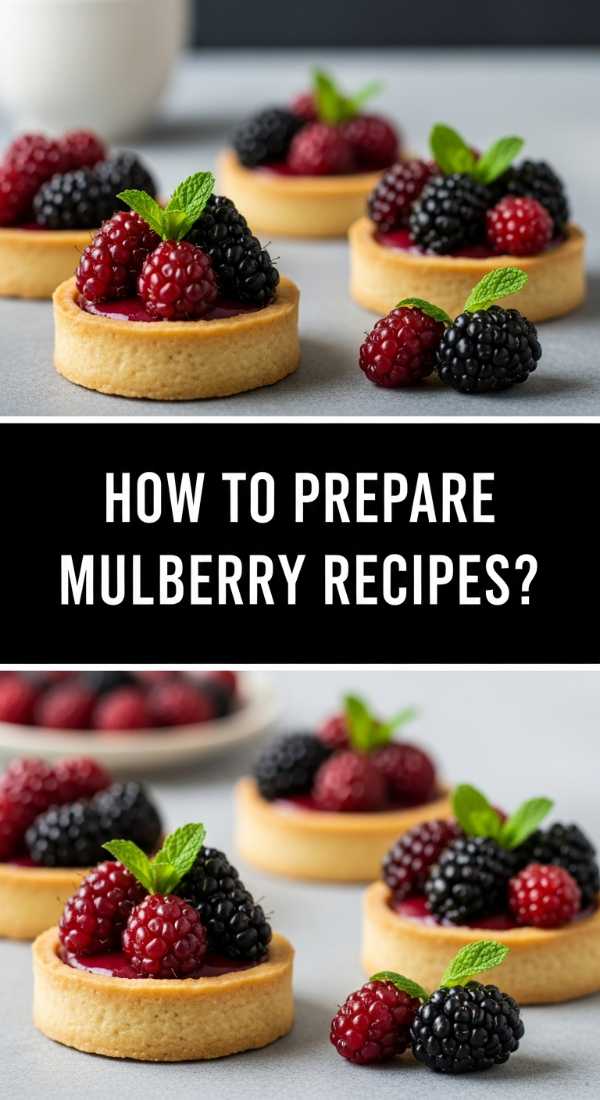
How to prepare mulberry recipes?
Why we love this
Mulberries are the hidden gems of the foraging world, offering a deep, earthy sweetness that is far more complex than a standard blackberry. They possess a delicate, elongated shape and a juice so rich it stains the fingers a beautiful purple-red—a true mark of a summer harvest. Whether tossed into a salad or baked into a tart, they provide a soft, melting texture and a honey-like flavor that feels ancient and special. Using them on your food board adds an element of intrigue and rustic charm that guests will find irresistible.
Ingredients
- 2 cups fresh mulberries, rinsed and stems removed
- 1 tablespoon honey
- 1 teaspoon balsamic glaze
- Fresh mint leaves for garnish
- Creamy goat cheese (for serving)
How to make it
- Gently wash the mulberries in a bowl of cold water. Be very careful as they are incredibly delicate and can bruise easily; pat them dry with a paper towel.
- For a simple board addition, toss the whole mulberries in a small bowl with the honey and balsamic glaze. This enhances their natural earthiness and gives them a beautiful shine.
- If you want to create a spread, lightly macerate half of the mulberries with a fork until they release their juices, then fold them into room-temperature goat cheese.
- Arrange the whole mulberries or the mulberry-cheese mixture on your board. The deep purple hue provides a stunning contrast against light-colored cheeses.
- Garnish with torn fresh mint leaves, which adds a refreshing herbal note that perfectly complements the dark fruit.
- Keep the mulberries chilled until the very last moment of serving to maintain their firm structure and refreshing temperature.
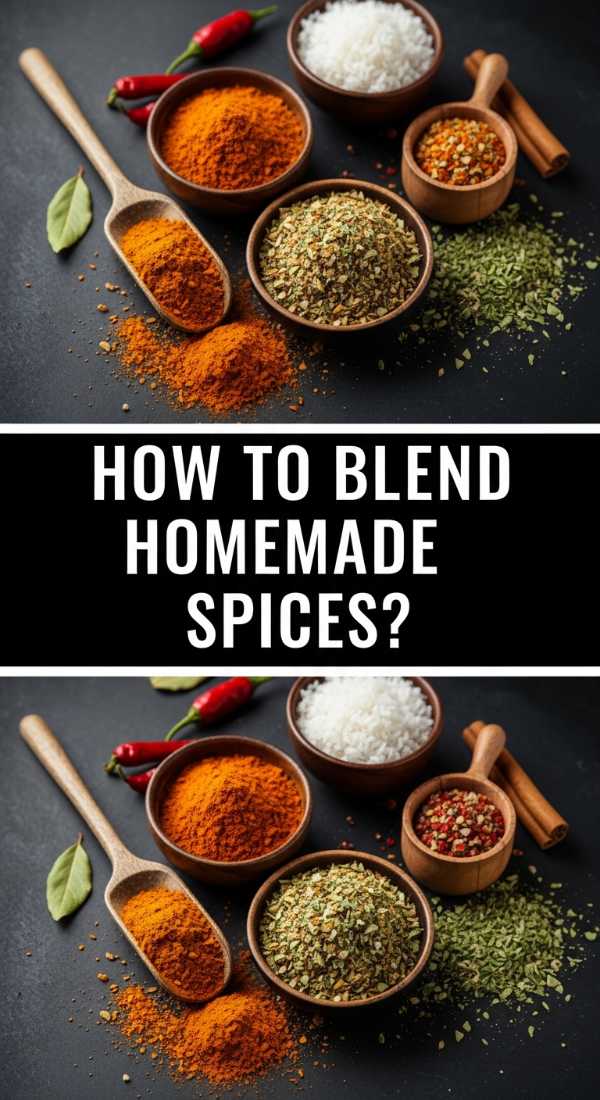
How to blend homemade spices?
Why we love this
There is a quiet, aromatic power in blending your own spices; it’s the difference between a good dish and one that is truly unforgettable. As you toast the whole seeds and grind them together, the kitchen is filled with a warm, intoxicating haze of cumin, coriander, and peppercorns. The texture is gritty and real, and the flavor is exponentially more potent than anything found in a pre-made jar. Providing a small bowl of a custom blend on your board allows guests to season their bites to their own liking, adding a thoughtful, artisanal touch.
Ingredients
- 2 tablespoons whole cumin seeds
- 2 tablespoons whole coriander seeds
- 1 tablespoon black peppercorns
- 1 tablespoon smoked paprika
- 1 teaspoon sea salt
- 1/2 teaspoon red pepper flakes
How to make it
- Place a small, dry skillet over medium-low heat. Add the whole cumin seeds, coriander seeds, and peppercorns.
- Toast the seeds for 2-3 minutes, shaking the pan frequently. Watch closely and remove from heat the moment they become fragrant and slightly darker; do not let them smoke.
- Allow the toasted seeds to cool completely. This is vital to prevent them from turning into a paste during the grinding process.
- Transfer the cooled seeds to a spice grinder or a mortar and pestle. Grind until you reach your desired consistency—some prefer a fine powder, while a coarse grind offers a nice crunch.
- Stir in the smoked paprika, sea salt, and red pepper flakes by hand to maintain the vibrant red color and ensure an even distribution of salt.
- Store the blend in an airtight glass jar in a cool, dark place. On your food board, serve it in a tiny decorative bowl with a small spoon for sprinkling over cheeses or meats.
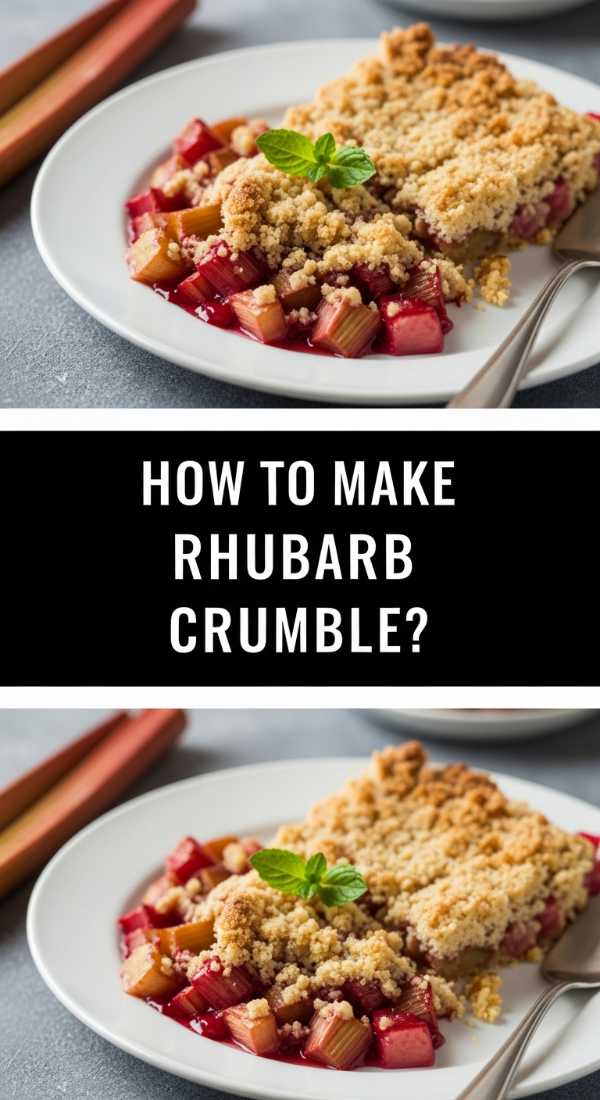
How to make rhubarb crumble?
[IMAGE_10]
Why we love this
Rhubarb crumble is the ultimate ‘hygge’ dessert, a warm and comforting bowl of contrast that feels like a big hug. The base is a bubbling, tart rhubarb compote that provides a sharp wake-up call, while the topping is a buttery, golden-brown blanket of toasted oats and brown sugar. The sound of the spoon breaking through that crisp, pebbled topping is pure satisfaction. It’s rustic, unpretentious, and the way the warm fruit juices mingle with a scoop of melting vanilla ice cream is a viral-worthy moment in itself.
Ingredients
- For the filling: 6 cups rhubarb (1-inch chunks), 3/4 cup sugar, 1 tbsp orange zest.
- For the topping: 1 cup all-purpose flour, 1 cup rolled oats, 1 cup brown sugar, 1/2 cup cold unsalted butter (cubed), 1 tsp cinnamon.
How to make it
- Preheat your oven to 375°F (190°C) and lightly butter a 9×13 inch baking dish.
- In a large bowl, toss the rhubarb with the sugar and orange zest until coated. Spread the mixture evenly into the bottom of the prepared baking dish.
- In a separate bowl, combine the flour, rolled oats, brown sugar, and cinnamon for the topping.
- Using your fingertips or a pastry cutter, work the cold, cubed butter into the dry ingredients until the mixture resembles coarse crumbs with some pea-sized pieces of butter remaining.
- Squeeze small handfuls of the topping together to create larger ‘clumps’ and sprinkle it evenly over the rhubarb filling.
- Bake for 35-45 minutes. You are looking for the topping to be a deep golden brown and the rhubarb juices to be thick and bubbling vigorously around the edges.
- Remove from the oven and let it rest for 15 minutes before serving. This allows the juices to thicken slightly, making for a much better texture when scooped.
Final Thoughts on Your Viral Board
Building a viral-worthy food board is less about following strict rules and more about embracing the joy of hosting. By combining the tart zing of rhubarb, the freshness of lemon pesto, and the celebratory spirit of graduation treats, you create a landscape of flavors that invites conversation. Remember to layer your textures, keep your colors bright, and most importantly, enjoy the process! Your guests will taste the love you put into every handmade element.