
10-Minute Viral Food Boards You Need to Try
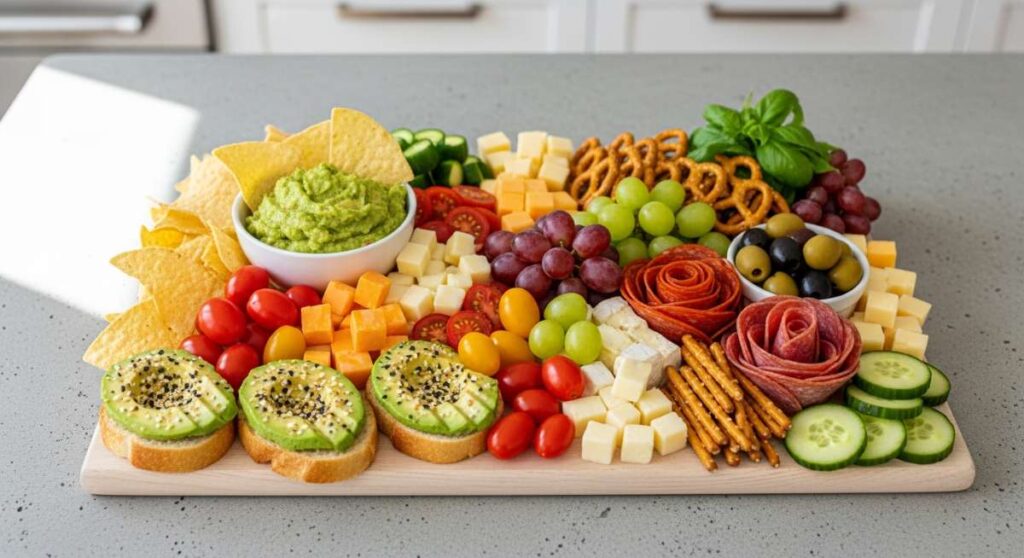
There is something undeniably magical about the way a beautifully arranged food board brings people together. Whether it is the laughter shared over a grazing platter or the collective ‘oohs’ and ‘aahs’ when a themed dessert board hits the table, these viral creations have transformed the way we entertain. I remember the first time I set out a simple board for a casual Friday night; it wasn’t just about the food, it was about the relaxed, communal atmosphere it created where everyone felt invited to nibble and chat at their own pace.
Today, we are taking that ‘board’ obsession to the next level by incorporating homemade, seasonal, and celebratory treats that turn a simple tray into a viral masterpiece. From the tart, nostalgic flavors of fresh rhubarb to the celebratory spark of graduation season, these ideas are designed to be effortless yet high-impact. Grab your favorite wooden platter, and let’s dive into how you can elevate your next gathering with these stunning, board-ready recipes.
How to bake graduation cakes?

Why we love this
There is nothing quite like the celebratory aroma of a classic vanilla bean sponge wafting through the house to mark a major milestone. This cake is designed to be the centerpiece of a celebratory dessert board, offering a moist, tender crumb that melts in your mouth and a delicate sweetness that isn’t overpowering. Imagine the visual of a perfectly golden crust, the sight of tiny black vanilla bean specks, and the feeling of soft, airy cake that stands tall against rich frosting—it is pure joy in every bite and the ultimate way to honor a graduate’s hard work.
Ingredients
- 2 1/2 cups all-purpose flour
- 1 1/2 cups granulated sugar
- 1 tablespoon baking powder
- 1/2 teaspoon salt
- 3/4 cup unsalted butter, softened
- 1 cup whole milk, room temperature
- 3 large eggs, room temperature
- 2 teaspoons vanilla bean paste
How to make it
- Preheat your oven to 350°F (175°C) and meticulously grease two 8-inch round cake pans with butter, then dust with flour or line the bottoms with parchment paper to ensure an easy release later.
- In a large mixing bowl, sift together the flour, baking powder, and salt; this aerates the dry ingredients and prevents any lumps in your final batter.
- Using a stand mixer with the paddle attachment, cream the softened butter and granulated sugar together on medium-high speed for about 3-5 minutes until the mixture is pale, light, and fluffy, which incorporates the air necessary for a good rise.
- Add the eggs one at a time, beating well after each addition to ensure they are fully emulsified into the butter-sugar mixture.
- Incorporate the vanilla bean paste, ensuring those fragrant seeds are distributed throughout the wet base.
- Reduce the mixer speed to low and alternate adding the dry flour mixture and the milk, starting and ending with the flour; mix only until just combined to avoid overworking the gluten, which can make the cake tough.
- Divide the batter evenly between the prepared pans, smoothing the tops with an offset spatula for an even bake.
- Bake for 28-32 minutes, or until a wooden skewer inserted into the center comes out clean or with just a few moist crumbs; the tops should spring back gently when pressed.
- Cool the cakes in the pans for 10 minutes before inverting them onto a wire rack to cool completely to room temperature before slicing into wedges for your board.
How to make rhubarb jam?
Why we love this
This vibrant, ruby-red jam is the definition of spring captured in a jar, offering a sharp, tangy bite that cuts through the sweetness of any brunch board. When it’s cooking, the scent is bright and floral, a sharp contrast to the earthy, pink stalks that slowly transform into a thick, glossy conserve. The texture is a delightful mix of smooth syrup and soft, fibrous fruit that spreads like a dream over warm scones or crusty bread, providing a zingy sensory experience that wakes up the palate with every spoonful.
Ingredients
- 4 cups fresh rhubarb, chopped into 1/2 inch pieces
- 1 1/2 cups granulated sugar
- 1 tablespoon lemon juice
- 1 teaspoon lemon zest
- 1/4 teaspoon ground ginger (optional)
How to make it
- In a heavy-bottomed saucepan or a Dutch oven, combine the chopped rhubarb, sugar, and lemon juice; toss well to coat the fruit and let it macerate for 30 minutes until the sugar begins to draw out the juices.
- Place the pot over medium heat and stir constantly until the sugar has completely dissolved and the mixture begins to simmer.
- Increase the heat slightly to bring the jam to a rolling boil; you want to see large, lazy bubbles popping on the surface.
- Stir in the lemon zest and ground ginger, then continue to cook for 10-15 minutes, stirring frequently to prevent the bottom from scorching as the mixture thickens.
- To test for the ‘setting point,’ place a small spoonful of jam on a chilled plate, wait 30 seconds, and push it with your finger; if it wrinkles, it is ready.
- Skim any foam off the surface with a metal spoon for a crystal-clear appearance.
- Remove from heat and let it cool slightly before transferring to sterilized glass jars; the jam will continue to firm up as it cools to room temperature.
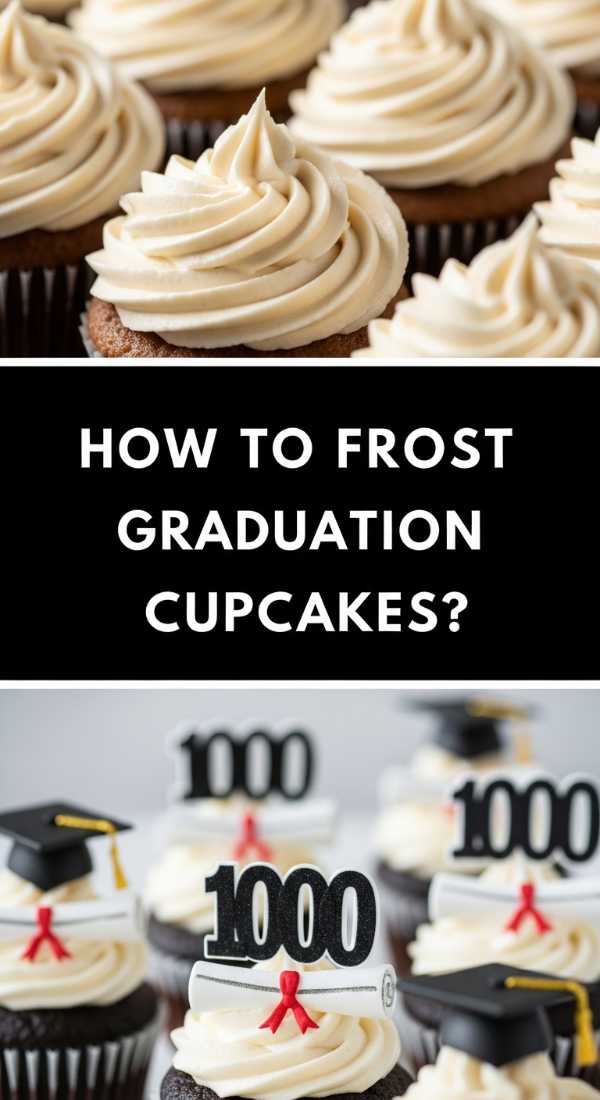
How to frost graduation cupcakes?
Why we love this
The crowning glory of any graduation board is a perfectly frosted cupcake, topped with a miniature mortarboard or a celebratory tassel. The frosting itself should be silky, stable, and decadently creamy, providing a smooth canvas for decorations that reflect the colors of the graduate’s school. There is something so satisfying about the feeling of a piping bag in your hand, watching the buttercream swirl into a perfect peak, and the sweet, buttery aroma that lingers in the kitchen as you put the finishing touches on these handheld treats.
Ingredients
- 1 batch of baked vanilla or chocolate cupcakes
- 2 cups unsalted butter, softened
- 4 cups powdered sugar, sifted
- 2 tablespoons heavy cream
- 1 teaspoon vanilla extract
- Gel food coloring (school colors)
- Chocolate squares and sour belt candy (for the hats)
How to make it
- Begin by creaming the softened butter in a stand mixer fitted with the whisk attachment on medium-high speed for a full 5 minutes until it is nearly white and incredibly light in texture.
- Turn the mixer to low and gradually add the sifted powdered sugar one cup at a time, ensuring each addition is fully incorporated before adding the next to avoid a sugar cloud in your kitchen.
- Add the heavy cream and vanilla extract, then increase the speed to high and whip for another 2 minutes until the frosting is voluminous and smooth.
- Divide the frosting into bowls and use a toothpick to add small amounts of gel food coloring, folding it in by hand to achieve the desired school colors without over-mixing.
- Fit a piping bag with a large star tip (like a Wilton 1M) and fill it with the colored buttercream, ensuring there are no air pockets in the bag.
- Hold the bag vertically over the cupcake and, starting from the outside edge, pipe a spiral moving inward and upward to create a professional high-swirl finish.
- Place a small square of dark chocolate on top of the swirl to represent the cap, and use a tiny strip of sour belt or a strand of licorice as the tassel, securing it with a dot of frosting.
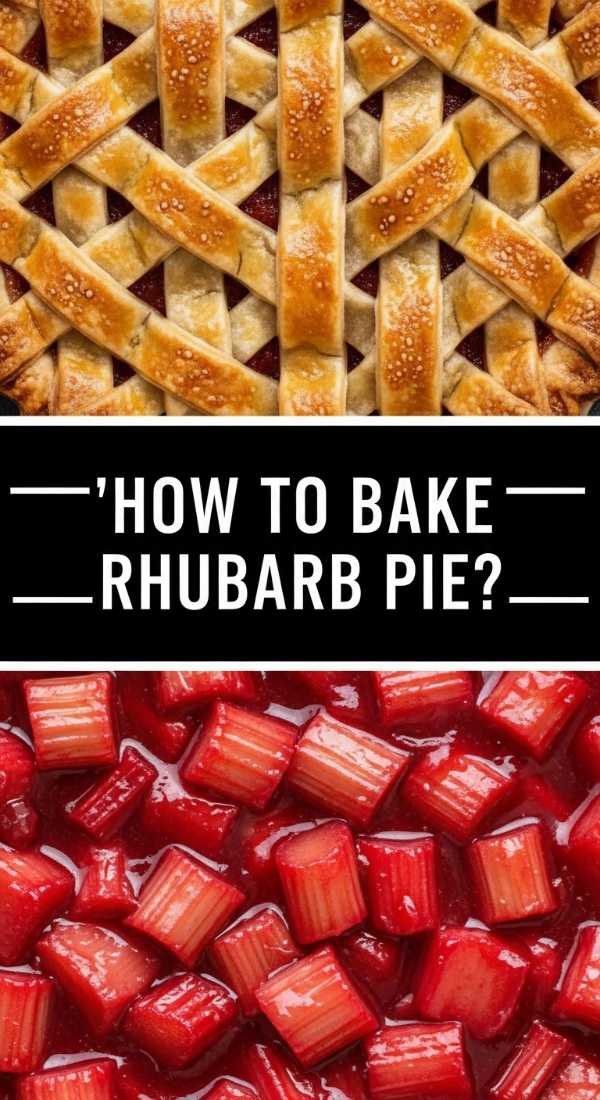
How to bake rhubarb pie?

Why we love this
Rhubarb pie is the ultimate rustic comfort food, boasting a flaky, golden-brown crust that shatters beautifully when you cut into it, revealing a pool of bubbling, sweet-tart filling. The smell of the pie as it bakes is intoxicating—a mixture of buttery pastry and the sharp, fruity scent of rhubarb—filling the house with a sense of warmth and tradition. Each slice offers a perfect balance of textures, from the crunch of the lattice top to the tender, jammy fruit inside, making it a standout feature for a garden-themed dessert board.
Ingredients
- Double pie crust (homemade or store-bought)
- 5 cups rhubarb, cut into 1/2 inch pieces
- 1 1/4 cups granulated sugar
- 1/4 cup cornstarch
- 1/2 teaspoon cinnamon
- 1 tablespoon butter, cubed
- 1 egg (for egg wash)
- 1 tablespoon coarse sugar
How to make it
- Preheat your oven to 400°F (200°C) and place a baking sheet on the bottom rack to catch any overflow of juices during the baking process.
- Roll out half of the pie dough on a lightly floured surface and fit it into a 9-inch pie plate, leaving a slight overhang; chill this in the fridge while you prepare the filling.
- In a large bowl, toss the rhubarb with the granulated sugar, cornstarch, and cinnamon until every piece of fruit is well-coated; the cornstarch is vital for thickening the juices so the pie isn’t runny.
- Pour the rhubarb mixture into the chilled bottom crust and dot the top of the fruit with the small cubes of butter for extra richness.
- Roll out the second half of the dough and cut it into strips to create a lattice top, weaving the strips over and under each other for a classic, professional look.
- Trim the excess dough and crimp the edges tightly with your fingers or a fork to seal the pie.
- Whisk the egg with a splash of water and brush it lightly over the top of the crust, then sprinkle generously with coarse sugar for a sparkling, crunchy finish.
- Bake at 400°F for 20 minutes, then reduce the heat to 350°F (175°C) and continue baking for 35-45 minutes until the crust is deep golden and the filling is bubbling through the lattice.
How to decorate grad cookies?
Why we love this
Decorating graduation cookies is an art form that brings a personalized, whimsical touch to your viral food board. The crisp snap of a sugar cookie paired with the smooth, matte finish of royal icing creates a sensory delight that is both visually stunning and delicious to eat. There is a meditative quality to the process of outlining and flooding the cookies, watching the vibrant colors fill the space and then adding tiny, intricate details like ‘Class of 2024’ or diploma ribbons that make each cookie a tiny celebration of its own.
Ingredients
- 1 dozen sugar cookies (graduation shapes: caps, diplomas, stars)
- 4 cups powdered sugar
- 3 tablespoons meringue powder
- 5-7 tablespoons warm water
- Gel food coloring
- Fine-tip edible markers
How to make it
- Prepare your royal icing by whisking the powdered sugar and meringue powder together, then slowly adding warm water while mixing on medium speed for 7-10 minutes until stiff peaks form.
- Divide the icing into portions: keep some ‘stiff’ for outlining and add a few extra drops of water to the rest to reach a ‘flood’ consistency (it should disappear into itself after 10 seconds).
- Tint the icing with gel food coloring to match your theme, then transfer the stiff icing to piping bags with small round tips and the flood icing to squeeze bottles.
- Outline the edge of your cookies with the stiff icing, creating a dam that will hold the thinner icing in place.
- Wait 5 minutes for the outline to set, then ‘flood’ the center of the cookie with the thinner icing, using a toothpick or scribe tool to pop bubbles and push the icing into the corners.
- Allow the base layer of icing to dry completely—this can take 6-12 hours depending on humidity—until the surface is hard to the touch.
- Once dry, use the stiff icing to pipe details like tassels on the caps or ribbons on the diplomas, and use edible markers to write names or dates for a truly custom look.
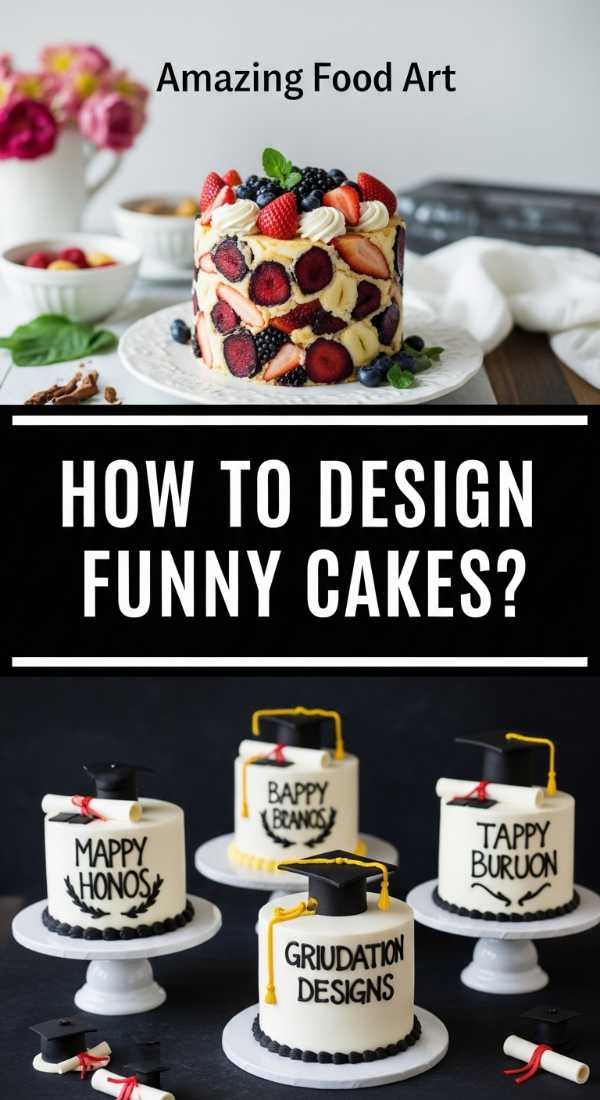
How to design funny cakes?
Why we love this
Funny cakes are all about breaking the rules and bringing a sense of humor to the dessert board, often using unexpected shapes or ‘mistake’ aesthetics to get a laugh. The texture is just as important as the look—soft, pillowy sponges stacked with layers of gooey filling, all wrapped in a playful exterior. We love these because they strip away the pressure of perfection; the aroma of chocolate and buttercream remains, but the visual is one of pure, unadulterated fun that serves as a fantastic conversation starter for any party.
Ingredients
- 3 layers of pre-baked round cake
- 4 cups chocolate or vanilla frosting
- Fondant in various bright colors
- Food-safe wire or skewers
- Edible glitter and sprinkles
How to make it
- Stack your cake layers with a generous amount of frosting between each, ensuring the cake is structurally sound by using a crumb coat (a thin layer of frosting) to lock in any loose crumbs.
- Chill the crumb-coated cake for 30 minutes until firm, then apply a final, smooth layer of frosting.
- To create a ‘gravity-defying’ or funny effect, use a food-safe wire to suspend a fondant object (like a spilled milk carton or a falling graduation cap) above the cake.
- Sculpt funny faces or ‘blobs’ out of colorful fondant and place them around the base of the cake as if they are trying to climb up the sides.
- Use an edible marker or piped frosting to write a humorous message on the top, such as ‘I’m done with this!’ or ‘Hire me!’.
- Finish with an intentional ‘mess’ of colorful sprinkles or edible glitter to lean into the whimsical, chaotic-good aesthetic.
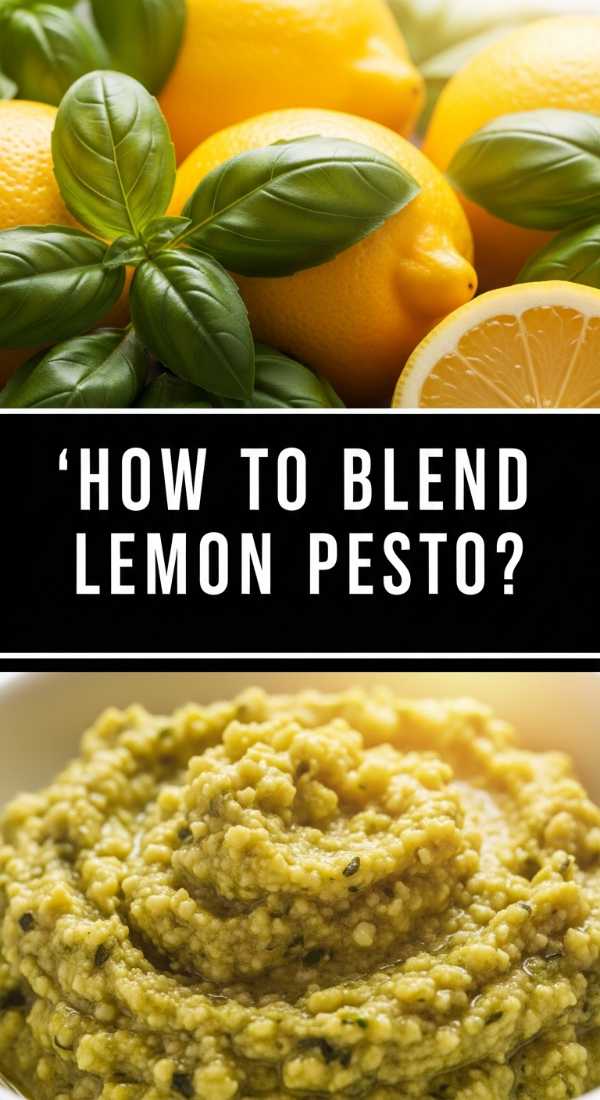
How to blend lemon pesto?
Why we love this
Lemon pesto is a bright, zingy twist on the classic Italian sauce, offering a burst of Mediterranean sunshine that is perfect for a savory snack board. The scent of fresh basil crushed with garlic and lemon zest is immediately invigorating, while the texture is a complex mix of creamy oil, gritty parmesan, and crunchy pine nuts. It adds a sophisticated layer to your board, acting as a vibrant green dip for crackers or a spread for fresh baguette slices that feels elevated and fresh.
Ingredients
- 2 cups fresh basil leaves, packed
- 1/2 cup grated Parmesan cheese
- 1/3 cup pine nuts, toasted
- 2 cloves garlic, peeled
- 1/2 cup extra-virgin olive oil
- Zest of 2 lemons
- 2 tablespoons fresh lemon juice
- Salt and pepper to taste
How to make it
- Start by toasting your pine nuts in a dry skillet over medium-low heat for 3-5 minutes, tossing frequently until they are golden and fragrant; this releases the oils and deepens the flavor.
- In a food processor, pulse the garlic cloves and toasted pine nuts until they are finely minced.
- Add the fresh basil leaves, lemon zest, and Parmesan cheese to the processor; pulse several times until the basil is coarsely chopped.
- With the processor running on a low setting, slowly drizzle in the extra-virgin olive oil in a steady stream to create a beautiful, thick emulsion.
- Stop and scrape down the sides of the bowl with a spatula to ensure everything is evenly incorporated.
- Add the lemon juice and pulse one last time; the acid from the lemon should be added at the end to keep the basil from turning brown too quickly.
- Season with salt and freshly cracked black pepper to your preference, then transfer to a small bowl for serving on your board.
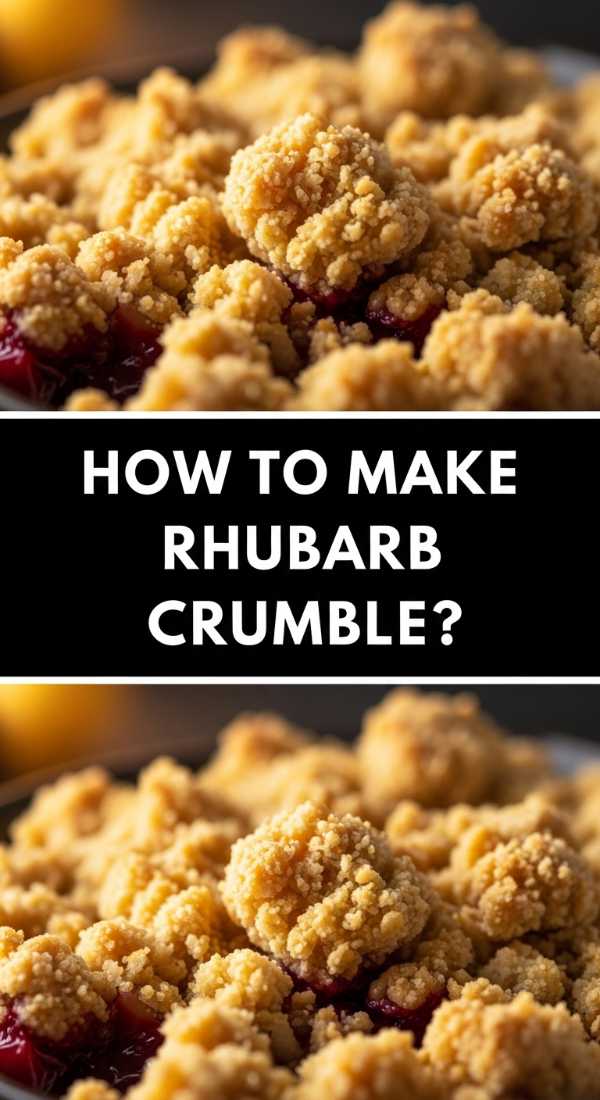
How to make rhubarb crumble?

Why we love this
There is something incredibly nostalgic about the scent of a fresh rhubarb crumble baking in the oven; it’s that perfect marriage of tart, ruby-red stalks softening into a jam-like consistency under a blanket of buttery, golden-brown oats. As you pull it from the heat, the edges are bubbling with sweet juices that have caramelized against the dish, creating a sticky, irresistible lace. The aroma is a heady mix of toasted cinnamon and citrus zest, promising a dessert that feels like a warm hug on a breezy spring afternoon, especially when served in small jars on a dessert board.
Ingredients
- 4 cups rhubarb, chopped
- 1/2 cup sugar
- 1 teaspoon orange zest
- 1 cup old-fashioned oats
- 1 cup all-purpose flour
- 3/4 cup brown sugar, packed
- 1/2 cup cold unsalted butter, cubed
- 1/2 teaspoon cinnamon
How to make it
- Preheat your oven to 375°F (190°C) and lightly grease a baking dish or several individual ramekins for a board-friendly presentation.
- Toss the chopped rhubarb with the 1/2 cup of granulated sugar and orange zest in a large bowl, then spread the mixture evenly into the bottom of your prepared dish.
- In a separate bowl, combine the oats, flour, brown sugar, and cinnamon, stirring to ensure the brown sugar is free of large lumps.
- Add the cold, cubed butter to the oat mixture and use a pastry cutter or your fingertips to work the butter into the dry ingredients until it resembles coarse crumbs with some pea-sized pieces remaining.
- Sprinkle the crumble topping generously over the rhubarb layer, pressing down slightly so it adheres to the fruit.
- Bake for 35-40 minutes until the fruit is bubbling and the topping is a deep, golden brown and smells like toasted sugar.
- Let the crumble rest for at least 15 minutes before serving to allow the juices to set slightly, making it easier to portion out.
How to brew fun coffee?

Why we love this
A ‘fun coffee’ station is the ultimate addition to a brunch or dessert board, turning a simple caffeine fix into an interactive, sensory experience. We love the ritual of it—the sound of the milk frother, the deep, earthy aroma of freshly ground beans, and the visual delight of layering colors and textures in a glass. Whether it’s a dollop of cold foam, a sprinkle of cocoa, or a swirl of caramel, fun coffee feels like a decadent treat that bridges the gap between a drink and a dessert, making your guests feel truly pampered.
Ingredients
- Freshly brewed espresso or strong coffee
- 1/2 cup whole milk or oat milk
- 1 tablespoon flavored syrup (lavender, vanilla, or mocha)
- Whipped cream
- Optional: Dried rose petals, cinnamon sticks, or chocolate shavings
How to make it
- Brew a concentrated shot of espresso or a very strong cup of dark roast coffee using your preferred method (French press, Moka pot, or machine).
- While the coffee is hot, stir in your flavored syrup of choice so the flavors meld perfectly with the heat of the brew.
- Heat your milk until it is steaming but not boiling, then use a handheld battery-powered frother to whip the milk for 30-45 seconds until it forms a thick, velvety foam.
- Hold a spoon over the coffee and gently pour the frothed milk over the back of the spoon to create distinct layers between the dark coffee and the white foam.
- Top with a generous swirl of whipped cream for extra indulgence.
- Garnish the top with sensory-rich additions like a dusting of cinnamon, a few chocolate shavings, or even edible flowers to match the aesthetic of your food board.
- Serve immediately in clear glass mugs so guests can see the beautiful gradients and textures.
How to make gourmet chocolate?
[IMAGE_10]
Why we love this
Making your own gourmet chocolate bark or truffles adds a touch of artisan luxury to any board, offering a snap and shine that only high-quality tempered chocolate can provide. The experience is incredibly tactile—the feeling of smooth, warm chocolate being spread across a sheet, the rhythmic sound of chopping nuts, and the intense, bittersweet aroma that fills the room. It’s a versatile component that allows you to play with sweet and salty combinations, creating a sophisticated treat that looks like it came from a high-end boutique but was made with love in your own kitchen.
Ingredients
- 12 oz high-quality dark or milk chocolate (at least 60% cocoa)
- 1/4 cup roasted almonds or pistachios, chopped
- 2 tablespoons dried cranberries or apricots
- 1 teaspoon flaky sea salt
- Optional: Edible gold leaf for a graduation theme
How to make it
- Finely chop your chocolate bars to ensure they melt evenly; avoid using chocolate chips as they often contain stabilizers that prevent a smooth temper.
- Set up a double boiler by placing a heat-proof bowl over a pot of barely simmering water, ensuring the bottom of the bowl does not touch the water.
- Place two-thirds of the chocolate in the bowl and stir constantly until it reaches 115°F (46°C) for dark chocolate or 110°F (43°C) for milk chocolate.
- Remove the bowl from the heat and stir in the remaining one-third of the ‘seed’ chocolate; this cools the mixture and encourages the correct crystal structure for a glossy finish.
- Continue stirring until the temperature drops to 88-90°F (31-32°C) for dark or 84-86°F (29-30°C) for milk; the chocolate should look shiny and feel slightly thickened.
- Quickly pour the tempered chocolate onto a parchment-lined baking sheet and spread it to a 1/4 inch thickness using an offset spatula.
- Immediately sprinkle with the chopped nuts, dried fruit, and flaky sea salt while the chocolate is still wet.
- Allow the chocolate to set at room temperature (not the fridge, which can cause bloom) for 2 hours until it is completely hard and snaps easily when broken into shards.
Conclusion: The Art of the Board
Creating a viral-worthy food board is less about following strict rules and more about embracing a spirit of abundance and creativity. By taking the time to bake a tart rhubarb pie or frost graduation cupcakes with care, you are infusing your gathering with a personal touch that guests will remember long after the last crumb is gone. These boards are a celebration of the season and the people we share it with—so don’t be afraid to mix, match, and experiment with these recipes to make them your own!