
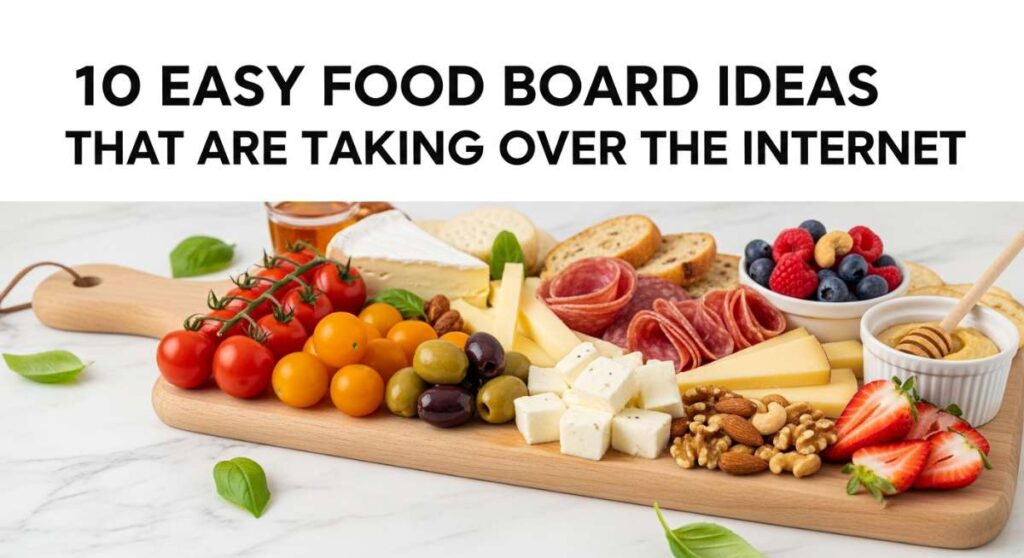
There is something almost magical about the way a beautifully arranged food board can transform a simple gathering into an unforgettable event. We’ve all been there, scrolling through our feeds and stopping dead in our tracks at those stunning spreads of color, texture, and flavor that seem too pretty to eat. But more than just being ‘Instagrammable,’ food boards represent a return to communal eating—a way to slow down, share a laugh, and linger over small bites with the people we love most.
As we move into a season of celebrations, from graduation parties to warm summer evenings on the patio, I wanted to share my absolute favorite viral food board concepts. These aren’t just snacks thrown on a tray; they are curated experiences. Whether you are celebrating a major milestone or just making a Tuesday morning feel a bit more special, these ten ideas will bring that ‘wow’ factor to your table with minimal stress and maximum impact.
How to bake graduation cakes?
Why we love this
There is nothing quite like the scent of a vanilla-bean infused sponge wafting through the kitchen to signal a major life milestone. A graduation cake board features miniature versions of classic bakes, offering a moist, tight crumb that contrasts perfectly with a silky, cloud-like buttercream frosting. Imagine the golden, buttery edges of a perfectly leveled cake paired with the sharp, sweet pop of fresh berries; it’s a nostalgic and sophisticated treat that feels like a hug in dessert form.
Ingredients
- 2 1/2 cups all-purpose flour
- 1 1/2 cups granulated sugar
- 1 tbsp baking powder
- 1/2 tsp salt
- 3/4 cup unsalted butter, softened
- 1 cup whole milk
- 2 large eggs
- 2 tsp vanilla bean paste
- For the frosting: 2 cups powdered sugar, 1 cup butter, 2 tbsp heavy cream
How to make it
- Preheat your oven to 350°F (175°C) and grease several mini-cake tins or a standard 9-inch round pan; ensure you line the bottom with parchment paper for a clean release.
- In a large bowl, sift together your flour, baking powder, and salt to ensure a light, airy texture without any clumps.
- Cream the softened butter and sugar together using a stand mixer on medium-high speed for about 5 minutes until the mixture is pale and fluffy—this aeration is key for a tender cake.
- Add eggs one at a time, beating well after each addition, then stir in the vanilla bean paste for those beautiful black specks.
- Alternate adding the dry ingredients and the milk, beginning and ending with the flour mixture; mix only until just combined to avoid overworking the gluten.
- Pour the batter into the prepared pans and bake for 25-30 minutes, or until a wooden skewer inserted into the center comes out clean and the top springs back when lightly pressed.
- Cool completely on a wire rack before slicing into small, board-ready squares or circles and topping with a swirl of buttercream.
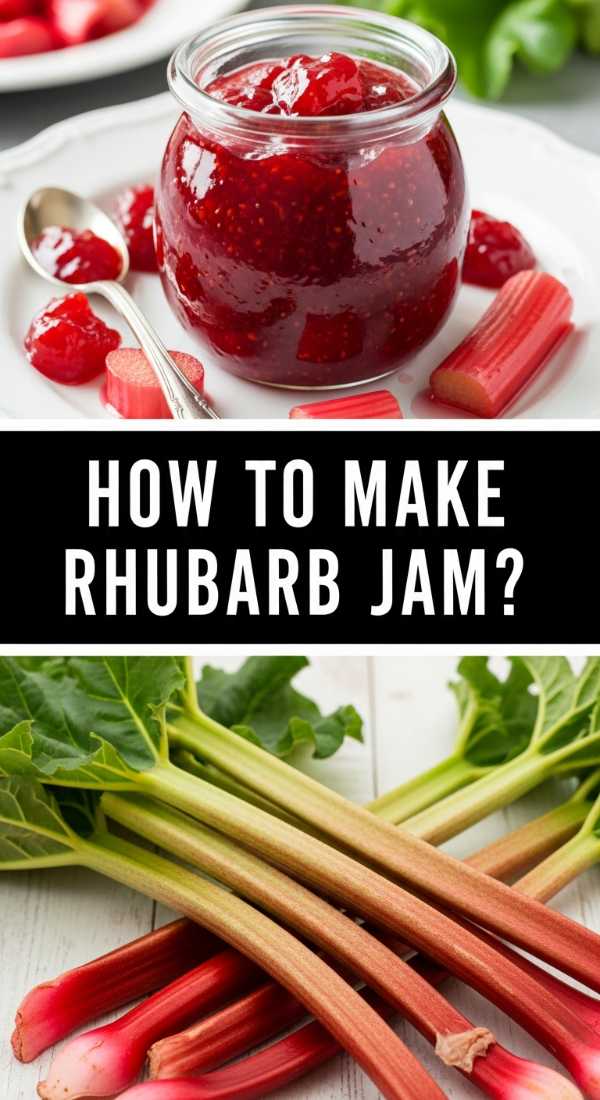
How to make rhubarb jam?

Why we love this
Rhubarb jam is the unsung hero of the brunch board, offering a brilliant, ruby-red hue and a complex flavor profile that dances between mouth-puckering tartness and honey-like sweetness. The texture is thick and luscious, with softened bits of fruit that spread like velvet across a warm piece of sourdough. Its bright, acidic aroma is enough to wake up your senses, making it the perfect companion for creamy cheeses and salty crackers on a curated platter.
Ingredients
- 4 cups fresh rhubarb, chopped into 1/2 inch pieces
- 1 1/2 cups granulated sugar
- 1 tbsp lemon juice
- 1 tsp lemon zest
- 1/2 tsp pure vanilla extract
- A pinch of sea salt
How to make it
- In a heavy-bottomed stainless steel saucepan, combine the chopped rhubarb, sugar, lemon juice, and zest; toss well and let it sit for about 30 minutes to allow the fruit to macerate and release its juices.
- Place the pan over medium heat and stir constantly until the sugar has completely dissolved and the mixture begins to simmer.
- Increase the heat slightly to bring the jam to a rolling boil, then reduce to a simmer, stirring frequently to prevent the bottom from scorching.
- Cook for about 20-25 minutes; you are looking for the rhubarb to break down completely and the liquid to thicken into a glossy, translucent syrup.
- To test the set, place a small spoonful of jam on a chilled plate and wait 30 seconds; if it wrinkles when pushed with your finger, it is ready.
- Stir in the vanilla and salt, then remove from heat and let it cool slightly before transferring to glass jars for your board.
How to decorate graduation cupcakes?
Why we love this
Cupcakes are the ultimate canvas for creativity, especially when styled on a massive dessert board with tassels and glitter. The visual appeal of a perfectly piped swirl—smooth, glossy, and holding its shape—is incredibly satisfying. When you bite into one, the combination of a light, fluffy cake base and the rich, decadent frosting creates a harmonious balance of textures that makes every guest feel like a VIP at the graduation party.
Ingredients
- 12 pre-baked vanilla or chocolate cupcakes
- 3 cups stiff vanilla buttercream
- Black fondant for ‘caps’
- Yellow sour belts or licorice for ‘tassels’
- Edible gold glitter or sprinkles
- Graduation-themed paper toppers
How to make it
- Fit a large piping bag with a star tip (like a 1M) and fill it with your chilled, stiff buttercream, ensuring there are no air bubbles trapped in the bag.
- Hold the bag vertically and start in the center of the cupcake, spiraling outward and then upward to create a high, professional-looking dome.
- Roll out your black fondant to 1/8 inch thickness and cut into small squares to mimic the top of a mortarboard.
- Attach a small strip of yellow sour belt to the center of the square using a tiny drop of water as ‘glue’ to act as the tassel.
- Place the fondant cap gently onto the peak of the buttercream swirl, pressing slightly so it stays secure.
- Finish with a light dusting of edible gold glitter to give the cupcakes a celebratory shimmer that catches the light on your food board.
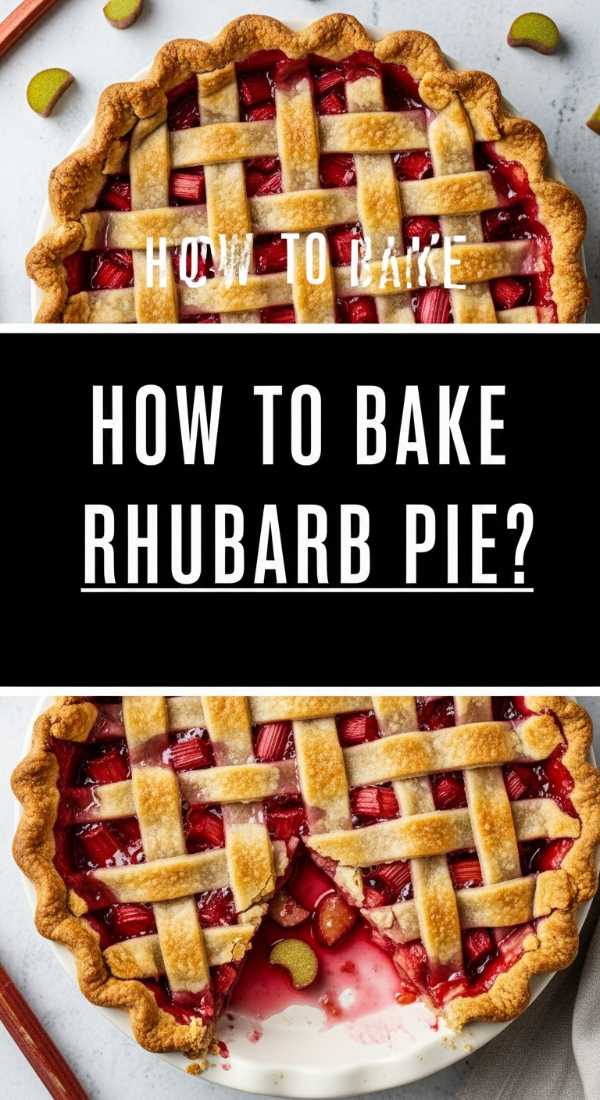
How to bake rhubarb pie?

Why we love this
There is a rustic elegance to a rhubarb pie that makes it the centerpiece of any early summer food board. The crust is incredibly flaky and golden-brown, shattering slightly with every forkful to reveal a bubbling, tart filling that smells of caramelized sugar and earth. It’s the contrast of the crisp, salty pastry against the tender, tangy fruit that makes this dish an absolute classic that everyone reaches for first.
Ingredients
- Double pie crust (chilled)
- 5 cups rhubarb, cut into 1/2 inch pieces
- 1 1/4 cups sugar
- 1/4 cup cornstarch
- 1/2 tsp cinnamon
- 1 tbsp cold butter, cubed
- 1 egg (for wash) + 1 tbsp coarse sugar
How to make it
- Preheat your oven to 400°F (200°C) and place a baking sheet on the middle rack to catch any drips from the pie.
- Roll out the bottom crust on a floured surface until it is 12 inches in diameter, then gently drape it into a 9-inch pie plate.
- In a large bowl, toss the rhubarb with the sugar, cornstarch, and cinnamon until every piece of fruit is evenly coated with the thickening mixture.
- Pour the filling into the crust and dot the top with the small cubes of cold butter to add richness and a silky mouthfeel to the filling.
- Roll out the second crust and cut into strips to create a lattice top, or place it whole over the fruit and cut several large steam vents.
- Crimp the edges tightly to seal, brush the entire top with a beaten egg wash, and sprinkle generously with coarse sugar for a crunch.
- Bake for 45-50 minutes until the crust is a deep golden brown and the filling is bubbling thick juices through the vents; let it cool for at least 3 hours before slicing for the board.
How to style graduation charcuterie?
Why we love this
Styling a charcuterie board for a graduate is about more than just food; it’s about a celebration of variety and abundance. We love the mix of textures—the snap of a spicy salami, the creamy give of a double-cream brie, and the crunch of Marcona almonds. The visual layout, with its rivers of crackers and clusters of grapes, creates an inviting landscape that encourages people to gather around and pick their own perfect bite.
Ingredients
- 3 types of meat (Prosciutto, Salami, Soppressata)
- 3 types of cheese (Brie, Sharp Cheddar, Gorgonzola)
- Crackers and sliced baguette
- Grapes, berries, and dried apricots
- Honey, fig jam, and grainy mustard
- Rosemary sprigs for garnish
How to make it
- Select a large wooden board or marble slab as your base and place your ‘anchor’ items first—these are small bowls of honey, jam, and olives.
- Position your cheeses in different areas of the board; leave the brie whole but slice the cheddar into uniform cubes or ‘shingles’ for easy grabbing.
- Fold your meats into ‘roses’ or fans: for a rose, drape slices of salami over the rim of a small glass, overlapping them until a flower shape forms when inverted.
- Create ‘movement’ by placing crackers and baguette slices in a winding, curved line that snakes through the center of the board.
- Fill the remaining gaps with clusters of grapes and bright berries to add height and pops of vibrant color.
- Finish by tucking fresh rosemary sprigs and a few edible flowers into any small holes to provide an aromatic, garden-fresh finish.
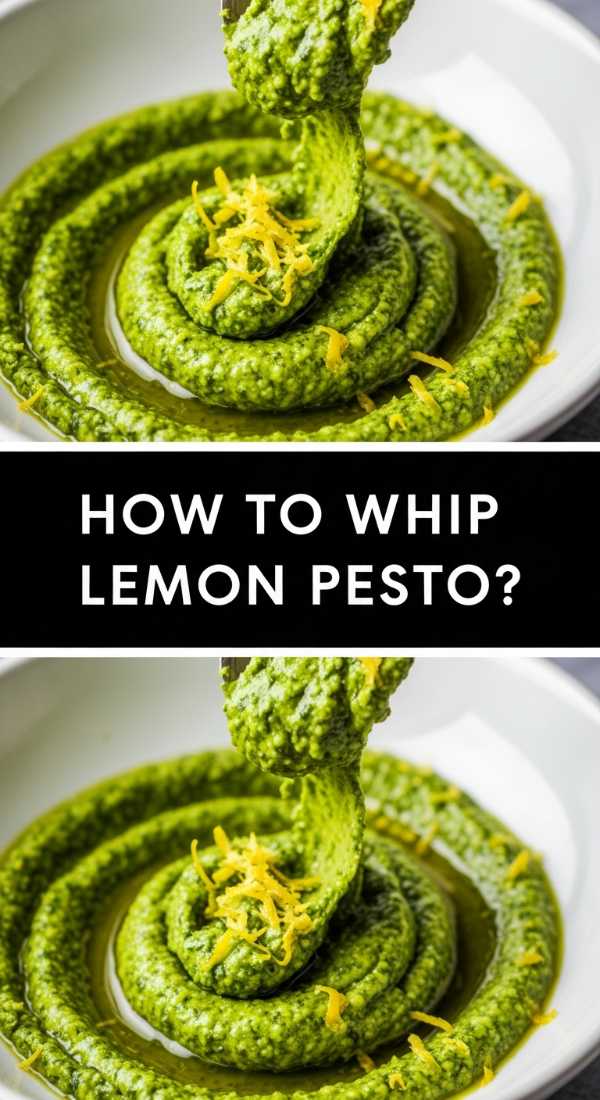
How to whip lemon pesto?

Why we love this
This isn’t your average pesto; the addition of fresh lemon zest and juice transforms the traditional earthy basil into something bright, zingy, and electric. The texture is incredibly light and whipped, almost like a savory mousse, making it a dream for dipping crusty bread or tossing with cold pasta on a Mediterranean-style board. The fragrance is intoxicating—a mixture of fresh herbs, toasted nuts, and sharp citrus that screams summer.
Ingredients
- 2 cups fresh basil leaves, packed
- 1/2 cup grated Parmesan cheese
- 1/3 cup toasted pine nuts or walnuts
- 2 cloves garlic, minced
- 1/2 cup extra virgin olive oil
- Zest and juice of 1 large lemon
- Salt and black pepper to taste
How to make it
- Toast your pine nuts in a dry pan over medium heat for 2-3 minutes until they are golden and fragrant; do not look away as they burn quickly.
- In a food processor, combine the basil, toasted nuts, and garlic; pulse several times until the mixture is coarsely chopped.
- Add the Parmesan cheese, lemon zest, and lemon juice, then pulse again to incorporate.
- With the processor running on low, slowly drizzle in the olive oil in a steady stream to emulsify the sauce into a smooth, whipped consistency.
- Season with salt and pepper, then pulse one last time to ensure everything is perfectly blended and airy.
- Transfer to a small serving bowl and top with an extra grating of lemon zest before placing it in the center of your dipping board.
How to ice summer cookies?
Why we love this
Summer cookies are a delight for the eyes, featuring bright pastels and whimsical shapes like lemons, suns, and flowers. The royal icing provides a satisfying ‘snap’ when you bite into it, giving way to a soft, buttery sugar cookie underneath. The smooth, matte finish of the icing looks professional and clean, making these the perfect sweet treat to scatter across a festive board for an outdoor garden party.
Ingredients
- Sugar cookies (cut into summer shapes)
- 4 cups powdered sugar
- 3 tbsp meringue powder
- 6-8 tbsp warm water
- Gel food coloring (yellow, pink, teal)
- Piping bags and small round tips
How to make it
- In a stand mixer, whisk together powdered sugar, meringue powder, and water on low speed for 7-10 minutes until the icing is glossy and forms stiff peaks.
- Divide the icing into separate bowls and add gel food coloring drop by drop until you achieve your desired summer shades.
- Adjust the consistency: ‘Outline’ icing should be like toothpaste, while ‘Flood’ icing should have the consistency of honey and disappear back into itself in 10 seconds.
- Pipe a border around the edge of the cookie with the outline icing and let it set for 2 minutes to create a dam.
- Fill the center with the flood icing, using a toothpick to pop any tiny air bubbles and move the icing into the corners.
- Allow the base layer to dry completely (about 4-6 hours) before adding detail lines, dots, or ‘summer’ text on top for a 3D effect.
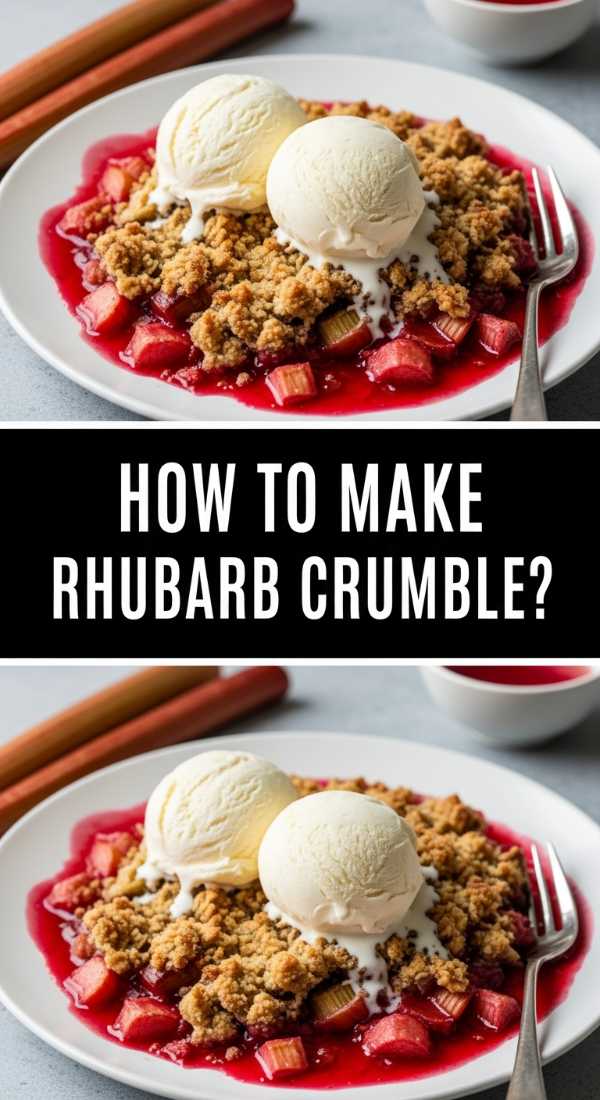
How to make rhubarb crumble?
Why we love this
Rhubarb crumble is the ultimate comfort food, especially when served family-style on a warm wooden board with a side of vanilla bean ice cream. The topping is a buttery, golden-brown landscape of toasted oats and brown sugar that provides a crunch that contrasts beautifully with the soft, jammy rhubarb underneath. The aroma of cinnamon and baking fruit creates an inviting, cozy atmosphere that draws everyone in for ‘just one more scoop.’
Ingredients
- For the filling: 6 cups rhubarb, 3/4 cup sugar, 1 tbsp cornstarch
- For the topping: 1 cup all-purpose flour, 1 cup rolled oats, 1 cup brown sugar, 1/2 cup cold butter (cubed), 1 tsp cinnamon
How to make it
- Preheat your oven to 375°F (190°C) and lightly grease a 9×13 inch baking dish.
- In a large bowl, toss the rhubarb pieces with the sugar and cornstarch until the fruit is moist and coated; spread this evenly into the bottom of the dish.
- In a separate bowl, combine flour, oats, brown sugar, and cinnamon; mix well to distribute the spices.
- Using your fingers or a pastry cutter, work the cold butter cubes into the dry mixture until it forms large, pea-sized crumbs that hold together when squeezed.
- Sprinkle the crumble mixture generously over the rhubarb, ensuring you don’t press it down—you want it to stay light and craggy.
- Bake for 35-40 minutes; you are looking for the fruit juices to bubble up at the edges and the topping to turn a deep, toasted golden brown.
- Serve warm directly from the board with a large spoon so guests can help themselves to the crispy bits and tender fruit.
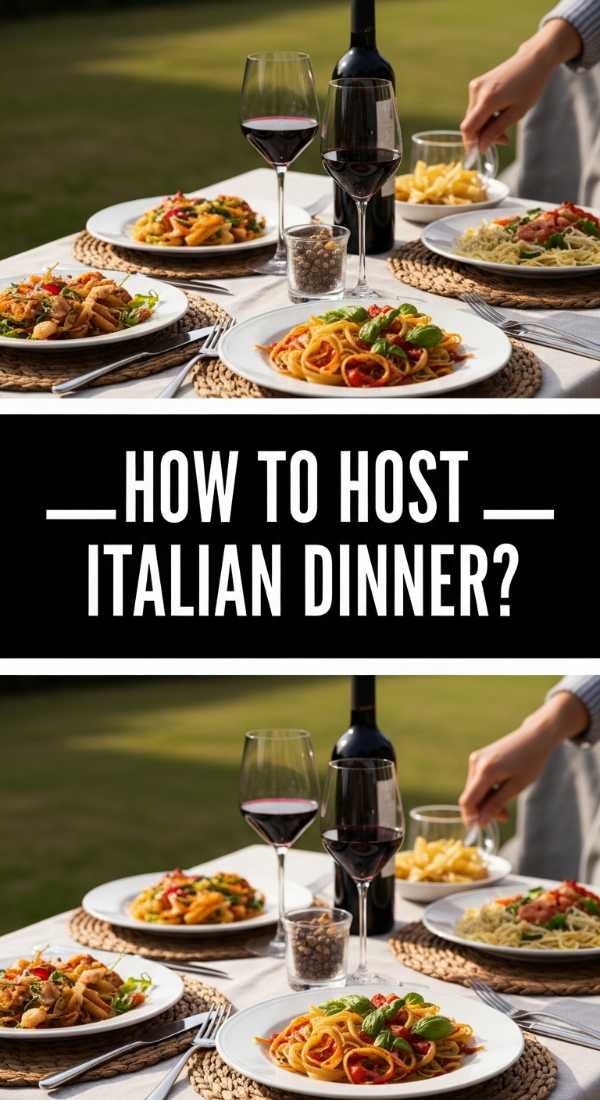
How to host italian dinner?

Why we love this
An Italian dinner board is an explosion of Mediterranean flavors that celebrate the art of the ‘long meal.’ We love the savory depth of aged balsamic drizzled over creamy mozzarella and the herbaceous punch of fresh basil. This style of eating is tactile and sensory, encouraging guests to tear off pieces of crusty ciabatta and assemble their own perfect bruschetta while sipping on a crisp glass of wine under the stars.
Ingredients
- Fresh mozzarella balls (Ciliegine)
- Heirloom tomatoes, sliced
- Prosciutto di Parma
- Artichoke hearts and roasted red peppers
- Ciabatta bread, sliced and toasted
- Extra virgin olive oil and balsamic glaze
- Fresh basil and oregano
How to make it
- Start with a very large board and place a bottle of high-quality olive oil and a jar of balsamic glaze at one end to serve as a self-serve dressing station.
- Arrange the sliced heirloom tomatoes and mozzarella balls in an alternating ‘Caprese’ fan down the center of the board.
- Nestle bundles of thinly sliced prosciutto next to the cheese, allowing the delicate meat to drape naturally for an artisanal look.
- Fill small bowls with marinated artichokes and roasted peppers, placing them in opposite corners to balance the weight of the board.
- Toast the ciabatta slices with a rub of garlic and a drizzle of oil until they are charred at the edges, then pile them high on the board.
- Scatter fresh basil leaves and sprigs of oregano over everything, then finish with a heavy sprinkle of flaky sea salt and cracked black pepper.
How to brew fun coffee?
[IMAGE_10]
Why we love this
Coffee boards are the newest trend for breakfast hosting, turning a simple caffeine fix into an interactive beverage bar. We love the sight of layered lattes, the smell of freshly ground beans, and the indulgence of flavored syrups and whipped foams. It’s a sensory experience that starts the day with a bit of whimsy, offering a customized cup of joy that looks as good as it tastes.
Ingredients
- Strong brewed coffee or espresso shots
- Whole milk and oat milk (for frothing)
- Vanilla and salted caramel syrups
- Whipped cream
- Cinnamon sticks and cocoa powder
- Mini chocolate chips or biscotti for the side
How to make it
- Brew a large carafe of high-quality, medium-roast coffee and place it on a warming mat on your board to keep it at the ideal 185°F.
- Use a handheld milk frother to create a thick, micro-foam with the milk of your choice; the foam should be dense enough to hold a spoon.
- Fill small glass decanters with different syrups so guests can control their own sweetness levels.
- To create a ‘layered’ look, pour the syrup into the bottom of a glass first, followed by the warm milk, and then slowly pour the espresso over the back of a spoon to create distinct layers.
- Set out ‘shakers’ filled with cinnamon and cocoa powder, along with a jar of cinnamon sticks for stirring and adding a woody aroma.
- Complete the board with a bowl of mini biscotti or chocolate-covered spoons that melt into the hot coffee for an extra layer of decadence.
Conclusion
Whether you’re honoring a graduate, welcoming the first rhubarb of the season, or simply gathering friends for an Italian-inspired evening, these food board ideas are designed to make hosting feel effortless and joyful. The beauty of the board is that it removes the formality of plated meals and replaces it with a shared, tactile experience. So, grab your favorite platter, gather your ingredients, and start creating a spread that tastes even better than it looks!