

There is something truly magical about the shift from spring into the heart of summer. It’s a season defined by milestones—graduations, prom nights, and long, lazy evenings spent on the deck with the people we love most. As a blogger, I’ve found that the secret to a viral-worthy home isn’t just about the furniture you buy, but the atmosphere you cultivate. It’s about creating spaces that invite connection and celebrate the big (and small) moments of life.
Today, I’m pulling back the curtain on my Viral Lifestyle Home & Events Board to show you exactly how to elevate your surroundings. Whether you’re sending your teen off to their first prom or turning a tiny balcony into a luxury oasis, these trends are designed to be approachable, beautiful, and deeply personal. We aren’t just decorating; we’re storytelling through our homes.
How to Host a Magical Prom Send Off for Memories That Last Forever

Why we love this
There is something truly ethereal about that golden hour window just before the kids head off to the dance, filled with the scent of fresh corsages and the nervous, excited energy of youth. A prom send-off is the perfect way to ground the evening in family and friendship before the whirlwind of the night begins. We love this because it transforms a stressful logistical moment into a serene, picturesque celebration where the sunlight catches the sequins of the dresses and the laughter feels a bit more intimate. It’s about creating a soft place to land and a stunning backdrop for those photos that will live in scrapbooks for decades.
Essential Elements:
- Sturdy balloon arch in school or neutral colors.
- Chilled sparkling cider and elegant glassware.
- Bite-sized charcuterie or light appetizers.
- A designated ‘Photo Zone’ with natural lighting.
- A curated playlist of upbeat, nostalgic hits.
How to make it
- Select a location in your yard or home that receives filtered, indirect sunlight approximately 90 minutes before sunset to avoid harsh shadows in photos.
- Construct a balloon arch using a flexible PVC frame or a specialized kit, alternating sizes of balloons to create a professional, organic texture that mimics a cloud.
- Set up a ‘Refresher Station’ featuring a linen-draped table with clear acrylic trays for appetizers, ensuring the food is ‘one-bite’ style to prevent any spills on formal wear.
- Direct the flow of guests by placing the beverage station away from the photo backdrop to prevent crowding and ensure the photographer has a clear line of sight.
- Conduct a ‘tech check’ on your speakers and lighting 30 minutes prior to arrival, ensuring the music is at a conversational volume and the mood is festive but relaxed.
How to Refresh Your Summer Front Porch for Maximum Curb Appeal

Why we love this
Your front porch is the handshake of your home, and refreshing it for summer feels like opening a window to let the fresh air in. We adore the sensory experience of walking up to a house that smells of jasmine and looks like a curated retreat, with the soft texture of a jute rug underfoot and the visual pop of vibrant greenery. It creates an immediate sense of belonging and peace, making the simple act of coming home feel like a special occasion. A well-styled porch isn’t just for the neighbors; it’s a sanctuary for you to enjoy your morning coffee while the world is still quiet and cool.
Essential Elements:
- A fresh, high-quality coir doormat.
- Layered outdoor rugs for texture and color.
- Symmetrical oversized planters with lush foliage.
- Comfortable seating with weather-resistant pillows.
- Polished or updated door hardware.
How to make it
- Begin by deep-cleaning the entire space, using a pressure washer on the siding and floor to remove winter grime and cobwebs, providing a pristine canvas.
- Choose a color palette of three colors—usually a neutral base with two accent shades—and select an outdoor rug that covers at least 60% of the porch floor area.
- Place a smaller, decorative coir mat directly over your larger base rug to create a designer ‘layered’ look that adds depth and visual interest to the entryway.
- Install heavy, high-quality planters on either side of the door; fill the bottom third with empty plastic bottles to reduce weight before adding premium potting soil and flowers.
- Finish by adding a seasonal wreath that echoes the colors of your planters, ensuring it is hung at eye level (roughly 57 inches from the ground) for maximum impact.
How to Bake Custom Graduation Cookies for a Personal Celebration

Why we love this
The scent of buttery vanilla and sweet almond extract wafting through the kitchen is the ultimate hallmark of a celebratory season. Custom graduation cookies are more than just a dessert; they are edible art pieces that honor a significant life milestone with every bite. We love the satisfying snap of a perfectly baked sugar cookie paired with the smooth, melt-in-your-mouth texture of royal icing. Seeing the graduate’s name and school colors rendered in sugar creates a sense of pride and joy that store-bought treats simply cannot replicate, making the dessert table the focal point of the party.
Essential Elements:
- High-quality unsalted butter and pure vanilla bean paste.
- Graduation-themed cookie cutters (caps, diplomas, years).
- Royal icing in multiple consistencies (piping and flood).
- Gel food coloring for vibrant school hues.
- Scribe tool or toothpick for smoothing icing.
How to make it
- Cream together room-temperature butter and sugar for at least 3-5 minutes until the mixture is pale and fluffy, which ensures a soft, non-spreading cookie base.
- Roll out the dough between two sheets of parchment paper to a uniform 1/4 inch thickness and chill in the freezer for 15 minutes before cutting shapes to maintain sharp edges.
- Bake at 350°F (175°C) just until the edges are a very pale gold; the center should look set but not browned, allowing the cookie to stay soft and tender.
- Prepare royal icing by whisking meringue powder, powdered sugar, and water; separate into bowls to create a thick ‘outline’ consistency and a thinner ‘flood’ consistency.
- Pipe the outlines of your shapes first, let them dry for 10 minutes, then ‘flood’ the centers with the thinner icing, using a scribe tool to pop any air bubbles for a glass-smooth finish.
How to Style a Cozy Deck for Relaxing Summer Evenings

Why we love this
Imagine the sun dipping below the horizon as you sink into a cloud of plush outdoor pillows, the soft glow of string lights reflecting in your wine glass. Styling a cozy deck is about creating an outdoor living room that feels every bit as comfortable as your indoor space, but with the added magic of the summer breeze. We love how the combination of soft textiles, warm wood tones, and flickering candlelight can lower your heart rate instantly. It’s the ultimate way to reclaim your evenings, turning a simple wooden platform into a private sanctuary for deep conversations and stargazing.
Essential Elements:
- Weatherproof sectional or oversized lounge chairs.
- Outdoor-safe throw blankets and textured pillows.
- Edison-style string lights or solar lanterns.
- A central coffee table or fire pit.
- Potted herbs for a gentle, calming aroma.
How to make it
- Define the space by laying down a large, soft outdoor rug that fits all the legs of your furniture, which anchors the ‘room’ and provides a soft surface for bare feet.
- Arrange your primary seating in a ‘U’ shape to encourage eye contact and conversation, ensuring there is a flat surface within arm’s reach of every seat for drinks.
- Drape string lights in a zig-zag pattern overhead, using sturdy poles or existing house eaves, ensuring they are high enough to not interfere with movement but low enough to feel intimate.
- Incorporate ‘living’ decor by placing pots of rosemary or lavender near the seating area; these provide a natural fragrance and help deter mosquitoes naturally.
- Layer in accessories like a woven tray on the coffee table and a basket of lightweight throw blankets for when the temperature drops after dark.
How to Maximize a Small Deck for Your Outdoor Oasis
Why we love this
There is a unique challenge and charm in transforming a limited footprint into a high-functioning outdoor escape. We love how small decks force you to be intentional, focusing on quality over quantity and clever design solutions that feel innovative. The result is often an incredibly intimate, jewel-box of a space where every square inch serves a purpose. The cozy constraints make the area feel like a secret hideaway, perfect for a solitary morning read or a quiet dinner for two, proving that you don’t need a sprawling backyard to enjoy the luxury of nature.
Essential Elements:
- Multifunctional furniture (like storage benches).
- Vertical gardening systems or railing planters.
- Fold-down or bistro-style tables.
- Slim-profile lounge seating.
- Wall-mounted lighting or sconces.
How to make it
- Measure your space precisely and select ‘apartment-sized’ furniture that maintains a clear walking path of at least 24 inches around all sides.
- Utilize the ‘vertical’ space by mounting cedar planter boxes directly to the walls or railings, which adds greenery without sacrificing precious floor real estate.
- Install a wall-mounted drop-leaf table that can be folded flat against the railing when not in use, providing a flexible dining area that disappears when needed.
- Choose light-colored furniture and rugs to make the space feel airy and open, avoiding dark, bulky pieces that can make a small deck feel claustrophobic.
- Hang a large outdoor-safe mirror on a shared wall to reflect the view and light, visually doubling the size of your oasis through a classic design trick.
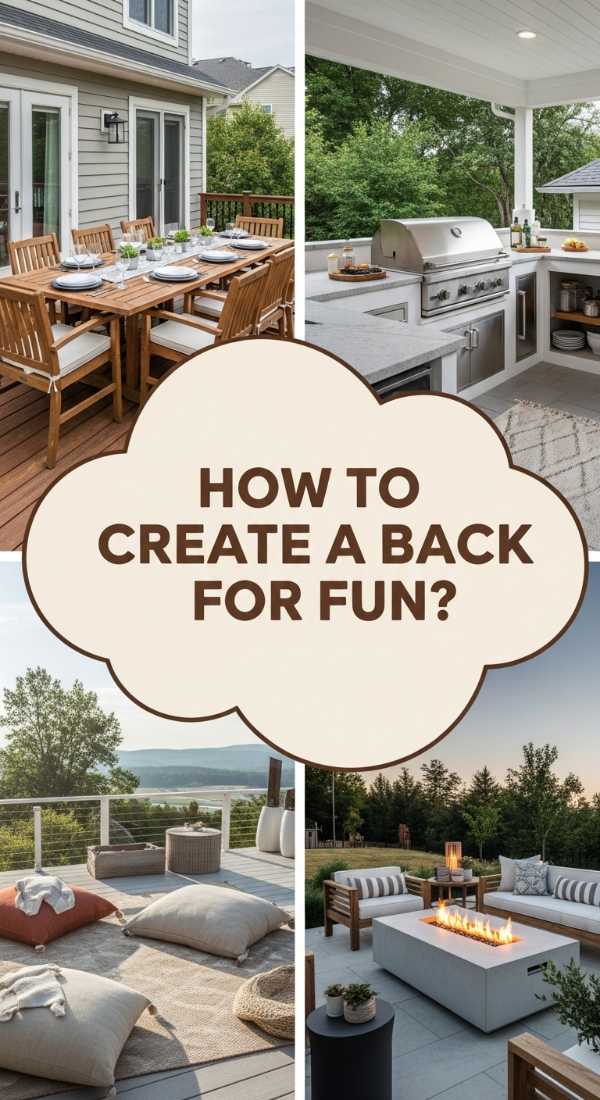
How to Create a Back Deck for Fun Family Gatherings

Why we love this
A family-oriented deck is the heart of summer entertaining, a place where the air is filled with the sizzle of the grill and the chaotic joy of children playing. We love this trend because it prioritizes durability and flow, ensuring that everyone from toddlers to grandparents feels welcome and comfortable. It’s about creating zones—one for cooking, one for dining, and one for lounging—that work together to facilitate seamless hosting. There’s a beautiful energy in a space designed for messy, happy gatherings where the flooring is tough enough for spills and the atmosphere is effortlessly laid back.
Essential Elements:
- Large dining table with easy-clean surfaces.
- A dedicated grilling or outdoor kitchen zone.
- Kid-friendly features like a built-in sandbox or chalk wall.
- Substantial, low-maintenance decking material (like composite).
- Pergola or umbrella for consistent shade.
How to make it
- Establish clear ‘traffic lanes’ by grouping furniture in a way that allows people to move from the house to the grill without bumping into the dining area.
- Select a dining table made of teak or high-grade aluminum that can be wiped down quickly, and pair it with stackable chairs for easy storage when the space needs to be cleared for games.
- Set up a ‘Safety First’ grill station, ensuring it is at least 10 feet away from the house and any overhanging branches, with a heat-resistant mat placed underneath.
- Create a designated ‘Kids’ Corner’ with an outdoor toy chest and a low table for coloring or snacks, which keeps the little ones entertained while the adults socialize.
- Install a large cantilever umbrella or a retractable awning to provide a ‘cool zone,’ ensuring the deck is usable even during the peak heat of the afternoon.
How to Design Dreamy Outdoor Prom Decorations for Perfect Photos

Why we love this
Creating an outdoor ‘photo studio’ for prom takes the pressure off finding a location and brings the celebration right to your doorstep. We love the whimsical, romantic feel of ethereal fabrics draped over trees and the soft shimmer of fairy lights tucked into the greenery. It turns a simple backyard into a fairytale setting where the textures of silk and tulle pop against the organic beauty of the outdoors. These decorations provide a controlled, beautiful environment for parents to capture those fleeting moments of their children all grown up, looking their absolute best in the soft light of evening.
Essential Elements:
- Sheer white draping fabric or chiffon.
- Floral pillars or a decorated garden arch.
- Copper-wire fairy lights for a ‘firefly’ effect.
- Vintage-style rugs or a clean wooden platform.
- Large floor lanterns with LED candles.
- Floral arrangements matching the prom corsages.
How to make it
- Identify a focal point, such as a large oak tree or a garden gate, and drape long lengths of sheer chiffon over the branches to create a soft, romantic vertical backdrop.
- Weave battery-operated fairy lights through the fabric and surrounding foliage, ensuring the wires are hidden and the lights provide a warm, golden glow rather than a harsh white one.
- Position two floral pillars (created by zip-tying faux or fresh blooms to tall garden stakes) on either side of the ‘stage’ to frame the subjects perfectly for portraits.
- Place a few large, varying-height lanterns at the base of the backdrop to add depth and provide ‘grounding’ light that illuminates the bottom of long dresses.
- Test the setup with a phone camera at various angles to ensure no power cords or distracting background elements are visible in the frame before the guests arrive.
How to Plant a Vibrant Summer Front Porch for a Colorful Welcome

Why we love this
There is nothing quite as life-affirming as the sight of a front porch overflowing with kaleidoscopic blooms and lush, green textures. We love the way vibrant flowers like petunias and geraniums can instantly lift the mood of anyone walking through the door, offering a sensory greeting of sweet floral scents and visual brilliance. Planting a summer porch is a form of living art that changes and grows with the season, providing a dynamic welcome that feels fresh every single day. It’s a way to express your personality and joy through nature, creating a high-energy focal point for your home’s exterior.
Essential Elements:
- Assorted high-quality ceramic or resin planters.
- ‘Thriller’ plants (like Purple Fountain Grass or Canna Lilies).
- ‘Filler’ plants (like Lantana or Marigolds).
- ‘Spiller’ plants (like Sweet Potato Vine or Trailing Lobelia).
- Premium moisture-control potting soil.
How to make it
- Choose a variety of plants that share the same sun requirements (e.g., all ‘Full Sun’ or all ‘Partial Shade’) to ensure they all thrive in the same container environment.
- Apply the ‘Thriller, Filler, Spiller’ design technique: place your tallest, most dramatic plant in the center, surround it with mid-height colorful mounding flowers, and tuck trailing vines around the edges.
- Fill your containers with high-quality potting soil, leaving about two inches at the top for watering, and mix in a slow-release fertilizer to sustain growth throughout the hot summer months.
- Water the containers deeply until water runs out of the drainage holes at the bottom, doing this early in the morning to prevent evaporation and leaf scorch from the midday sun.
- Deadhead (remove) spent blooms every few days to encourage the plant to produce new flowers and keep the porch looking tidy and vibrant all season long.
How to Decorate Elegant Graduation Cookies for Every Graduate

Why we love this
Decorating graduation cookies is an exercise in precision and love, where every piped line of gold luster and every perfectly centered ‘Class of 2024’ feels like a tribute to hard work. We love the sophisticated look of a minimalist color palette—think crisp whites, deep blacks, and metallic accents—which elevates the cookie from a simple snack to a high-end party favor. The process of layering textures, from the matte finish of the base icing to the shiny, raised details of the graduation cap’s tassel, creates a tactile and visual experience that delights guests and honors the graduate’s achievement with style.
Essential Elements:
- Edible gold luster dust and high-proof alcohol (for painting).
- Fine-tip piping bags and various metal tips (#1 and #2).
- Stencils for consistent lettering and logos.
- Tweezers for placing edible pearls or stars.
- Dehydrator or fan to speed up icing dry time.
How to make it
- Once your cookies are completely cool, flood them with a base layer of royal icing and allow them to dry for at least 8-12 hours in a low-humidity environment until the surface is rock-hard.
- Mix edible gold luster dust with a few drops of vodka or lemon extract to create a thick, paint-like consistency that will glide onto the icing without dissolving it.
- Use a very fine-tipped brush to paint the edges of ‘diploma’ cookies or the ‘2024’ numbers, using steady, confident strokes to ensure a clean, professional metallic finish.
- For the graduation cap tassels, pipe a small ‘button’ of icing, then drag three or four fine lines downward with a #1 tip to mimic the texture of silk threads.
- Allow the decorated cookies to set for another 4 hours before heat-sealing them in clear bags, which preserves the crispness of the cookie and the shine of the gold.
How to Build a Modern Deck for a Minimalist Home Aesthetic
[IMAGE_10]
Why we love this
Modern deck design is all about the beauty of simplicity, where clean lines, hidden fasteners, and a monochromatic palette create a sleek, architectural extension of the home. We love the calm, orderly feel of a minimalist deck, where the focus is on the quality of the materials—like rich ipe wood or cool-toned composite—rather than fussy ornamentation. It feels sophisticated and timeless, providing a neutral backdrop that allows the natural beauty of the surrounding landscape to take center stage. This aesthetic is perfect for the homeowner who values a ‘less is more’ approach, resulting in a space that feels contemporary and incredibly high-end.
Essential Elements:
- Composite decking in grey, charcoal, or light oak tones.
- Hidden fastening system for a screw-free surface.
- Black cable railing or glass panels for unobstructed views.
- Built-in linear LED lighting in the stairs and perimeter.
- Low-profile, geometric outdoor furniture.
How to make it
- Design the deck with a simple rectangular or L-shaped footprint, avoiding complex angles to maintain the clean, minimalist silhouette that defines the modern style.
- Install the deck boards using a hidden fastener system, which slots into the sides of the boards to keep the top surface perfectly smooth and free of visible screws or holes.
- Choose a railing system made of thin black stainless steel cables; this provides the necessary safety while remaining visually ‘light’ and allowing the eye to see right through to the yard.
- Incorporate ‘integrated’ features like wide, low stairs that run the entire length of one side, which can double as extra seating and creates a seamless transition to the grass.
- Select a monochromatic furniture set with sharp, straight lines and no decorative flourishes, placing it in a centered, symmetrical layout to emphasize the deck’s architectural balance.
The Joy of a Curated Summer
As we wrap up this look into my favorite trends for the season, I hope you feel inspired to take one of these projects and make it your own. Whether it’s the meticulous detail of a gold-leafed cookie or the sweeping transformation of your front porch, these efforts are what make a house a home. Summer is fleeting, but the memories we create in these beautifully styled spaces will last a lifetime. Happy hosting!