
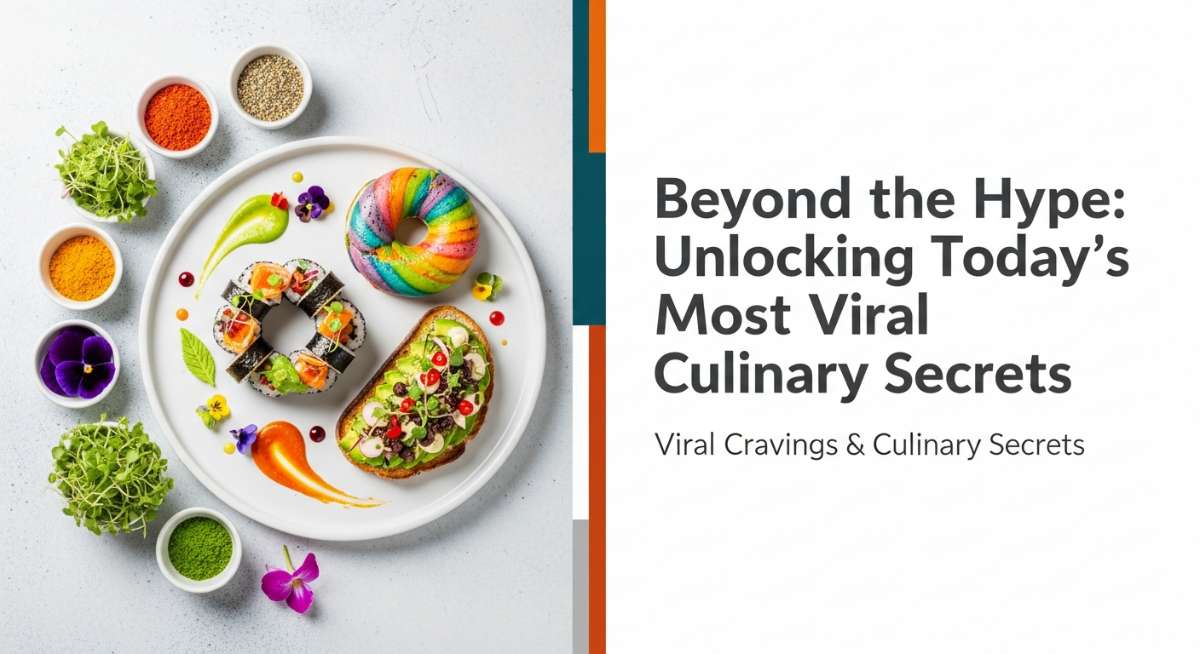
Hello, my loves! Welcome back to our little corner of the internet where the air always smells like fresh herbs and the coffee is never cold. Today, I’ve gathered you all close because I’ve been quietly experimenting in my sun-drenched kitchen, testing all those whispers of ‘the next big thing’ in the culinary world. We aren’t just looking for trends; we are looking for those soul-stirring flavors that turn a simple Tuesday night into a memory you’ll cherish forever.
There is something so deeply meditative about the rhythm of chopping, the sizzle of a pan, and the first bite of something you made with your own two hands. I want to share these secrets with you like a handwritten letter passed between best friends. From the crunch that echoes through the house to the softest, most whimsical cakes you’ve ever seen, these recipes are my gifts to you, meant to bring a little extra sparkle and a lot more flavor to your beautiful lives.
The Most Addictive Crispy Bang Bang Salmon Bites

Why we love this
There is a certain magic that happens when high-heat crispiness meets a creamy, spicy glaze that just dances across your palate. These little golden nuggets are the ultimate crowd-pleaser, offering a satisfying crunch that yields to buttery, flakey salmon inside every single bite. It feels like a high-end bistro appetizer served right in the comfort of your pajamas, providing that perfect balance of comfort and sophistication. You will find yourself making these on repeat because they truly nourish the soul while hitting every single flavor note you crave.
Ingredients
- Fresh salmon fillets, skin removed and cubed
- Cornstarch for dredging
- Half cup of mayonnaise
- Two tablespoons of Sriracha
- One tablespoon of honey
- Squeeze of fresh lime juice
- Avocado oil for frying
- Sliced green onions for garnish
How to make it
- Begin by patting your salmon cubes completely dry with a paper towel to ensure the ultimate level of crispiness.
- Toss the cubes gently in a bowl of cornstarch until every side is evenly and lightly coated, shaking off any excess powder.
- In a separate small bowl, whisk together the mayonnaise, Sriracha, honey, and lime juice until the sauce is smooth and vibrant.
- Heat avocado oil in a large skillet over medium-high heat until it shimmers, then add the salmon in a single layer.
- Fry the bites for about 2-3 minutes per side until they are golden brown and perfectly crispy to the touch.
- Remove the salmon from the pan, let it drain for a moment, and then toss the warm bites into your prepared creamy sauce.
Bakery Style Strawberry Scones with Glossy Glaze

Why we love this
Imagine waking up to the scent of sweet butter and roasting strawberries wafting through your hallways like a soft, warm embrace. These scones are light, airy, and boast those iconic craggy edges that provide a delightful contrast to their tender, fruit-filled centers. They aren’t just a breakfast item; they are an invitation to slow down, pour a cup of tea, and savor the sweetness of a quiet morning. The glossy glaze adds that professional bakery touch that makes you feel like an absolute kitchen goddess every time you serve them.
Ingredients
- 2 cups all-purpose flour
- 1/2 cup granulated sugar
- 1 tablespoon baking powder
- 1/2 cup cold unsalted butter, cubed
- 1/2 cup heavy cream (plus extra for brushing)
- 1 cup fresh strawberries, finely chopped
- 1 cup powdered sugar and 2 tablespoons milk for glaze
How to make it
- Whisk your dry ingredients together in a large chilled bowl to ensure everything is evenly distributed and airy.
- Using a pastry cutter or your fingertips, work the cold butter into the flour until the mixture resembles coarse crumbs.
- Gently fold in your chopped strawberries, being careful not to overwork them so the dough doesn’t turn entirely pink.
- Pour in the heavy cream and stir just until a shaggy dough forms, then turn it out onto a lightly floured surface.
- Pat the dough into a circle about one inch thick, cut into eight wedges, and place them on a prepared baking sheet.
- Bake at 400 degrees for 18-20 minutes, then allow them to cool slightly before drizzling with a whisked mixture of powdered sugar and milk.
Pro Level Homemade Sushi Masterclass

Why we love this
Mastering the art of the sushi roll is like learning a new language of love and precision that rewards you with every bite. There is an incredible sense of accomplishment in creating these beautiful, colorful rounds that look like edible jewels on your dinner plate. It transforms a simple meal into an interactive experience, allowing you to customize every texture and flavor to your exact heart’s desire. Once you understand the secret to the perfect rice, you will never look at store-bought sushi the same way again, my loves.
Ingredients
- Sushi-grade fish (tuna or salmon)
- Premium short-grain sushi rice
- Rice vinegar, sugar, and salt for seasoning
- Nori (dried seaweed sheets)
- Cucumber, avocado, and scallions
- Soy sauce, wasabi, and pickled ginger for serving
How to make it
- Rinse your sushi rice multiple times until the water runs clear, then cook it according to package directions for a fluffy finish.
- While the rice is still warm, gently fold in a mixture of rice vinegar, sugar, and salt, then let it cool to room temperature.
- Place a sheet of nori on a bamboo rolling mat and spread a thin, even layer of rice over the surface, leaving a small gap at the top.
- Arrange your thinly sliced fish and vegetables in a neat horizontal line across the lower third of the rice-covered nori.
- Using the mat as a guide, roll the sushi tightly away from you, applying gentle pressure to create a firm, even cylinder.
- Wet a very sharp knife with water and slice the roll into bite-sized pieces, cleaning the blade between every single cut.
Ultimate Keto Dinner Ideas For Weight Loss

Why we love this
Choosing a healthier lifestyle should never mean sacrificing the rich, decadent flavors that make dinner the highlight of your entire day. These keto-friendly ideas focus on high-quality fats and vibrant proteins that keep you feeling satiated and energized without any of the heavy carb-slump. It’s about celebrating whole ingredients like creamy avocado, zesty garlic, and tender greens in ways that feel truly indulgent and luxurious. You can achieve your goals while still feeling like you are dining at a five-star steakhouse every single night of the week.
Ingredients
- Large zucchini for zoodles
- Grass-fed ground beef or Italian sausage
- Heavy whipping cream and freshly grated parmesan
- Fresh cloves of garlic and organic baby spinach
- Extra virgin olive oil and crushed red pepper flakes
- Pink Himalayan salt and cracked black pepper
How to make it
- Spiralize your zucchini into long, elegant strands and set them aside on a paper towel to drain any excess moisture.
- In a large skillet, brown your protein of choice over medium heat until it is fully cooked and slightly caramelized.
- Add minced garlic and red pepper flakes to the pan, stirring for one minute until the fragrance fills your entire kitchen.
- Pour in the heavy cream and bring to a gentle simmer, then stir in the parmesan until the sauce becomes thick and velvety.
- Toss in the baby spinach and zucchini noodles, cooking for just two minutes until the greens are wilted and the noodles are tender-crisp.
- Plate the dish immediately and top with an extra sprinkle of cheese and a drizzle of high-quality olive oil for richness.
Whimsical Wildflower Cake Decorating Inspiration

Why we love this
Turning a simple cake into a canvas for nature’s beauty is one of the most rewarding ways to express your inner cottage-core spirit. These cakes look like they’ve been plucked straight from a fairytale meadow, bringing a sense of wonder and whimsy to any celebration or afternoon tea. It’s a technique that requires no professional piping skills, only a gentle hand and an appreciation for the organic shapes of the earth. Every petal and leaf adds a story to your dessert, making it almost—but not quite—too beautiful to eat.
Ingredients
- A baked and cooled layer cake of your choice
- Smooth vanilla or lemon buttercream frosting
- Assorted edible flowers (pansies, violas, or chamomile)
- Fresh herbs like mint or thyme for foliage
- Offset spatula for a smooth finish
- Culinary tweezers for precise flower placement
How to make it
- Apply a generous ‘crumb coat’ of frosting to your cake and chill for thirty minutes to ensure a perfectly smooth final surface.
- Apply the final layer of buttercream, using your offset spatula to create either a sleek finish or a rustic, textured look.
- Carefully wash and pat your edible flowers dry, ensuring there is no moisture left on the petals before you begin decorating.
- Using your tweezers, gently press the largest flowers onto the side or top of the cake to create your focal points.
- Fill in the gaps with smaller blossoms and sprigs of herbs to mimic the natural growth pattern of a wild, sunlit garden.
- Step back frequently to check the balance of your design, adding tiny petals for a ‘falling’ effect around the base of the cake.
The Creamiest Chia Seed Pudding Hack
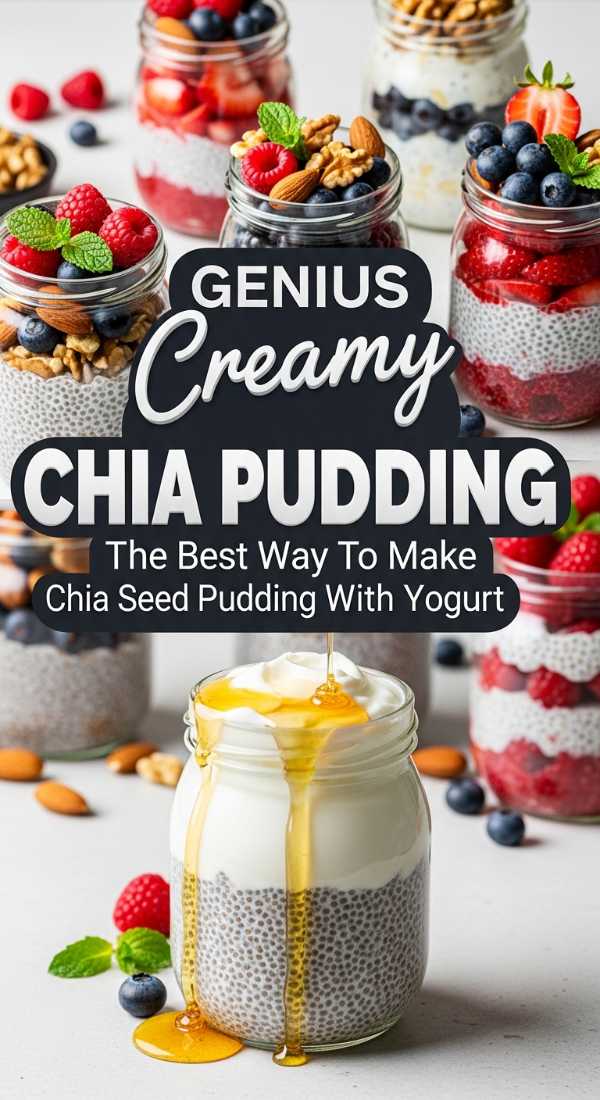
Why we love this
If you have struggled with the texture of traditional chia pudding, this revolutionary blending hack is going to change your morning routine forever. By blending the seeds, you transform them into a silky, mousse-like consistency that feels more like a decadent chocolate pudding than a health food. It is the ultimate meal-prep win, providing a high-fiber, high-protein start to your day that tastes like a complete treat. You get all the incredible nutritional benefits of the seeds in a format that is purely velvet on the tongue.
Ingredients
- 1/4 cup chia seeds
- 1 cup unsweetened nut milk
- 1 tablespoon maple syrup or honey
- 1 teaspoon pure vanilla extract
- A pinch of sea salt
- Optional: Cocoa powder or fresh berries
How to make it
- Combine your chia seeds, nut milk, sweetener, vanilla, and salt in a glass jar and stir vigorously to combine.
- Let the mixture sit in the refrigerator for at least two hours, or even overnight, so the seeds can fully hydrate.
- Transfer the thickened mixture into a high-speed blender and add any flavorings like cocoa powder if you desire.
- Blend on high for 45-60 seconds until the seeds are completely broken down and the mixture is perfectly smooth and creamy.
- Pour the pudding back into small jars or bowls and let it set in the fridge for another thirty minutes to firm up.
- Serve with a topping of fresh fruit, a dollop of yogurt, or a sprinkle of toasted nuts for the perfect crunch.
Better Than Restaurant Caesar Salad Dressing

Why we love this
There is a world of difference between a bottled dressing and a fresh, handmade Caesar emulsion that packs a punch of umami and bright citrus. This recipe is the secret weapon of every home chef, offering a depth of flavor that elevates a humble head of romaine into a masterpiece. It’s salty, tangy, and incredibly creamy, with that signature garlic bite that lingers just long enough to make you reach for another forkful. Once you taste this, you’ll realize why this classic salad has remained a favorite for decades across the globe.
Ingredients
- 1 fresh egg yolk at room temperature
- 2-3 anchovy fillets, minced into a paste
- 1 clove of garlic, finely grated
- 1 teaspoon Dijon mustard
- 1 tablespoon fresh lemon juice
- 1/2 cup neutral oil or light olive oil
- 1/4 cup finely grated Parmigiano-Reggiano
How to make it
- In a medium bowl, whisk together the egg yolk, anchovy paste, grated garlic, mustard, and lemon juice until well combined.
- While whisking constantly, begin adding the oil literally drop by drop to start the emulsification process properly.
- Once the mixture begins to thicken and look like mayonnaise, you can increase the oil flow to a very thin, steady stream.
- Continue whisking vigorously until all the oil is incorporated and the dressing is thick, pale, and incredibly smooth.
- Fold in the grated parmesan cheese and season with a generous amount of cracked black pepper to finish the profile.
- Taste the dressing and add an extra squeeze of lemon or a pinch of salt if needed, then toss with crisp lettuce immediately.
Healthy Avocado Egg Salad For Meal Prep
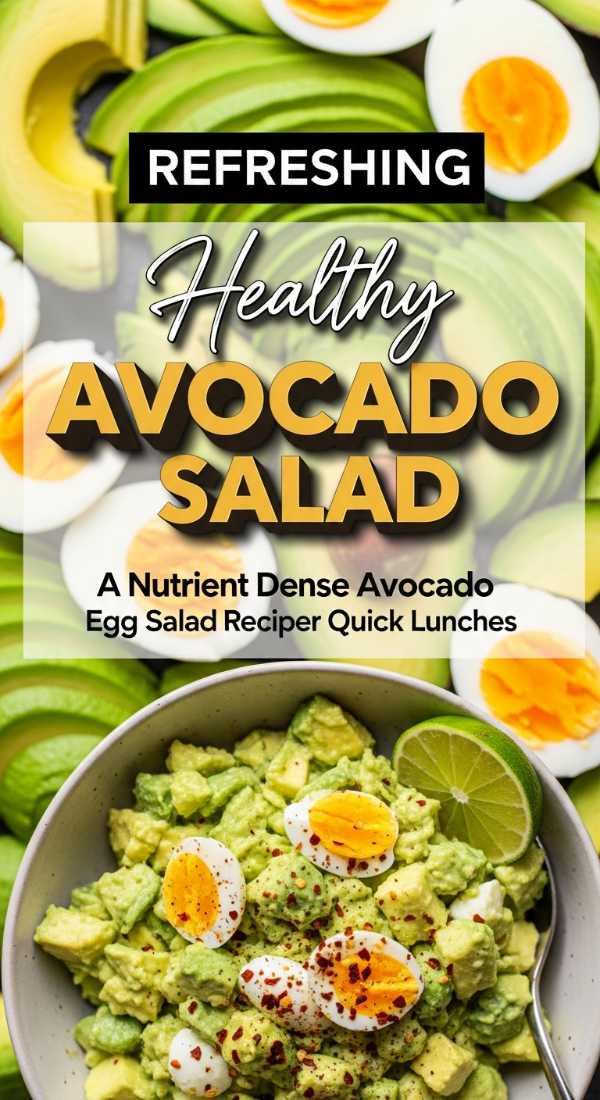
Why we love this
This is the modern, vibrant update to the classic egg salad that we all needed for our busy weekday lunches. By swapping out traditional mayonnaise for ripe, mashed avocado, you get a beautiful green hue and a dose of heart-healthy monounsaturated fats. It’s incredibly creamy without feeling heavy, and the addition of lime juice keeps everything bright and prevents the avocado from browning. It’s the perfect filling for a grain bowl, a piece of sourdough toast, or even just enjoyed with some crisp cucumber slices.
Ingredients
- 6 large hard-boiled eggs, peeled
- 1 large ripe avocado
- 1 tablespoon fresh lime or lemon juice
- 2 tablespoons chopped fresh cilantro or chives
- 1/4 cup finely diced red onion
- Salt, pepper, and a pinch of smoked paprika
How to make it
- In a medium-sized mixing bowl, mash the ripe avocado with the lime juice until it reaches your desired level of smoothness.
- Roughly chop the hard-boiled eggs into bite-sized pieces, ensuring you have a nice mix of yolk and white textures.
- Gently fold the chopped eggs into the avocado mash, being careful not to over-mix so the eggs retain some structure.
- Add in the diced red onion and your choice of fresh herbs to provide a necessary crunch and a burst of fragrance.
- Season the mixture generously with salt, black pepper, and a dash of smoked paprika for a subtle, earthy depth of flavor.
- Store in an airtight container with a piece of plastic wrap pressed directly onto the surface to keep it fresh for 24 hours.
Secret Pink Gelatin Trick For Perfect Desserts

Why we love this
This is the pro-level baker’s secret that adds a touch of ethereal, rosy glow and structural perfection to your most delicate sweet creations. Using a tiny hint of natural pink tint within your gelatin allows fruit tarts, mousses, and panna cottas to look vibrant and professional without artificial dyes. It creates a ‘finished’ look that catches the light beautifully, making your desserts the undisputed star of any dinner party or social media feed. It’s a subtle touch that whispers of high-end patisserie skill while remaining incredibly simple to execute at home.
Ingredients
- 1 packet of unflavored gelatin powder
- 1/4 cup cold filtered water
- 1 teaspoon of beet juice or hibiscus tea (for the pink tint)
- 1 cup of fruit puree or sweetened cream base
- A dash of vanilla bean paste for flavor
How to make it
- Sprinkle the gelatin powder evenly over the cold water in a small heat-proof bowl and let it ‘bloom’ for five minutes.
- Add your teaspoon of beet juice or concentrated hibiscus tea to the bloomed gelatin to achieve that perfect soft pink hue.
- Gently heat the mixture over a double boiler or in the microwave for 10-second bursts until the gelatin is completely melted and clear.
- Slowly temper the warm gelatin into your room-temperature fruit puree or cream base, stirring constantly to avoid any lumps.
- Strain the entire mixture through a fine-mesh sieve into your final molds to ensure the texture is absolutely flawless and glass-like.
- Allow the dessert to set in the refrigerator for at least four hours until it is firm enough to unmold or serve.
Flavorful Sweet Potato Taco Bowls

Why we love this
These bowls are a celebration of color, texture, and the kind of nourishment that makes you feel vibrant from the inside out. The natural sweetness of the roasted potatoes pairs so beautifully with the smoky spices and the zesty lime crema, creating a symphony in every bite. It’s a versatile meal that works perfectly for family dinners or as a pre-prepped lunch that you’ll actually look forward to eating all day long. Filling, fiber-rich, and utterly delicious, it’s proof that plant-forward eating is anything but boring or restrictive.
Ingredients
- 2 large sweet potatoes, cubed
- 1 can black beans, rinsed and drained
- 1 cup cooked quinoa or brown rice
- Taco seasoning (cumin, chili powder, garlic powder)
- For crema: Greek yogurt, lime juice, and cilantro
- Toppings: Sliced radish, avocado, and pickled onions
How to make it
- Toss your cubed sweet potatoes with olive oil and taco seasoning, then roast at 400 degrees until they are tender and caramelized.
- While the potatoes roast, warm your black beans in a small saucepan with a splash of water and a pinch of salt.
- Whisk together the Greek yogurt, lime juice, and finely chopped cilantro in a small bowl until you have a smooth, drizzlable crema.
- Build your bowls by starting with a base of warm quinoa, then adding a generous scoop of the roasted sweet potatoes and beans.
- Arrange your fresh toppings like avocado and radish slices in decorative sections to make the bowl look as good as it tastes.
- Finish the dish with a heavy drizzle of the lime crema and a few extra sprigs of cilantro for a final pop of color.
Bringing the Magic Home
Thank you so much for spending this time with me, my loves. I hope these culinary secrets spark a little fire in your kitchen and a lot of joy in your hearts. Remember, cooking isn’t about perfection; it’s about the love you fold into the dough and the stories you share over the table. Go forth, create something beautiful, and never forget that you are the most important ingredient in every dish you make. Sending you so much warmth and flavor until we meet again!