

There is something inherently magical about a lazy Sunday afternoon when the sun spills across your kitchen counter, illuminating the vibrant colors of fresh produce and the steam rising from a freshly baked treat. For years, we have been obsessed with the classic charcuterie board, but lately, I have found myself craving something more eclectic, more personal, and frankly, more delicious. The viral food board trend is taking over my feed, and for good reason—it turns a simple meal into a communal art project that tastes even better than it looks.
This isn’t just about throwing things on a tray; it is about creating a sensory experience that invites everyone to linger a little longer at the table. Whether you are hosting a festive brunch or just looking to elevate a quiet weeknight, these boards allow you to mix and match textures, temperatures, and flavors in a way that traditional plating never could. It is the ultimate hack for the modern host who wants to impress without the stress of a five-course meal.
Join me as we explore ten incredible components that can turn any wooden board into a viral-worthy masterpiece. From the deepest, fudgiest brownies to the crispiest roasted vegetables, we are diving deep into the recipes that make this food board hack a total game changer for your lifestyle and your palate.
How to bake perfect fudgy brownies?

Why we love this
There is nothing quite like the intoxicating aroma of dark chocolate wafting through the house as a batch of fudgy brownies reaches its peak in the oven. These aren’t your average cakey squares; these are dense, decadent, and possess that elusive, paper-thin crinkle top that shatters delicately with every bite. The texture is almost like a truffle—rich and velvety on the tongue—with a deep cocoa resonance that lingers long after the last crumb is gone, making them the perfect centerpiece for a dessert-focused food board.
Ingredients
- 1 cup unsalted butter, melted and cooled slightly
- 2 cups granulated sugar
- 2 large eggs plus 1 yolk, room temperature
- 1 tablespoon pure vanilla extract
- 3/4 cup Dutch-processed cocoa powder
- 3/4 cup all-purpose flour
- 1/2 teaspoon sea salt
- 1 cup semi-sweet chocolate chunks
How to make it
- Preheat your oven to 350°F (175°C) and line an 8×8 inch square baking pan with parchment paper, leaving an overhang on the sides for easy removal.
- In a large mixing bowl, whisk the melted butter and granulated sugar vigorously for about 2 minutes. The sugar won’t fully dissolve, but the mixture should look pale and well-combined; this step is crucial for that shiny, crackly top.
- Add the eggs, extra yolk, and vanilla extract. Whisk for another 2-3 minutes until the mixture increases slightly in volume and looks smooth and ribbony.
- Sift in the cocoa powder, flour, and salt. Use a rubber spatula to gently fold the dry ingredients into the wet mixture. Stop as soon as you see no more streaks of flour to avoid over-mixing, which leads to a cakey texture rather than a fudgy one.
- Gently fold in the chocolate chunks to ensure every bite has a pocket of melted chocolate.
- Pour the batter into the prepared pan and smooth the top with your spatula.
- Bake for 25-30 minutes. You are looking for the edges to be set while the center remains slightly soft. A toothpick inserted should come out with a few moist crumbs attached, not clean.
- Allow the brownies to cool completely in the pan before lifting them out and slicing. This patience ensures the fudgy structure sets perfectly.
How to make creamy pumpkin soup?

Why we love this
As the weather turns crisp, a bowl of creamy pumpkin soup feels like a warm hug for your soul. Its texture is incredibly silky, gliding over the palate with a luxurious richness that is balanced by the earthy sweetness of roasted pumpkin and a hint of warming spices. The vibrant orange hue adds a stunning pop of color to any food board, while the scent of toasted nutmeg and garlic creates an atmosphere of pure autumnal comfort that makes you want to curl up by a fire.
Ingredients
- 2 lbs sugar pumpkin or butternut squash, peeled and cubed
- 1 large yellow onion, chopped
- 3 cloves garlic, smashed
- 1 can (14 oz) full-fat coconut milk
- 3 cups vegetable broth
- 1 teaspoon ground ginger
- 1/2 teaspoon ground nutmeg
- Salt and black pepper to taste
- Roasted pumpkin seeds for garnish
How to make it
- In a large heavy-bottomed pot or Dutch oven, heat a tablespoon of olive oil over medium-high heat. Add the onions and cook for 5-7 minutes until they are translucent and just beginning to caramelize.
- Add the smashed garlic cloves and cook for another 60 seconds until fragrant, being careful not to burn the garlic.
- Toss in the cubed pumpkin, ginger, and nutmeg. Stir well to coat the pumpkin in the aromatics and spices, allowing the flavors to bloom for 2 minutes.
- Pour in the vegetable broth, ensuring the liquid just covers the pumpkin pieces. Bring the mixture to a rolling boil, then immediately reduce the heat to low.
- Cover the pot and simmer for 20-25 minutes, or until the pumpkin is fork-tender and falling apart.
- Use an immersion blender directly in the pot to puree the soup until it is completely smooth. If you use a stand blender, work in batches and be careful with the hot liquid.
- Stir in the coconut milk to add that signature creamy finish. Heat through on low for another 5 minutes, but do not let it boil again.
- Season generously with salt and pepper. Serve in small bowls on your board, topped with roasted pumpkin seeds for a necessary crunch.
How to prepare authentic street tacos?

Why we love this
Street tacos are the ultimate social food, offering a burst of bright, zingy flavors and charred textures that wake up every taste bud. The combination of tender, marinated meat nestled in a warm, slightly toasted corn tortilla is timeless, but it’s the fresh toppings—the sharp bite of raw white onion and the herbaceous punch of cilantro—that truly transport you to a bustling night market. They add an interactive element to your food board, inviting guests to build their own perfect bite with a squeeze of lime.
Ingredients
- 1 lb flank steak or chicken thighs, thinly sliced
- 2 tablespoons soy sauce
- Juice of 2 limes
- 2 cloves garlic, minced
- 1 teaspoon chili powder
- Small corn tortillas
- 1 cup finely diced white onion
- 1 cup fresh cilantro, chopped
- Radish slices and lime wedges for serving
How to make it
- In a medium bowl, whisk together the soy sauce, lime juice, minced garlic, and chili powder. Add your sliced meat and toss thoroughly. Let this marinate for at least 30 minutes in the fridge to tenderize the fibers.
- Heat a cast-iron skillet over high heat until it is smoking slightly. This high heat is essential for achieving the “street style” char on the meat without overcooking the interior.
- Add a splash of high-smoke-point oil (like avocado oil) and sear the meat in batches. Do not crowd the pan; let the meat develop a dark, crispy crust for about 3-4 minutes per side. Remove and set aside.
- Wipe the skillet and place your corn tortillas directly on the hot surface for 30 seconds per side. Look for small charred bubbles to appear; this softens the tortilla and enhances the corn flavor.
- Stack two tortillas together (the traditional way!) and fill with a generous portion of the seared meat.
- Top immediately with the diced white onion and fresh cilantro. The heat from the meat will slightly soften the onion.
- Arrange on your board with plenty of lime wedges and thinly sliced radishes for a cool, crunchy contrast to the smoky meat.
How to make homemade matcha lattes?
Why we love this
A homemade matcha latte is more than just a drink; it is a ritual of wellness and vibrant energy. The powder’s stunning emerald green color is a feast for the eyes, while the flavor profile offers a unique balance of grassy earthiness and creamy sweetness. When whisked correctly, it develops a frothy, cloud-like foam that feels incredibly indulgent on the lips, making it the perfect sophisticated beverage to serve alongside a morning brunch board or an afternoon snack spread.
Ingredients
- 1.5 teaspoons high-quality ceremonial grade matcha powder
- 2 ounces hot water (approx. 175°F / 80°C)
- 1 cup oat milk or whole milk
- 1-2 teaspoons honey or maple syrup
- Optional: A drop of vanilla extract
How to make it
- Sift the matcha powder through a fine-mesh strainer into a wide, shallow bowl. This step is non-negotiable as it removes all lumps, ensuring a smooth, grit-free latte.
- Pour in the hot water. It is vital that the water is not boiling; boiling water will scorch the delicate tea leaves and create a bitter taste. Aim for just below a simmer.
- Using a bamboo whisk (chasen) or a small handheld electric frother, whisk the matcha and water in a rapid “W” motion for about 45-60 seconds. You are looking for a thick, frothy layer of tiny bubbles to form on the surface.
- In a separate small saucepan or milk frother, heat your milk until it is steaming but not boiling. If you want a thick foam, use an electric frother once the milk is warm.
- Stir your sweetener and vanilla into the hot milk.
- Pour the matcha concentrate into your serving glass, then slowly pour the frothed milk over the top. The green and white layers will swirl beautifully together.
- Serve immediately while the foam is stiff and the temperature is perfect.
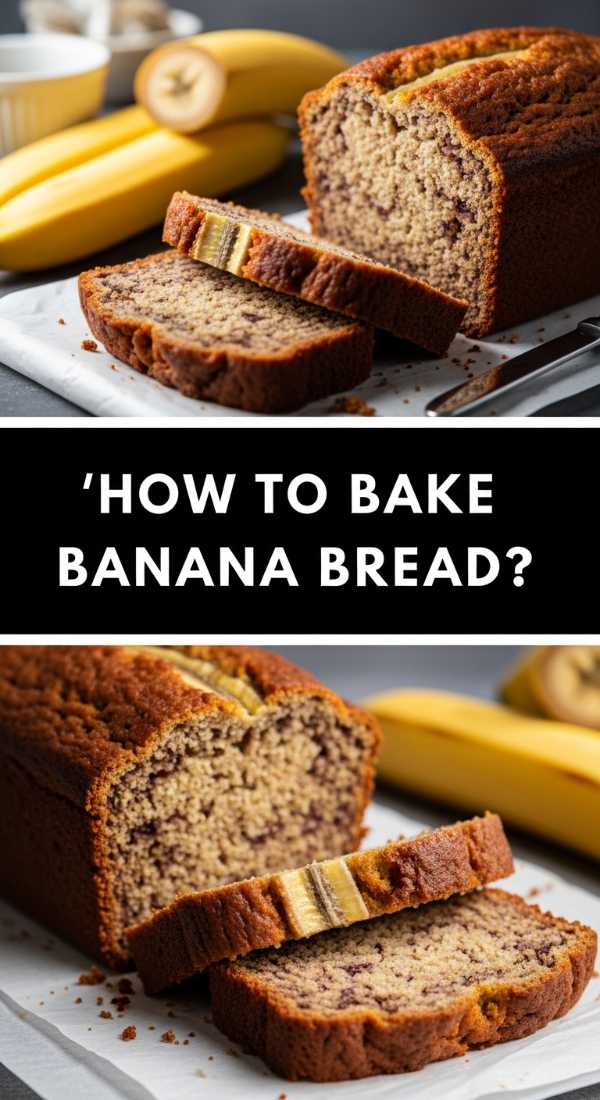
How to bake soft banana bread?
Why we love this
Banana bread is the ultimate nostalgic comfort food, filling the kitchen with a sweet, caramelized scent that reminds us of home. A truly perfect loaf is incredibly moist and soft, with a tight crumb that almost melts in your mouth. The sweetness comes naturally from overripe bananas, accented by a hint of cinnamon and the rich depth of brown sugar. Sliced thick and served with a smear of salted butter, it adds a rustic, cozy charm to any viral food board.
Ingredients
- 3 very overripe bananas, mashed
- 1/2 cup unsalted butter, melted
- 3/4 cup brown sugar, packed
- 1 large egg
- 1 teaspoon vanilla extract
- 1.5 cups all-purpose flour
- 1 teaspoon baking soda
- 1/2 teaspoon salt
- 1 teaspoon ground cinnamon
How to make it
- Preheat your oven to 350°F (175°C) and grease a 9×5 inch loaf pan thoroughly with butter or non-stick spray.
- In a large bowl, mash the bananas with a fork until they are mostly smooth with only small lumps remaining. The more spots on the banana, the better the flavor!
- Whisk in the melted butter and brown sugar until the mixture is glossy. Add the egg and vanilla, whisking again until fully incorporated.
- In a separate bowl, whisk together the flour, baking soda, salt, and cinnamon. Sifting these together helps prevent clumps of soda in your finished bread.
- Slowly fold the dry ingredients into the wet banana mixture using a spatula. Mix only until the flour streaks disappear. Over-mixing will activate the gluten and make the bread tough rather than soft.
- Pour the batter into the prepared loaf pan and smooth the top. You can sprinkle a little extra brown sugar or a split banana on top for a professional look.
- Bake for 50-60 minutes. Check for doneness by inserting a long skewer into the center; it should come out clean.
- Let the bread cool in the pan for 10 minutes before transferring to a wire rack. Slicing it while too hot can cause it to crumble, so let it set for the best texture.
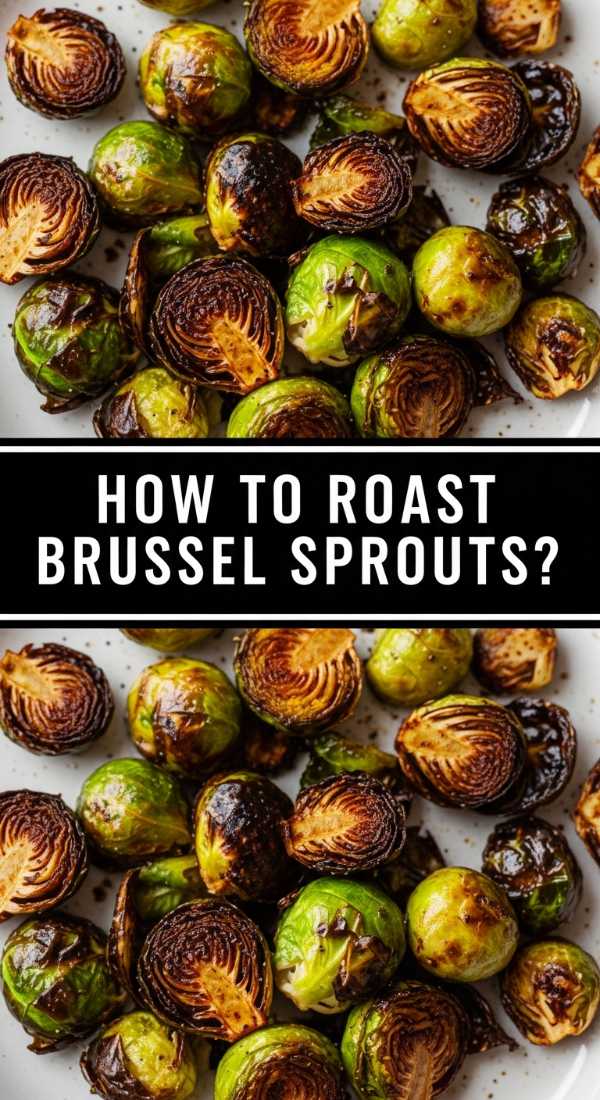
How to roast crispy brussel sprouts?
Why we love this
Forget the soggy sprouts of the past; when roasted at high heat, Brussels sprouts become addictive little morsels of crispy, salty goodness. The outer leaves turn dark and potato-chip thin, while the centers remain tender and sweet. The contrast of the charred edges against a drizzle of tangy balsamic glaze makes them a sophisticated addition to a savory board, offering a healthy but deeply satisfying crunch that usually disappears faster than the cheese!
Ingredients
- 1 lb Brussels sprouts, trimmed and halved
- 2 tablespoons extra virgin olive oil
- 1/2 teaspoon kosher salt
- 1/4 teaspoon cracked black pepper
- 2 tablespoons balsamic glaze
- Optional: 1/4 cup grated parmesan cheese
How to make it
- Place a large sheet pan in the oven and preheat to 425°F (220°C). Heating the pan beforehand ensures that the sprouts sizzle the moment they touch the surface, leading to maximum crispiness.
- In a bowl, toss the halved Brussels sprouts with olive oil, salt, and pepper. Ensure every nook and cranny is coated.
- Carefully remove the hot sheet pan and spread the sprouts across it. For the best results, place them all cut-side down. This creates a flat surface for caramelization.
- Roast for 20-25 minutes. Do not toss them halfway through; leaving them undisturbed allows that deep golden-brown crust to form on the flat side.
- Check the sprouts. They should be tender when pierced with a fork and the outer leaves should be dark and crisp.
- Immediately after removing from the oven, toss with the balsamic glaze while they are still piping hot. The heat will help the glaze thicken and coat the sprouts evenly.
- If using, sprinkle with parmesan cheese and serve warm on your food board as a savory highlight.
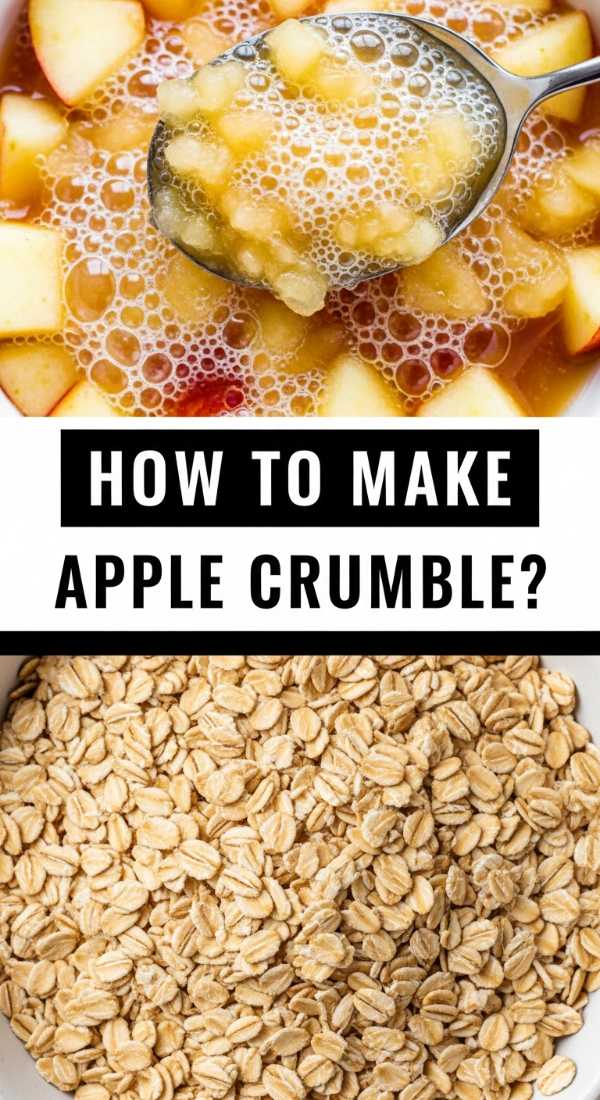
How to make classic apple crumble?

Why we love this
Apple crumble is the epitome of rustic elegance, combining the tart, softened bite of seasonal apples with a buttery, oat-filled topping that provides a satisfying snap. As it bakes, the juices from the fruit bubble up and mingle with the cinnamon and sugar, creating a natural syrup that is absolutely divine. It brings a sense of warmth and abundance to a food board, especially when served in individual ramekins or as a large, scoopable center-piece that invites everyone to dig in.
Ingredients
- 6 Granny Smith apples, peeled and sliced
- 1/2 cup granulated sugar
- 1 tablespoon ground cinnamon
- 1 cup rolled oats
- 1 cup all-purpose flour
- 1 cup brown sugar
- 1/2 cup cold unsalted butter, cubed
How to make it
- Preheat your oven to 375°F (190°C) and lightly grease a baking dish.
- In a large bowl, toss the sliced apples with the granulated sugar and cinnamon. Arrange them in an even layer in the bottom of the baking dish.
- In another bowl, combine the oats, flour, and brown sugar. Whisk to break up any large sugar clumps.
- Add the cold, cubed butter to the dry mixture. Using your fingers or a pastry cutter, work the butter into the flour and oats until the mixture resembles coarse crumbs with some pea-sized chunks of butter remaining. This texture is key to a “crumble” rather than a paste.
- Sprinkle the topping evenly over the apples, covering them completely.
- Bake for 40-45 minutes. The topping should be a deep golden brown, and you should see the apple juices bubbling around the edges of the dish.
- Let it stand for 10 minutes before serving. This allows the juices to thicken so the crumble isn’t too runny when scooped onto your board.
How to cook creamy chicken soup?

Why we love this
This isn’t just a basic soup; it is a velvety, rich masterpiece that feels like pure luxury in a bowl. The combination of tender shredded chicken, softened mirepoix, and a silky cream base creates a depth of flavor that is both sophisticated and incredibly comforting. Its thick consistency makes it perfect for dipping crusty bread or artisanal crackers, turning it into a hearty anchor for a savory-themed grazing board that promises to keep everyone full and happy.
Ingredients
- 2 chicken breasts, cooked and shredded
- 2 tablespoons butter
- 1 onion, diced
- 2 carrots, sliced into rounds
- 2 stalks celery, chopped
- 1/4 cup all-purpose flour
- 4 cups chicken bone broth
- 1 cup heavy cream
- 1 teaspoon dried thyme
- Salt and pepper to taste
How to make it
- In a large pot, melt the butter over medium heat. Add the onion, carrots, and celery. Sauté for about 8-10 minutes until the vegetables are softened and the onions are sweet and translucent.
- Sprinkle the flour over the vegetables and stir constantly for 2 minutes. This cooks out the raw flour taste and creates a roux that will thicken the soup.
- Slowly whisk in the chicken broth, one cup at a time. Ensure you scrape the bottom of the pot to incorporate all the flour and flavorful bits (the fond).
- Bring the mixture to a simmer and add the thyme, salt, and pepper. Let it cook for 10 minutes until the liquid has slightly thickened.
- Stir in the shredded chicken and the heavy cream. Turn the heat down to low and let the soup gently heat through for another 5 minutes. Do not let it reach a hard boil once the cream is added, as this can cause it to separate.
- Adjust seasoning to taste and ladle into small, warm mugs to place on your board for easy sipping and dipping.
How to make no-bake cheesecake?

Why we love this
No-bake cheesecake is a miracle of modern dessert—light, airy, and impossibly smooth without ever needing to touch the oven. It has a bright, tangy profile thanks to the cream cheese and a hint of lemon, sitting atop a buttery graham cracker crust that provides the perfect salty-sweet crunch. Because it sets in the fridge, it is a stress-free addition to a food board that looks incredibly polished, especially when topped with fresh berries or a drizzle of fruit coulis.
Ingredients
- 2 cups graham cracker crumbs
- 1/2 cup unsalted butter, melted
- 16 oz cream cheese, softened to room temperature
- 1 cup powdered sugar
- 1 teaspoon vanilla extract
- 1 teaspoon lemon juice
- 1.5 cups heavy whipping cream, chilled
How to make it
- In a bowl, mix the graham cracker crumbs and melted butter until it feels like wet sand. Press this firmly into the bottom of a springform pan or individual mini-molds. Chill in the freezer for 15 minutes to set.
- In a large mixing bowl, beat the softened cream cheese until it is completely smooth and lump-free. This is the most important step for a silky texture!
- Gradually add the powdered sugar, vanilla, and lemon juice, beating until well-combined and fluffy.
- In a separate cold bowl, whip the heavy cream until stiff peaks form. Be careful not to over-whip it into butter.
- Gently fold the whipped cream into the cream cheese mixture using a spatula. Use slow, circular motions to keep the air in the cream, which gives the cheesecake its mousse-like lightness.
- Pour the filling over the prepared crust and smooth the top with an offset spatula.
- Refrigerate for at least 6 hours, or ideally overnight. The cold temperature is what allows the proteins and fats to bond and create a sliceable structure.
- Garnish with fresh fruit right before placing it on your viral board.
How to make fluffy pancake stacks?
[IMAGE_10]
Why we love this
There is a primal joy in a towering stack of fluffy pancakes, especially when they are so light they practically melt when hit with warm maple syrup. These pancakes are all about the lift—thick, airy, and golden-brown with slightly crisp edges. They serve as the perfect canvas for a breakfast board, surrounded by fresh berries, whipped butter, and crispy bacon, creating a brunch experience that feels like a celebration of the weekend.
Ingredients
- 1.5 cups all-purpose flour
- 3.5 teaspoons baking powder
- 1 teaspoon salt
- 1 tablespoon white sugar
- 1.25 cups milk
- 1 egg
- 3 tablespoons butter, melted and cooled
- 1 teaspoon vanilla extract
How to make it
- In a large bowl, whisk together the flour, baking powder, salt, and sugar. The generous amount of baking powder is the secret to the ultimate fluffiness.
- Make a well in the center of the dry ingredients and pour in the milk, egg, melted butter, and vanilla.
- Whisk the ingredients together until just combined. It is vital to leave some lumps in the batter! If you whisk until smooth, the pancakes will be tough and flat rather than airy.
- Let the batter rest for 10 minutes. This allows the baking powder to activate and the flour to hydrate, resulting in a better rise.
- Heat a non-stick griddle or skillet over medium heat. Lightly grease with a tiny bit of butter or oil.
- Pour 1/4 cup of batter onto the griddle for each pancake. Cook until bubbles form on the surface and the edges look set and matte (about 2-3 minutes).
- Flip carefully and cook for another 1-2 minutes until the other side is golden brown.
- Stack them high on your board and keep them warm under a clean kitchen towel until you are ready to serve.
Conclusion
Stepping away from the traditional charcuterie board and embracing these viral food board hacks is about more than just a trend—it is about reclaiming the joy of eating together. By incorporating these detailed, chef-inspired recipes onto a single communal surface, you create a tapestry of flavors that invites conversation and connection. Whether it’s the crunch of a Brussels sprout or the decadence of a fudgy brownie, these boards turn every meal into a memorable event. So grab your biggest wooden plank and start building your own masterpiece today!