
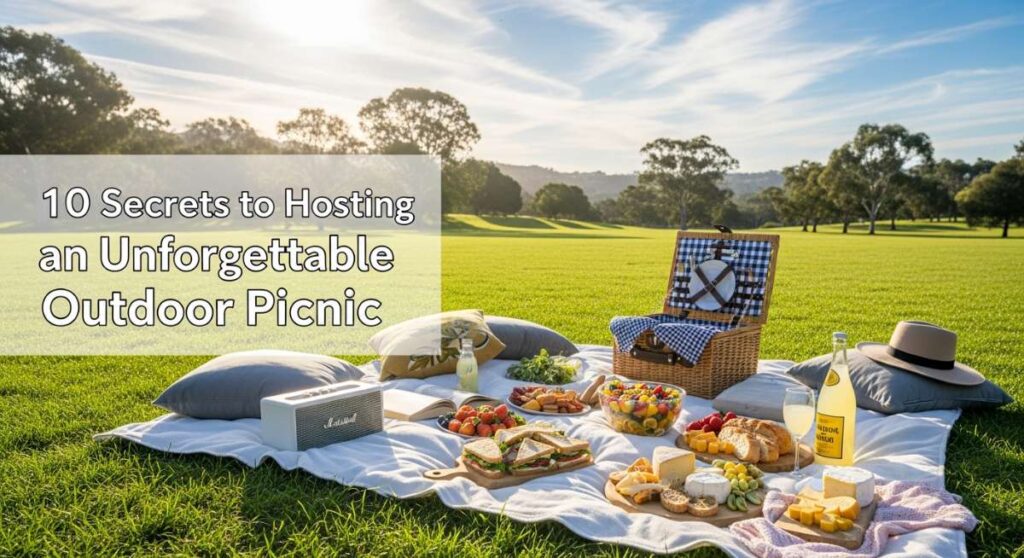
10 Secrets to Hosting an Unforgettable Outdoor Picnic
Hello, my loves! There is something truly magical about the way the golden sun filters through the trees, casting that soft, honey-hued glow over a spread of delicious treats. As the seasons shift and the air turns sweet with the scent of blooming jasmine, my heart always yearns for those long, slow afternoons spent lounging on the grass with the people I cherish most. I believe a picnic isn’t just a meal; it’s a cloud-soft embrace of nature and friendship, a chance to disconnect from the digital hum and reconnect with the soul.
Today, I am so excited to share my ultimate guide to creating a picnic party that feels like a dream. Whether you’re celebrating a milestone or just the beauty of a Saturday afternoon, these little secrets will help you weave together an experience that lingers in your guests’ hearts long after the sun goes down. Let’s create some magic together, shall we?
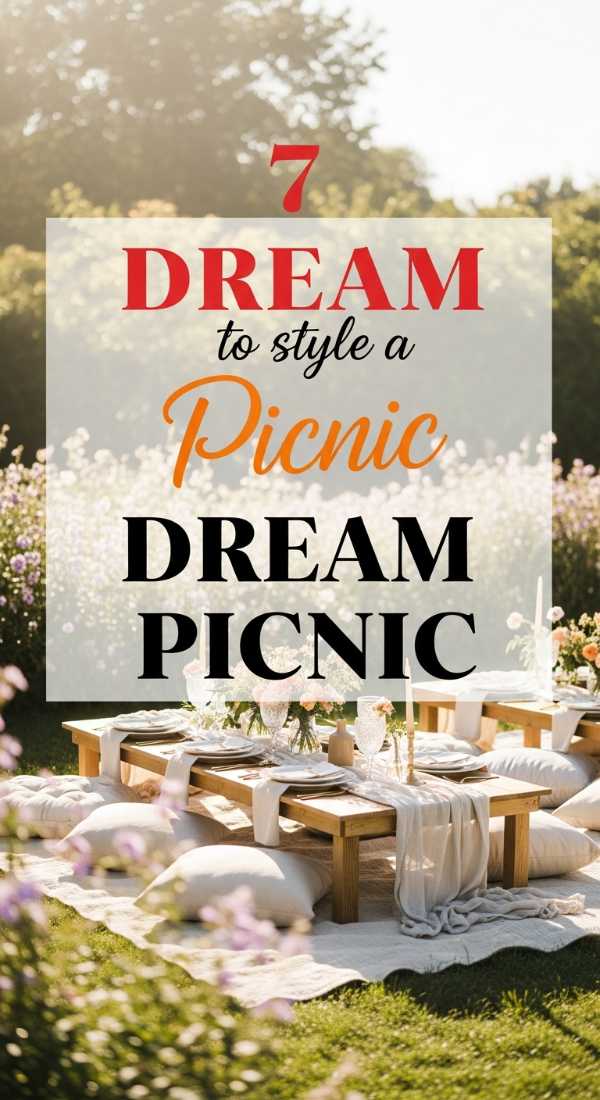
7 Simple Steps to Style a Dream Picnic
Why to love this Party Idea:
Styling your picnic is like painting a canvas where comfort meets whimsy. It sets a stage where your loves feel instantly pampered and relaxed, turning a simple patch of grass into a boutique sanctuary. This approach blends tactile textures with organic elements to create a visual poem.
Essential Items:
- Linen or cotton throw blankets
- Assorted velvet and woven floor cushions
- A low-profile wooden pallet or crate
- Dried flower bundles
- Vintage cloth napkins
How to Prepare:
- Layer three different textured blankets for a plush base.
- Scatter oversized cushions around the perimeter for relaxed lounging.
- Place a low wooden surface in the center to act as your ‘anchor’ table.
- Drape a cheesecloth runner across the central surface.
- Add small vases of dried lavender to resist the wind.
- Use stones or heavy decorative weights to keep napkins in place.
- Finalize with a sprinkle of rose petals across the blankets.
Budget Range
- Thrifted linens: $10 – $20
- Floor cushions (set of 4): $40 – $60
- Pallet table: Free/DIY
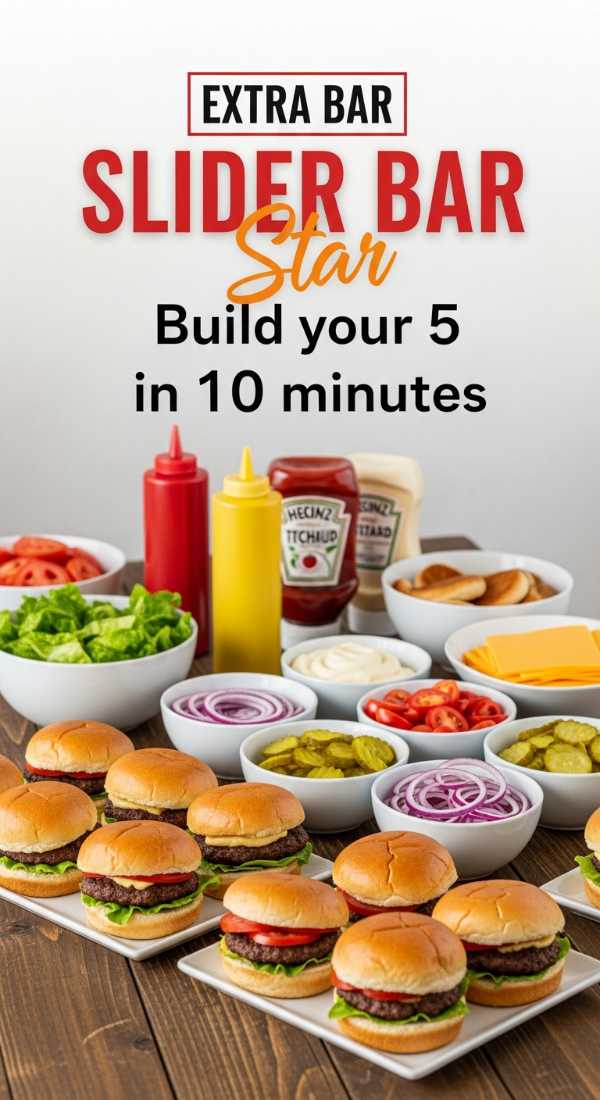
Build Your 5 Star Slider Bar in 10 Minutes
Why to love this Party Idea:
Slider bars are the ultimate stress-free way to feed a crowd while keeping things interactive. There’s something so playful about guests building their own tiny, gourmet sandwiches, and it ensures everyone gets exactly what they crave.
Essential Items:
- Mini brioche buns
- Pre-cooked pulled pork or rotisserie chicken
- Sliced gouda and sharp cheddar
- Arugula and pickled red onions
- Truffle mayo and honey mustard
How to Prepare:
- Slice all brioche buns and arrange them in a wicker basket.
- Place hot proteins in insulated glass jars to keep them warm.
- Arrange cheeses on a marble slab for easy picking.
- Set out small bowls for the arugula and pickles.
- Provide small wooden spreaders for the sauces.
Budget Range
- Brioche buns (2 packs): $8 – $12
- Assorted meats and cheeses: $25 – $35
- Artisan condiments: $15
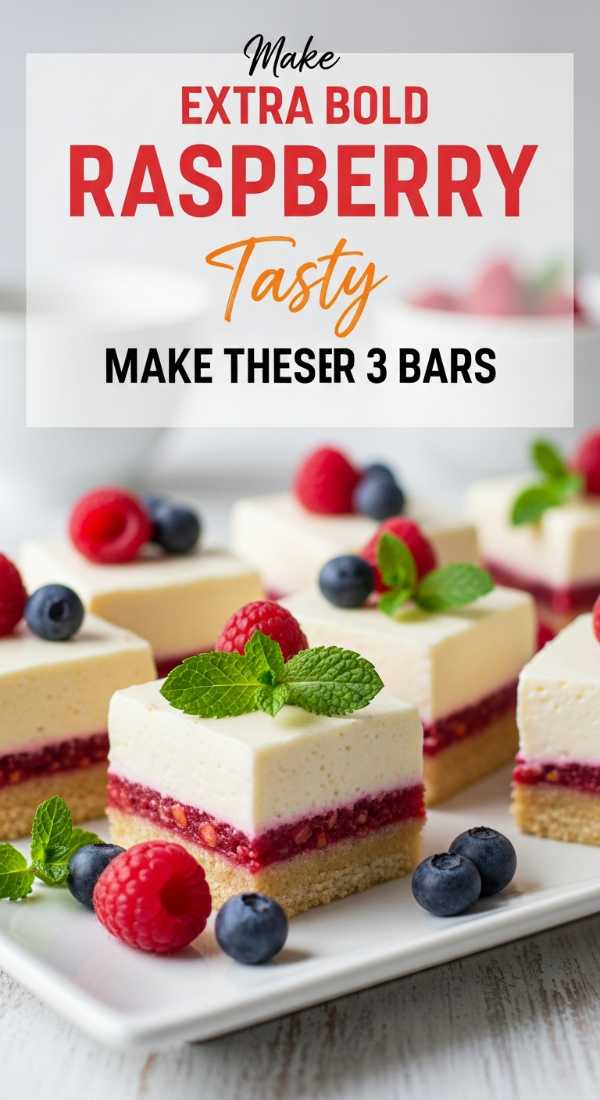
Make These 3 Layer Raspberry Bars for Your Party
Why to love this Party Idea:
These bars are like a sweet summer sunset in every bite. With a buttery crust, a tart fruit center, and a crumble top, they are easy to transport and even easier to fall in love with. They offer that homemade, ‘baked with love’ feeling that store-bought treats just can’t match.
Essential Items:
- Fresh or frozen raspberries
- All-purpose flour and cold butter
- Granulated sugar and a pinch of salt
- Lemon zest
- Vanilla extract
How to Prepare:
- Mix flour, butter, and sugar to create a shortbread base; press half into a pan.
- Bake the base for 15 minutes until lightly golden.
- Simmer raspberries with sugar and lemon zest to create a thick jam.
- Spread the jam over the baked base.
- Crumble the remaining dough over the top and bake until bubbly.
Budget Range
- Baking staples (flour/sugar/butter): $10
- Fresh raspberries (2 pints): $8 – $10
Create 4 DIY Floating Floral Garlands for Under $20
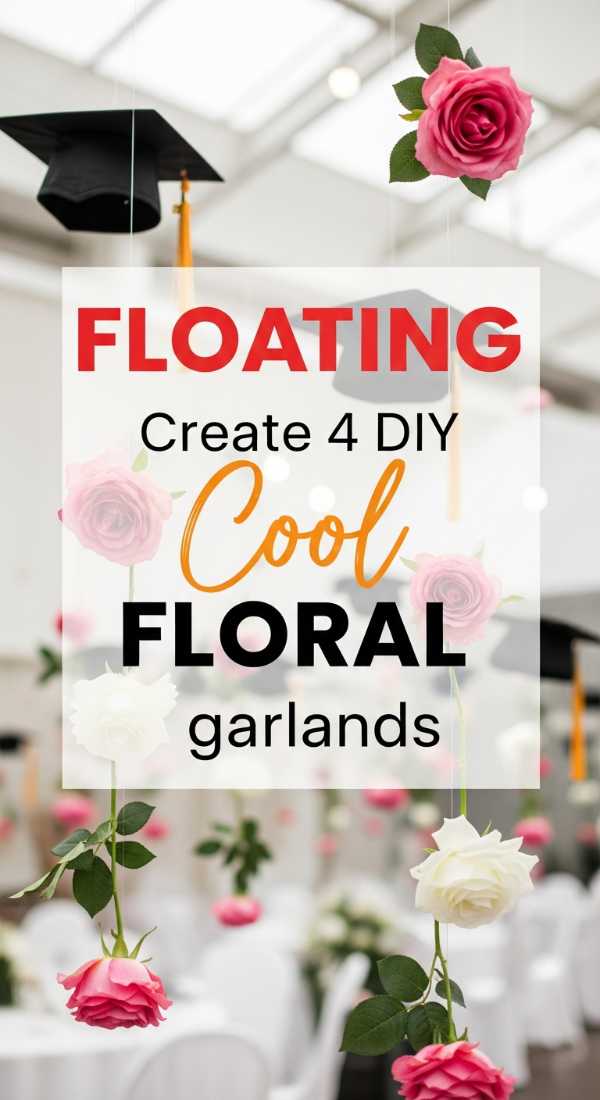
Why to love this Party Idea:
Nothing says ‘ethereal’ like flowers suspended in mid-air. These garlands add a vertical dimension to your picnic, making it feel like an enchanted forest. It’s a high-impact decor piece that costs less than a fancy lunch!
Essential Items:
- Clear fishing line
- Large sewing needle
- Assorted sturdy blooms (carnations or marigolds work best)
- Small gold beads (optional)
How to Prepare:
- Thread the fishing line through the needle.
- Pierce through the base of the flower heads, spacing them 5 inches apart.
- Tie a small knot or thread a bead under each flower to hold it in place.
- Tie the top of each line to a low-hanging tree branch.
Budget Range
- Fishing line: $3
- Bulk flowers (grocery store): $12 – $15
Hang 6 Types of Fairy Lights for the Perfect Vibe
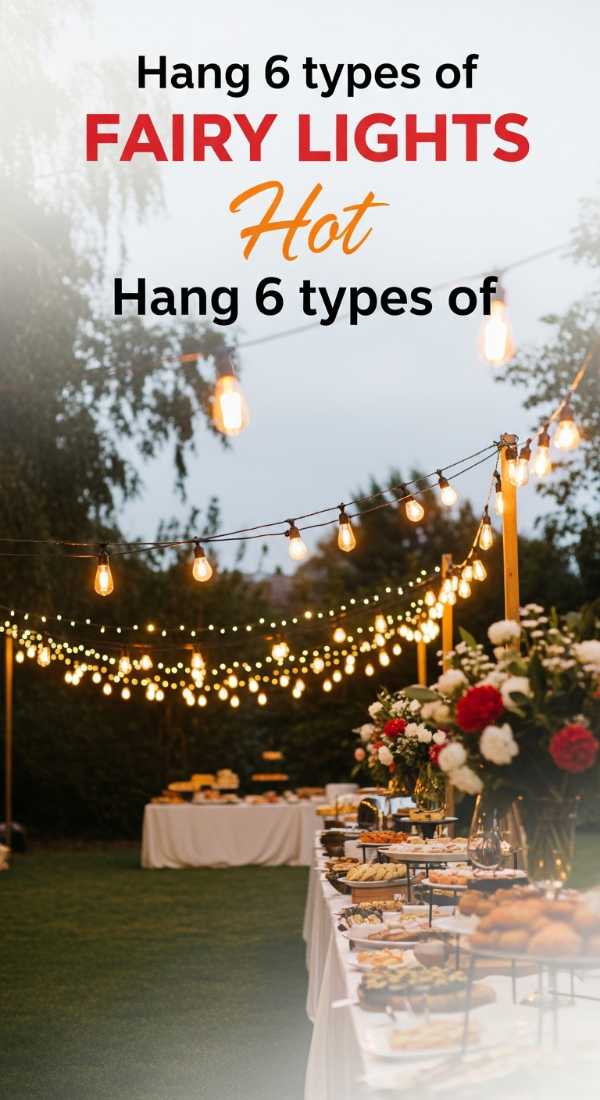
Why to love this Party Idea:
As the daylight begins to fade, fairy lights provide a warm, flickering glow that feels like captured starlight. Lighting is the secret ingredient that transitions your picnic from a casual lunch to a romantic evening affair.
Essential Items:
- Battery-operated copper wire lights
- Solar-powered globe lights
- Hanging star lanterns
- Clip-on umbrella lights
- LED tea lights in mason jars
- Curtain string lights for the trees
How to Prepare:
- Wrap copper wire lights around the trunks of nearby trees.
- Hang star lanterns at varying heights from the branches.
- Place LED tea lights inside jars and scatter them around the seating area.
- Drape globe lights along the perimeter of the blankets.
- Ensure all battery packs are hidden under pillows or décor.
- Turn everything on 15 minutes before the sun fully sets.
Budget Range
- Variety pack of LED lights: $30 – $50
- Mason jars: $1 each
Prepare Your Party Drink Bucket in 5 Minutes
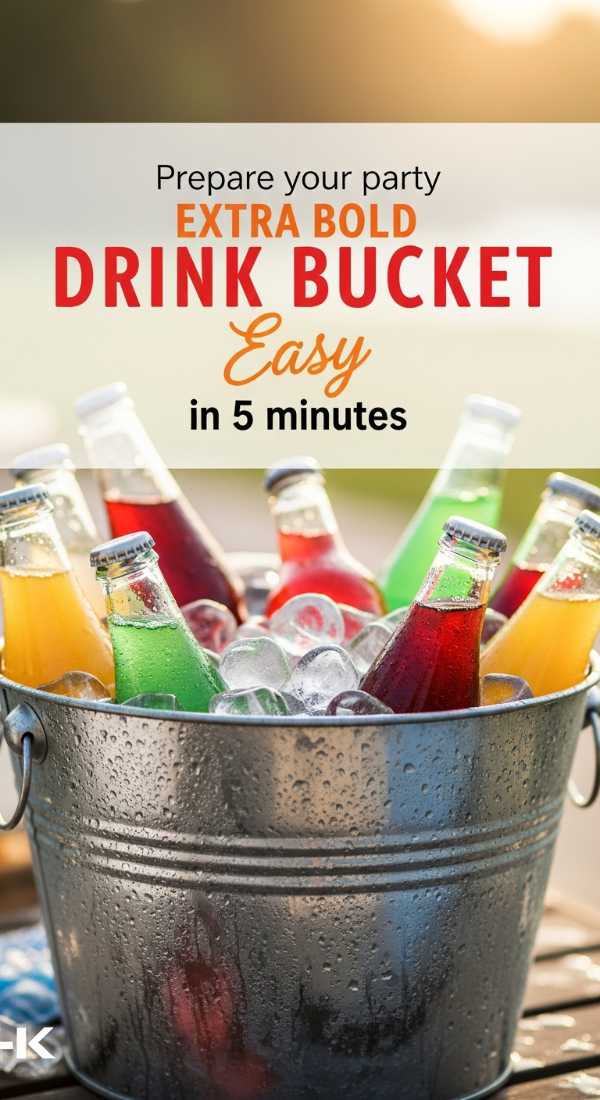
Why to love this Party Idea:
A beautifully styled drink bucket is both functional and refreshing. It keeps the hydration flowing without anyone needing to hunt through a clunky plastic cooler, maintaining that soft aesthetic we love.
Essential Items:
- Large galvanized or copper bucket
- Plenty of ice
- Sparkling water and artisan sodas
- Fresh mint sprigs and citrus slices
- Edible flower ice cubes (optional)
How to Prepare:
- Fill the bucket halfway with ice.
- Tuck in your bottles and cans, alternating colors.
- Add more ice to fill the gaps.
- Garnish the top of the ice with fresh mint and citrus rounds for a pop of color.
- Place a bottle opener on a ribbon tied to the handle.
Budget Range
- Galvanized bucket: $15 – $25
- Bag of ice and beverages: $20 – $40
Assemble 8 Gourmet Appetizer Skewers for Guests
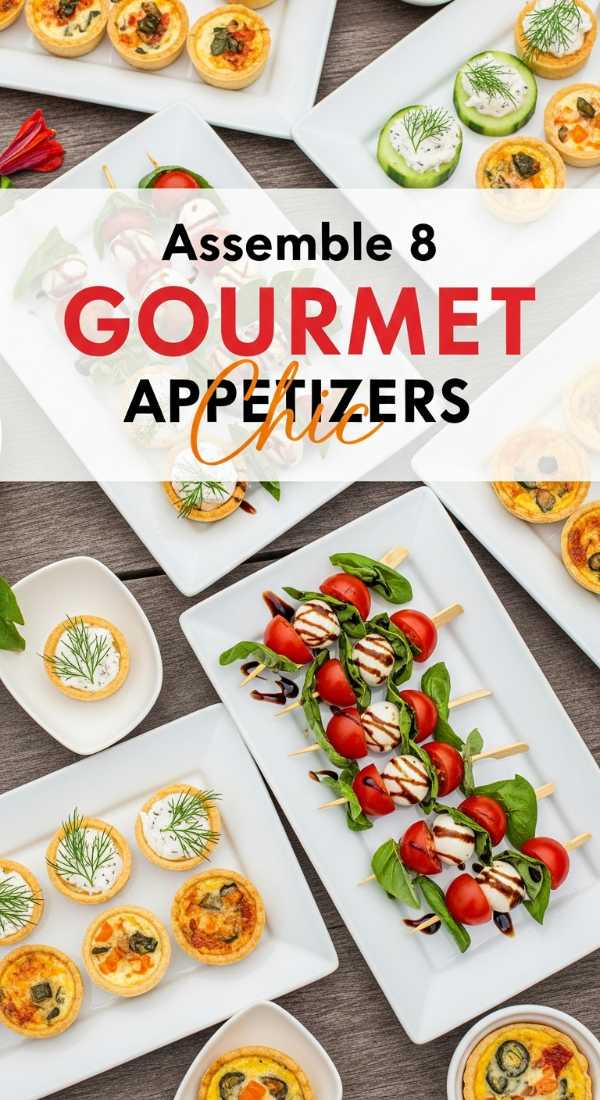
Why to love this Party Idea:
Skewers are the ultimate ‘clean hands’ picnic food. They are elegant, colorful, and packed with flavor, allowing your loves to nibble while they chat without the need for plates or forks.
Essential Items:
- Bamboo skewers
- Caprese style: Mozzarella, tomato, basil
- Greek style: Cucumber, olive, feta
- Fruit style: Melon, prosciutto, mint
- Dessert style: Brownie bite, strawberry
How to Prepare:
- Prep all ingredients into bite-sized cubes or rounds.
- Thread 3-4 complementary items onto each bamboo skewer.
- Drizzle savory skewers with balsamic glaze just before serving.
- Arrange them on a flat wooden board in a circular pattern.
- Keep them chilled until the very moment the party starts.
Budget Range
- Skewers (pack of 100): $5
- Assorted fresh ingredients: $30 – $40
Add 4 Graduation Touches to Your Picnic Party

Why to love this Party Idea:
If you’re celebrating a graduate, these subtle touches honor their achievement without losing the relaxed picnic vibe. It adds a layer of sentiment and pride to your gathering.
Essential Items:
- Small scrolls tied with ribbon (as napkins)
- ‘Class of’ custom stir sticks
- Polaroid camera for ‘future memories’
- A ‘wisdom jar’ for guests to leave notes
How to Prepare:
- Roll cloth napkins and tie them with black ribbon to look like diplomas.
- Set up a small station with the wisdom jar and slips of paper.
- Place the Polaroid camera on a tray with extra film.
- Insert the custom stir sticks into the drink bucket or individual glasses.
Budget Range
- Ribbon and paper: $10
- Polaroid film: $15 – $20
Organize Your Picnic Buffet in 5 Easy Zones
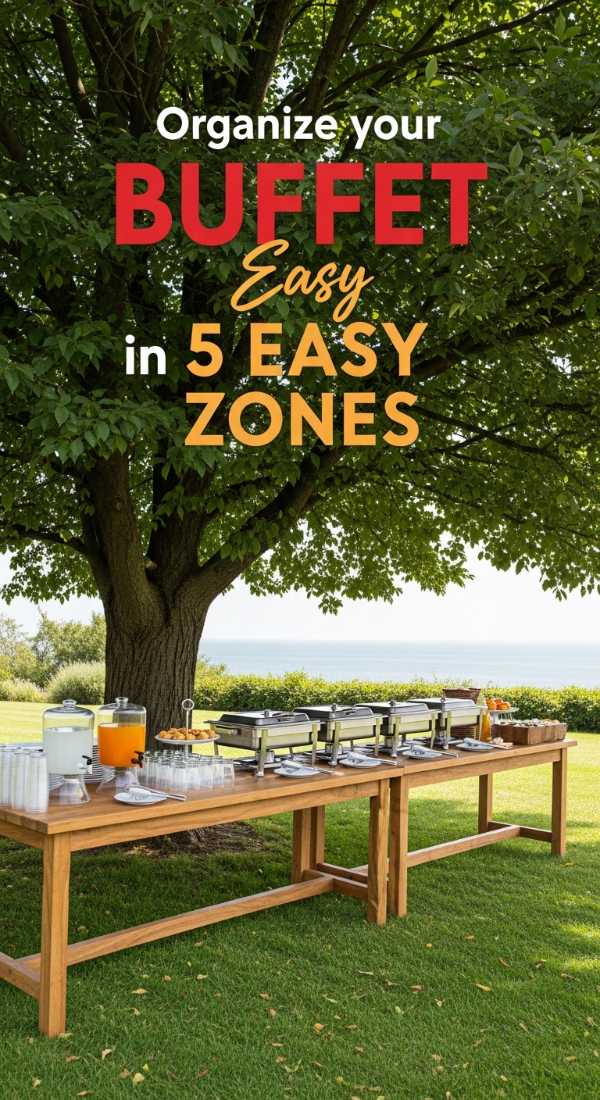
Why to love this Party Idea:
Organization is the key to a flow that feels effortless. By creating ‘zones,’ you prevent crowding and ensure your guests know exactly where to find everything they need to feel pampered.
Essential Items:
- Label cards or small chalkboards
- Serving trays of different heights
- Napkin and utensil baskets
- A dedicated ‘trash and recycling’ hidden station
How to Prepare:
- Zone 1: The Welcome Drinks (the first thing guests see).
- Zone 2: Savory Appetizers and Skewers.
- Zone 3: The Main Event (the Slider Bar).
- Zone 4: The Sweets Corner (Raspberry bars).
- Zone 5: The Essentials (Napkins, wipes, and the wisdom jar).
Budget Range
- Small chalkboards: $10 – $15
- Serving trays (melamine or wood): $20 – $40
Set Up Your 10 Person Floor Seating Arrangement
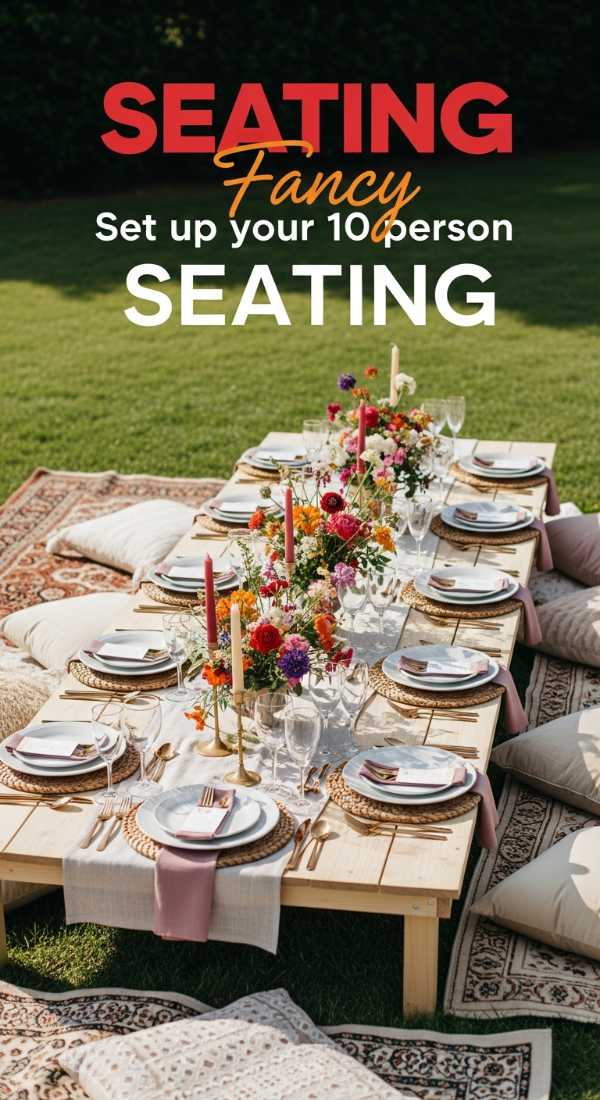
Why to love this Party Idea:
Traditional tables can feel a bit formal and stiff. Floor seating encourages people to lean in, linger longer, and feel truly grounded in the moment. It’s the ultimate way to foster deep conversation and shared laughter.
Essential Items:
- 2 Large outdoor rugs
- 10-12 medium-sized pillows
- 2 low coffee tables or crates pushed together
- Outdoor poufs
How to Prepare:
- Lay the rugs side-by-side to create a massive ‘safe zone’ from the grass.
- Line up the crates or low tables down the center.
- Place two pillows at every ‘seat’—one for sitting, one for the back.
- Ensure there is enough space between guests to stretch their legs.
- Place a small basket of ‘picnic essentials’ (sunscreen, bug spray) at the corner.
Budget Range
- Outdoor rugs (on sale): $40 – $80
- Pillows (repurposed or cheap inserts): $50
A Beautiful Beginning to Your Summer Stories
As the last of the sliders are enjoyed and the fairy lights begin to twinkle against the twilight sky, you’ll realize that the true magic wasn’t just in the decor or the food. It was in the space you created for love to breathe. These moments are the ones we tuck away in our hearts like pressed flowers. I hope these secrets inspire you to head outside, spread a blanket, and celebrate the simple, stunning gift of being together. Happy picnicking, my loves!