

The Ultimate Guide to Creating a Viral Food Board in Minutes
There is something truly magical about a shared table that feels both effortless and intentionally beautiful. We have all seen those stunning, color-drenched food boards across social media—the ones that look like a still-life painting brought to life with vibrant produce and golden, caramelized textures. Creating a viral-worthy food board isn’t just about the arrangement; it is about the love and technique poured into every single component, making your guests feel truly pampered and nourished from the moment they walk through the door.
For me, the secret to a ‘Viral Simple Food Board’ lies in the humble vegetable. When we take the time to treat seasonal produce with the respect it deserves—using high heat, quality oils, and the perfect balance of seasoning—we transform everyday ingredients into something extraordinary. This guide is my love letter to roasting, designed to help you master the textures and flavors that will make your next gathering absolutely unforgettable. Let’s dive into the world of charred edges, honey-sweetened centers, and velvety soups that anchor a perfect board.
Mastering the art of roasted vegetables

Why we love this
There is nothing quite as satisfying as the transformation a vegetable undergoes inside a hot oven. The dry heat coaxes out the natural sugars, turning a raw, crunchy stalk into a tender, melt-in-your-mouth delicacy with complex layers of flavor. We love this method because it is incredibly versatile and serves as the backbone of any impressive food board, offering a spectrum of colors from deep purples to bright oranges. The aroma of roasting vegetables wafting through the house creates an immediate sense of warmth and home, setting the perfect mood for a cozy evening with friends.
Ingredients
- 2 lbs Assorted seasonal vegetables (Brussels sprouts, sweet potatoes, bell peppers)
- 3 tbsp Extra virgin olive oil
- 1 tsp Sea salt
- 1/2 tsp Freshly cracked black pepper
- 2 sprigs Fresh rosemary
How to make it
- Begin by preheating your oven to 425°F (218°C). This high temperature is crucial for achieving that signature roasted texture without turning the vegetables into mush.
- Wash and thoroughly dry all your produce. Any lingering moisture will create steam in the oven, preventing that beautiful browning we are looking for.
- Cut your vegetables into uniform sizes—about 1-inch cubes or slices—to ensure they all cook at the same rate and finish at the same time.
- In a large mixing bowl, toss the vegetables with the olive oil, salt, and pepper. Ensure every piece is thinly and evenly coated; too much oil will make them greasy, but too little will leave them dry.
- Spread the vegetables in a single layer on a heavy-duty rimmed baking sheet. Do not crowd the pan; if the vegetables are touching too much, they will steam instead of roast. Use two pans if necessary.
- Roast for 25–35 minutes, tossing halfway through with a metal spatula to ensure even browning on all sides. Look for tender centers and crisp, dark edges as your cue for perfection.
Secrets to ultra crispy broccoli florets

Why we love this
If you have only ever had steamed broccoli, you are in for a life-changing experience with this ultra-crispy version. The tiny trees catch the heat in their intricate florets, becoming light, airy, and almost popcorn-like in their crunchiness. We love how the bitterness of the green vegetable vanishes, replaced by a nutty, savory depth that is addictive enough to eat straight off the pan. It adds a necessary textural element to your food board, providing a satisfying snap that contrasts beautifully with softer cheeses or dips.
Ingredients
- 2 Large heads of broccoli
- 1/4 cup Avocado oil (high smoke point)
- 1 tsp Garlic powder
- 1/2 tsp Kosher salt
- Optional: 1 tbsp Nutritional yeast for a ‘cheesy’ finish
How to make it
- Preheat your oven to 450°F (232°C). High heat is the absolute secret to achieving maximum crispiness in the shortest amount of time.
- Cut the broccoli into medium-sized florets, keeping the stems relatively short. Make sure the florets are completely dry—use a salad spinner if you washed them recently.
- Place the florets on a large baking sheet and drizzle with avocado oil. Use your hands to massage the oil into the ‘heads’ of the florets so the fat reaches every nook and cranny.
- Sprinkle evenly with garlic powder and salt. The garlic powder provides a consistent savory base that doesn’t burn as easily as fresh garlic at this high temperature.
- Arrange the florets cut-side down on the pan. This maximizes surface contact with the hot metal, leading to deep browning.
- Roast for 15–20 minutes. You are looking for the tips of the florets to turn dark brown, almost black, and the stems to be fork-tender.
Elevating roasted carrots with honey glaze

Why we love this
Carrots are naturally sweet, but when you introduce a high-quality honey glaze, they become a decadent treat that feels more like candy than a vegetable. The honey caramelizes into a sticky, glossy coating that clings to the carrots, highlighting their vibrant orange hue and making them glow on your serving board. We love the way the floral notes of the honey mingle with the earthy carrot, creating a sophisticated flavor profile that appeals to both kids and adults alike. It is the perfect ‘pop’ of color and sweetness to balance out salty elements like prosciutto or olives.
Ingredients
- 1 lb Whole heirloom carrots (rainbow colors are best)
- 2 tbsp Wildflower honey
- 1 tbsp Melted butter
- 1/2 tsp Ground cumin
- Fresh thyme leaves for garnish
How to make it
- Preheat the oven to 400°F (204°C). Scrub the carrots well, but leave the skins on if they are organic for a rustic, textured look.
- If the carrots are thick, slice them in half lengthwise so they cook through evenly without burning the outside glaze.
- In a small bowl, whisk together the melted butter, honey, and cumin. The cumin adds a subtle smokiness that prevents the dish from being cloyingly sweet.
- Place the carrots on a parchment-lined baking sheet—the parchment is vital here to prevent the honey from sticking and burning to the pan.
- Pour the glaze over the carrots and toss well. Arrange them so they aren’t overlapping.
- Roast for 20–25 minutes. About 5 minutes before they are done, brush them again with the juices from the pan to get that high-gloss, viral-worthy finish.
Creamy roasted vegetable soup tutorial

Why we love this
There is nothing more comforting than a bowl of soup that tastes like the essence of autumn in every spoonful. By roasting the vegetables before blending them, you infuse the soup with a depth of flavor that a standard pot-boiled soup simply cannot match. We love the velvety, luxurious mouthfeel of this dish, which feels incredibly indulgent despite being packed with vitamins. Served in small ramekins on your food board, it provides a warm, sippable element that makes the whole spread feel like a complete, curated meal.
Ingredients
- 3 cups Roasted butternut squash or pumpkin
- 1 Roasted onion
- 2 cups Vegetable broth
- 1/2 cup Heavy cream or coconut milk
- 1/4 tsp Ground nutmeg
How to make it
- Start with vegetables that have already been roasted until soft and slightly caramelized. Using pre-roasted veggies is the key to the ‘fast’ part of this tutorial.
- Place the roasted squash and onion into a high-speed blender. Ensure the onion skins have been removed if you roasted it whole.
- Add the vegetable broth starting with 1.5 cups. It is easier to thin a soup later than it is to thicken it, so start with less liquid for a creamier result.
- Blend on high until the mixture is completely smooth and no lumps remain. This usually takes about 60 to 90 seconds depending on your blender’s power.
- Pour the mixture into a saucepan over medium heat. Stir in the heavy cream and nutmeg, which adds a beautiful aromatic warmth.
- Heat until just simmering, then taste and adjust salt and pepper as needed. Serve warm with a drizzle of olive oil on top for visual flair.
The ultimate vegetable seasoning guide
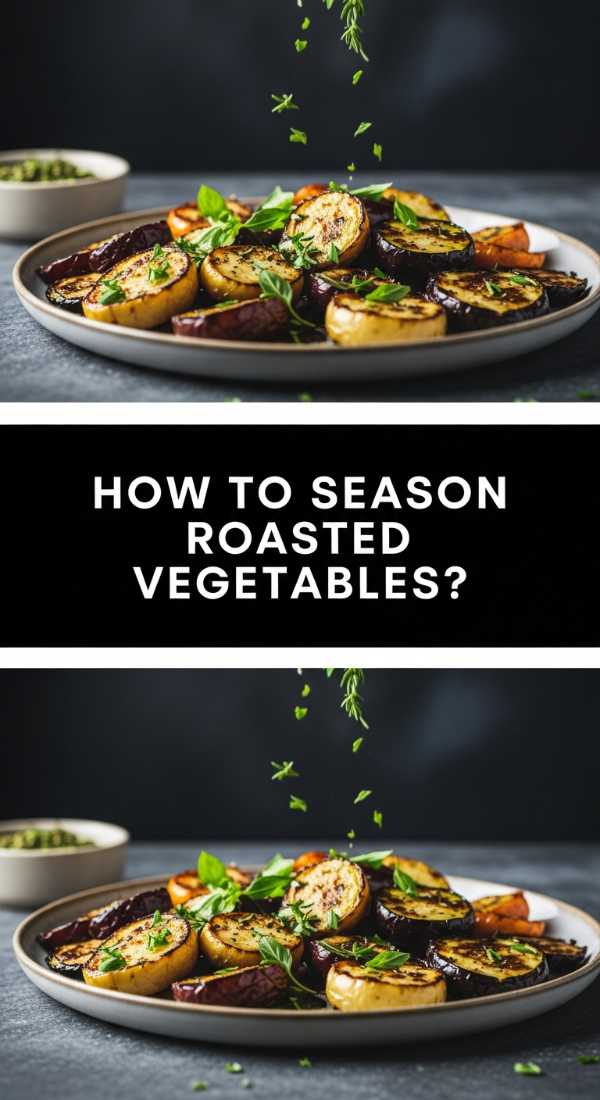
Why we love this
Seasoning is the bridge between a bland side dish and a culinary masterpiece. We love this guide because it empowers you to experiment with flavors beyond just salt and pepper, giving you the confidence to customize your food board to any theme—from Mediterranean to Middle Eastern. The right spice blend can accentuate the natural sweetness of root vegetables or the earthiness of brassicas, creating a sensory journey for your palate. Mastering these combinations ensures that every bite on your board is exciting and balanced.
Ingredients
- Smoked Paprika (for depth)
- Dried Oregano and Thyme (for herbiness)
- Red Pepper Flakes (for heat)
- Lemon Zest (for brightness)
- Maldon Sea Salt (for crunch)
How to make it
- Always start with a high-quality base of sea salt. The coarse grains provide little bursts of flavor that make the other spices stand out.
- For an ‘Earthy Blend,’ mix 1 tsp thyme, 1 tsp rosemary, and 1/2 tsp garlic powder. This is perfect for potatoes and root vegetables.
- For a ‘Zesty Blend,’ combine 1 tsp lemon zest with 1 tsp cracked black pepper. Apply this to green vegetables like asparagus or broccoli immediately after roasting.
- To achieve ‘The Smokey Viral Finish,’ mix 1 tsp smoked paprika with 1/2 tsp cumin and a pinch of cayenne. This creates a beautiful reddish hue and a ‘grilled’ flavor.
- Pro tip: Apply dried herbs before roasting so their oils can bloom in the heat, but save fresh herbs and citrus zests for a post-oven garnish to keep their flavors bright and volatile.
Perfectly charred garlic broccoli florets
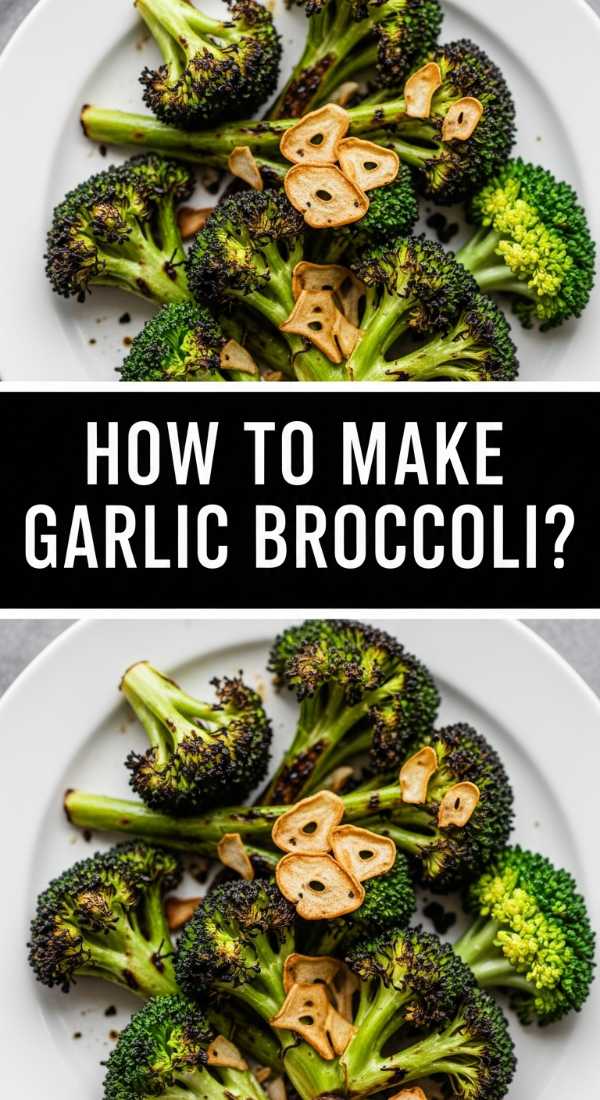
Why we love this
Garlic and broccoli are a match made in heaven, but the secret here is the char. Those dark, crispy edges provide a bitter-sweet complexity that pairs perfectly with the pungent, buttery notes of roasted garlic. We love this dish because it smells incredible—the scent of toasted garlic hitting the oven air is enough to make anyone’s mouth water. It is a bold, savory component that stands up well to strong cheeses like aged cheddar or a sharp gorgonzola on your board.
Ingredients
- 2 heads of Broccoli, cut into small florets
- 4 cloves Garlic, thinly sliced
- 3 tbsp Olive oil
- 1/2 tsp Chili flakes
- Fresh lemon juice
How to make it
- Preheat your oven to 425°F (218°C). A slightly lower temp than the ‘ultra-crispy’ version allows the garlic to roast without burning too quickly.
- Toss the broccoli florets with olive oil and salt in a bowl. Do not add the garlic yet! Garlic burns much faster than broccoli.
- Spread the broccoli on a baking sheet and roast for 12 minutes.
- Pull the tray out and scatter the thinly sliced garlic and chili flakes over the broccoli. Toss gently to incorporate.
- Return to the oven for another 5–8 minutes. Watch closely; you want the garlic to be golden brown and the broccoli edges to be significantly charred.
- Remove from the oven and immediately squeeze fresh lemon juice over the top. The acid will cut through the richness of the oil and brighten the whole dish.
Sweet and savory balsamic roasted carrots
Why we love this
Balsamic vinegar undergoes a stunning transformation in the oven, reducing down into a thick, syrupy glaze that is both tangy and deeply sweet. We love how this acidity cuts through the natural sugar of the carrots, creating a balanced bite that feels incredibly sophisticated. The dark glaze also provides a beautiful visual contrast on a board filled with lighter-colored items. It is the kind of dish that guests will ask for the recipe for, assuming it took hours of reduction when it actually happened right on the roasting pan.
Ingredients
- 1 lb Slim carrots
- 2 tbsp Aged balsamic vinegar
- 1 tbsp Maple syrup
- 2 tbsp Olive oil
- 1/2 tsp Salt
How to make it
- Preheat oven to 400°F (204°C). Line your tray with parchment paper to manage the sticky balsamic reduction.
- Whisk together the balsamic vinegar, maple syrup, olive oil, and salt in a small jar or bowl until emulsified.
- Toss the carrots in the mixture until they are completely purple-tinted and well-coated.
- Layout the carrots on the tray, ensuring they have space. If they are crowded, the balsamic will stay watery rather than becoming a thick glaze.
- Roast for 20 minutes, then rotate the carrots using tongs. This ensures the side touching the pan doesn’t burn while the top side gets that syrupy finish.
- Roast for another 10 minutes until the carrots are tender and the glaze is bubbling and thick.
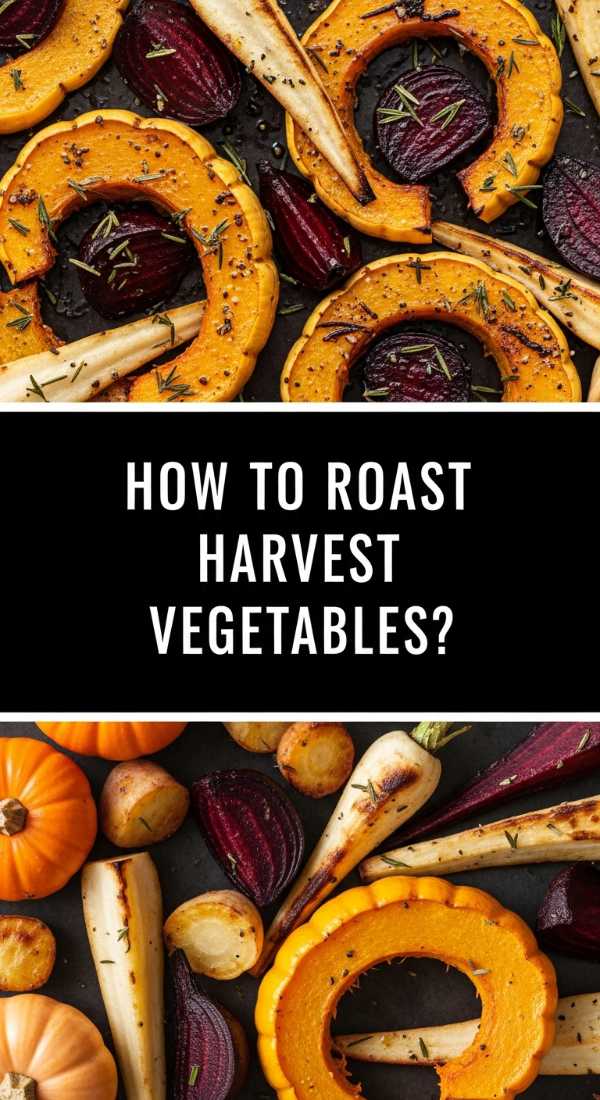
Gourmet harvest roasted vegetable mix

Why we love this
This is the ultimate ‘everything’ dish for your viral board. By combining different shapes, colors, and textures—like the starchiness of potatoes, the crunch of sprouts, and the sweetness of peppers—you create a cornucopia that looks bountiful and professional. We love the ‘harvest’ feel of this mix, which celebrates the best of what’s in season. It allows every guest to pick and choose their favorites, ensuring that there is something for everyone on the platter, making it the true centerpiece of your entertaining spread.
Ingredients
- 1 cup Brussels sprouts (halved)
- 1 cup Red onion (wedged)
- 1 cup Sweet potato (cubed)
- 1 cup Parsnips (sliced)
- 3 tbsp Olive oil
- Fresh sage and rosemary
How to make it
- Preheat the oven to 400°F (204°C). This middle-ground temperature works best when roasting a variety of vegetables with different densities.
- The most important step: Cut the harder vegetables (sweet potatoes and parsnips) into smaller pieces and the softer ones (onions and sprouts) into larger pieces. This levels the playing field for cooking times.
- Toss everything in a very large bowl with the oil, salt, and sturdy herbs like sage and rosemary.
- Spread across two baking sheets. Crowding is the enemy of a gourmet roast!
- Roast for 35–40 minutes. Every 15 minutes, give the pans a good shake to redistribute the heat.
- Test the thickest piece of sweet potato with a fork. If it slides in like butter, the whole tray is ready for the board.
Creating the perfect creamy vegetable base
Why we love this
A creamy vegetable base is the secret weapon of high-end catering. It is essentially a thick, savory puree that can be spread across the bottom of your food board or used as a dip for the roasted veggies themselves. We love how it adds a layer of ‘velvet’ to the plate, acting as a glue that holds other ingredients in place while providing a rich, concentrated burst of flavor. It elevates the entire presentation from ‘homemade’ to ‘fine dining’ in just a few pulses of the food processor.
Ingredients
- 2 cups Roasted cauliflower or parsnips
- 1/4 cup Cashew butter or Tahini (for creaminess)
- 1 tbsp Lemon juice
- 1 clove Roasted garlic
- 1/4 cup Hot water (to adjust consistency)
How to make it
- Start with vegetables that have been roasted until very soft—almost collapsing. Cauliflower is the gold standard for a neutral, creamy base.
- Place the warm vegetables into a food processor. Adding them while warm helps the fats emulsify more easily for a smoother finish.
- Add the cashew butter (or tahini) and the roasted garlic clove. These provide the ‘fat’ needed for that luxurious mouthfeel without needing heavy dairy.
- Pulse until the mixture begins to break down, then turn to a constant blend.
- Slowly drizzle in the hot water and lemon juice while the processor is running. Stop once you reach a consistency that is thicker than soup but spreadable like hummus.
- Season generously with salt. This base needs to be well-seasoned as it will be paired with other elements.
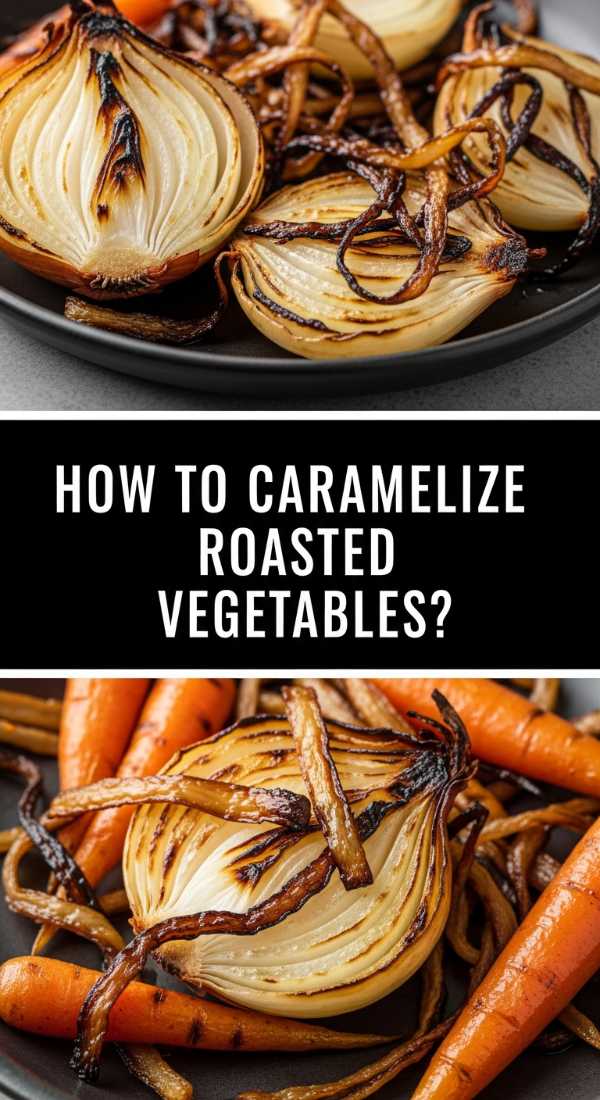
Maximum caramelization for roasted veggies
[IMAGE_10]
Why we love this
Caramelization is where the science of cooking meets the art of flavor. Known as the Maillard reaction, this process creates hundreds of new flavor compounds that give roasted food its irresistible, savory-sweet profile. We love focusing on maximum caramelization because it transforms ‘healthy food’ into ‘craveable food.’ Those deep brown spots aren’t just for show; they are concentrated pockets of umami that make your food board stand out from the rest. Achieving this level of browning is the hallmark of a skilled home cook.
Ingredients
- Any density vegetable (Potatoes, carrots, sprouts)
- High-quality Extra Virgin Olive Oil
- A pinch of Granulated Sugar (the secret hack)
- Fine Sea Salt
How to make it
- Preheat your oven to 425°F (218°C) and place your empty baking sheet inside for 10 minutes before adding food. A pre-heated tray sears the vegetables the moment they touch it.
- In a bowl, toss your vegetables with oil and salt. For an extra boost, add a tiny pinch of granulated sugar. This helps jumpstart the browning process without changing the flavor.
- Avoid using parchment paper if you want the absolute maximum caramelization; the direct contact with the metal pan is superior for browning (though cleanup is harder).
- Place vegetables cut-side down. Do not move them for at least 15-20 minutes. Peeking and stirring too early prevents the crust from forming.
- Use a thin metal spatula to ‘release’ the vegetables from the pan once they have browned. If they stick, they usually need 2-3 more minutes to finish caramelizing and release naturally.
- Finish with a broil for 2 minutes at the very end for that final ‘viral’ char.
The Final Flourish: Bringing Your Board to Life
Now that you have mastered the components, the fun part begins! To create that viral food board look, start by placing your larger bowls of soup or creamy bases first. Then, nestle your colorful roasted vegetables around them, grouping them by color for a ‘rainbow’ effect or mixing them for a rustic ‘harvest’ feel. Add some fresh herbs, a handful of toasted nuts, and perhaps some sliced sourdough. The beauty is in the variety and the clear evidence of the care you took in roasting each piece to perfection. Your guests won’t just be eating; they’ll be experiencing a celebration of flavor.
Frequently Asked Questions
Everything you need to know to troubleshoot your roasting and board-building process.