
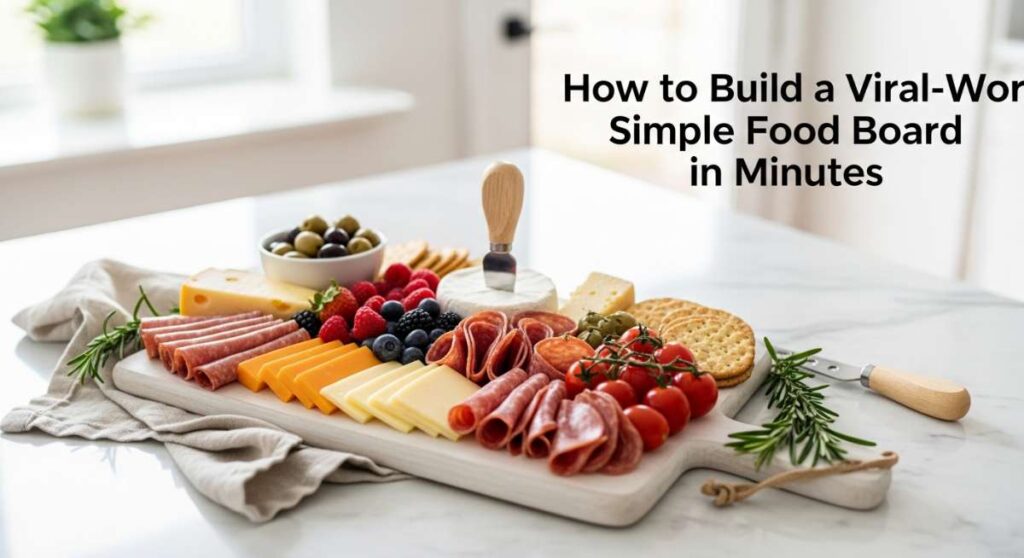
There is something truly magical about gathering friends and family around a table filled with vibrant, wholesome food. In our fast-paced lives, the simplicity of a food board—curated with love and intentionality—reconnects us to the joy of eating together. I remember the first time I swapped the traditional heavy charcuterie for a warm, roasted vegetable board; the room went silent for a moment as everyone took in the stunning colors before diving into the earthy, caramelized goodness.
Creating a viral-worthy food board isn’t about perfection; it’s about texture, aroma, and the celebration of seasonal ingredients. It’s that perfect balance of a crispy charred edge and a velvety smooth dip that makes people reach for their phones to snap a photo before reaching for a fork. Today, I’m sharing the secrets to mastering the art of the roasted board, from getting that elusive crunch on your broccoli to the silkiness of a blended soup centerpiece.
How to Roast Perfect Vegetables?

Why we love this
There is nothing quite like the transformation of a humble raw vegetable into a goldened, caramelized masterpiece through the power of high heat. The way the edges turn into a delicate brown lace while the centers remain tender and sweet is pure culinary alchemy. When you pull that tray out of the oven, the sizzle and the deep, savory scent of roasted garlic and olive oil immediately make your mouth water, promising a bite that is both comforting and sophisticated for any gathering.
Ingredients
- 2 lbs Mixed root vegetables (potatoes, parsnips, radishes)
- 3 tbsp Extra virgin olive oil
- 1 tsp Flaky sea salt
- 1/2 tsp Cracked black pepper
- 2 sprigs Fresh rosemary
How to make it
- Preheat your oven to 425°F (220°C). This high temperature is crucial for achieving caramelization rather than just steaming the vegetables.
- Cut your vegetables into uniform sizes, approximately 1-inch chunks, to ensure they all cook at the same rate. This prevents some pieces from burning while others remain raw.
- In a large mixing bowl, toss the vegetables with olive oil, salt, and pepper until every surface is glistening. Do not skimp on the oil, as it conducts heat for that golden finish.
- Spread the vegetables onto a heavy-duty rimmed baking sheet. Ensure they are in a single layer with space between them; crowding the pan creates steam, which prevents browning.
- Roast for 25-35 minutes, tossing them halfway through with a metal spatula. Look for deep golden-brown edges and a tender interior when pierced with a fork.
How to Make Crispy Broccoli?

Why we love this
Crispy broccoli is the ultimate game-changer for anyone who thinks they don’t like greens. The florets act like little sponges for flavor, turning delightfully crunchy and nutty in the oven’s heat. We love how the tips of the florets become almost like savory popcorn, providing a satisfying textural contrast to the softer stems, making it an addictive addition to your food board that disappears in seconds.
Ingredients
- 2 large heads of Broccoli
- 2 tbsp Avocado oil (high smoke point)
- 1/2 tsp Garlic powder
- 1/4 cup Grated Parmesan cheese
- Lemon wedges for serving
How to make it
- Wash and thoroughly dry the broccoli. Any moisture left on the florets will create steam, preventing them from becoming truly crispy.
- Cut the broccoli into small, bite-sized florets with flat edges. The flat surface area increases contact with the hot pan for maximum browning.
- Toss with avocado oil and garlic powder in a bowl until evenly coated. Avocado oil is preferred here because it can withstand the high heat without smoking.
- Place the baking sheet in the oven while it preheats to 425°F. Placing the broccoli onto a pre-heated tray creates an immediate sear.
- Arrange the broccoli flat-side down and roast for 15-20 minutes. At the 15-minute mark, sprinkle the Parmesan over the top and roast for 3 more minutes until the cheese is a golden crust.
How to Glaze Roasted Carrots?

Why we love this
Glazed carrots bring a touch of elegance and a pop of bright orange to your viral board. The glaze creates a beautiful, glossy sheen that catches the light, while the sweetness of the coating enhances the natural sugars of the carrot. Each bite starts with a sticky, honeyed exterior that gives way to a melt-in-your-mouth texture, creating a sensory experience that feels like a decadent treat rather than just a side dish.
Ingredients
- 1 lb Heirloom or baby carrots
- 2 tbsp Melted butter
- 1 tbsp Honey or maple syrup
- 1/4 tsp Ground cumin
- Fresh parsley for garnish
How to make it
- Scrub the carrots clean but leave the skins on if they are young for a rustic look. If using large carrots, slice them in half lengthwise.
- In a small bowl, whisk together the melted butter, honey, and cumin until fully emulsified.
- Lay the carrots on a parchment-lined baking sheet and pour the glaze over them, using your hands to ensure every inch is covered.
- Roast at 400°F (200°C) for 20 minutes. The sugars in the glaze will begin to bubble and thicken during this time.
- Remove the tray and toss the carrots in the pooling glaze on the parchment, then return to the oven for another 5-10 minutes until the glaze has reduced to a sticky coating and the carrots are fork-tender.
How to Make Creamy Soup?
Why we love this
A small bowl of creamy soup in the center of a board provides a luxurious, velvety anchor for dipping roasted vegetables or crusty bread. The aroma of simmering aromatics like onions and thyme creates an inviting atmosphere long before the first bite. We love the rich, silky mouthfeel of a well-blended soup, which offers a warm, soothing contrast to the crunchy, roasted elements surrounding it on your board.
Ingredients
- 1 medium Onion, diced
- 2 cloves Garlic, minced
- 4 cups Vegetable broth
- 1 lb Cauliflower or Butternut squash
- 1/2 cup Heavy cream or coconut milk
How to make it
- Sauté the diced onion in a large pot over medium heat with a splash of oil until translucent and fragrant, about 5-7 minutes.
- Add the minced garlic and cook for just 60 seconds to avoid burning the delicate oils.
- Add your chosen vegetable (cauliflower or squash) and the vegetable broth. Bring to a boil, then reduce to a simmer.
- Simmer for 20-25 minutes until the vegetables are completely soft and falling apart.
- Remove from heat and stir in the cream. Use an immersion blender to process until perfectly smooth, then season generously with salt and white pepper for a clean look.
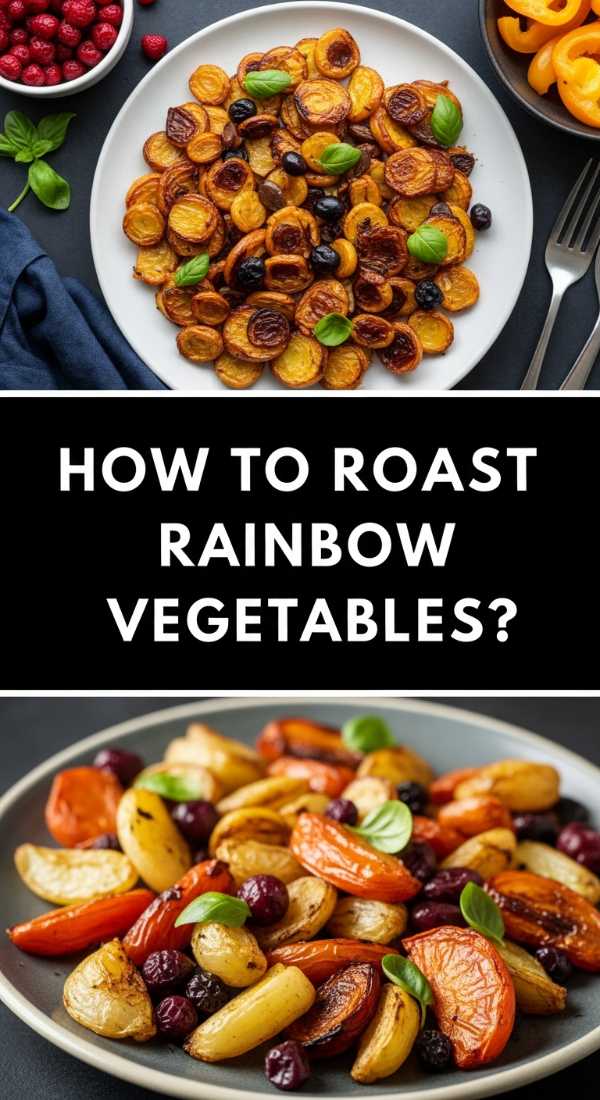
How to Roast Rainbow Vegetables?
Why we love this
The visual appeal of rainbow vegetables is what truly makes a food board go viral. Seeing a spectrum of deep purples, bright yellows, and emerald greens arranged artfully is a feast for the eyes before it ever hits the tongue. We love how this method celebrates diversity in flavor and nutrition, offering a variety of textures from the snap of a pepper to the creaminess of a golden beet, all unified by the smoky kiss of the oven.
Ingredients
- 1 Red bell pepper
- 1 Orange sweet potato
- 1 Yellow squash
- 1 Zucchini
- 1 Purple onion
How to make it
- Chop all vegetables into similar sizes, but keep the different colors separated in bowls initially to prevent color bleeding (especially from beets or onions).
- Toss each color group with a light coating of oil and salt.
- Arrange the vegetables on the baking sheet in a gradient pattern, following the colors of the rainbow. This creates a stunning visual for your board.
- Roast at 400°F (200°C) for 25 minutes. Note that denser vegetables like sweet potatoes may need a 10-minute head start before adding the softer squash.
- Monitor the colors closely; you want them to be cooked through but still vibrant. Avoid over-charring to maintain the rainbow aesthetic.
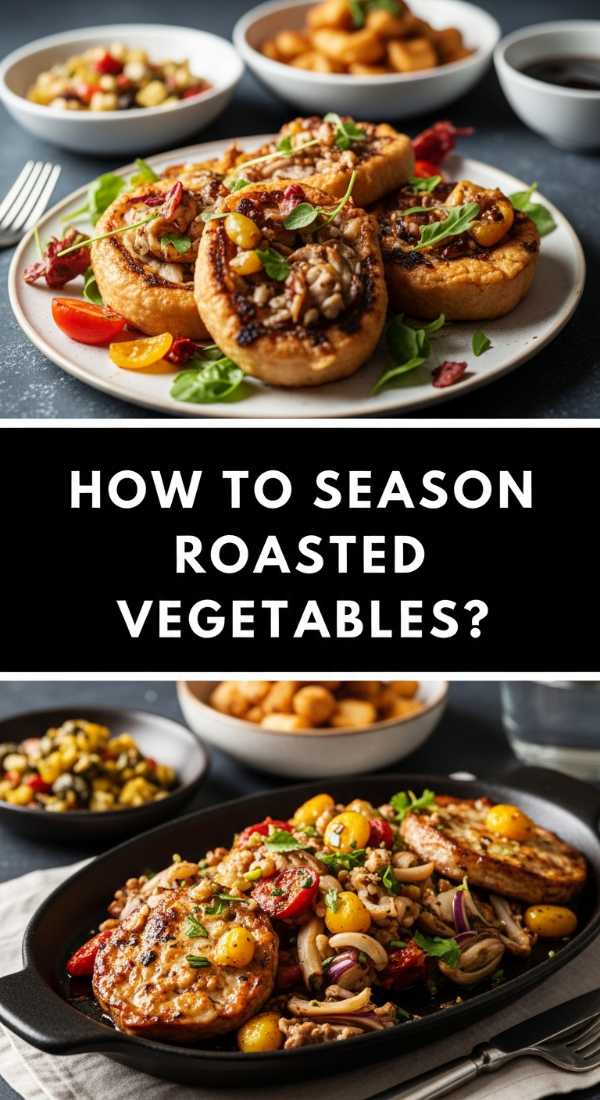
How to Season Roasted Vegetables?
Why we love this
Seasoning is the soul of roasted vegetables; it’s what elevates them from simple produce to a crave-able dish. A thoughtful blend of spices can transport your taste buds to different parts of the world, whether it’s the warmth of smoked paprika or the freshness of dried oregano. We love the way herbs toasted in the oven release their essential oils, infusing the vegetables with an irresistible fragrance that fills the entire house.
Ingredients
- 2 tbsp Olive oil
- 1 tsp Smoked paprika
- 1 tsp Dried thyme
- 1/2 tsp Onion powder
- 1/2 tsp Sea salt
How to make it
- Create a “seasoning slurry” by mixing your dry spices with the olive oil in a small bowl before applying it to the vegetables. This ensures even distribution and prevents dry spices from burning.
- Pat your vegetables completely dry with a paper towel. Seasoning adheres better to dry surfaces and allows the spices to toast rather than steam.
- Massage the seasoning mixture into the vegetables by hand, ensuring every crevice is reached.
- Roast as per the vegetable type, usually at 400°F-425°F.
- Taste a piece immediately upon removal from the oven; if it’s bland, add a final sprinkle of salt while the oil is still hot so it sticks.
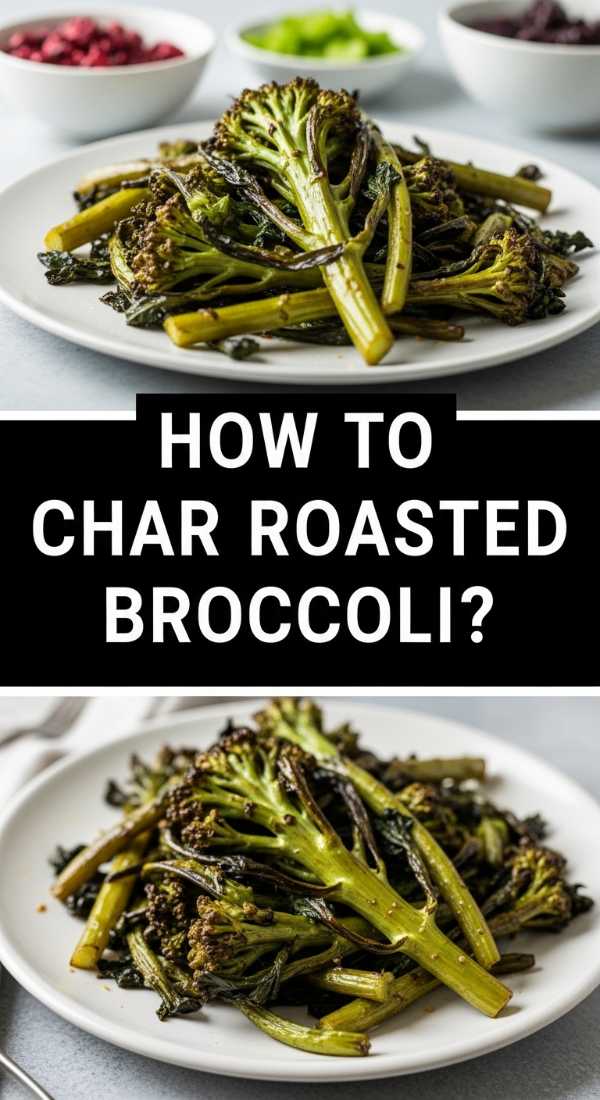
How to Char Roasted Broccoli?

Why we love this
Charred broccoli brings a sophisticated, smoky depth of flavor that is often found in high-end restaurants. Those blackened, crispy edges provide a bitter contrast that perfectly complements a squeeze of bright lemon or a dusting of salty cheese. We love the dramatic look it adds to a board—the deep dark green against the charred black bits creates a rustic, artisanal vibe that looks incredible in photos.
Ingredients
- 1 lb Broccoli florets
- 3 tbsp Olive oil
- Red pepper flakes
- Lemon zest
- Salt to taste
How to make it
- Set your oven rack to the highest position, closest to the top heating element. Preheat to 450°F (230°C).
- Toss broccoli with a generous amount of olive oil and red pepper flakes. The extra oil helps the edges catch the heat and char quickly.
- Spread on a dark-colored baking sheet, which absorbs more heat and encourages faster browning.
- Roast for 10-12 minutes without flipping. Leaving them undisturbed allows the bottom and the top tips to develop that characteristic dark char.
- Check frequently toward the end; you want the tips to be dark brown/black but not ashy. Finish with fresh lemon zest for a bright pop.
How to Sweeten Roasted Carrots?

Why we love this
Sweetening carrots through roasting is about emphasizing their natural sugars and adding a touch of indulgence. As the carrots roast, their internal starches break down into sugars, which then mingle with added sweeteners like brown sugar or maple to create a candy-like exterior. We love how these sweet carrots act as a bridge on a food board, pairing perfectly with both savory dips and tart accompaniments like pomegranate seeds.
Ingredients
- 1 lb Carrots, sliced into coins
- 1 tbsp Brown sugar
- 1/2 tsp Cinnamon
- 1 tbsp Coconut oil, melted
- Pinch of salt
How to make it
- Melt the coconut oil and stir in the brown sugar and cinnamon until the sugar is mostly dissolved.
- Toss the carrot coins in this mixture until they are fully coated in the fragrant syrup.
- Spread the coins in a single layer on a parchment-lined sheet. Using parchment is essential here as the sugar will stick to a bare pan.
- Roast at 375°F (190°C). Use a slightly lower temperature for sweetened vegetables to prevent the sugar from burning before the carrots are soft.
- Roast for 20-25 minutes, stirring once to ensure the carrots are glazed on all sides.
How to Blend Vegetable Soup?

Why we love this
The act of blending soup is where the magic of texture happens. It turns chunky, disparate ingredients into a cohesive, silky liquid that feels incredibly luxe. We love how a perfectly blended soup holds its shape when dolloped or swirled on a board, and how it coats a roasted vegetable piece perfectly when dipped. The smoothness provides a clean, professional finish that makes any home-cooked board look like it was catered by a pro.
Ingredients
- Cooked vegetable soup base
- 1 tbsp Butter or high-quality olive oil
- Optional: Handful of spinach for color
- Salt and pepper
How to make it
- Ensure your soup base is fully cooked and the vegetables are soft enough to be smashed with a spoon.
- If using a stand blender, fill it no more than halfway and hold the lid down with a towel; hot liquid expands and can cause the lid to pop off.
- For the smoothest results, use an immersion blender and move it in a slow, circular motion, keeping the blade fully submerged to avoid incorporating too much air.
- Add a tablespoon of cold butter or olive oil at the very end of blending. This “emulsification” adds a professional glossy finish and a richer mouthfeel.
- Pass the soup through a fine-mesh sieve if you want a truly five-star, silky texture without any fibrous bits.
How to Bake Tasty Vegetables?
[IMAGE_10]
Why we love this
Baking tasty vegetables is the final step in bringing your board to life. This method is all about the harmony of flavor—balancing salt, fat, and acid to make the vegetables sing. We love the satisfaction of seeing a tray of perfectly roasted produce, knowing that every bite is packed with concentrated flavor. It’s the ultimate way to show off the season’s harvest and provide a healthy, delicious centerpiece that everyone can enjoy regardless of their dietary needs.
Ingredients
- Variety of seasonal vegetables
- High-quality sea salt
- Balsamic glaze
- Fresh basil leaves
- Toasted pine nuts
How to make it
- Always start with the freshest seasonal produce you can find; the quality of the raw vegetable dictates the final taste.
- Use a heavy-gauge baking pan. Thin pans warp in high heat and don’t distribute heat evenly, leading to hot spots and uneven cooking.
- Bake at 400°F (200°C) until the vegetables are tender and slightly browned.
- As soon as the vegetables come out of the oven, hit them with a splash of balsamic glaze or a squeeze of lemon. The heat helps the acid penetrate the vegetable for better flavor.
- Finish the board by scattering fresh herbs and toasted nuts over the baked vegetables to add layers of fresh flavor and additional crunch.
Conclusion
Building a viral-worthy food board is truly an art form that rewards the senses. By mastering these roasting and blending techniques, you aren’t just making a meal; you’re creating an experience. The colors, the textures, and the inviting aromas will draw people in, but the incredible flavors will keep them at the table. So, grab your favorite wooden board, preheat your oven, and get ready to dazzle your guests with a healthy, beautiful spread that is as delicious as it is photogenic!