
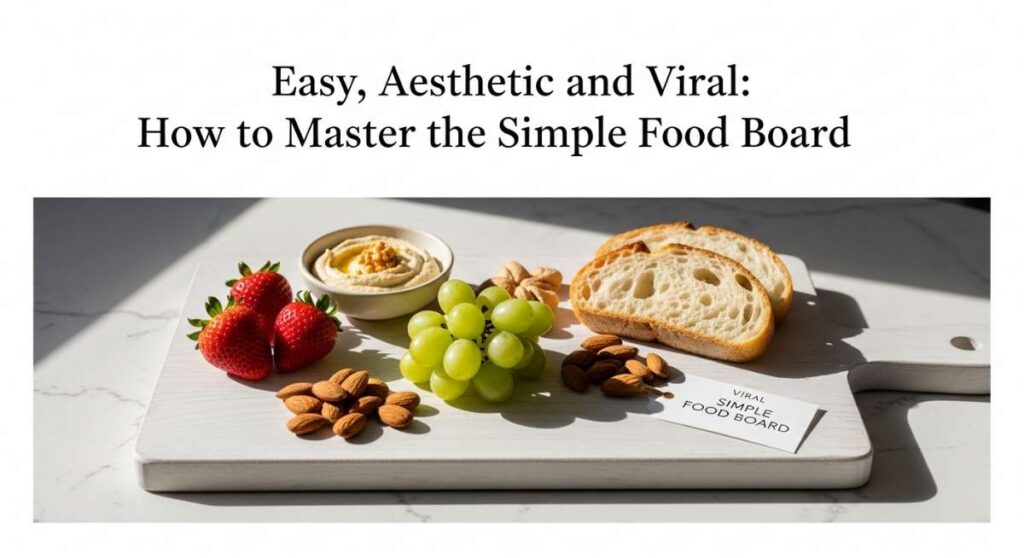
There is something inherently magical about a shared meal, especially one that looks as good as it tastes. We’ve all seen those stunning food boards scrolling through our feeds—the ones that make you stop, double-tap, and immediately start planning a party. But here’s a secret: you don’t need a culinary degree or a professional styling kit to create that viral-worthy aesthetic. It’s all about the texture, the balance of colors, and that ‘perfectly imperfect’ arrangement that invites guests to dive in.
When I first started assembling these boards, I was worried about things being too complicated. However, I soon realized that the most successful boards are built on a foundation of classic, comforting favorites elevated with a bit of love and attention to detail. This isn’t just about feeding people; it’s about creating a sensory experience that lingers in the memory long after the last bite is gone. The aroma of roasted garlic, the crunch of a perfectly fried cheese stick, and the vibrant colors of fresh garnishes turn a simple snack into a celebration.
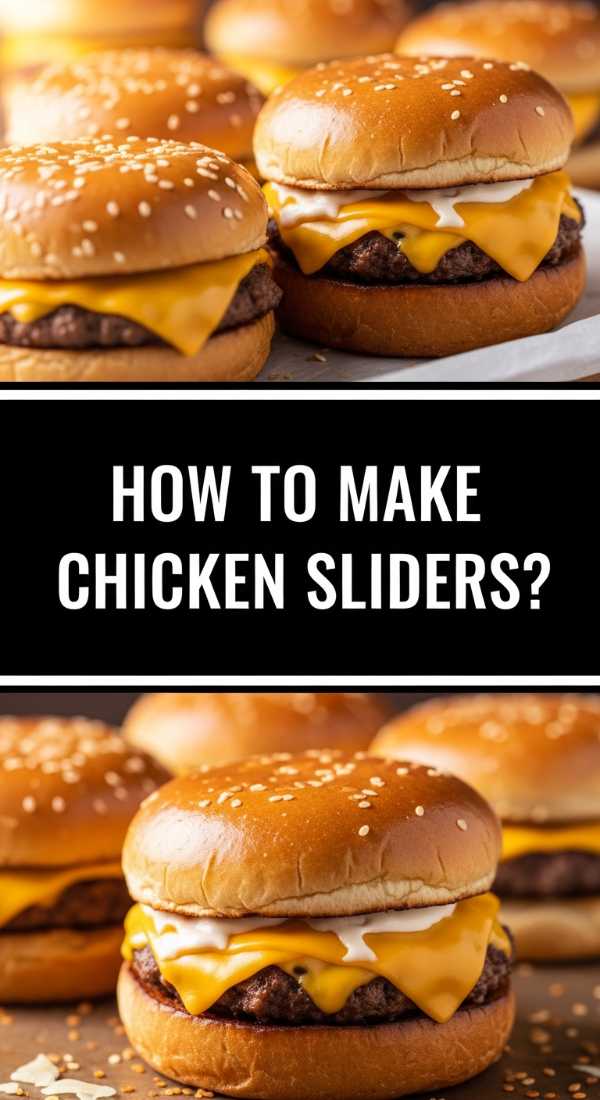
How to make chicken sliders?
Why we love this
Chicken sliders are the ultimate crowd-pleaser, offering a symphony of textures and flavors in every single bite. Imagine biting through a pillowy-soft, butter-glazed brioche bun to reach a layer of savory, juicy chicken and gooey, melted cheese that stretches with every pull. The aroma of toasted garlic and herbs wafting from the oven creates an instant sense of warmth and comfort in the kitchen. They are visually stunning when piled high on a board, with their golden-brown tops and glistening glaze catching the light perfectly.
Ingredients
- 12-pack slider buns (brioche or sweet Hawaiian)
- 2 cups shredded cooked chicken (rotisserie works great)
- 1 cup shredded mozzarella cheese
- 1/2 cup buffalo sauce or BBQ sauce
- 1/4 cup melted salted butter
- 1 teaspoon garlic powder
- 1 teaspoon dried parsley
How to make it
- Preheat your oven to 350°F (175°C) and line a baking sheet with parchment paper to ensure easy cleanup.
- Using a long serrated knife, slice the entire block of slider buns in half horizontally, keeping the individual rolls connected so you have a top slab and a bottom slab.
- Place the bottom slab of buns onto the baking sheet and spread your shredded chicken evenly across the surface, ensuring every corner is covered for a consistent bite.
- Drizzle your chosen sauce (Buffalo or BBQ) generously over the chicken, then top with a thick, even layer of shredded mozzarella cheese.
- Place the top slab of buns back on. In a small bowl, whisk together the melted butter, garlic powder, and dried parsley until well combined.
- Using a pastry brush, generously coat the tops of the buns with the garlic butter mixture, making sure to get into the crevices between the rolls.
- Cover the sliders loosely with aluminum foil and bake for 10 minutes; then, remove the foil and bake for an additional 5-7 minutes until the cheese is fully melted and the bun tops are golden brown and slightly crisp.
How to bake potato skins?

Why we love this
Potato skins are the quintessential pub-style comfort food that brings a rustic, earthy charm to any food board. There is something deeply satisfying about the contrast between the salty, ultra-crispy exterior of the skin and the thin, fluffy layer of potato remaining inside. When topped with sharp cheddar and smoky bacon, they release a savory aroma that is absolutely irresistible. The finishing touch of cold, velvety sour cream and the sharp bite of fresh green onions creates a flavor profile that is balanced, rich, and incredibly nostalgic.
Ingredients
- 4 large Russet potatoes
- 2 tablespoons olive oil
- 1 teaspoon kosher salt
- 1.5 cups shredded sharp cheddar cheese
- 1/2 cup cooked bacon bits
- Sour cream and sliced green onions for garnish
How to make it
- Preheat your oven to 400°F (200°C). Thoroughly scrub the potatoes to remove dirt, pat them dry, and prick them several times with a fork to allow steam to escape.
- Bake the whole potatoes directly on the oven rack for 50-60 minutes, or until the skin is crisp and the insides are tender when pierced with a knife.
- Remove the potatoes and let them cool enough to handle. Cut each potato in half lengthwise, and then into quarters if they are very large.
- Using a spoon, scoop out the flesh, leaving about a 1/4-inch thick shell of potato against the skin; save the scooped potato for mash later!
- Increase the oven temperature to 425°F. Brush both sides of the potato skins with olive oil and sprinkle with salt.
- Place the skins cut-side down on a baking sheet and bake for 10 minutes. Flip them over and bake for another 5-8 minutes until the edges are dark golden and very crispy.
- Fill each skin with a generous amount of cheddar cheese and bacon bits. Return to the oven for 2-3 minutes until the cheese is bubbling and molten. Top with sour cream and onions before serving.
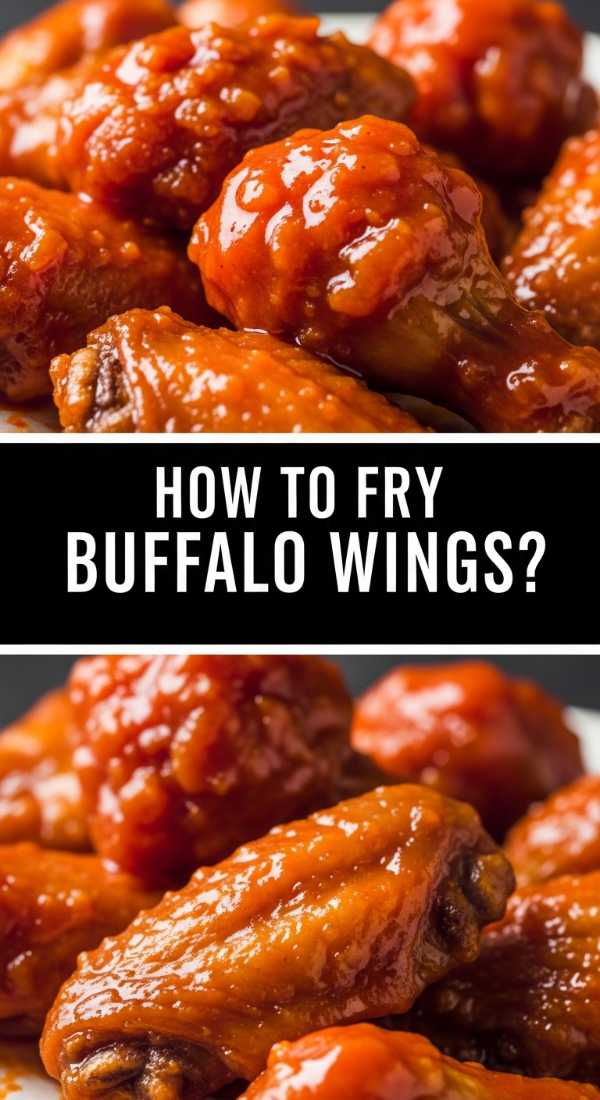
How to fry buffalo wings?
Why we love this
Nothing says ‘viral food board’ like a pile of glistening, bright orange buffalo wings that look as fiery as they taste. The sensory experience starts with the audible crunch of the shattered skin, followed immediately by the tender, steam-released moisture of the perfectly cooked chicken inside. The vinegary tang of the hot sauce hits your nose first, balanced by the rich, silky scent of melted butter. They are messy, bold, and provide a vibrant pop of color that anchors the entire aesthetic of your spread.
Ingredients
- 2 lbs chicken wings (flats and drumettes)
- 1 tablespoon baking powder (for extra crunch)
- 1/2 teaspoon salt
- Neutral oil for frying (canola or vegetable)
- 1/2 cup Buffalo hot sauce
- 4 tablespoons unsalted butter, melted
How to make it
- Pat the chicken wings extremely dry with paper towels; any moisture on the skin will prevent them from becoming truly crispy.
- In a large bowl, toss the wings with the baking powder and salt until lightly and evenly coated.
- Fill a heavy-bottomed pot or Dutch oven with about 2-3 inches of oil. Heat the oil to 375°F (190°C), using a thermometer to ensure accuracy.
- Carefully lower 6-8 wings into the hot oil at a time, being careful not to overcrowd the pot, which would drop the oil temperature and lead to greasy wings.
- Fry for 8-12 minutes, turning occasionally with tongs, until the wings reach an internal temperature of 165°F and the skin is deep golden brown and stiff.
- While the wings fry, whisk together the hot sauce and melted butter in a large metal bowl until emulsified.
- Remove the wings from the oil and let them drain on a wire rack for 1 minute, then toss them immediately in the sauce bowl until every nook and cranny is coated. Serve piping hot.
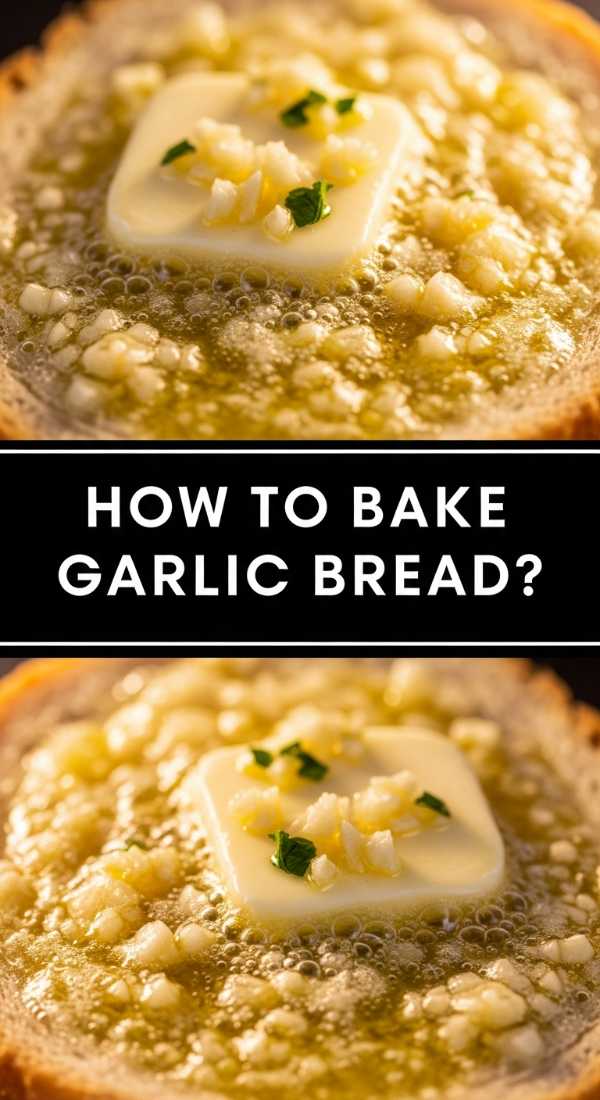
How to bake garlic bread?
Why we love this
Garlic bread is the aromatic heartbeat of a food board, drawing everyone in with the scent of roasted garlic and toasted yeast. When done right, it features a crust that shatters beautifully when bitten, leading into a soft, pillowy center soaked in golden, herb-flecked butter. The sight of melted parmesan bubbling over the edges and the bright green of fresh parsley makes it a visual masterpiece. It’s the ultimate comfort side that feels both sophisticated and deeply homey at the same time.
Ingredients
- 1 large loaf of French or Italian bread
- 1/2 cup unsalted butter, softened
- 4 cloves garlic, minced
- 2 tablespoons fresh parsley, chopped
- 1/4 cup grated Parmesan cheese
- 1/4 teaspoon salt
How to make it
- Preheat your oven to 375°F (190°C). In a small mixing bowl, combine the softened butter, minced garlic, chopped parsley, Parmesan, and salt. Mash them together with a fork until you have a smooth, uniform paste.
- Slice the bread loaf into 1-inch thick slices. You can either slice all the way through or cut almost to the bottom (Hasselback style) to keep the loaf intact for a dramatic presentation.
- Generously spread the garlic butter mixture between each slice and across the top of the loaf, ensuring the butter reaches the center of the bread.
- Wrap the entire loaf in aluminum foil. This step is crucial as it allows the butter to steam into the bread, flavoring the interior without burning the crust.
- Bake the foil-wrapped loaf for 10 minutes.
- Carefully open the foil, exposing the top of the bread. Bake for an additional 5-7 minutes. This allows the exterior to crisp up and the cheese to turn a beautiful golden-brown color.
- Let it rest for 2 minutes before pulling apart or finishing the slices, ensuring the butter has slightly set so it doesn’t all run off.
How to cook mini tacos?

Why we love this
Mini tacos are a delightful explosion of flavor and texture, perfectly scaled down for the ultimate grazing experience. The smell of toasted corn tortillas mingling with seasoned, savory meat and zesty lime is enough to make anyone’s mouth water. Each taco is a tiny canvas of color, from the deep reds of the salsa to the vibrant greens of fresh cilantro and the creamy white of crumbled cotija cheese. They bring a fun, interactive element to the board, encouraging guests to grab and go while enjoying a punchy, festive vibe.
Ingredients
- 12 mini corn tortillas (street taco size)
- 1 lb ground beef or shredded chicken
- 1 packet taco seasoning
- 1/2 cup shredded lettuce
- 1/2 cup diced tomatoes
- Crumpled cotija cheese and fresh cilantro
- Lime wedges for serving
How to make it
- Brown your choice of meat in a skillet over medium-high heat. Drain any excess fat to prevent the tacos from becoming soggy.
- Add the taco seasoning and a splash of water according to the packet instructions. Simmer on low for 5 minutes until the sauce has thickened and the meat is deeply flavored.
- To prep the shells, lightly brush both sides of the mini tortillas with oil. Place them directly over a low gas flame for 10-15 seconds per side using tongs, or heat in a dry skillet until they are pliable and show light charred spots.
- Immediately fold the warm tortillas into a taco shape. You can rest them against each other on a plate to help them hold their form as they cool slightly.
- Fill each shell with a small amount of the seasoned meat. It’s important not to overfill so that the garnishes can fit.
- Layer on the shredded lettuce, diced tomatoes, and a sprinkle of cotija cheese.
- Finish with a pinch of fresh cilantro and arrange them on the board with lime wedges nestled between them; the lime juice is essential for brightening the savory fats of the meat.
How to fry cheese sticks?

Why we love this
Is there anything more satisfying than a perfect cheese pull? Frying cheese sticks at home creates an experience that frozen versions simply cannot match. The outer coating is a rugged, seasoned landscape of golden breadcrumbs that provides a loud, satisfying crunch, while the interior is a molten river of warm, milky mozzarella. The contrast of the hot cheese against a cold, herb-heavy marinara sauce is a classic pairing that appeals to the inner child in everyone, making it a guaranteed viral hit on any snack board.
Ingredients
- 12 mozzarella cheese sticks (string cheese)
- 1/2 cup all-purpose flour
- 2 large eggs, beaten
- 1 cup Italian seasoned breadcrumbs
- 1/2 teaspoon garlic powder
- Vegetable oil for frying
- Marinara sauce for dipping
How to make it
- Unwrap the cheese sticks and place them in the freezer for at least 1-2 hours. This is the most critical step; it prevents the cheese from melting and leaking out before the crust is golden.
- Set up a dredging station: one bowl with flour, one with the beaten eggs, and one with the seasoned breadcrumbs mixed with garlic powder.
- Coat each frozen cheese stick in flour, shaking off the excess. Dip it into the egg wash, then roll it in the breadcrumbs.
- For an extra-thick, fail-proof crust, dip the breaded stick back into the egg and then back into the breadcrumbs a second time (double dredging).
- In a deep skillet, heat about 1 inch of oil to 350°F (175°C).
- Fry the cheese sticks in small batches for about 1-2 minutes, turning frequently. Watch for the first sign of cheese beginning to peek through the crust—that is your cue to remove them immediately.
- Drain on paper towels and serve while the cheese is still at its peak elasticity.
How to make jalapeno poppers?

Why we love this
Jalapeno poppers are the perfect balance of heat, creaminess, and salt. As they bake, the peppers soften and lose some of their aggressive bite, becoming a tender vessel for a rich, herb-filled cream cheese stuffing. When wrapped in bacon, the fat renders down, crisping up and infusing the entire popper with a smoky, savory essence. The visual of the glossy green pepper against the rustic, dark red bacon is stunning, and the aroma of roasting chilies and sizzling pork is practically a siren song for hungry guests.
Ingredients
- 10-12 large jalapenos
- 8 oz cream cheese, softened
- 1 cup shredded cheddar cheese
- 1/2 teaspoon onion powder
- 10-12 slices of bacon (cut in half)
How to make it
- Preheat your oven to 400°F (200°C) and line a baking sheet with a wire rack. This allows air to circulate under the poppers, ensuring the bacon crisps on all sides.
- Wearing gloves to protect your skin from the oils, slice the jalapenos in half lengthwise. Use a small spoon to scrape out the seeds and the white membranes (this is where the heat lives).
- In a medium bowl, mix together the softened cream cheese, cheddar cheese, and onion powder until smooth.
- Fill each jalapeno half with the cheese mixture, smoothing the top so it’s flush with the edges of the pepper.
- Wrap each filled pepper with a half-slice of bacon, ensuring the ends of the bacon are tucked underneath the pepper so they don’t unravel during cooking.
- Place the poppers on the wire rack and bake for 20-25 minutes.
- You are looking for the bacon to be fully cooked and crispy, and the cheese to be slightly browned and bubbling. Let them rest for 5 minutes before serving to allow the cheese to set.
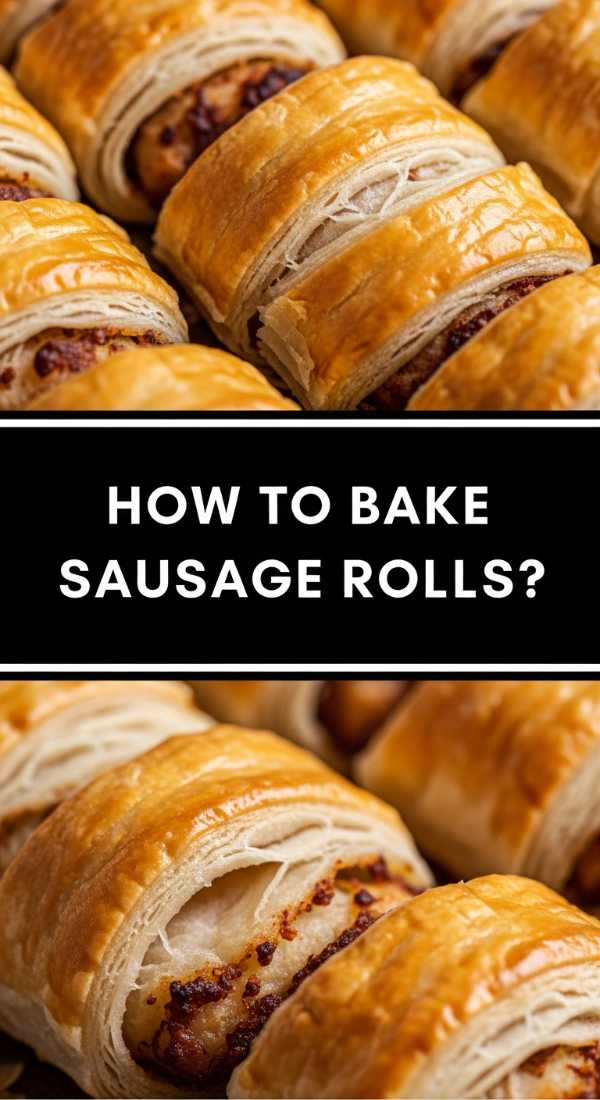
How to bake sausage rolls?
Why we love this
Sausage rolls are the epitome of sophisticated comfort. The puff pastry creates thousands of delicate, buttery layers that shatter upon impact, revealing a hearty, seasoned meat filling that is incredibly moist and flavorful. There is a beautiful, rustic elegance to the way they look when sliced into bite-sized rounds, showing off the spiral of pastry and meat. The scent of sage and thyme baked into the pork creates an autumnal, cozy atmosphere that makes these an absolute staple for any aesthetic food board.
Ingredients
- 1 sheet frozen puff pastry, thawed
- 1 lb ground pork sausage
- 1/4 cup breadcrumbs
- 1 tablespoon fresh sage, minced
- 1 egg (for egg wash)
- 1 teaspoon sesame seeds (optional garnish)
How to make it
- Preheat your oven to 400°F (200°C) and line a baking sheet with parchment paper.
- In a bowl, mix the pork sausage, breadcrumbs, and minced sage until well incorporated. The breadcrumbs help hold the juices inside the pastry.
- Roll out the puff pastry sheet on a lightly floured surface and cut it in half lengthwise to create two long rectangles.
- Form the sausage mixture into two long logs and place one down the center of each pastry rectangle.
- Brush one edge of the pastry with the beaten egg, then fold the pastry over the meat, pressing the edges together with a fork to seal.
- Brush the tops of the long rolls with more egg wash—this provides that professional, high-gloss golden finish. Sprinkle with sesame seeds if desired.
- Cut the logs into 2-inch pieces and place them on the baking sheet. Score the tops with two small diagonal slits to let steam escape.
- Bake for 20-25 minutes until the pastry is puffed and deep golden brown, and the meat is fully cooked through.
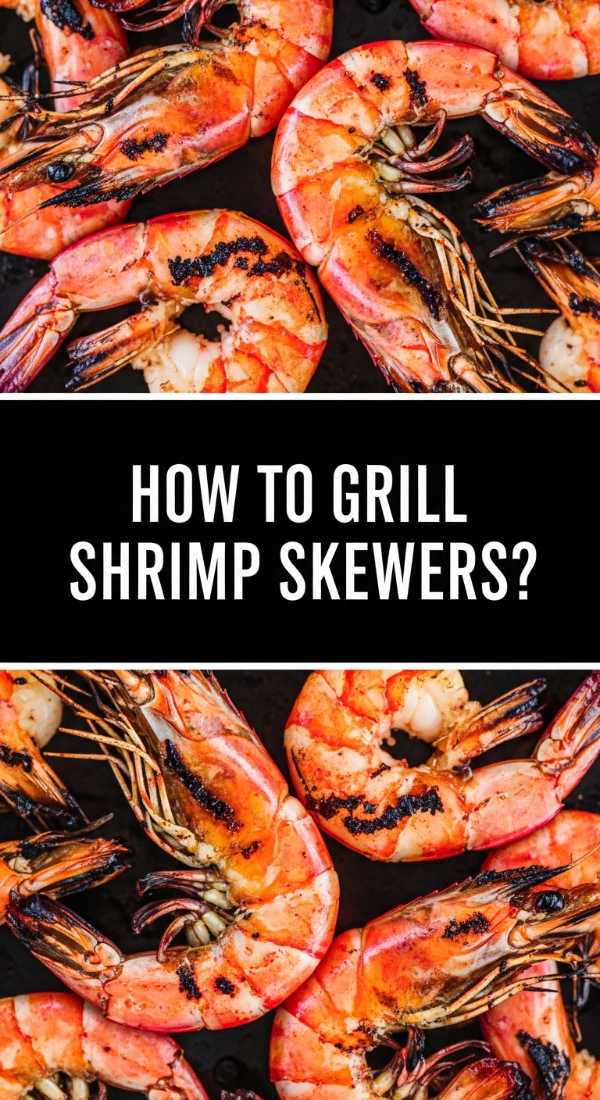
How to grill shrimp skewers?
Why we love this
Shrimp skewers add a touch of lightness and coastal flair to your food board. They are visually striking, with their elegant curved shapes and the vibrant charred marks from the grill. The sensory experience is all about the snap of the firm, succulent shrimp followed by the bright, zesty explosion of lemon and garlic. They provide a wonderful textural break from the heavier, breaded items on the board, and their pinkish-orange hue adds a sophisticated pop of color that makes the whole arrangement look curated and high-end.
Ingredients
- 1 lb large shrimp, peeled and deveined
- 2 tablespoons olive oil
- 3 cloves garlic, minced
- 1 teaspoon lemon zest
- 1/2 teaspoon red pepper flakes
- Wooden skewers (soaked in water for 30 mins)
How to make it
- In a bowl, whisk together the olive oil, minced garlic, lemon zest, and red pepper flakes. Toss the shrimp in the marinade and let them sit for no more than 15-20 minutes (any longer and the acid will start to ‘cook’ the shrimp).
- Thread 4-5 shrimp onto each soaked wooden skewer. Make sure they are touching but not tightly packed, so they cook evenly.
- Preheat your grill or a cast-iron grill pan over medium-high heat. Lightly oil the grates to prevent sticking.
- Place the skewers on the hot grill. Cook for about 2-3 minutes per side.
- Watch for visual cues: the shrimp should turn from translucent gray to an opaque, vibrant pink and white. The edges should have slight char marks.
- Do not overcook; shrimp can become rubbery very quickly. As soon as they are opaque all the way through, remove them from the heat.
- Serve with fresh lemon wedges for an extra hit of brightness right before eating.
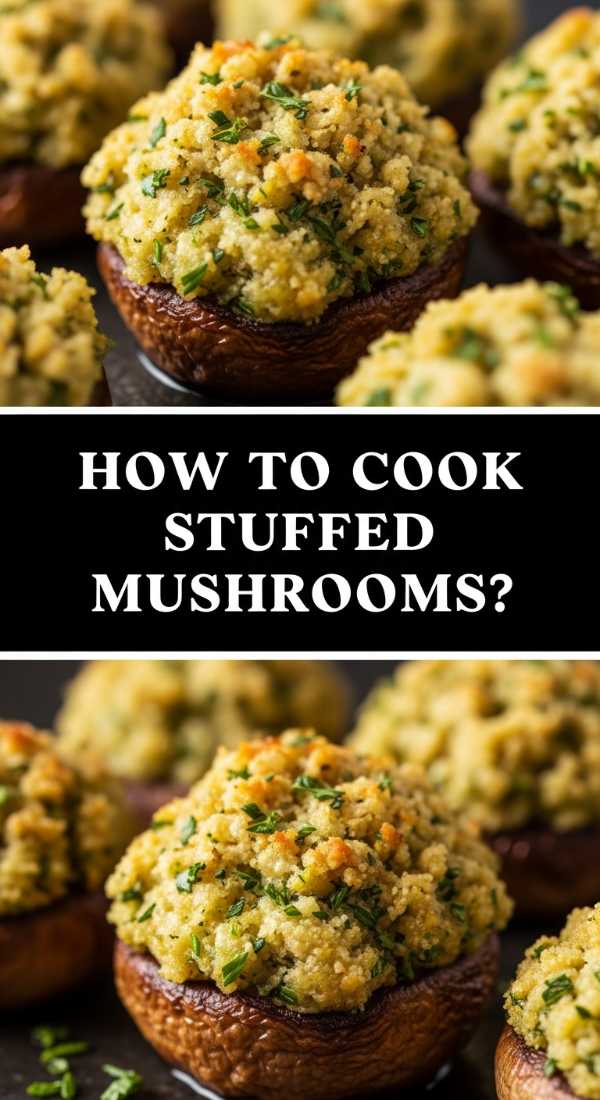
How to cook stuffed mushrooms?
Why we love this
Stuffed mushrooms are earthy, umami-rich gems that feel like a true gourmet addition to any spread. The mushroom cap acts as a tender, juicy bowl for a crunchy, herb-scented filling that is often enriched with parmesan and garlic. As they bake, they release an incredible, deep aroma that grounds the lighter scents on the board. Their dark, natural tones provide a beautiful contrast to the brighter colors of the tacos or shrimp, giving your board a grounded, professional aesthetic that is perfect for photos.
Ingredients
- 15-20 large cremini mushrooms
- 2 tablespoons butter
- 2 cloves garlic, minced
- 1/4 cup breadcrumbs
- 1/4 cup grated Parmesan cheese
- 2 tablespoons cream cheese
- 1 tablespoon fresh parsley, chopped
How to make it
- Preheat your oven to 375°F (190°C). Clean the mushrooms with a damp paper towel (don’t soak them, or they’ll become mushy).
- Carefully pop the stems out of the mushroom caps. Finely chop the stems—they are packed with flavor and will form the base of your filling.
- In a skillet, melt the butter over medium heat. Add the chopped stems and garlic, sautéing for 4-5 minutes until the moisture has evaporated and they are lightly browned.
- In a bowl, combine the sautéed stems with the breadcrumbs, Parmesan, cream cheese, and parsley. Stir until a thick paste forms.
- Generously stuff each mushroom cap with the mixture, mounding it slightly on top for a beautiful presentation.
- Place the mushrooms on a baking sheet and bake for 18-22 minutes.
- The caps should be tender and juicy, and the stuffing should be golden-brown and slightly crisp on top. Serve warm to appreciate the contrast in textures.
Creating the Final Masterpiece
Now that you have your individual components, the real fun begins: assembly! Start by placing any bowls (like dips or sauces) on the board first to act as anchors. Then, place your larger items—like the sliders and potato skins—in different areas to distribute the visual weight. Fill in the gaps with the smaller items like the skewers and mushrooms, and finally, garnish the entire board with fresh herbs, lemon wedges, and extra lime to give it that ‘viral’ finished look. Remember, there are no mistakes here—only delicious choices!
Frequently Asked Questions
- How do I keep the food warm? If you are serving a large crowd, try to time the baking of the ‘heavier’ items (like sliders and skins) to finish last. You can also use a heated marble board or simply serve in smaller batches.
- Can I prep these items in advance? Absolutely! Most of these can be assembled a few hours ahead and kept in the fridge. Just wait to do the final bake or fry until right before your guests arrive for the best texture.
- What size board should I use? For 10 subtopics, a large rectangular wooden board (about 24×18 inches) works best to ensure everything has space to breathe without looking cluttered.