
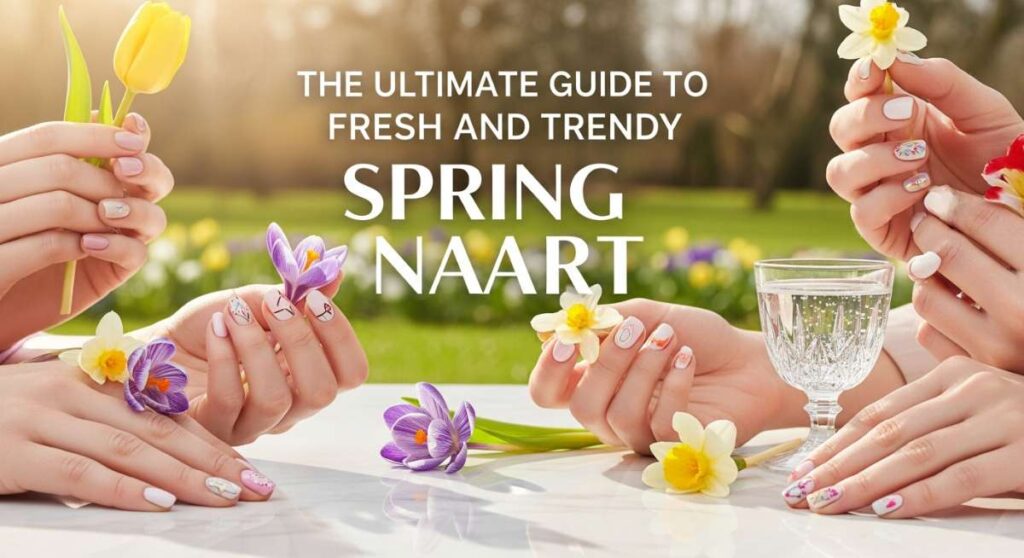
The Ultimate Guide to Fresh and Trendy Spring Nail Art
Hello, my loves! Can you feel it? That soft, golden whisper in the air and the way the earth seems to be waking up from its long, cozy slumber? Spring is finally here, and with it comes the most beautiful invitation to shed our heavy layers and embrace a fresh, colorful start. There is something so incredibly healing about watching the world bloom, and I always feel that same renewal right at my fingertips.
Whenever I sit down to do my nails, it feels like a tiny act of self-love, a moment to breathe and just be. Whether you’re sipping a lavender latte or walking through a park filled with cherry blossoms, your hands tell a story of grace and joy. Today, I’m so excited to walk you through my favorite spring nail designs that feel like a warm, cloud-soft embrace for your soul. Let’s get creative together!
3 steps to perfect red spring nails
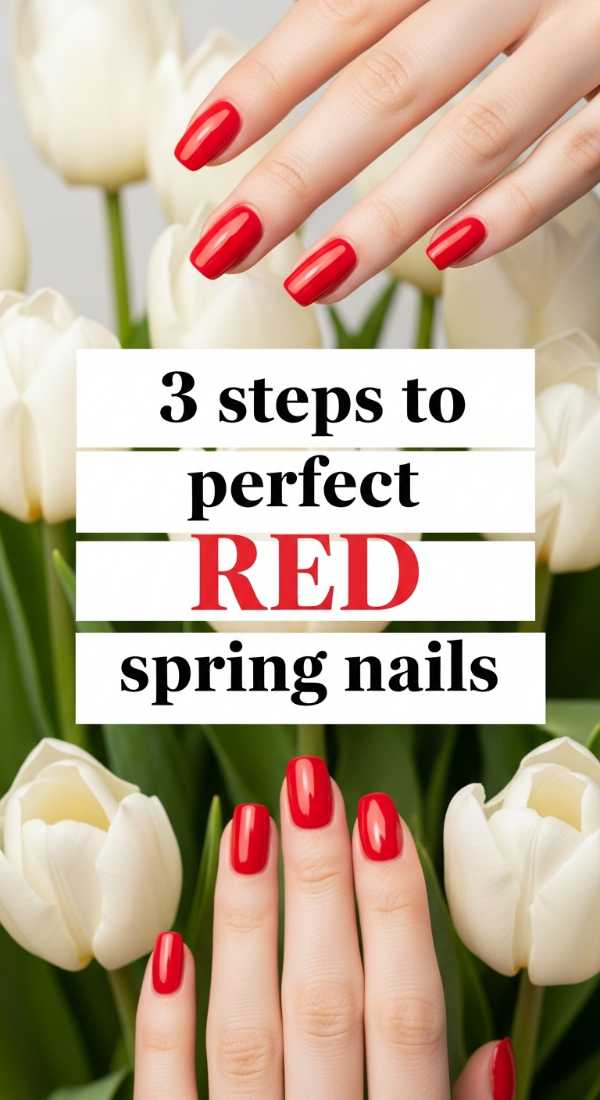
Why to love this Design:
Red is often thought of as a winter classic, but in the spring, a bright poppy red feels like the first bloom of the season. It’s a bold statement of confidence and warmth that pairs perfectly with a sundress. This design is all about that high-shine, juicy finish that makes your hands look radiant in the sunlight.
Essential Elements:
- Bright Poppy Red Polish
- Smoothing Base Coat
- High-Gloss Top Coat
How to Prepare:
- Cleanse your nails thoroughly with a lint-free wipe and alcohol to ensure a smooth canvas.
- Apply one thin layer of base coat to protect your natural nail and prevent staining.
- Sweep on two thin, even layers of your favorite red, followed by a thick layer of glossy top coat for that glass-like finish.
Budget Range
- Essie “Geranium” – $10.00
- OPI “Big Apple Red” – $11.50
- Sally Hansen Insta-Dri Top Coat – $6.00
5 easy ways to style square spring nails
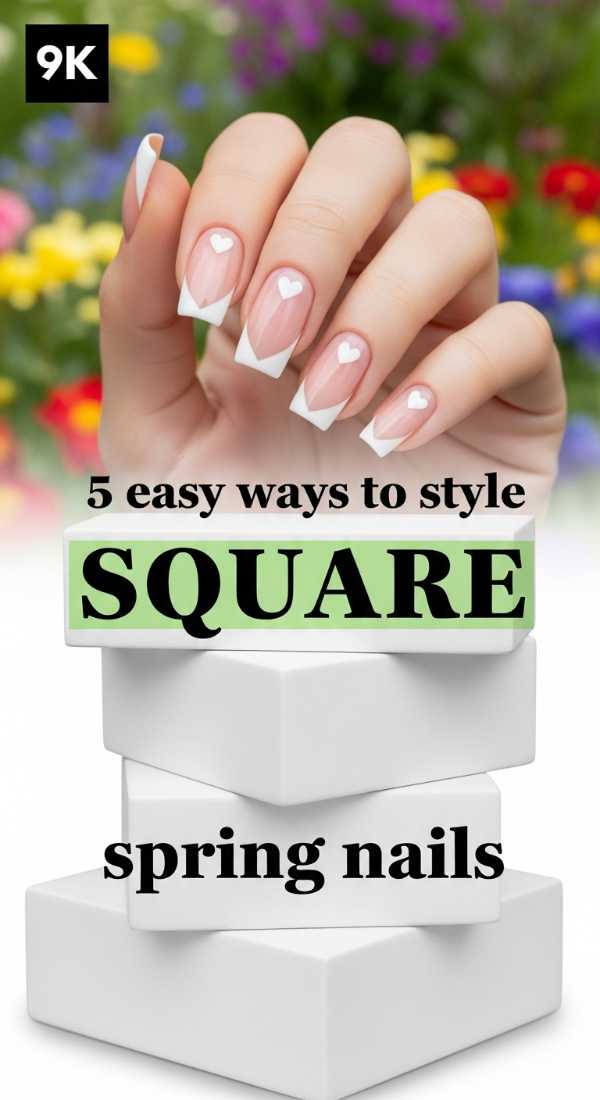
Why to love this Design:
Square nails provide a modern, clean silhouette that feels organized and chic. They offer a larger canvas for art while keeping your look grounded and sophisticated. I love how square tips give a little edge to the softness of spring pastels, creating a perfect balance of strength and sweetness.
Essential Elements:
- Flat Nail File
- Soft Pastel Palette (Mint, Lavender, Buttercup)
- Matte Top Coat for a modern twist
How to Prepare:
- File your nails in one direction to create a straight, flat edge at the tip.
- Softly buff the corners just enough to prevent snagging while maintaining the square shape.
- Experiment with a “Skittle” mani—painting each square nail a different pastel shade.
- Try a micro-French tip in a neon shade across the square edge.
- Add a single pearl sticker at the base of the nail for a touch of elegance.
Budget Range
- Olive & June Pastel Set – $40.00
- Revlon File N’ Smooth – $4.00
- Zoya “Tiana” Mint Polish – $12.00
Create 4 cute spring nail designs at home
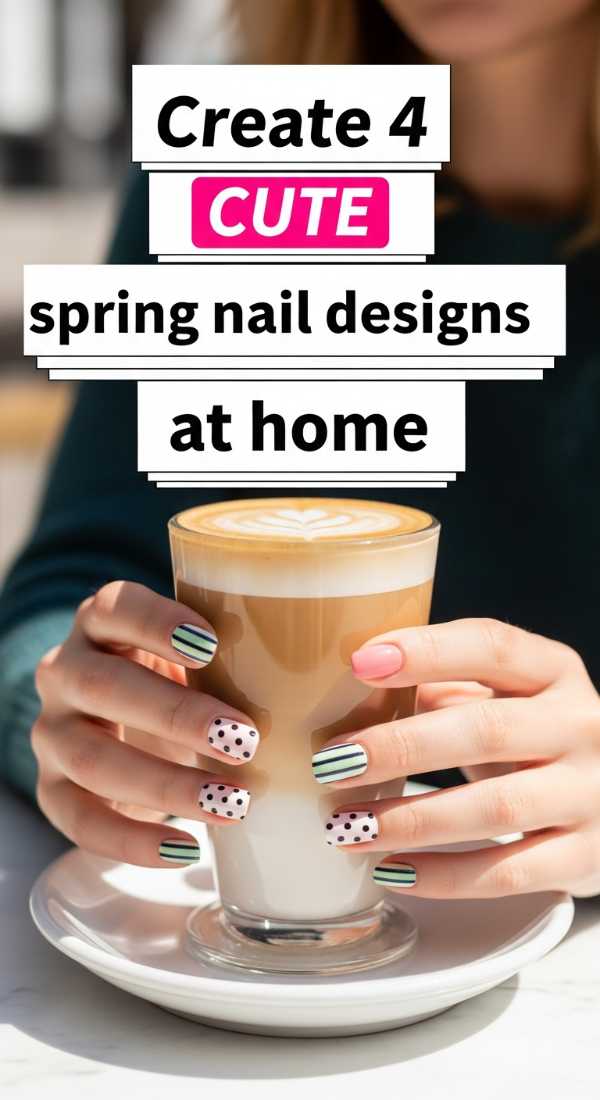
Why to love this Design:
There is nothing quite like the pride of looking down at your hands and saying, “I did that!” These designs are meant to be playful and forgiving. From tiny dots to soft gradients, these cute patterns are like a celebration of the whimsical spirit of spring. It’s DIY therapy at its absolute finest.
Essential Elements:
- Dotting Tools or a Toothpick
- Makeup Sponge for gradients
- Nude Base Color
- Pastel Nail Art Pens
How to Prepare:
- Start with a clean, buffed nail and a sheer nude base to make the designs pop.
- For design one, use a dotting tool to create a tiny daisy in the corner of your nail.
- For design two, sponge a light pink onto the tips for a soft sunset ombré.
- For design three, draw thin vertical stripes using a nail pen.
- For design four, create a “cloud” effect by layering white semi-circles at the tips.
Budget Range
- Nail Art Dotting Tool Set (Amazon) – $5.00
- Holler and Glow Nail Stickers – $4.00
- Orly “Rose-Colored Glasses” – $15.00
6 steps for chic red square spring nails
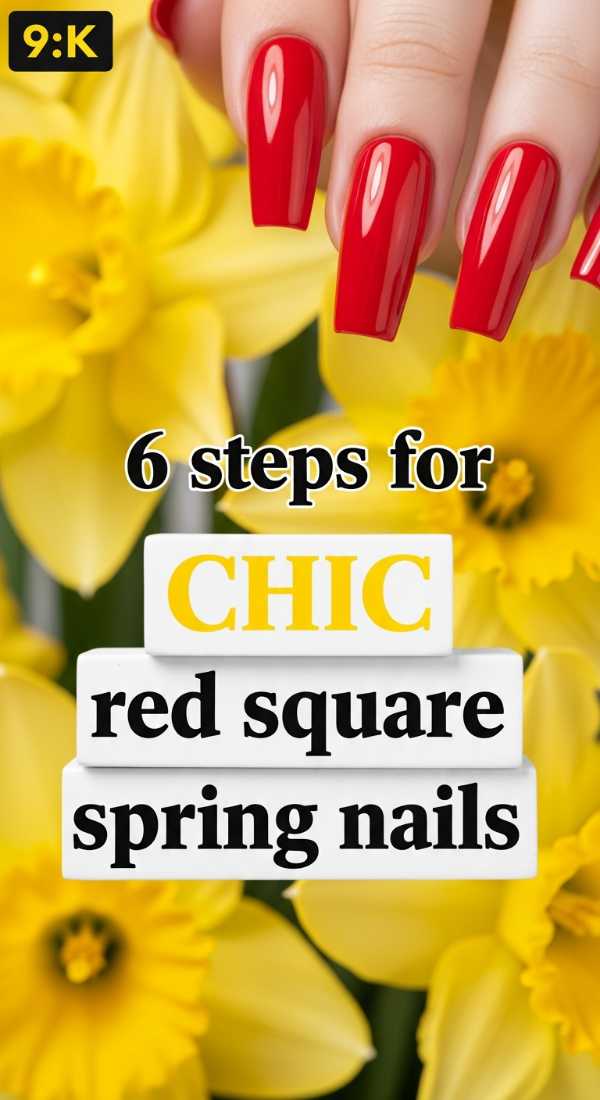
Why to love this Design:
This is the ultimate “boss babe” spring look. It combines the fiery energy of red with the structured precision of a square shape. It’s chic, it’s timeless, and it makes every outfit look expensive. I find this look especially empowering when I have a busy week ahead but still want to feel feminine.
Essential Elements:
- Deep Crimson or Cherry Red Polish
- Square-shaped Extension or Natural Square File
- Cuticle Oil for that healthy glow
How to Prepare:
- Shape the nails into a sharp square, ensuring the side walls are straight.
- Gently push back cuticles to maximize the nail bed space.
- Apply a ridge-filling base coat for a perfectly flat surface.
- Paint the first layer of red starting from the center and moving to the sides.
- Apply a second coat, making sure to cap the free edge to prevent chipping.
- Finish with a nourishing cuticle oil to frame the vibrant red beautifully.
Budget Range
- Deborah Lippmann “It’s Raining Men” – $20.00
- CND SolarOil – $9.00
- Flowery Blue Nail File – $2.00
Apply solid color spring nails in 10 minutes
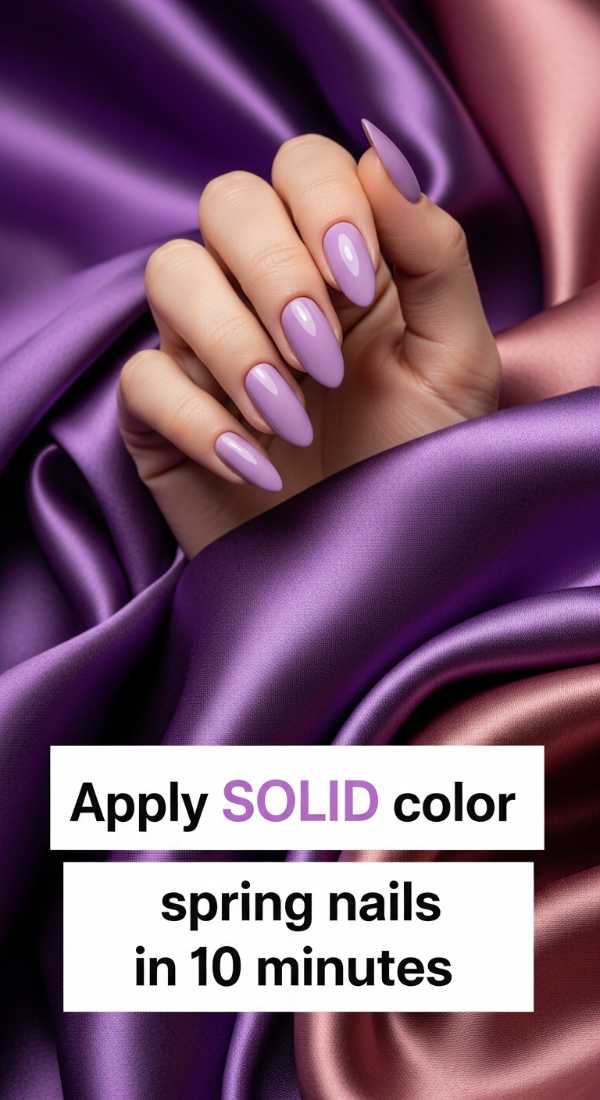
Why to love this Design:
We all have those weeks where life moves a little too fast, don’t we? This approach is for the busy soul who still wants to feel put together. A solid, creamy spring color—like a soft peach or a sky blue—can completely shift your mood in less time than it takes to brew a pot of tea.
Essential Elements:
- Quick-Dry Polish
- Base/Top Coat Duo
- Clean-up Brush with Acetone
How to Prepare:
- Quickly swipe nails with polish remover to get rid of any oils.
- Apply a 2-in-1 base and top coat to save a step.
- Use a high-pigment, one-coat formula if possible.
- Clean up any flooded cuticles with a small brush dipped in acetone for a salon-pro finish.
Budget Range
- Sally Hansen Insta-Dri – $7.00
- Pure Ice Nail Polish – $3.00
- Ella + Mila Soy Polish Remover – $11.50
3 simple techniques for spring floral nail designs
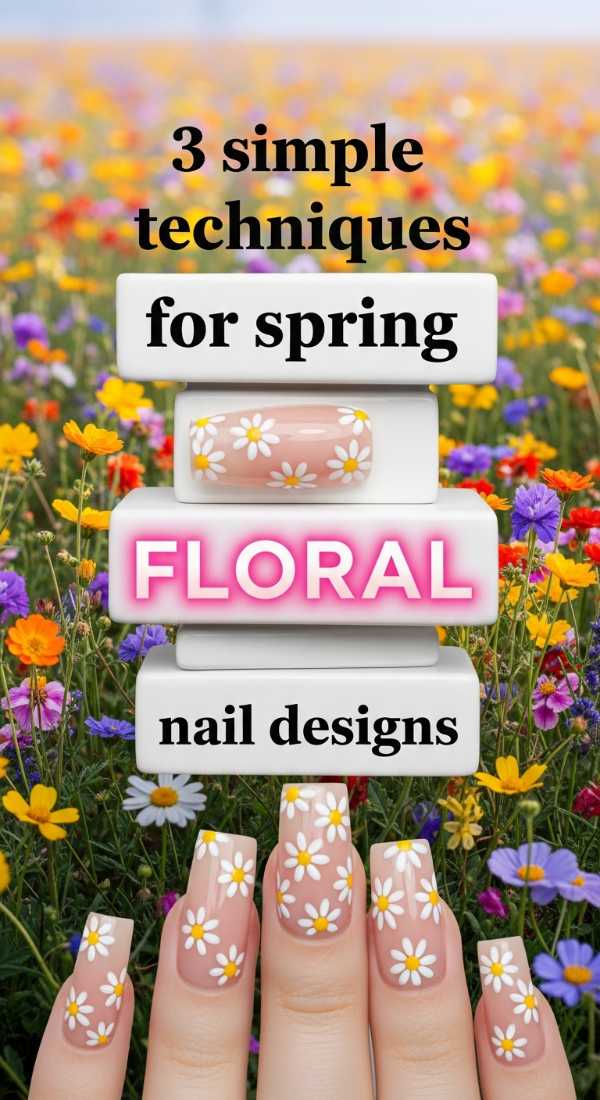
Why to love this Design:
Florals for spring? Groundbreaking, I know! But truly, wearing flowers on your nails is like carrying a secret garden with you. These techniques make it so easy to achieve a delicate, hand-painted look without needing the skills of a master artist. It’s soft, romantic, and so very “cottagecore.”
Essential Elements:
- White and Yellow Polish (for daisies)
- Fine Detail Brush
- Clear Top Coat
How to Prepare:
- The “Dot Method”: Use a dotting tool to place five white dots in a circle and a yellow dot in the center.
- The “Swipe Method”: Use a thin brush to swipe petals toward a center point for a more abstract tulip look.
- The “Sticker Hack”: Apply floral water decals onto a dry base for an instant, intricate garden.
Budget Range
- Maniology Floral Stamping Plate – $8.00
- Beetles Nail Art Brushes – $9.00
- OPI “Alpine Snow” – $11.50
5 ways to wear red spring nails with art
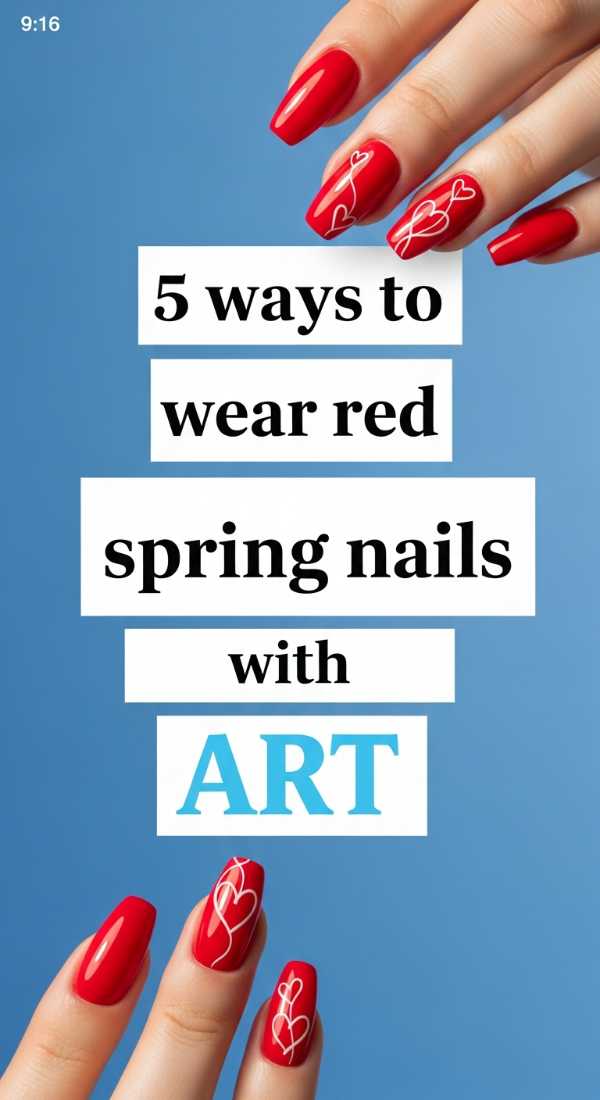
Why to love this Design:
Red doesn’t have to be lonely! Adding art to a red base gives it a playful, modern twist that feels less formal and more festive. It’s about taking a classic and making it your own. Think of it as adding a little sprinkle of magic to an old favorite.
Essential Elements:
- Classic Red Polish
- Gold Foil or Silver Glitter
- White Striping Tape
How to Prepare:
- Accent Nail: Keep four nails solid red and do a white floral print on the ring finger.
- Gold Flakes: Press tiny pieces of gold foil into a tacky red coat for a royal feel.
- Negative Space: Leave a small heart-shaped window of natural nail showing through the red.
- Glitter Gradient: Sweep silver glitter from the base of the nail upward over the red.
- Geometric Lines: Use striping tape to create crisp white lines over a dry red base.
Budget Range
- Nail Art Gold Foil Flakes – $6.00
- Essie “Set in Stones” Glitter – $10.00
- Seche Vite Dry Fast Top Coat – $9.50
4 steps to get trendy cute square nails
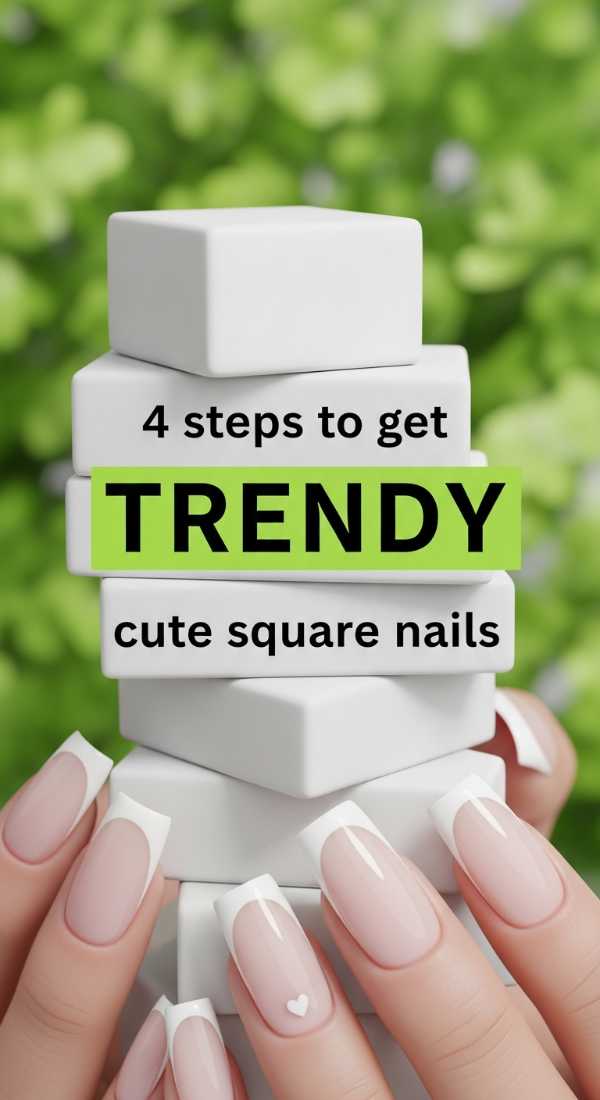
Why to love this Design:
There’s a reason the “cute square” look is taking over social media—it’s youthful, trendy, and incredibly flattering. When you combine a shorter square length with trendy designs like “aura” nails or “swirls,” you get a look that is both edgy and adorable. It’s the perfect way to feel current.
Essential Elements:
- Short-to-Medium Square Extensions
- Jelly Polishes
- UV Lamp (if using gel)
How to Prepare:
- Trim nails to a manageable length and file perfectly straight across.
- Apply a translucent “jelly” base color for a trendy, squishy look.
- Use a sponge to dab a darker color in the center for an “aura” effect.
- Seal with a high-shine top coat to give it that trendy, plastic-like finish.
Budget Range
- Modelones Jelly Gel Polish Set – $15.00
- SUNUV LED Lamp – $25.00
- Kiss PowerFlex Nail Glue – $4.00
7 steps to your best spring nail designs ever
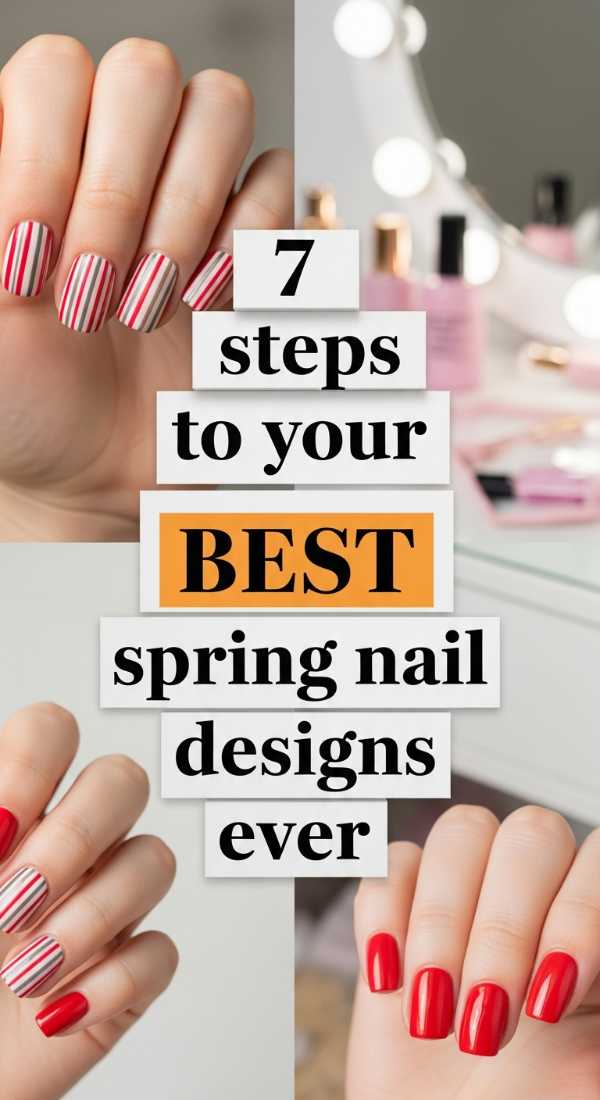
Why to love this Design:
This is the comprehensive ritual for the girl who wants the absolute best results. It’s not just about the color; it’s about the health of the nail and the precision of the application. When you follow these steps, your manicure won’t just look good—it will last for weeks and keep your nails strong.
Essential Elements:
- Glass Nail File (gentler on nails)
- Cuticle Remover Gel
- Bonder Base Coat
How to Prepare:
- Dehydrate the nail plate with an alcohol swipe.
- Apply cuticle remover and gently push back growth.
- Shape with a glass file to prevent peeling.
- Apply a pH-balancing bonder.
- Thin coats are key—never gloop the polish!
- Wait 2 minutes between every single layer.
- Finish with a professional-grade top coat and ice-water dip to set.
Budget Range
- Orly Bonder Base Coat – $12.00
- Blue Cross Cuticle Remover – $6.00
- Mont Bleu Glass Nail File – $10.00
Paint vibrant red spring nails in 4 minutes
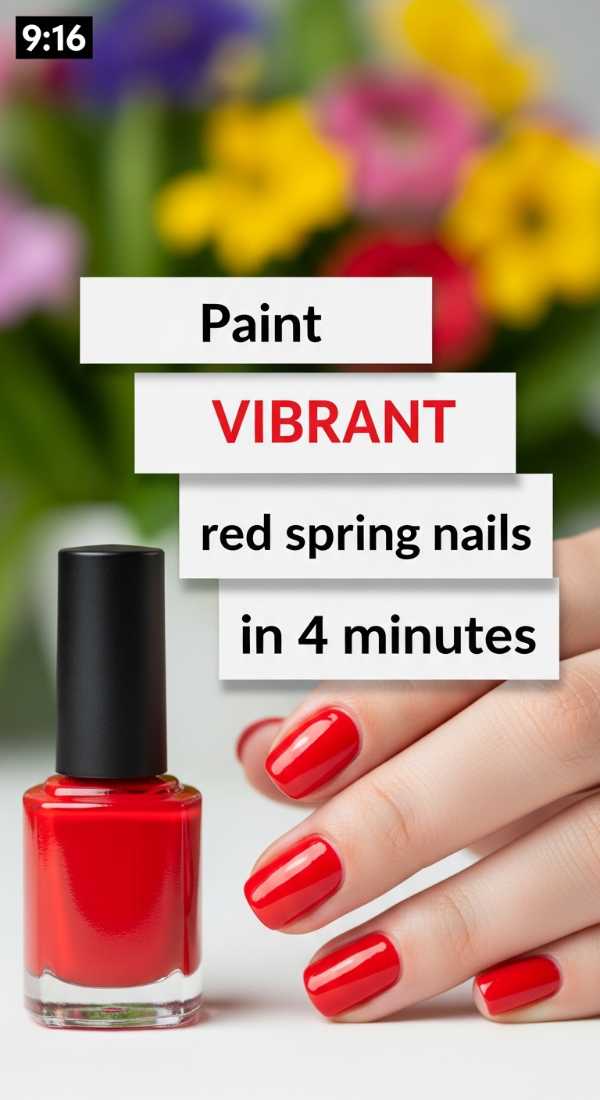
Why to love this Design:
Sometimes we just need a quick pop of color before running out the door for a brunch date. This 4-minute method focuses on efficiency without sacrificing that vibrant, cherry-red impact. It’s the ultimate hack for the girl on the go who refuses to leave the house without a little polish.
Essential Elements:
- Highly Pigmented Red One-Coater
- Quick-Dry Spray or Drops
How to Prepare:
- One minute: Prep by swiping one quick coat of base.
- Two minutes: Apply one generous (but not messy) coat of high-pigment red.
- Three minutes: Apply a quick-dry top coat.
- Four minutes: Use quick-dry drops and you are out the door!
Budget Range
- Holo Taco “Left on Red” – $11.00
- Nicole Diary Quick Dry Drops – $5.00
- Pacifico Bio-Glitter Top Coat – $12.00
Conclusion: Embrace Your Spring Glow
As we wrap up our journey through these spring designs, I hope you feel inspired to take a little time for yourself this week. Whether you choose a fiery red or a soft pastel floral, remember that your nails are a reflection of your own unique beauty and the vibrant life you’re leading. Spring is all about blooming where you are planted, and sometimes, that start with a fresh coat of polish and a deep breath of fresh air. Stay beautiful, my loves, and let your light shine through every fingertip!