
10 Viral Home Hacks That Will Completely Transform Your Space
There is something almost magical about the way a home can evolve from a simple building into a living, breathing reflection of our own souls. I remember the first time I realized that my space wasn’t just a place to sleep; it was a canvas waiting for my personality to be brushed across it. Whether it’s the quiet joy of watching a new flower bed bloom or the satisfaction of a DIY project finally coming together, these changes do more than just improve aesthetics—they improve our quality of life.
Lately, my social media feeds have been exploding with creative, budget-friendly ways to elevate every corner of the home and garden. From the backyard to the front porch, these viral trends are taking over for a reason: they are accessible, stunning, and deeply rewarding. Today, I’m sharing ten of my favorite viral home hacks that will help you craft a space that feels like a permanent vacation and a warm embrace all at once.
How to Create a Cozy Duck Enclosure for Happy Backyard Pets

Why we love this
There is nothing quite as charming as the gentle, rhythmic quacking of ducks as they waddle through a sun-dappled yard. Creating a cozy enclosure isn’t just about utility; it’s about crafting a sanctuary that smells of fresh cedar shavings and dried lavender, where your feathered friends feel safe and cherished. This project brings a touch of rustic, farm-to-table elegance to your backyard, offering a peaceful focal point that connects you directly to the rhythms of nature and the delight of gathering fresh eggs each morning.
Essential Elements:
- Pressure-treated lumber for the frame
- Hardware cloth (not chicken wire, for predator safety)
- Cedar shavings or hemp bedding
- Nesting boxes and a sturdy ramp
- Weatherproof roofing material (corrugated metal or shingles)
- Locking latches for safety
How to make it
- Level the ground where the enclosure will sit, ensuring there is proper drainage to prevent mud buildup during the rainy season.
- Build the main frame using 2×4 pressure-treated lumber, creating a structure that is at least 4 feet high to allow for easy cleaning and ventilation.
- Attach hardware cloth to the exterior using heavy-duty staples, burying the bottom edge 6-12 inches underground to deter digging predators like foxes or raccoons.
- Construct a raised sleeping area inside the frame with a solid wooden floor, adding a hinged door for easy egg collection and daily cleaning access.
- Install a gentle ramp leading from the ground to the sleeping quarters, ensuring it has small wooden slats for traction so the ducks don’t slip.
- Add the roof at a slight pitch to allow for water runoff, ensuring the overhang is wide enough to keep the interior dry during storms.
- Finish the interior with a thick layer of absorbent bedding and place nesting boxes in the darkest, quietest corner to encourage laying.
How to Craft Realistic Mud Kitchen Rock Food for Endless Sensory Play

Why we love this
Imagine the sound of little hands clinking smooth river stones together as they “cook” up a feast in the garden. This DIY project transforms ordinary rocks into vibrant, tactile works of art that spark endless imaginative play. The texture of the cool stone against the skin, the bright pops of acrylic color mimicking tomatoes and lemons, and the sound of laughter in the fresh air make this a sensory masterpiece. It’s a beautiful way to encourage children to connect with the outdoors while creating durable toys that will last through seasons of sun and rain.
Essential Elements:
- Smooth, flat river stones (various sizes)
- Outdoor-grade acrylic paint or paint pens
- Fine-point black permanent markers for detail
- Clear UV-resistant spray sealant
- Soft-bristle brushes
How to make it
- Scrub your river stones thoroughly with warm soapy water to remove all dirt and oils, then let them dry completely in the sun for at least two hours.
- Select stones based on their natural shapes—oval for potatoes, round for tomatoes, and long, thin stones for carrots or cucumbers.
- Apply a base coat of white acrylic paint if the stone is very dark; this helps your vibrant colors pop and prevents them from looking muddy.
- Paint your fruit or vegetable designs using high-quality outdoor acrylics, layering the colors to add depth and realism, such as adding tiny yellow dots for strawberry seeds.
- Once the paint is dry, use a fine-point permanent marker to add tiny details like the veins in a lettuce leaf or the “eyes” on a potato rock.
- In a well-ventilated area, apply two to three thin coats of UV-resistant clear sealant, allowing each coat to dry for 30 minutes to ensure the rocks are waterproof and fade-resistant.
- Place the finished rocks in a wooden crate or basket near your mud kitchen once the sealant has cured for 24 hours.
How to Design Lush Flower Beds in Front of House for Instant Curb Appeal

Why we love this
Walking up to a home framed by lush, blooming flower beds feels like being greeted with a warm, floral-scented hug. The visual transition from the street to your front door becomes a journey through textures—the velvet of dusty miller, the structural elegance of boxwoods, and the soft petals of hydrangeas. It’s about creating a first impression that radiates care and hospitality, making your home stand out with a professional, manicured look that feels both high-end and deeply inviting every time you pull into the driveway.
Essential Elements:
- Landscaping fabric or cardboard for weed suppression
- Nutrient-rich topsoil and organic compost
- A mix of perennials (base) and annuals (color)
- Hardwood mulch (dark brown or black)
- Decorative stone or brick edging
How to make it
- Mark out the shape of your beds using a garden hose to create soft, organic curves that lead the eye naturally toward the front door.
- Remove any existing grass or weeds, then layer damp cardboard over the area to naturally suppress future weed growth without harsh chemicals.
- Add a 4-inch layer of high-quality garden soil mixed with organic compost to provide a nutrient-dense foundation for your new plants.
- Arrange your plants while they are still in their pots, placing taller structural shrubs in the back and shorter, spreading flowers in the front.
- Dig holes twice as wide as the root ball, gently teasing the roots before placing them in the ground at the same depth they were in the nursery pot.
- Install your edging material—whether it’s stacked stone or scalloped brick—to create a clean, defined border between the lawn and the garden.
- Finish with a 3-inch layer of mulch to lock in moisture and regulate soil temperature, being careful not to pile it directly against the plant stems.
How to Style a Vibrant Summer Door Hanger for a Welcoming Entryway
Why we love this
A door hanger is more than just decor; it is a signal to the world that someone thoughtful lives inside. During the summer, a vibrant door hanger captures the essence of long, golden days with its bright colors and breezy textures. We love the way a splash of coral or sunshine yellow pops against a neutral door, instantly boosting the mood of anyone who rings the bell. It adds a layer of personality and seasonal flair that makes your entryway feel fresh, updated, and ready for a summer full of guests and gatherings.
Essential Elements:
- A wooden round or grapevine wreath base
- High-quality faux greenery (eucalyptus or ferns)
- Faux silk flowers (peonies, sunflowers, or dahlias)
- Weather-resistant wire-edged ribbon
- Hot glue gun and floral wire
- Personalized vinyl decal or hand-painted script
How to make it
- Clean your base—if using a wooden round, sand it lightly and apply a coat of outdoor-grade paint or stain in a color that complements your front door.
- Layout your greenery first, creating a crescent shape or a full circle to provide a lush, textured background for your focal flowers.
- Secure the greenery using floral wire or high-temp hot glue, ensuring the pieces are angled to mimic the natural growth of a real plant.
- Layer in your large “star” flowers, clustering them in odd numbers (like groups of three) to create a more pleasing, professional-looking visual balance.
- Tie a multi-looped bow using wire-edged ribbon, which allows you to fluff and shape the loops so they don’t go flat in the wind.
- If using a wooden round, apply your vinyl lettering or hand-painted greeting (like “Hello Summer” or your family name) in the center or slightly off-center.
- Attach a sturdy loop of jute twine or a wire hanger to the back, ensuring it is centered so the piece hangs perfectly straight on your door hook.
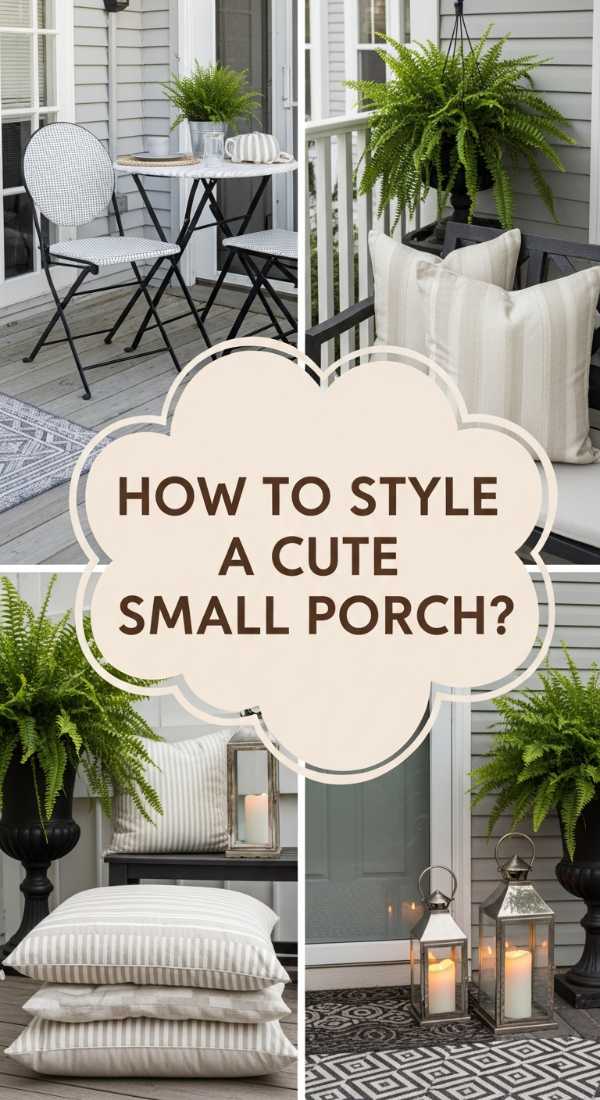
How to Arrange a Cute Small Porch for Relaxing Morning Coffee

Why we love this
There is a specific kind of peace found in a small porch that has been thoughtfully curated for those quiet, early morning hours. Even the tiniest concrete slab can be transformed into a cozy nook where the steam from your coffee rises into the cool air and the world feels still. We love the intimacy of a small space; it forces you to choose only the most comfortable textures and most beautiful plants. It’s about reclaiming a few square feet of the outdoors and turning them into a private retreat for reflection and relaxation.
Essential Elements:
- A compact bistro set or two slim Adirondack chairs
- Outdoor area rug to define the space
- Potted plants of varying heights
- Weatherproof throw pillows and a light blanket
- String lights or a small outdoor lantern
How to make it
- Start by clearing everything off the porch and giving the floor a deep scrub or power wash to create a clean, fresh foundation.
- Lay down an outdoor rug that fills most of the floor space; this adds immediate warmth and makes the porch feel like an extension of your indoor living room.
- Position your seating at an angle to make the space feel larger and more inviting, ensuring there is enough room to walk past without feeling cramped.
- Place a small side table between the chairs—this is essential for holding your morning coffee, books, or a small candle.
- Use vertical space by hanging a planter or adding a tiered plant stand in the corner to bring in greenery without taking up precious floor real estate.
- Add soft touches like a couple of high-quality outdoor pillows and a lightweight throw for those chilly mornings before the sun fully hits the porch.
- Install battery-operated lanterns or solar string lights to create a warm glow that makes the space usable and magical even after the sun goes down.
How to Choose Two Tone Deck Color Ideas for a Modern Backyard Oasis

Why we love this
The two-tone deck is the ultimate modern upgrade, bringing an architectural, high-end feel to a standard backyard. By contrasting a dark charcoal or deep chocolate frame with lighter, honey-toned floorboards, you create a visual boundary that feels sophisticated and expensive. We love the way this design technique defines the space, making the deck look more like a piece of custom furniture than a simple wooden platform. It’s a bold choice that adds depth and dimension, providing a stunning backdrop for modern outdoor furniture and lush green lawns.
Essential Elements:
- Two contrasting shades of high-quality exterior deck stain
- Painter’s tape (high-adhesion for outdoor surfaces)
- Power washer and deck cleaner
- Synthetic bristle brushes and rollers
- Long-handled extension pole
How to make it
- Power wash the deck thoroughly to remove all old stain, mold, and debris, then allow the wood to dry for at least 48 to 72 hours until no moisture remains.
- Apply the lighter “main” color to the floorboards first, using a roller for the large areas and a brush for the gaps between the boards to ensure full coverage.
- Let the first color dry completely (usually 24 hours) before applying painter’s tape along the edges where the two colors will meet.
- Carefully apply the darker “accent” color to the railings, posts, and the outer perimeter boards (the picture frame) to create a crisp, modern contrast.
- Work in small sections with the darker stain, using a brush to maintain precision and avoid drips onto the lighter floorboards below.
- Remove the painter’s tape while the second coat is still slightly tacky to achieve the cleanest, sharpest lines possible between the two tones.
- Allow the entire deck to cure for at least 48 hours before moving furniture back into place to prevent any scuffing or sticking of the new finish.
How to Plant Low Maintenance Flower Bed Ideas for Effortless Garden Beauty
Why we love this
Low maintenance doesn’t mean low beauty; in fact, it often means a garden that looks more natural and established. We love the idea of a garden that thrives on its own, allowing you more time to sit in a lounge chair with a cold drink rather than kneeling in the dirt with a weeding tool. By choosing hardy perennials and strategic groundcovers, you create a self-sustaining ecosystem that changes beautifully with the seasons. The scent of lavender, the silver leaves of lamb’s ear, and the reliable blooms of coneflowers create a tapestry of color that feels effortless and timeless.
Essential Elements:
- Native perennial plants (e.g., Coneflowers, Black-eyed Susans)
- Drought-tolerant shrubs (e.g., Boxwoods or Spirea)
- Slow-release organic fertilizer
- Soaker hoses for efficient watering
- Pre-emergent weed preventer
How to make it
- Choose a selection of native plants that are naturally adapted to your local climate and soil conditions, as these will require significantly less water and care.
- Group plants with similar water and light needs together (a technique called hydro-zoning) to ensure every plant gets exactly what it needs without extra effort.
- Incorporate evergreen shrubs to provide structure and color during the winter months when the flowering perennials have gone dormant.
- Install a simple soaker hose system hidden under the mulch, which delivers water directly to the roots and reduces water waste and fungal diseases.
- Apply a pre-emergent weed preventer in early spring to stop weed seeds from germinating before they even have a chance to take over your beds.
- Use a thick, 3-inch layer of wood chips or shredded bark to suppress weeds and keep the soil moist, significantly reducing the need for manual weeding.
- Perform a simple “deadheading” (cutting off faded blooms) once a week to encourage more flowers and keep the garden looking tidy with minimal work.
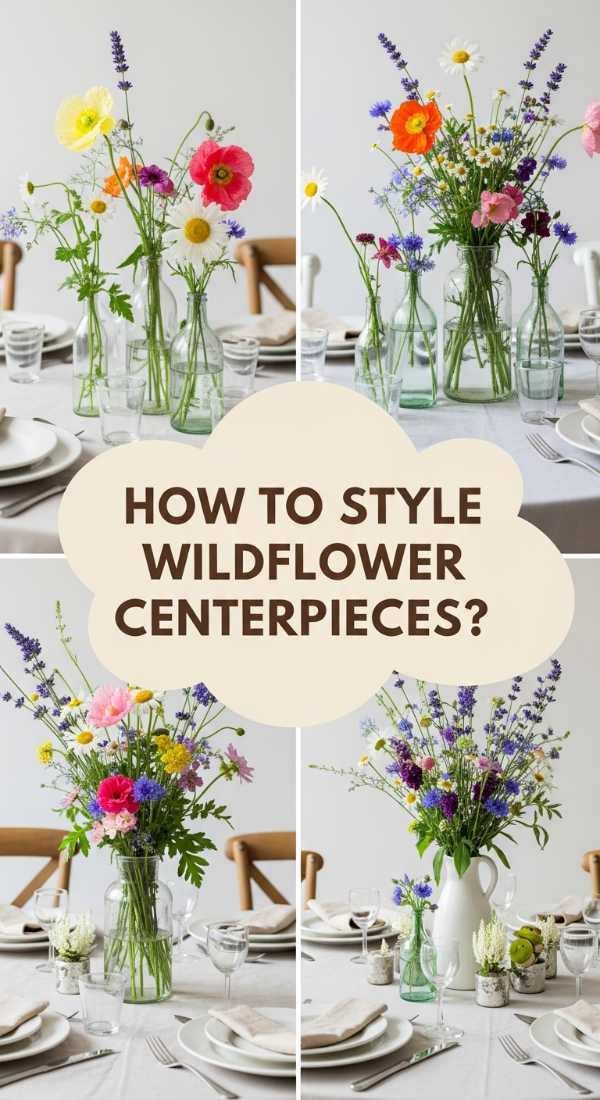
How to Assemble Wildflower Centerpieces Round Table for Whimsical Dinner Parties

Why we love this
There is a whimsical, untamed elegance in a centerpiece that looks like it was gathered during a stroll through a summer meadow. Wildflower arrangements on a round table encourage conversation and connection, bringing the carefree spirit of the outdoors right to your dinner plate. We love the mix of delicate textures—the airy breath of Queen Anne’s Lace, the bold pops of poppies, and the fragrance of wild herbs. It’s a style that feels unpretentious and deeply personal, making every guest feel like they’ve stepped into a secret, enchanted garden party.
Essential Elements:
- A collection of mismatched vintage glass jars or stoneware crocks
- A mix of wildflowers (Cosmos, Zinnias, Daisies)
- Greenery fillers (Ferns, Eucalyptus, or Ivy)
- Floral shears or sharp scissors
- Floral foam or a “frog” for stability
How to make it
- Select a variety of flowers with different heights and textures, aiming for a mix of “thrillers” (bold blooms), “fillers” (smaller clusters), and “spillers” (vines or drooping greens).
- Cut the stems at a 45-degree angle under lukewarm running water to ensure maximum hydration and longevity for your arrangement.
- Place a floral frog or a piece of chicken wire inside your central vase to help the stems stand upright and spread out naturally.
- Start by creating a base of greenery around the rim of the vase, letting some pieces spill over the edge to soften the look of the container.
- Add your largest, most vibrant flowers to the center, rotating the vase as you work to ensure the arrangement looks beautiful from every angle of the round table.
- Tuck in the smaller filler flowers to bridge the gaps, keeping the overall shape loose and airy rather than tight and formal.
- Cluster several smaller jars around the main centerpiece with single stems to create a “meadow” effect that spans the center of the table without blocking sightlines.
How to Build DIY Outdoor Shower Ideas Simple for Refreshing Summer Rinses

Why we love this
An outdoor shower is the ultimate summer luxury, offering a refreshing escape that feels like a high-end resort in your own backyard. The feeling of cool water on sun-warmed skin, surrounded by the scent of cedar and the rustle of leaves, is an unmatched sensory experience. We love it for its practicality—keeping sand and mud out of the house—but also for the way it elevates a simple daily routine into a moment of pure bliss. It’s a project that brings a sense of freedom and a tropical vibe to any outdoor space.
Essential Elements:
- Outdoor-rated shower head and plumbing kit
- Cedar or pressure-treated wood planks for the enclosure
- River rock or gravel for a drainage base
- Waterproof sealant or outdoor wood stain
- Heavy-duty hooks for towels
How to make it
- Select a location near your existing outdoor water spigot to minimize plumbing complexity, ensuring the area has a natural slope for drainage.
- Dig out a 3×3 foot area about 6 inches deep and fill it with decorative river rocks or pea gravel to create a natural, effective drainage bed.
- Construct a simple three-sided privacy screen using cedar planks, leaving small gaps between the boards for airflow while maintaining privacy.
- Mount the outdoor shower kit to a sturdy vertical post or the side of your house, ensuring all connections are tightened with plumber’s tape to prevent leaks.
- Connect the shower to your garden hose using a high-quality brass splitter, or run a permanent PEX line if you prefer a more professional setup.
- Apply a clear waterproof sealant to the wood to protect it from constant moisture and prevent graying over time.
- Install a few oversized brass hooks on the exterior of the enclosure to keep fluffy towels dry and within easy reach for your post-shower rinse.
How to Select Pool Stone and Tile Ideas for a Luxury Resort Feel
[IMAGE_10]
Why we love this
The right combination of stone and tile can transform a standard pool into a breathtaking oasis that rivals the world’s most exclusive spas. We love the way sunlight dances off iridescent glass tiles and the sophisticated, earthy feel of natural stone coping underfoot. This design choice is about creating a visual and tactile experience; the cool touch of travertine on a hot day and the deep, shimmering blues of the water create a sanctuary for the senses. It’s the ultimate way to bring a permanent sense of vacation and luxury to your home.
Essential Elements:
- Natural stone coping (Travertine, Slate, or Limestone)
- Glass or porcelain pool tiles for the waterline
- Non-slip outdoor pavers for the surrounding deck
- High-quality waterproof thin-set and grout
- Expansion joint material
How to make it
- Choose a “cool-touch” stone like light-colored travertine for the coping (the edge of the pool) to ensure it remains comfortable for bare feet even in direct midday sun.
- Select waterline tiles that complement the color of your pool’s interior finish; blues and teals create a classic tropical look, while grays and whites offer a modern, chic vibe.
- Layout the stone and tile in a dry run before installing to ensure the patterns flow naturally and the corners are perfectly mitered.
- Apply a high-bond, waterproof thin-set to the back of each tile, pressing firmly to ensure there are no air pockets where water could freeze and cause cracking.
- Use a grout color that matches the stone to create a seamless, monolithic look that makes the pool area feel larger and more cohesive.
- Ensure that the deck pavers are installed with a slight 1-degree pitch away from the pool to prevent dirty rainwater and debris from washing back into the clean pool water.
- Seal the natural stone with a penetrating, breathable sealer that protects against salt or chlorine damage while maintaining the stone’s natural grip.
Transforming Your House Into a Home
As we’ve seen, the most impactful changes don’t always require a massive renovation budget or a team of contractors. Sometimes, all it takes is a few river rocks, a fresh coat of two-tone stain, or the soft light of a new porch lantern to completely shift the energy of your space. These hacks are about more than just “viral” trends—they are about the joy of creation and the pride of ownership. I hope these ideas inspire you to step outside, roll up your sleeves, and add a little more of yourself to the place you call home. Your sanctuary is waiting!