
Sun, Sand, and Style: Your Ultimate Guide to Summer 2026 Nail Art
Hello my loves! Can you feel it? That first, soft kiss of the 2026 summer sun on your skin? There is something so magical about this time of year—it’s like the whole world is exhaling a long, warm sigh of relief. As we tuck away our heavy coats and step into the light, I’ve been thinking so much about how we can carry that sunshine right at our fingertips. Your nails aren’t just a manicure; they are the tiny, sparkling storytellers of your summer adventures.
I’ve spent the last few weeks sipping iced lattes and dreaming up the most soul-soothing, trend-setting designs for our best summer yet. Whether you’re dancing at a beach bonfire, walking across a graduation stage, or just enjoying the quiet glow of a sunset on your porch, I want you to look down at your hands and feel an instant rush of joy. Grab your favorite polish and let’s dive into the colors of Summer 2026 together.
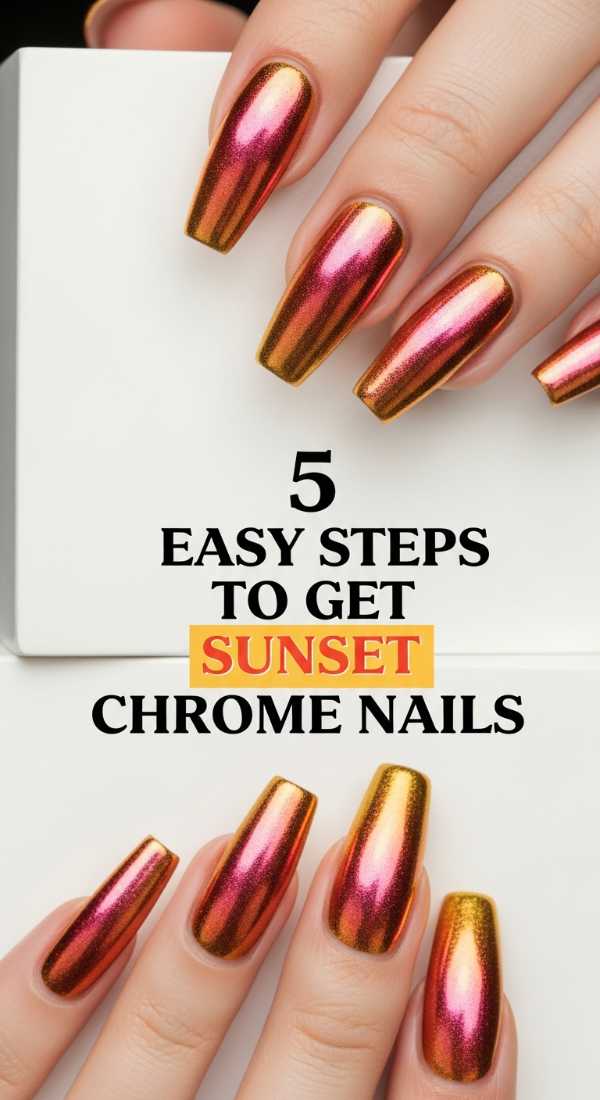
The Golden Hour: 5 Easy Steps to Get Sunset Chrome Nails
Why to love this Design:
There is nothing quite like that magical moment when the sky turns into a palette of melted gold and soft peach. Sunset chrome nails capture that fleeting glow and keep it with you all day long. It’s sophisticated yet ethereal, giving your hands a lit-from-within look that flatters every skin tone under the bright summer sun.
Essential Elements:
- Peach or apricot base polish
- Fine gold chrome powder
- Silicone applicator tool
- No-wipe top coat
How to Prepare:
- Apply two thin coats of your favorite peach base color and let dry completely.
- Apply a thin layer of no-wipe top coat and cure/dry until it’s just slightly tacky.
- Use your silicone tool to buff the gold chrome powder onto the nail until it shines like a mirror.
- Gently brush away any excess powder with a soft fluff brush.
- Seal the magic with a final glossy top coat to protect the chrome finish.
Budget Range
- Essie Expressie in ‘Check In to Check Out’ ($10)
- Artdone Holographic Chrome Powder ($8)
- Beetles No Wipe Gel Top Coat ($7)
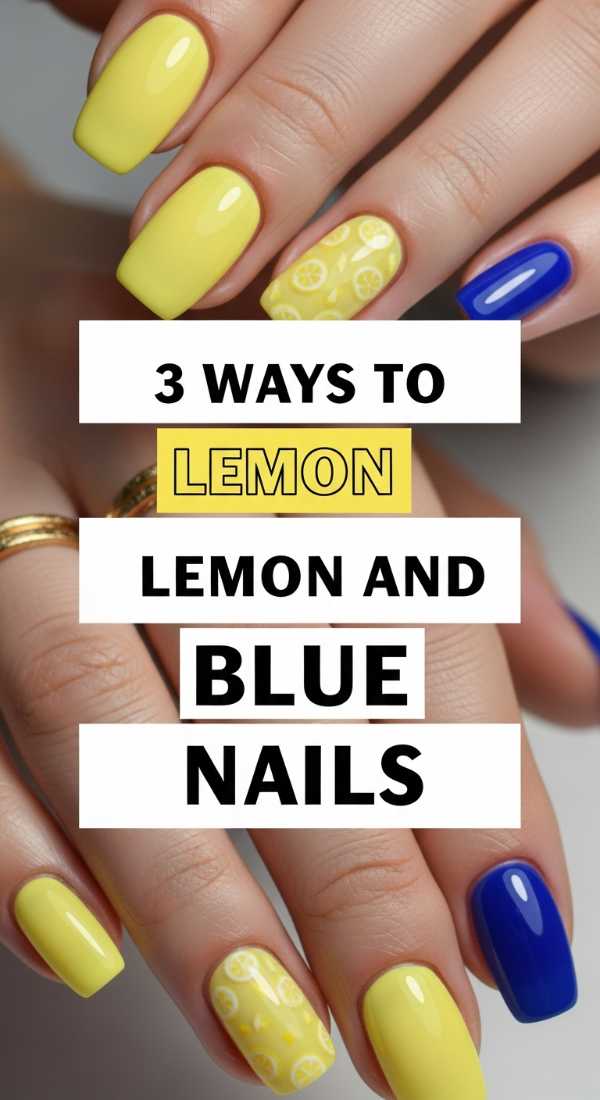
Mediterranean Dreams: 3 Ways to Wear Lemon and Blue Nails
Why to love this Design:
This combo is a total mood booster, my loves! It reminds me of the Amalfi Coast—vibrant yellow lemons against the deep, sparkling blue of the sea. It’s crisp, refreshing, and adds a playful pop of color to your summer linens and denim shorts. It’s basically a vacation in a manicure.
Essential Elements:
- Cobalt blue polish
- Pastel yellow or bright lemon polish
- Ultra-fine detail brush
- Matte and glossy top coats
How to Prepare:
- Option 1: The ‘Lemon Micro-French’ – Paint nails a sheer nude and add a tiny lemon silhouette at the tips with cobalt blue accents.
- Option 2: ‘Tile Print’ – Use the blue to create Mediterranean tile patterns on two accent nails, leaving the rest a solid, sunny yellow.
- Option 3: ‘Mismatched Bliss’ – Paint your left hand shades of blue and your right hand shades of lemon for a modern, asymmetrical vibe.
Budget Range
- Zoya Professional Lacquer in ‘Darcy’ ($12)
- Sally Hansen Insta-Dri in ‘Blueberry Blitz’ ($6)
- Nail Art Brushes Set from Amazon ($5)
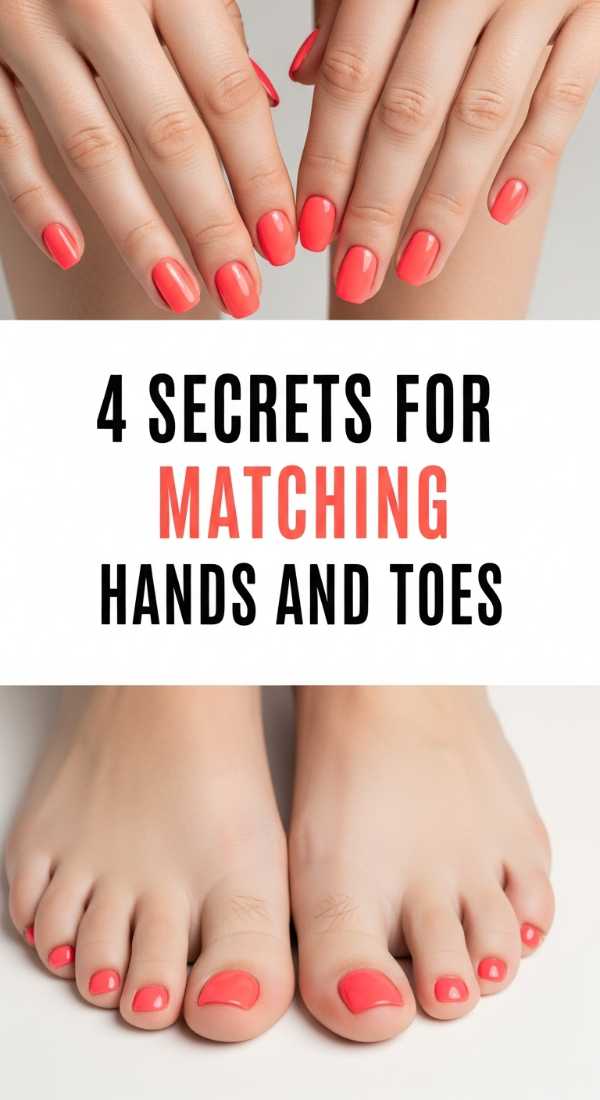
Seamless Harmony: 4 Secrets for Matching Hands and Toes
Why to love this Design:
Sometimes, we want that ‘put-together’ feeling without looking too matchy-matchy. Coordinating your mani and pedi is the ultimate secret to looking effortlessly polished at the pool. It shows you’ve put a little extra love into your self-care routine, and that confidence shines through every step you take.
Essential Elements:
- Two complementary shades (e.g., Lavender and Silver)
- Matching glitter accents
- Hydrating cuticle oil
- Long-wear base coat
How to Prepare:
- Secret 1: Use the ‘Sister Color’ rule—pick two shades in the same color family but different depths (like a soft pink on hands and a deep fuchsia on toes).
- Secret 2: Mirror the art—if you have a floral accent on your ring finger, put a matching petal on your big toe.
- Secret 3: Texture matching—keep both finishes the same, whether they are both high-shine jelly or both velvety matte.
- Secret 4: Don’t forget the prep—exfoliate your feet and hands simultaneously so the skin looks equally glowing and soft.
Budget Range
- Olive & June ‘The Mani System’ ($50)
- Tree Hut Shea Sugar Scrub ($10)
- Cupa natural Cuticle Oil ($9)
Midnight Heat: 6 Ways to Style Summer Goth Nails
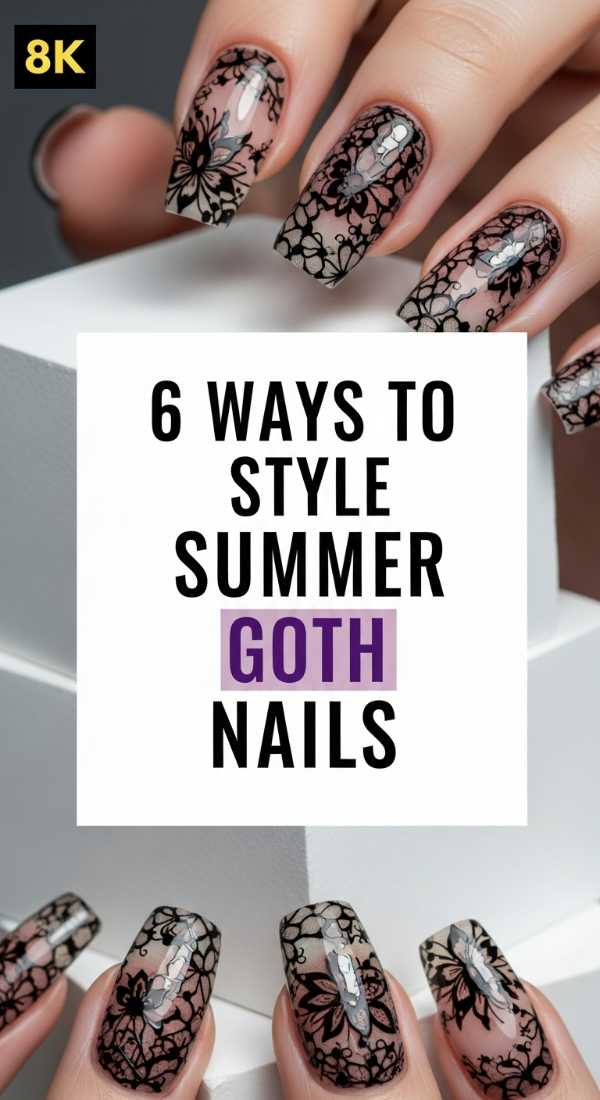
Why to love this Design:
Who says dark colors are just for winter? Summer Goth is all about that edgy, mysterious contrast against sun-kissed skin. It’s for my loves who prefer the moon to the sun and want a look that feels a little rebellious, a little sultry, and completely unique during the brightest months of the year.
Essential Elements:
- Sheer black ‘stocking’ polish
- Silver metallic studs
- Deep plum or onyx cream polish
- Fine liners for spiderweb or star details
How to Prepare:
- The ‘Sheer Smoke’ – Apply a watery, translucent black for a veil-like effect.
- ‘Chrome Noir’ – Add black polish with a dark oil-slick chrome powder on top.
- ‘Goth Florals’ – Paint delicate black roses over a nude base.
- ‘Pierced Tips’ – Add tiny silver hoops to the edge of long, matte black extensions.
- ‘Starry Night’ – Deepest navy base with tiny silver hand-painted constellations.
- ‘Velvet Matte’ – Use a matte top coat over deep burgundy for a heavy, luxurious summer evening look.
Budget Range
- Cirque Colors ‘Spotted’ Black Polish ($12)
- Metallic Nail Studs Kit ($7)
- OPI Matte Top Coat ($11)
Electric Energy: 7 Ideas for Neon Yellow Nails
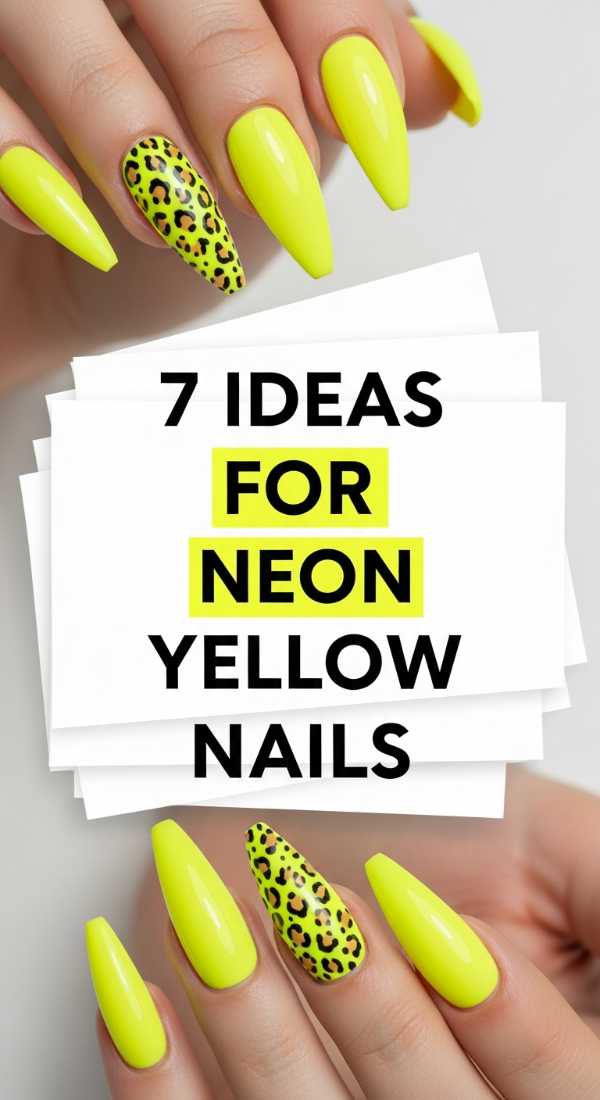
Why to love this Design:
Neon yellow is the ultimate ‘look at me’ color! It’s high-energy, futuristic, and looks absolutely incredible when you’re holding a cold drink by the pool. It’s a color that says you’re ready for festivals, parties, and making bold memories. It’s pure, unadulterated summer joy.
Essential Elements:
- Opaque white base (to make the neon pop)
- High-pigment neon yellow polish
- Geometric stencils
- High-gloss top coat
How to Prepare:
- Always start with a white base coat to ensure the yellow doesn’t look streaky or dull.
- Try ‘Neon Negative Space’ by leaving a triangle at the base of the nail unpainted.
- Go for ‘High-Vis French’ with neon tips on a natural pink base.
- Mix with grey for a ‘Cyberpunk’ aesthetic.
- Add a single neon yellow accent nail to a set of soft grey nails.
- Use a sponge to create a neon-to-white ombre.
- Finish with ‘Drip Art’—let a thick drop of neon yellow ‘run’ down a clear nail.
Budget Range
- Orly Retrowave Collection ‘Neon Heat’ ($15)
- Sinful Colors ‘Neon Yellow’ ($3)
- Maniology Nail Stencils ($6)
The Big Day: 5 Tips for College Graduation Nails

Why to love this Design:
You did it! Graduation is such an emotional, beautiful milestone. These nails need to look great in photos holding your diploma, but also feel like ‘you.’ It’s about balancing professional elegance with your personal flair as you step into this exciting new chapter of your life.
Essential Elements:
- Your school colors (subtly used)
- Pearl accents or ‘Glazed Donut’ finish
- Neutral ‘your nails but better’ base
- Gold leaf flakes
How to Prepare:
- Choose a classic neutral base that won’t clash with your graduation gown.
- Add a tiny ‘2026’ in gold foil on your ring finger for a sentimental touch.
- Incorporate one school color as a thin ‘smile line’ at the tip of the nail.
- Apply a pearl powder for a timeless, sophisticated glow that catches the light during the ceremony.
- Keep the shape manageable—oval or soft square looks timeless in those close-up diploma photos.
Budget Range
- Dashing Diva Gloss Palette ($8)
- Nail Art Gold Foil Flakes ($6)
- Lights Lacquer ‘Paper Snow’ ($13)
Tropical Punch: 4 Steps to Design Coral Nails
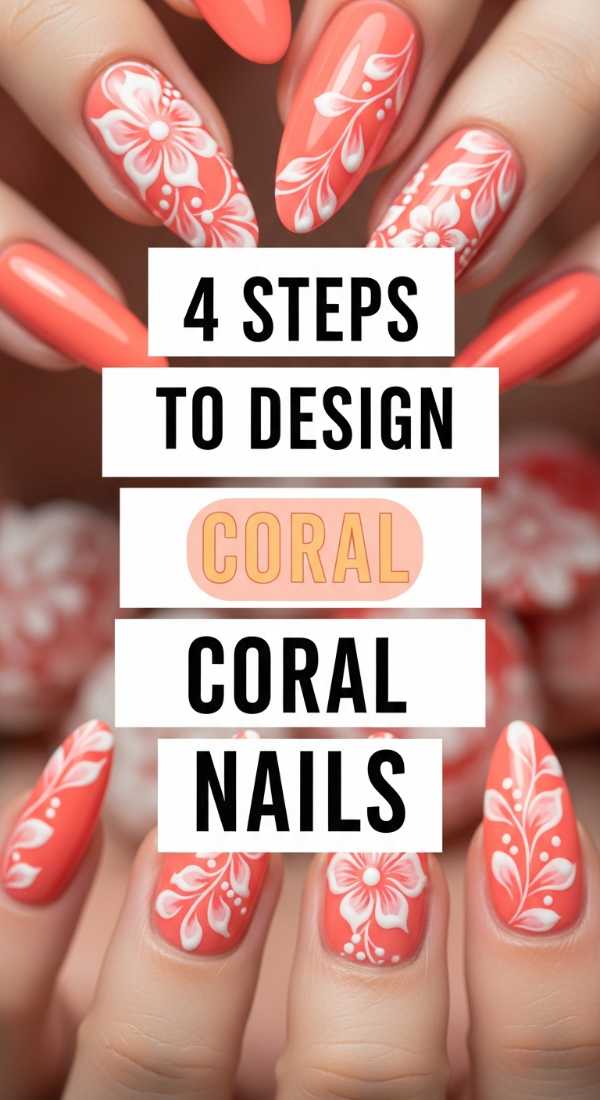
Why to love this Design:
Coral is the quintessential summer color. It’s that perfect bridge between pink and orange that feels so warm and inviting. It reminds me of reef diving and hibiscus flowers. It’s soft enough for the office but vibrant enough for a beach getaway. It’s truly a universal favorite!
Essential Elements:
- Creamy coral polish
- Gold striping tape
- White floral decals
- Glossy top coat
How to Prepare:
- Clean your nails thoroughly and apply a strengthening base coat.
- Apply two coats of coral polish, ensuring the edges are sealed to prevent chipping from sand and salt.
- Apply white floral decals on the middle and ring fingers for a tropical ‘island girl’ vibe.
- Add a single horizontal line of gold striping tape across the thumb for a modern metallic touch.
Budget Range
- Revlon Enamel in ‘Coral Reef’ ($6)
- White Flower Nail Decals ($5)
- Holo Taco Long-Lasting Base ($11)
Wild Wild West: 3 Ways to Rock Teal Western Nails

Why to love this Design:
Western aesthetic is having a huge moment for 2026! Teal is the perfect ‘desert’ color—think turquoise jewelry and vast summer skies. It’s earthy yet vibrant, giving off a cool, bohemian energy that pairs perfectly with cowboy boots and vintage sundresses.
Essential Elements:
- Turquoise or teal cream polish
- Copper or bronze metallic polish
- Matte top coat
- Tiny ‘turquoise stone’ water decals
How to Prepare:
- ‘The Turquoise Stone’ – Use a ‘dry brush’ technique with black and copper over a teal base to mimic the look of natural turquoise stone.
- ‘Desert Sunset’ – Ombre teal into a soft sandy tan at the cuticles.
- ‘Cowboy Chrome’ – Apply a teal base and top with a bronze magnetic ‘cat-eye’ effect for a rugged, metallic shimmer.
Budget Range
- ILNP ‘Mutagen’ Teal ($10)
- KBShimmer Magnetic Polish ($12)
- Born Pretty Water Decals ($4)
Celebrate You: 6 Ideas for May Birthday Nails

Why to love this Design:
To my May babies—this is your time to shine! May is all about blooming and new beginnings. These designs celebrate the Emerald birthstone and the lush green of late spring turning into summer. It’s a way to wear your birthday pride on your sleeves (well, fingers!).
Essential Elements:
- Emerald green glitter
- Pressed dried flowers
- Nude jelly polish
- Silver shimmer
How to Prepare:
- ‘Emerald City’ – A deep, rich green holographic polish that mimics an emerald gemstone.
- ‘Milk Bath’ – Real pressed dried flowers encapsulated in a milky white jelly polish.
- ‘Taurus/Gemini Symbols’ – Small, delicate silver zodiac signs hand-painted on a sheer base.
- ‘Lily of the Valley’ – May’s birth flower painted in delicate white bells over a soft green.
- ‘Glitter Gradient’ – Emerald green glitter starting at the base and fading out toward the tips.
- ‘Dainty Dots’ – A minimalist row of green dots along the center of each nail.
Budget Range
- Holler and Glow Dried Flower Kit ($9)
- Essie ‘Off Tropic’ Dark Green ($10)
- Zodiac Nail Charms ($6)
Radiant Spirit: 5 Steps to Create Sunset Aura Nails
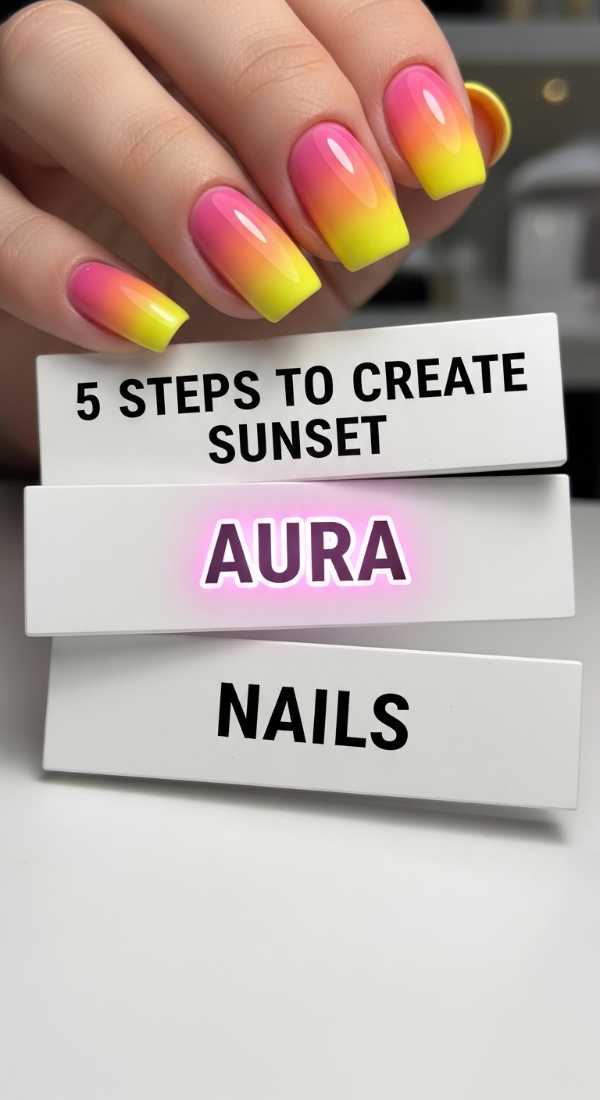
Why to love this Design:
Aura nails are all about your inner energy! The sunset version uses soft gradients of pink, orange, and yellow to create a ‘glow’ from the center of the nail. It looks like you’ve captured a tiny piece of the evening sky and let it radiate from your fingertips. It’s incredibly trendy and deeply soothing to look at.
Essential Elements:
- Makeup sponge (wedge)
- Pink, Orange, and Yellow polishes
- Latex barrier (optional)
- Sheer shimmer top coat
How to Prepare:
- Paint your nails a solid, soft pink as your base color.
- Apply a circular ‘blob’ of orange and then a smaller blob of yellow onto a makeup sponge.
- Gently dab the sponge onto the center of the nail, building the ‘aura’ glow slowly.
- Repeat the dabbing process until the colors blend seamlessly without harsh lines.
- Apply a sheer shimmer top coat to blur any sponge textures and give it a heavenly finish.
Budget Range
- Real Techniques Makeup Sponges ($7)
- China Glaze ‘Summer Days’ Set ($14)
- Sally Hansen ‘Big Shiny Top Coat’ ($6)
Stay Shining, My Loves
As the sun sets on our little guide today, I hope you feel inspired to try something new. Summer is a season of growth, warmth, and self-expression. Whether you choose the bold energy of neon yellow or the quiet grace of a sunset aura, remember that your beauty comes from the joy you feel inside. Take these ideas, make them your own, and let your hands tell the story of your most beautiful summer yet. I can’t wait to see what you create!