
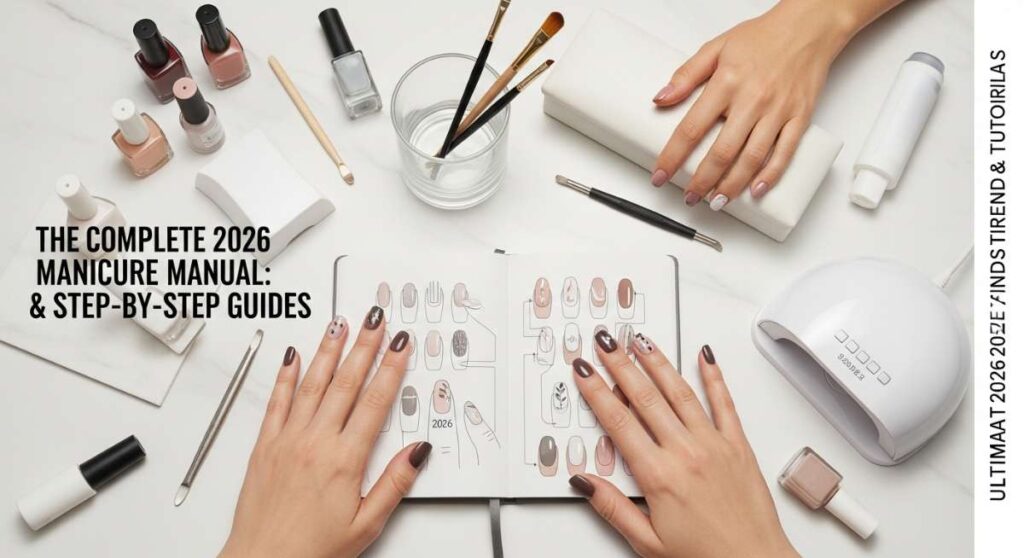
The Complete 2026 Manicure Manual: Top Trends & Step-by-Step Guides
Hi my loves! I’m so incredibly glad you’ve found your way into my little corner of the world today. There is something so deeply grounding about the ritual of a manicure, isn’t there? It’s more than just polish and shine; it’s that quiet half-hour where you’re just with yourself, tending to your own hands—the hands that work, hold, and create your beautiful life. Think of this guide as a cloud-soft embrace for your soul and your nails.
As we lean into 2026, the trends are all about self-expression and tactile joy. We’re seeing a beautiful blend of high-energy neons and the quiet, whispering elegance of natural shapes. Whether you’re celebrating a milestone or just want to feel a little more ‘you’ when you look down at your keyboard, I’ve gathered the most enchanting looks just for you. Let’s dive into these tutorials together, shall we?
Get graduation ready in 5 simple steps

Why to love this Design:
Graduation is such a tender bridge between who you were and who you are becoming. This design is all about timeless elegance that won’t distract from your diploma but will look absolutely radiant in every single photo. It’s a soft, sophisticated nod to your hard work and the bright future ahead.
Essential Elements:
- Sheer nude or ‘milky’ base polish
- Gold leaf flakes or metallic gold liner
- High-shine top coat
- Buffer block
How to Prepare:
- Shape your nails into a soft oval to elongate the fingers.
- Apply two thin coats of your favorite milky nude polish.
- While the second coat is slightly tacky, gently press gold leaf onto the ring finger.
- Seal everything with a generous layer of high-gloss top coat.
- Hydrate your cuticles with rose oil for that camera-ready glow.
Budget Range
- Essie ‘Marshmallow’ ($10)
- Amazon Gold Leaf Sheets ($6)
- Sally Hansen Insta-Dri Top Coat ($7)
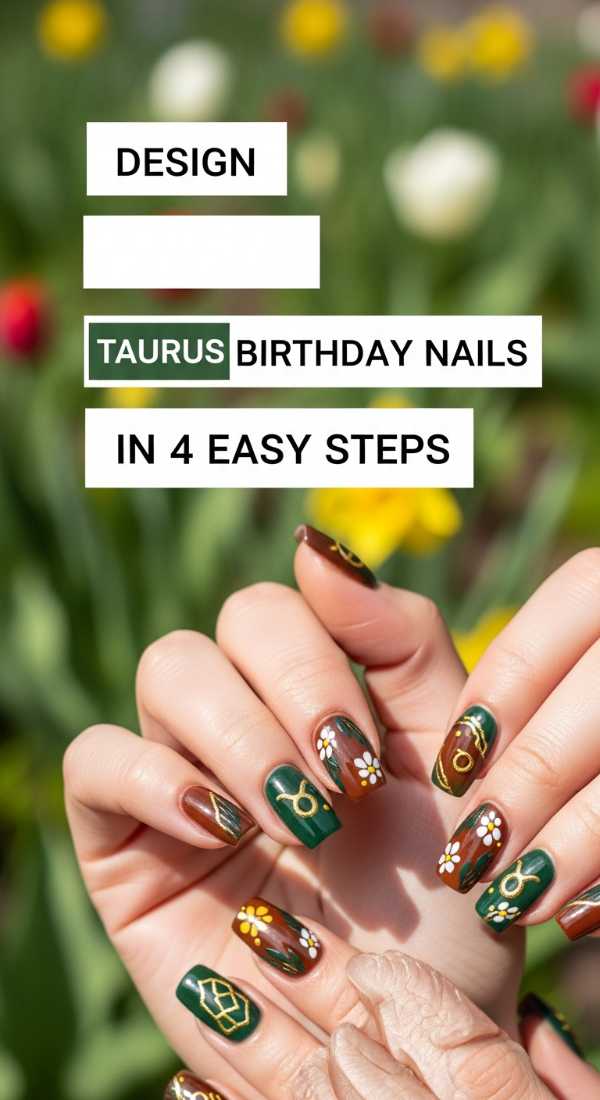
Design taurus birthday nails in 4 easy steps
Why to love this Design:
Oh, my beautiful Taurus loves, this one is for you. Rooted in the earth but touched by luxury, this design celebrates your grounded nature and your appreciation for the finer things. It’s a lush, botanical-inspired look that feels like a walk through a sun-drenched forest.
Essential Elements:
- Deep emerald green polish
- Gold celestial stickers or stamping plate
- Matte top coat for a velvet finish
- Cuticle pusher
How to Prepare:
- Apply two coats of emerald green for a rich, opaque base.
- Once dry, apply a matte top coat to give it that expensive, velvety texture.
- Place a gold bull or crescent moon sticker near the base of the nail.
- Press firmly and finish with a tiny dab of clear gloss only on the sticker.
Budget Range
- Zoya ‘Danica’ ($12)
- Mooncat Matte Made in Hell ($13)
- Deco Miami Celestial Stickers ($8)
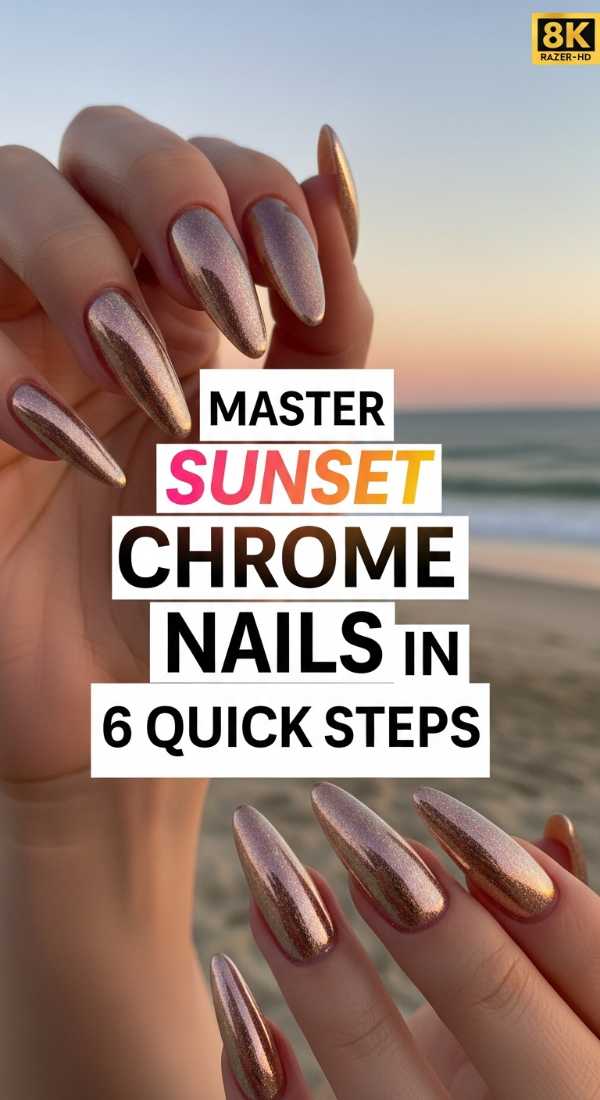
Master sunset chrome nails in 6 quick steps
Why to love this Design:
Imagine the sky at that magic hour when the sun kisses the horizon—that’s exactly what this manicure captures. It’s ethereal, glowing, and feels like you’re carrying a little piece of twilight wherever you go. It’s perfect for those who want a bit of futuristic magic on their fingertips.
Essential Elements:
- Peach and pink gel polishes
- Unicorn or iridescent chrome powder
- Sponge applicator
- No-wipe gel top coat
How to Prepare:
- Apply a peach base coat and cure.
- Sponge a bit of pink onto the tips to create a soft gradient.
- Apply a no-wipe top coat and cure for only 30 seconds.
- Buff the chrome powder over the entire nail using the sponge.
- Brush off excess powder with a soft brush.
- Apply a final top coat and cure fully for a mirror-like finish.
Budget Range
- Beetles Gel Polish Sunset Kit ($15)
- Artdone Chrome Powder ($9)
- UV LED Nail Lamp ($20)
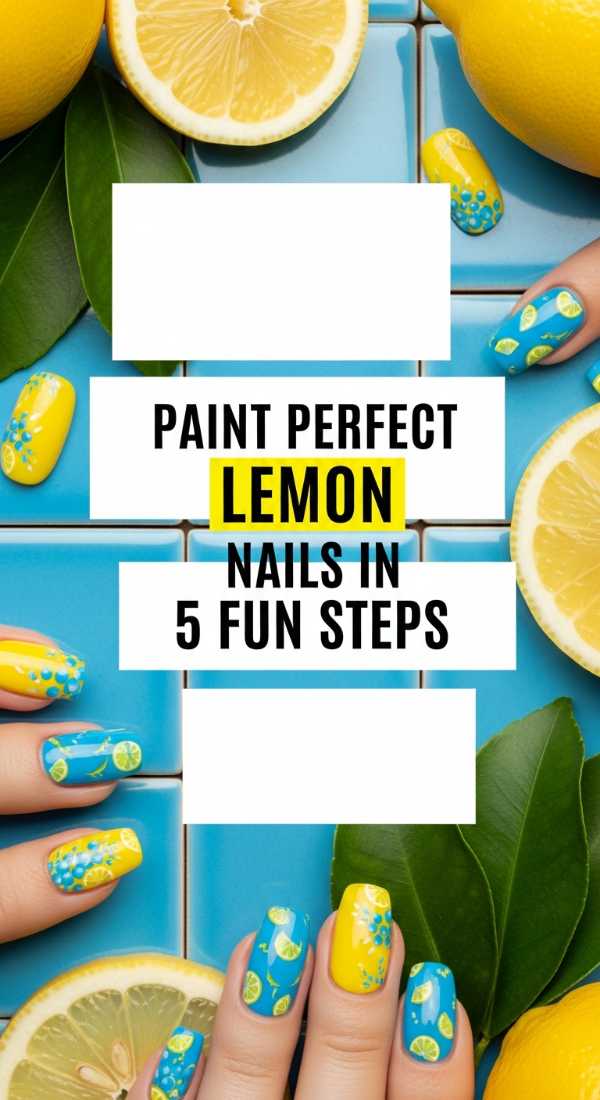
Paint perfect lemon nails in 5 fun steps
Why to love this Design:
When life gives you lemons, you absolutely must put them on your nails! This design is pure sunshine and zest. It’s playful, kitschy, and guaranteed to make you smile every time you reach for your iced coffee. It’s the ultimate ‘cottagecore’ summer vibe.
Essential Elements:
- Pastel yellow polish
- White and leaf-green nail art pens
- Dotting tool
- Clear base coat
How to Prepare:
- Paint your nails a crisp, pastel yellow.
- Use a white nail art pen to draw two small semi-circles (the lemon slices).
- Add tiny white ‘pulp’ lines radiating from the center.
- Use the green pen to add a tiny leaf flourish at the top of the lemon.
- Protect your art with a quick-dry clear coat.
Budget Range
- OPI ‘Exotic Birds Do Not Tweet’ ($11)
- Isadora Nail Art Pens ($12)
- Seche Vite Dry Fast Top Coat ($9)
Create summer goth nails in 3 bold steps
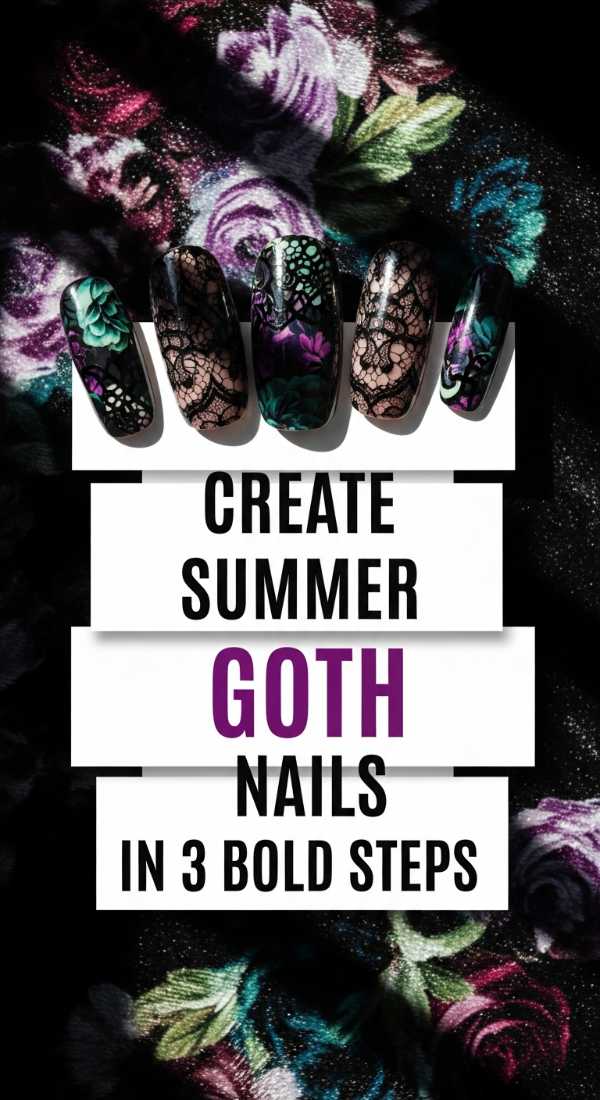
Why to love this Design:
Who says dark colors are only for winter? Summer goth is all about high contrast—think ‘midnight at the beach.’ It’s edgy, mysterious, and incredibly chic when paired with a breezy white linen dress. It’s the perfect way to honor your dark side during the brightest months.
Essential Elements:
- Sheer ‘jelly’ black polish
- Solid jet black polish
- Ultra-glossy top coat
How to Prepare:
- Apply one coat of sheer black jelly polish for a ‘smoke’ effect.
- Use the solid black to paint a deep French tip or a single bold stripe.
- Finish with the glossiest top coat you own to give it a wet, obsidian look.
Budget Range
- Cirque Colors ‘Soot’ Jelly ($12)
- Hollo Taco ‘One-Coat Black’ ($11)
- Glisten & Glow Top Coat ($8)
Match hands and toes in 4 professional steps
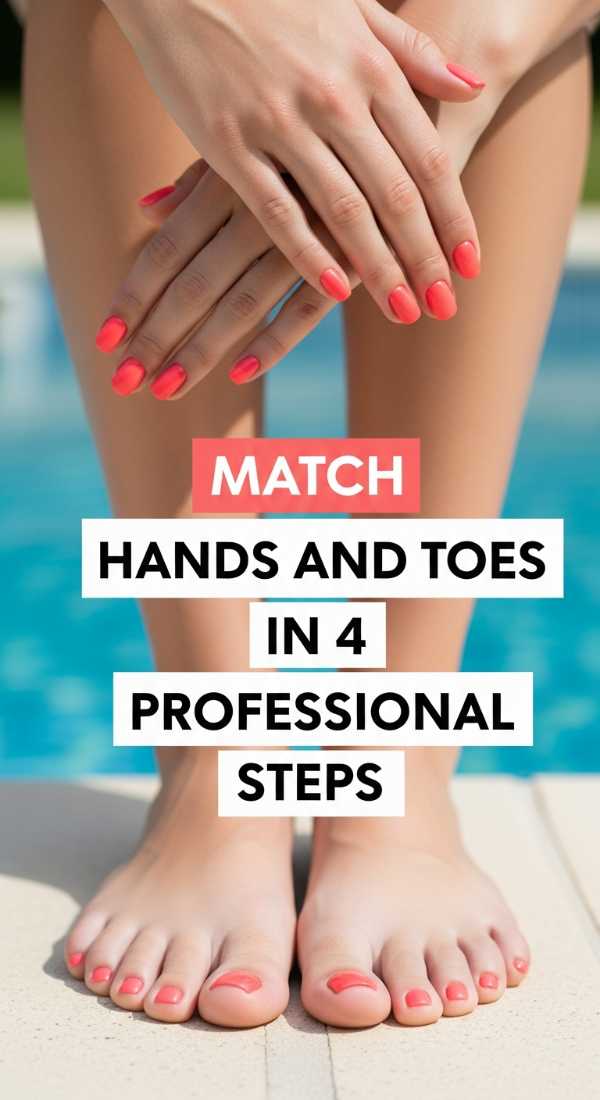
Why to love this Design:
There is a specific kind of peace that comes from being perfectly coordinated. Matching your mani and pedi is the ultimate ‘clean girl’ move—it makes you feel put together and professional even if you’re just wearing a t-shirt. It’s the foundation of a polished life.
Essential Elements:
- One signature color (like a classic red or soft mauve)
- Exfoliating foot scrub
- Matching lacquer and gel (if preferred)
- Toe separators
How to Prepare:
- Exfoliate both hands and feet to ensure a smooth canvas.
- Apply the same base color to all twenty nails for total cohesion.
- Ensure the shape of your fingernails and toenails are both neatly squared or rounded.
- Finish with the same brand of top coat for a consistent shine across the board.
Budget Range
- Olive & June ‘The Everything Box’ ($80)
- Tree Hut Shea Sugar Scrub ($9)
- Revlon Enamel Polish ($6)
Recreate pucci nail art in 7 detailed steps
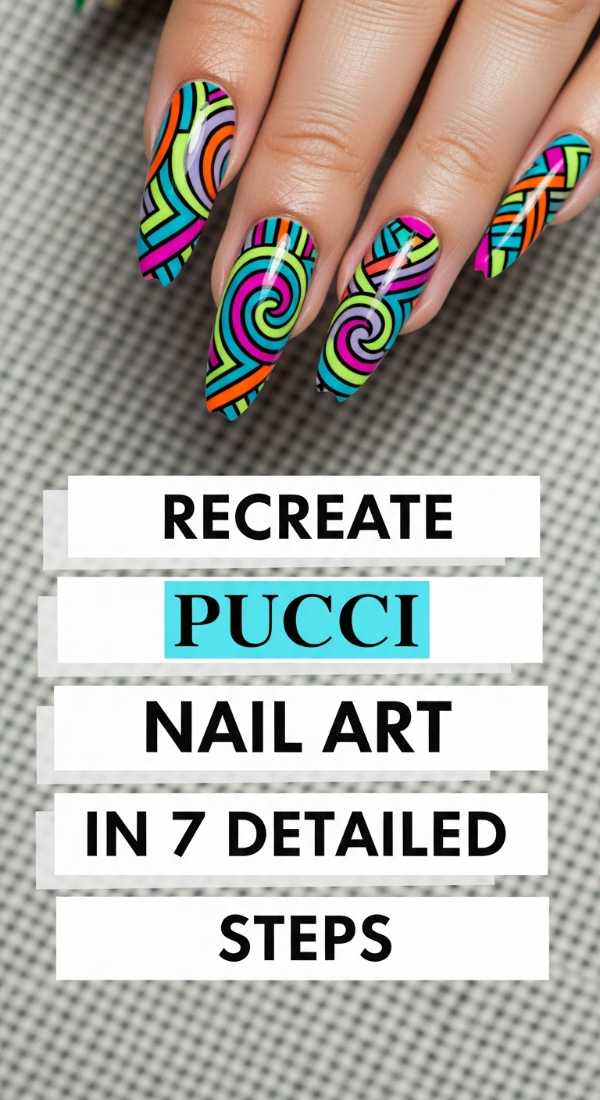
Why to love this Design:
Channeling the iconic 60s prints, Pucci nails are a maximalist’s dream. They are swirling, colorful, and architectural. This look says you’re bold, artistic, and not afraid to take up space. It’s like wearing a piece of vintage Italian fashion on your hands.
Essential Elements:
- White, turquoise, pink, and orange polishes
- Fine-liner detail brush
- Acetone for cleanup
- Patience and a steady hand!
How to Prepare:
- Start with a solid white base to make the colors pop.
- Using the detail brush, draw a large, curvy ‘S’ shape in turquoise.
- Fill in another section with a bright pink wave.
- Add an orange accent section nestled against the others.
- Outline the shapes with a very thin line of black or dark navy.
- Clean up any messy edges with a brush dipped in acetone.
- Seal with a thick top coat to level out the layers.
Budget Range
- Winstonia Detail Brushes ($10)
- Orly Mini Color Pass ($15)
- Pure Acetone ($5)
Apply neon cheetah print in 5 trendy steps
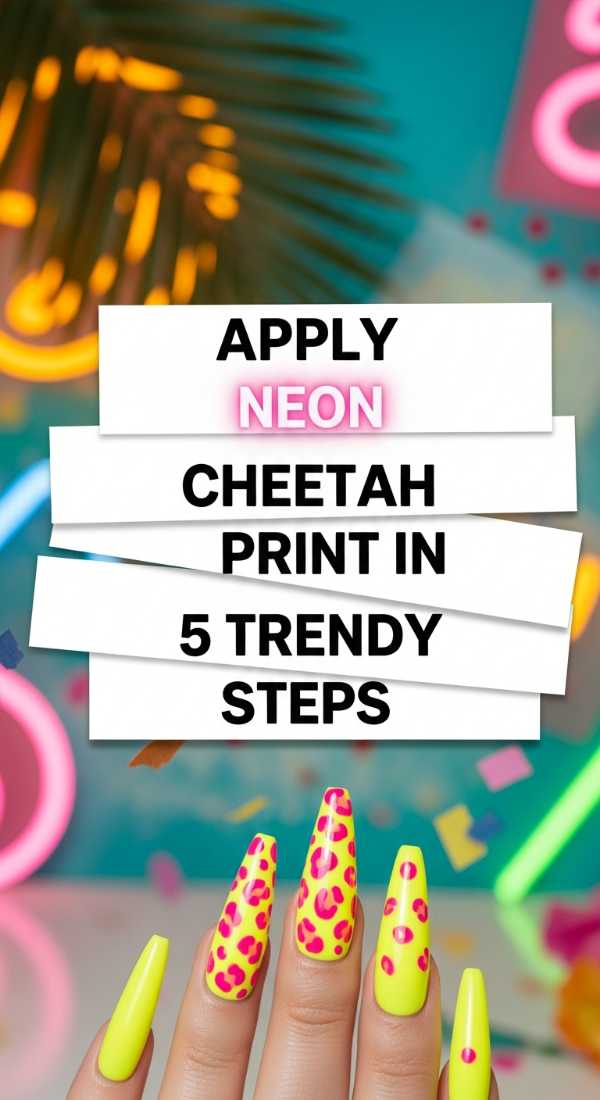
Why to love this Design:
Cheetah print is a neutral, but neon cheetah? That’s a party! This design is for my loves who want to stand out and have a little fun. It’s retro, energetic, and brings a wonderful 90s-meets-2026 energy to your style. It’s impossible to have a bad day with these nails.
Essential Elements:
- Neon pink or lime green base
- Brown or dark pink ‘spots’
- Black detail polish
- Dotting tool
How to Prepare:
- Paint two coats of your favorite neon shade.
- Use a dotting tool to place irregular ‘blobs’ of the secondary color.
- With a thin brush, partially outline those blobs with black ‘C’ shapes.
- Add a few random black dots in the empty spaces.
- Top coat it once it’s completely dry to prevent smearing.
Budget Range
- China Glaze Neon Collection ($8/bottle)
- Nail Art Dotting Tool Set ($5)
- Maniology Stamping Polish ($7)
Get teal western nails in 6 creative steps
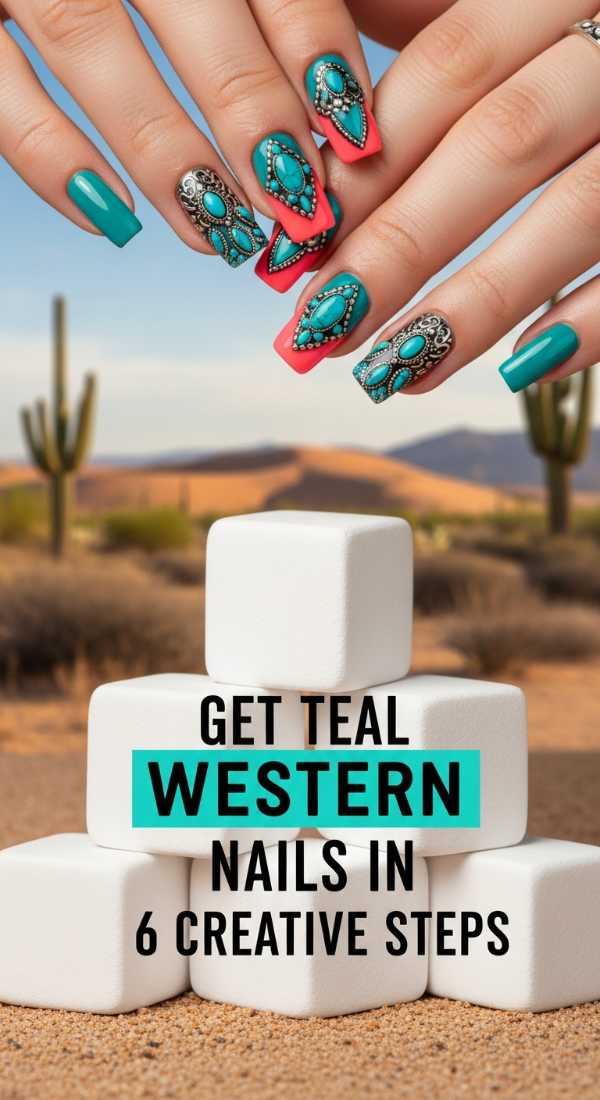
Why to love this Design:
Think turquoise jewelry, dusty trails, and desert sunsets. This ‘Teal Western’ look is rugged yet refined. It feels artisanal and handmade, perfect for those who love silver jewelry and denim. It’s a soulful design that feels very grounded in nature.
Essential Elements:
- Turquoise or teal cream polish
- Silver metallic polish or studs
- Matte top coat
- Tiny silver beads
How to Prepare:
- Apply two coats of teal polish.
- Apply a matte top coat for a stone-like finish.
- Use a tiny drop of nail glue to place a silver stud at the center of the cuticle.
- Alternatively, use silver polish to draw tiny ‘stitching’ lines along the edge.
- Add a second coat of matte finish over the polish sections.
- Oil your cuticles to make the teal pop against your skin.
Budget Range
- ILNP ‘Turquoise’ Polish ($10)
- Nail Rhinestone/Stud Kit ($8)
- Nailene Nail Glue ($4)
Shape natural square nails in 4 classic steps
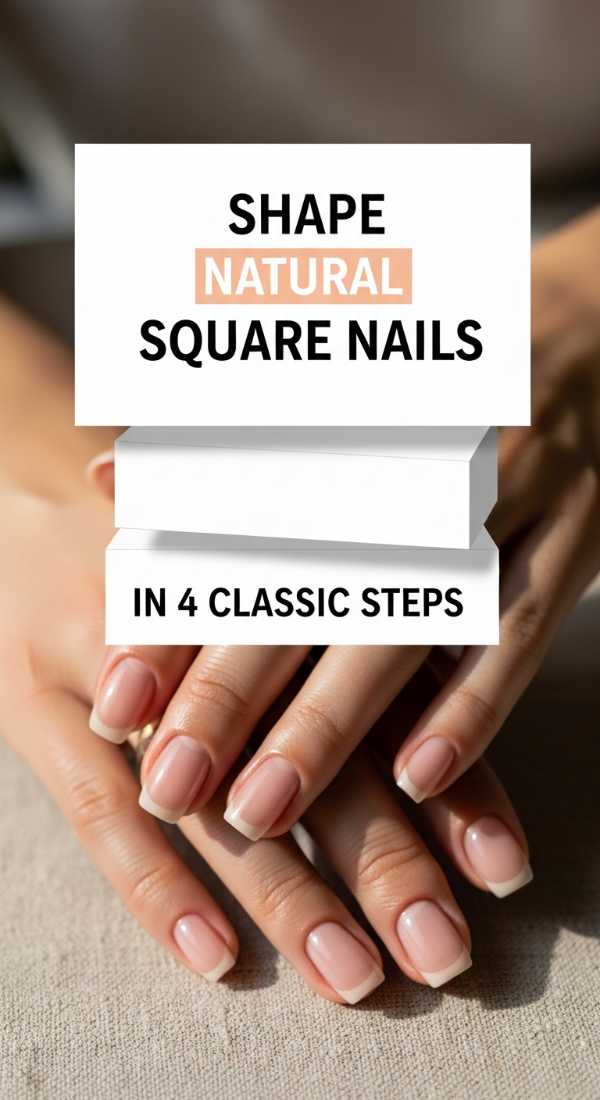
Why to love this Design:
Sometimes the most radical thing you can do is keep it simple. A perfectly shaped natural square nail is the height of ‘quiet luxury.’ It looks healthy, strong, and intentional. It’s the perfect ‘reset’ manicure for when you want to feel clean and refreshed.
Essential Elements:
- Glass nail file
- Nail clippers
- Buffing block
- Nail strengthener
How to Prepare:
- Clip your nails straight across to the desired length.
- Hold the glass file perpendicular to the nail and file in one direction to flatten the top.
- File the sides straight up, parallel to your finger.
- Very lightly round the sharp corners just enough so they don’t snag on sweaters.
Budget Range
- Mont Bleu Glass Nail File ($12)
- Barielle Nail Strengthener ($10)
- Flowery Buffing Blocks ($5)
A Moment for You
I hope these designs spark a little flame of creativity in your heart, sweet soul. Remember, your nails are a canvas for your joy, but the real beauty is the person wearing them. Whether you chose the bold neon cheetah or the quiet natural square, I hope you feel a little more like the masterpiece you truly are. Take a deep breath, admire your handiwork, and go shine your light on the world. Until next time, all my love!