

From Neon to Nude: Your Complete Summer 2026 Manicure Handbook
Hello, my loves! Can you feel it? The air is getting that honey-sweet thickness, the sun is lingering just a little longer on our skin, and Summer 2026 is officially whispering its arrival. There is something so profoundly healing about the ritual of a manicure—it’s that quiet moment of self-care where we get to decide exactly how we want to show up in the world. Whether you’re feeling like a vibrant neon queen or a soft, nude-toned dreamer, your hands are the canvas for your summer story.
This season, I wanted to create a little sanctuary for you, a place where you can find the perfect shade to match your iced matcha or your graduation gown. We are diving deep into the trends that are making my heart skip a beat right now. Think of this as a warm, cloud-soft embrace for your creative soul. Let’s find your signature summer look together, shall we?
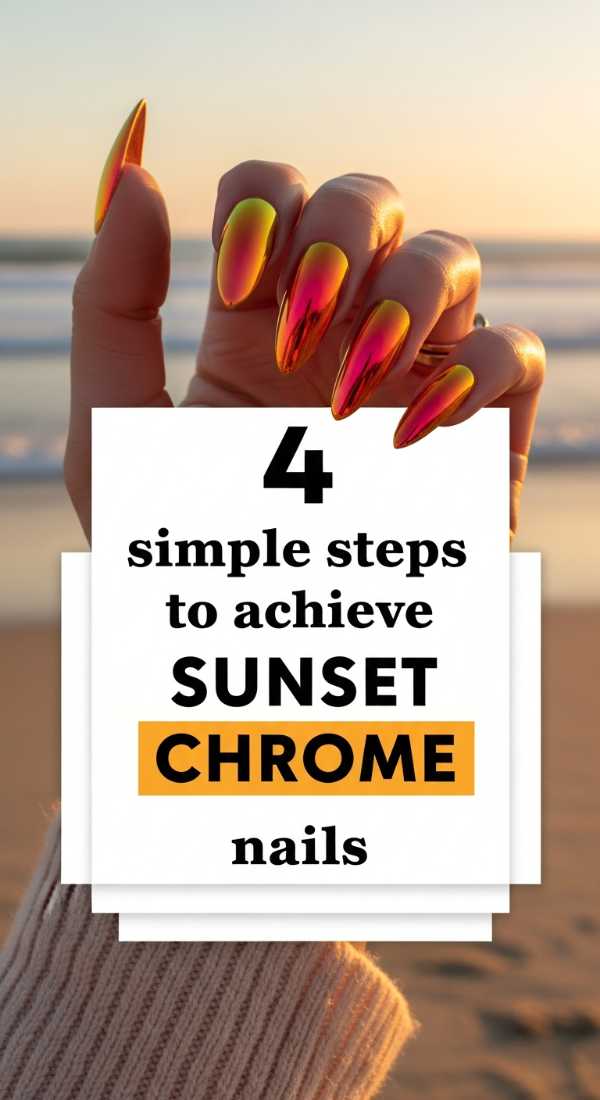
4 Simple Steps to Achieve Sunset Chrome Nails
Why to love this Design:
There is something truly ethereal about capturing a summer evening on your fingertips. Sunset chrome nails are the ultimate way to carry that golden hour glow with you, reflecting pinks, oranges, and purples with every movement of your hands.
Essential Elements:
- Neon orange and hot pink gel polish
- Fine-milled sunset gold chrome powder
- Sponge applicator
- No-wipe top coat
How to Prepare:
- Apply a thin base coat and cure, then paint a vertical gradient using pink on one side and orange on the other.
- Cure the gradient and apply a no-wipe top coat; cure for only 30 seconds so it remains slightly tacky.
- Gently buff the chrome powder over the entire nail using the sponge applicator until it glows.
- Seal the magic with a final thick layer of high-gloss top coat and cure fully.
Budget Range
- OPI GelColor in ‘Data Peach’ – $15-20
- Holographic Chrome Powder (Amazon) – $8-12
- UV LED Lamp (Entry level) – $25-40
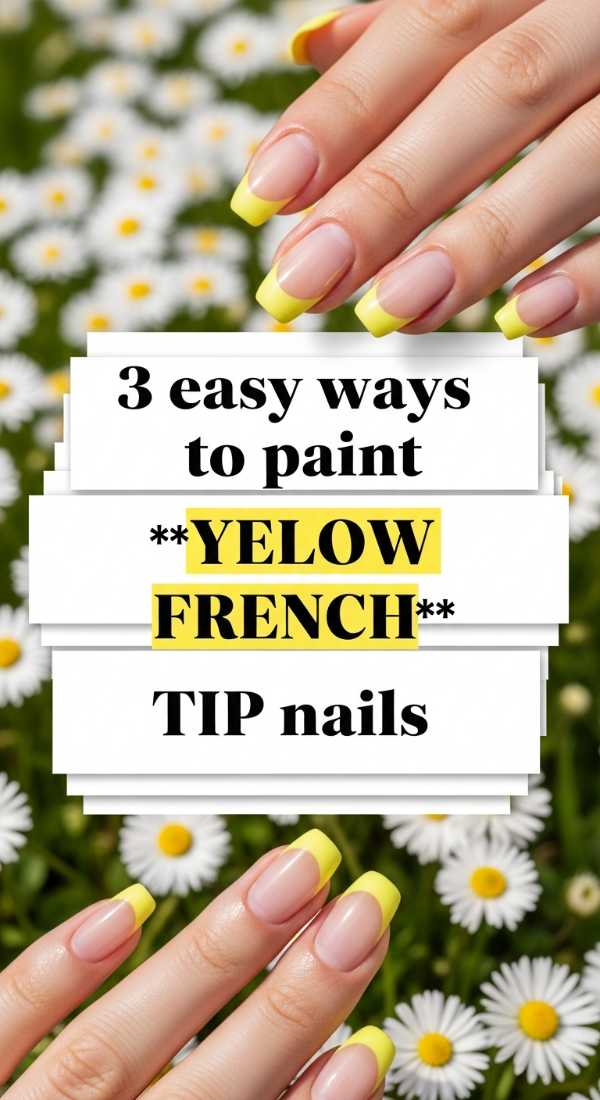
3 Easy Ways to Paint Yellow French Tip Nails
Why to love this Design:
Yellow is the color of pure joy, my loves. Bringing that sunshine to a classic French tip feels like a little wink to the universe—it’s sophisticated enough for the office but playful enough for a weekend at the beach.
Essential Elements:
- Pastel or Lemon yellow polish
- Ultra-thin liner brush
- Sheer nude base coat
How to Prepare:
- Option 1: The Micro-Tip. Use a very fine brush to trace a whisper-thin line along the very edge of your nail.
- Option 2: The Deep V. Paint two diagonal lines from the sides of your nail meeting in the center for a modern geometric look.
- Option 3: The Classic Curve. Use a French tip sticker guide to paint a clean, thick yellow smile line across the free edge.
Budget Range
- Essie ‘Check Your Baggage’ Yellow – $10
- Nail Art Liner Brush Set – $6
- Orly Rubberized Base Coat – $12
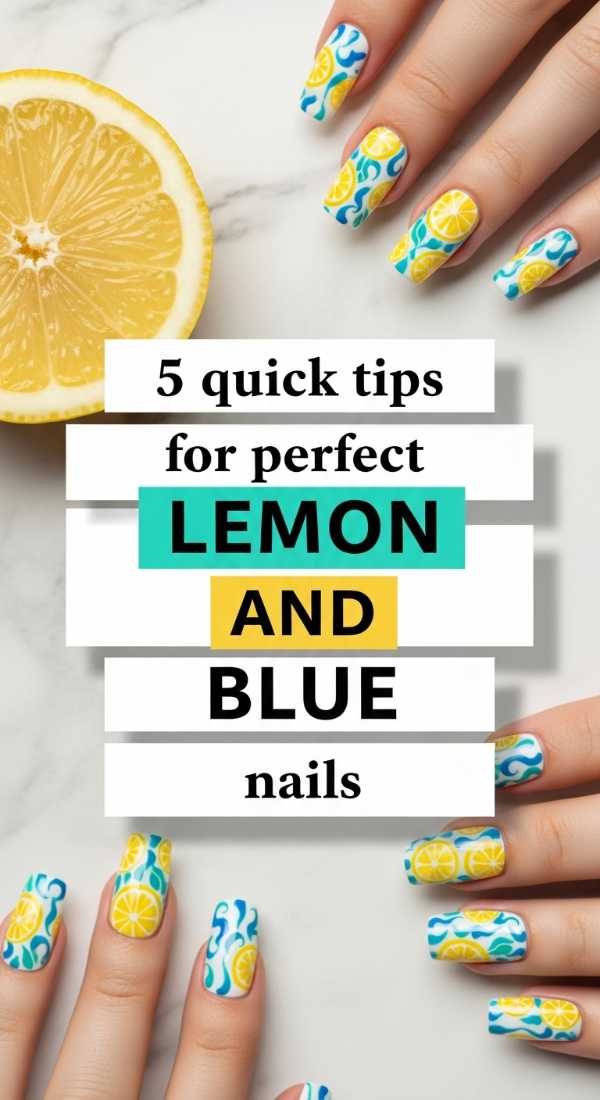
5 Quick Tips for Perfect Lemon and Blue Nails
Why to love this Design:
This combo is giving me major Mediterranean coast vibes! It’s fresh, crisp, and reminds me of sipping lemonade by the sea in a blue-striped cabana. It’s the ultimate refreshing palette for those scorching July days.
Essential Elements:
- Cobalt blue polish
- Citrus yellow polish
- Dotting tool
- Matte top coat (optional for a ceramic look)
How to Prepare:
- Always start with the lighter color; paint your lemon accents first to keep the yellow bright and untainted.
- Use a dotting tool to create tiny lemon ‘blobs’ and add a tiny green leaf with a toothpick.
- Contrast the fruit with bold, solid cobalt blue nails on your pointer and pinky fingers.
- Keep the designs small; negative space is your best friend to prevent the look from feeling cluttered.
- Try a matte top coat over the blue nails to make them look like expensive Greek pottery.
Budget Range
- Zoya Blue Polish – $12
- Sally Hansen ‘Sun-Kissed’ – $8
- Nail Decal Set (Lemons) – $5
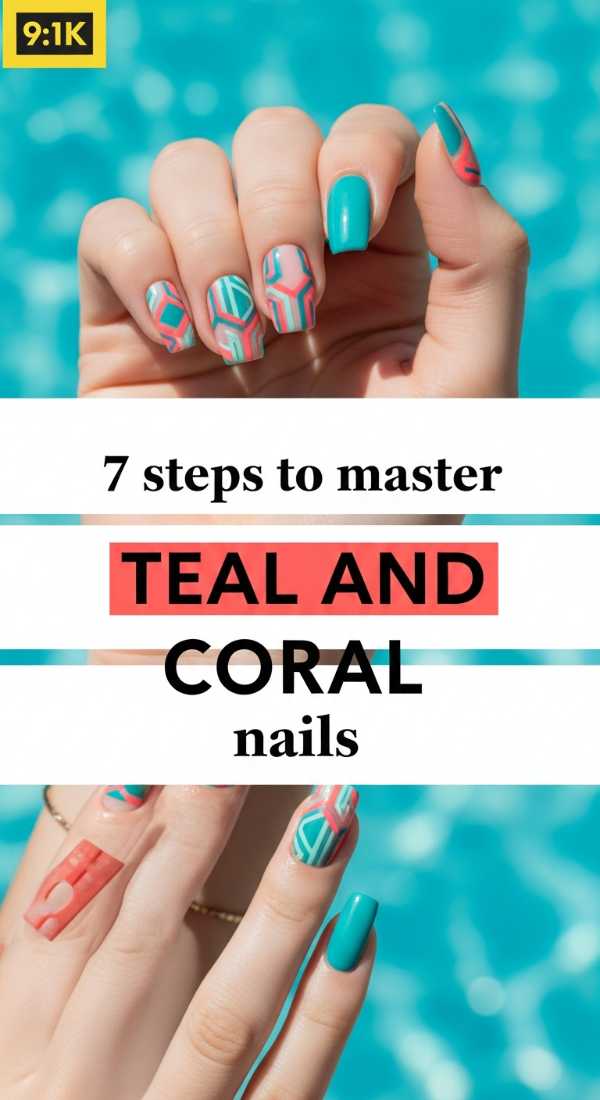
7 Steps to Master Teal and Coral Nails
Why to love this Design:
Teal and coral are the soulmates of the color wheel. One is cool and deep like the ocean, the other is warm and vibrant like a reef. Together, they create a balanced, tropical harmony that looks incredible on every skin tone.
Essential Elements:
- Deep teal lacquer
- Vibrant coral lacquer
- Striping tape
- Nourishing cuticle oil
How to Prepare:
- Cleanse your nails thoroughly with alcohol to ensure a long-lasting bond.
- Apply your base coat and let it dry completely.
- Paint two coats of teal on your thumb, middle, and pinky.
- Paint two coats of coral on your index and ring fingers.
- On the teal nails, use a striping tape to create a single vertical coral line down the center.
- Remove the tape while the coral is still slightly wet for a crisp edge.
- Finish with a hydrating cuticle oil to make the colors pop against healthy skin.
Budget Range
- Butter London ‘Teal’ – $18
- Revlon ‘Coral Reef’ – $7
- Cuccio Cuticle Oil – $10
6 Ways to Style Your College Graduation Nails

Why to love this Design:
Oh, the bittersweet beauty of graduation! You want a manicure that says ‘I’m a professional now’ while still celebrating the vibrant magic of your youth. It’s about elegance, milestone-marking, and looking great in those diploma photos.
Essential Elements:
- Sheer ‘your nails but better’ nude
- Gold leaf or metallic foil
- White gel paint
How to Prepare:
- The Pearl Finish: Use a white pearl powder over a nude base for a timeless, ‘clean girl’ aesthetic.
- The School Spirit: Incorporate one tiny dot of your university colors near the cuticle.
- The Class Year: Use a toothpick to subtly paint ‘2026’ on your thumb nail in gold.
- The Marble Effect: Mix white and nude polish for a sophisticated stone-look.
- The Gold Edge: Paint a thin gold metallic line along the cuticle for a ‘reverse French’ look.
- The Classic Sheer: Go for three coats of a high-shine sheer pink for a clean, polished appearance.
Budget Range
- DND Sheer Nude Gel – $12
- Gold Foil Flakes – $5
- Chanel ‘Ballerina’ Polish – $32
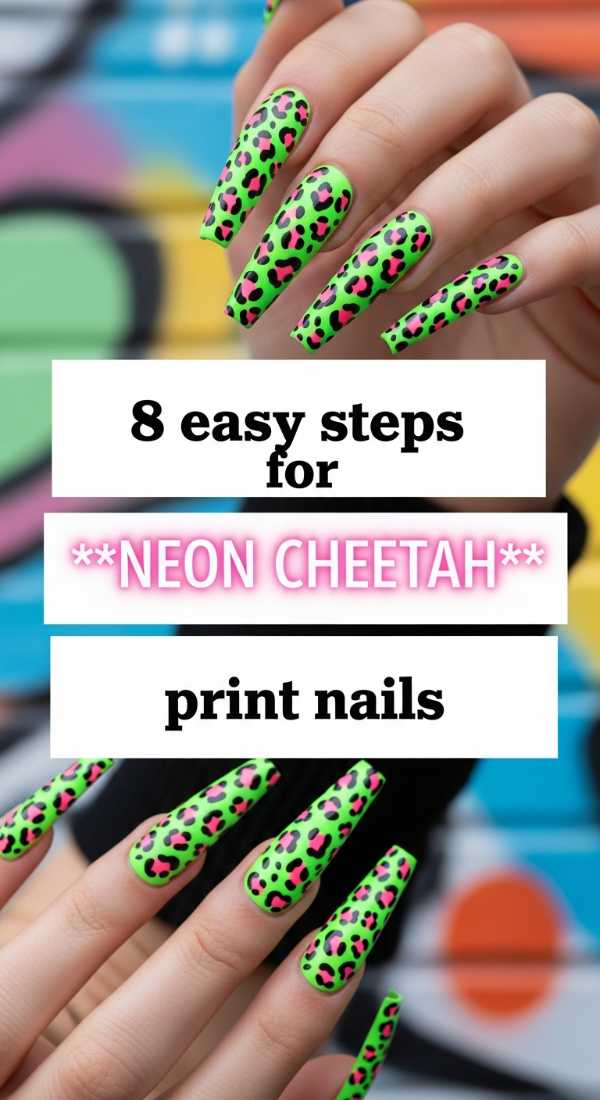
8 Easy Steps for Neon Cheetah Print Nails
Why to love this Design:
For my wild-at-heart loves! Summer 2026 is all about maximalism, and neon cheetah print is the ultimate ‘look at me’ manicure. It’s energetic, fierce, and surprisingly easy to DIY once you know the secret of the ‘C’ shape.
Essential Elements:
- Neon lime or pink base
- Black acrylic paint or liner
- Metallic gold or darker neon for the ‘center’ of the spots
How to Prepare:
- Apply two coats of your chosen neon base and let dry.
- Use a dotting tool to place irregular ‘blobs’ of your accent color across the nail.
- Take your black liner and draw two or three ‘C’ shapes around each blob.
- Don’t be too perfect—the beauty of cheetah print is in its irregularity.
- Add a few tiny black dots in the empty spaces between the spots.
- Wait at least 10 minutes for the art to dry to avoid smearing.
- Apply a generous layer of top coat.
- Cure or air dry until rock hard.
Budget Range
- China Glaze ‘Electric Nights’ Neon – $9
- Black Nail Art Pen – $7
- Seche Vite Top Coat – $10
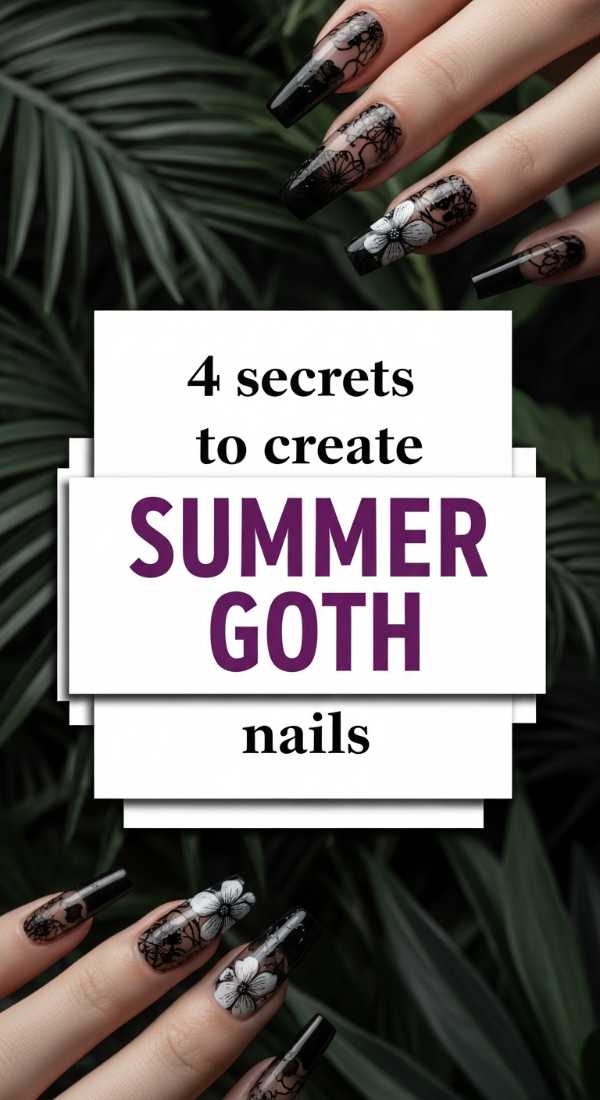
4 Secrets to Create Summer Goth Nails
Why to love this Design:
Who says dark colors are just for winter? Summer Goth is a huge trend this year—it’s about taking those moody blacks and deep purples and making them airy and light. It’s for the girls who love the moon as much as the sun.
Essential Elements:
- Black jelly polish (sheer black)
- Silver star decals
- Glossy top coat
How to Prepare:
- The Jelly Secret: Use a sheer black ‘jelly’ polish instead of an opaque black to keep the look light and ‘squishy.’
- The Starry Night: Add tiny silver holographic stars to mimic a summer night sky.
- The Matte-Gloss Mix: Paint the nail matte but add a glossy French tip for texture.
- The Negative Space: Leave a small half-moon at the base of the nail unpainted for a modern, breathable feel.
Budget Range
- Cirque Colors Black Jelly – $14
- Star Nail Stickers – $4
- Holler and Glow Polish – $6
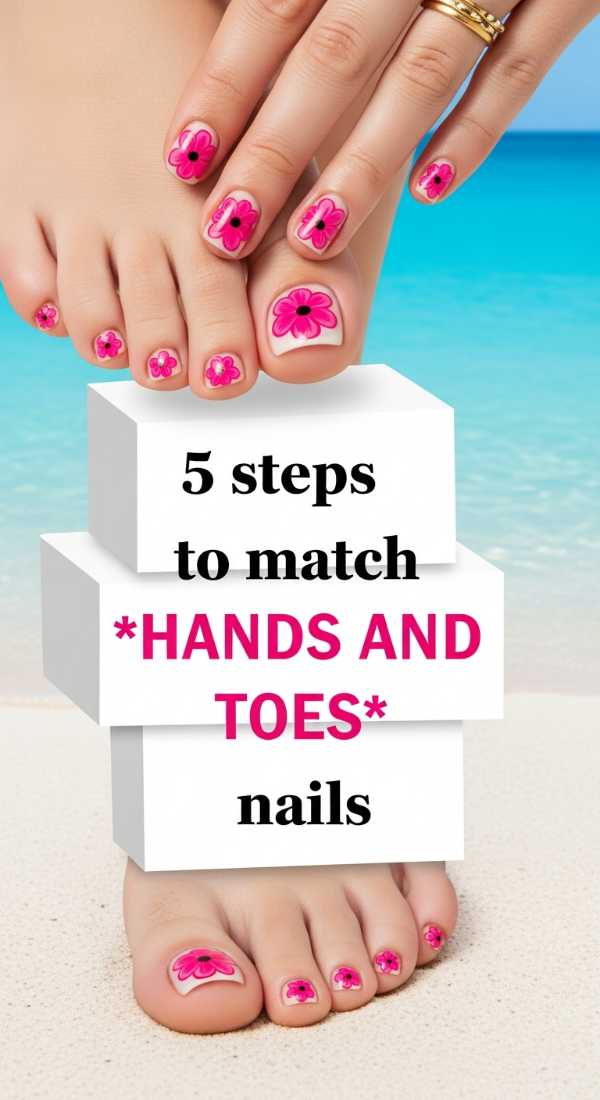
5 Steps to Match Hands and Toes Nails
Why to love this Design:
There is a certain ‘put-together’ magic that happens when your mani and pedi are in total sync. It makes every outfit look intentional and high-end, even if you’re just wearing a bikini and a sarong.
Essential Elements:
- A ‘Universal’ shade (like soft peach or white)
- Matching top coats
- Separator for toes
How to Prepare:
- Pick a ‘hero’ color that complements your summer sandals.
- Perform your pedicure first, as toes take longer to dry and require more focus.
- Use the exact same brand of polish for both to ensure the pigments match perfectly under sunlight.
- Ensure both sets of nails are shaped similarly (e.g., both squoval or both rounded).
- Finish both with the same high-shine top coat to unify the light reflection.
Budget Range
- Olive & June Mani/Pedi Kit – $50
- Matching Essie Set – $20
- Pumice Stone – $3
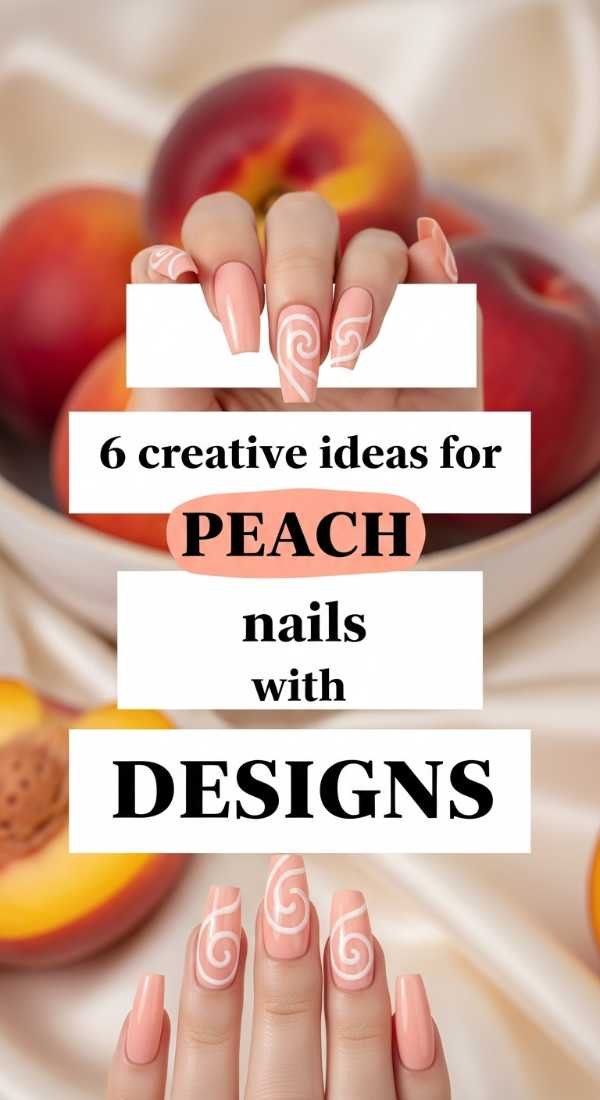
6 Creative Ideas for Peach Nails with Designs
Why to love this Design:
Peach is the sweetheart of 2026. It’s warmer than nude but softer than orange. It feels like a fuzzy summer fruit and looks absolutely stunning against a sun-kissed tan. It’s the ultimate ‘soft girl’ aesthetic.
Essential Elements:
- Peach cream polish
- White floral stickers
- Rose gold glitter
How to Prepare:
- The Velvet Peach: Use a magnetic polish to create a soft, shimmering texture.
- The Fruit Salad: Add a tiny peach decal on the ring finger.
- The Ombre: Blend peach into a creamy white at the tips.
- The Rose Gold Sparkle: Apply a thin layer of glitter over just the tips of the peach base.
- The Floral Accent: Use white daisy stickers for a 70s-inspired summer look.
- The Matte Peach: Remove the shine for a modern, ‘dry’ fruit appearance.
Budget Range
- Lights Lacquer ‘Paper Snow’ – $13
- Peach Polish (various) – $10
- Rose Gold Glitter – $6
3 Expert Tips for DIY Pucci Nails
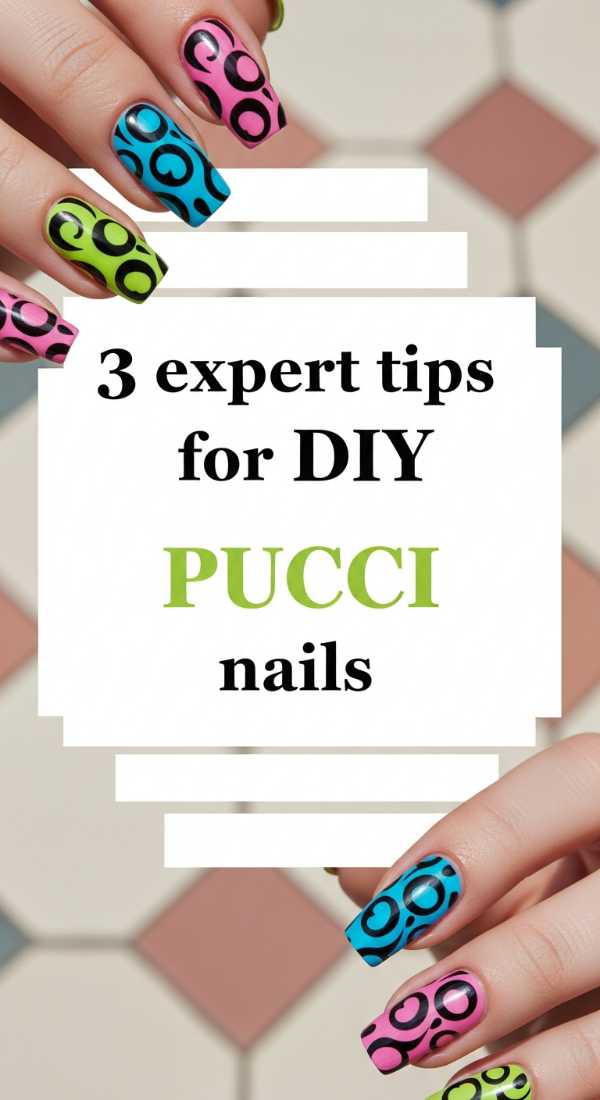
Why to love this Design:
Inspired by the iconic Emilio Pucci prints, this design is high-fashion, retro, and incredibly artistic. It’s like wearing a vintage silk scarf on your nails. It screams luxury and Mediterranean glamour.
Essential Elements:
- At least 4 contrasting colors (mint, pink, purple, white)
- Toothpicks or a very fine detail brush
- Steady hand and patience
How to Prepare:
- The Palette Strategy: Pick colors that are all the same ‘weight’ (e.g., all pastels or all neons) so one doesn’t overpower the others.
- The Swirl Technique: Drop small beads of different colors onto the nail and use a toothpick to gently swirl them into organic, elongated shapes.
- Thin Layers: Pucci designs involve a lot of overlapping; keep each layer paper-thin to avoid a ‘lumpy’ nail finish.
Budget Range
- Multi-color Polish Set – $25
- Professional Detail Brush – $15
- Glass Mixing Palette – $8
Embracing Your Summer Glow
As we wrap up our little nail journey, I want you to remember that there are no real rules in beauty—only feelings. Whether you choose the fierce neon cheetah or the quiet elegance of a peach ombre, let it be a reflection of how you feel inside. Summer is a time for expansion, for joy, and for letting our light shine. I hope these designs make you feel a little more beautiful, a little more confident, and ready to take on every sunset Summer 2026 has to offer. I love you all so much, and I can’t wait to see your beautiful creations!
Summer Nails FAQ
You’ve got questions, my loves, and I’ve got answers! Here are the most-asked things about keeping your summer mani looking fresh.
How do I stop my neon polish from fading in the sun?
Neons are notorious for being light-sensitive! The secret is to use a top coat with UV inhibitors. Also, applying a white base coat under your neon not only makes the color pop but helps maintain its integrity.
How can I make my manicure last longer at the beach?
Sand and salt water are natural exfoliants, which can dull your polish. Always rinse your hands with fresh water after a dip in the ocean, and apply a fresh layer of top coat every 2-3 days to seal the edges.
Is ‘Summer Goth’ really okay for hot weather?
Absolutely! The trick is the ‘jelly’ texture. By using sheer blacks or deep berries that let some light through, the look feels intentional and high-fashion rather than heavy or out of place in the sun.