
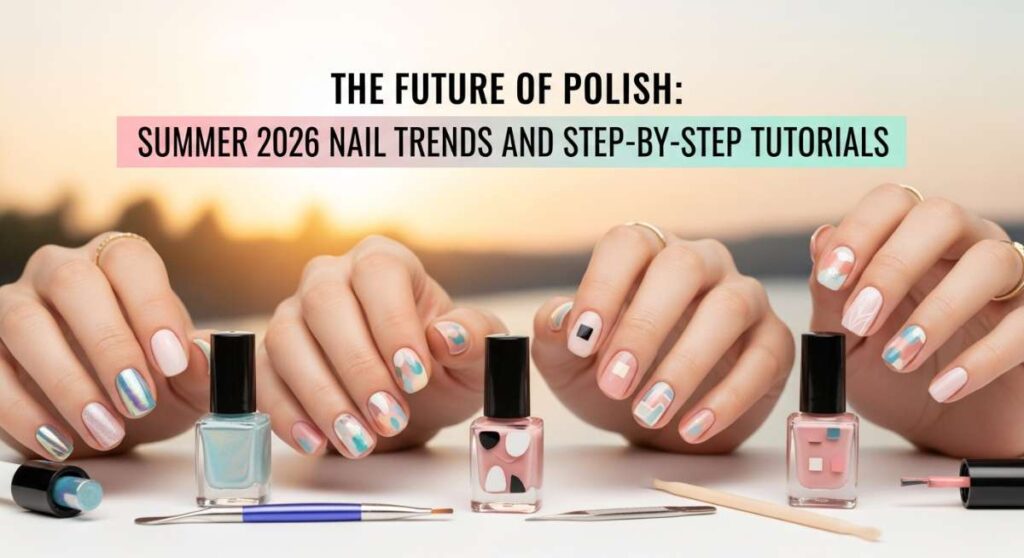
The Future of Polish: Summer 2026 Nail Trends and Step-by-Step Tutorials
Hi my sweet loves! As the soft, golden light of 2026 begins to filter through our windows, I’ve found myself sitting on my porch, sipping a cold lavender matcha and thinking about how much our hands tell our stories. There is something so incredibly intimate about the way we choose to decorate ourselves, isn’t there? It’s like a little love letter to the world every time we reach for a cup of coffee or tuck a stray hair behind our ears.
This summer is all about the ‘Cloud-Soft Glow’—a movement toward textures and colors that feel like a warm hug for your soul. We are moving away from the harsh lines of the past and leaning into ethereal auras, juicy Mediterranean hues, and patterns that spark pure joy. I’ve spent the last few weeks playing with new palettes and textures to bring you my absolute favorite looks for the season ahead. Whether you’re celebrating a milestone or just celebrating the fact that the sun is out, there is a design here just for you.
Grab your favorite file, put on some lo-fi beats, and let’s dive into these beautiful trends together. I’ve broken everything down so we can achieve salon-level magic right from the comfort of our cozy living rooms. Let’s make this summer the most beautiful one yet, one fingertip at a time.
5 Easy Steps to Get Sunset Aura Nails

Why to love this Design:
There is nothing quite like that magical moment when the sun dips below the horizon, painting the sky in shades of dreams. Sunset aura nails capture that exact fleeting vibration, creating a soft, blurred center that looks like your nails are glowing from within. It’s a peaceful, meditative look that reminds us to slow down and breathe in the evening air.
Essential Elements:
- Soft peach base polish
- Hot pink stamping or airbrush polish
- A small makeup sponge
- Glossy top coat
How to Prepare:
- Apply two thin coats of your peach base and let dry completely.
- Apply a small dot of pink polish to the center of your makeup sponge.
- Lightly dab the sponge onto the center of your nail, building the intensity slowly.
- Blend the edges by dabbing with a clean part of the sponge for that ‘aura’ effect.
- Seal the glow with a thick layer of high-shine top coat.
Budget Range
- Essie ‘Peach Side Babe’ ($10)
- OPI ‘Pink Flamenco’ ($11)
- Generic Wedge Sponges ($3)
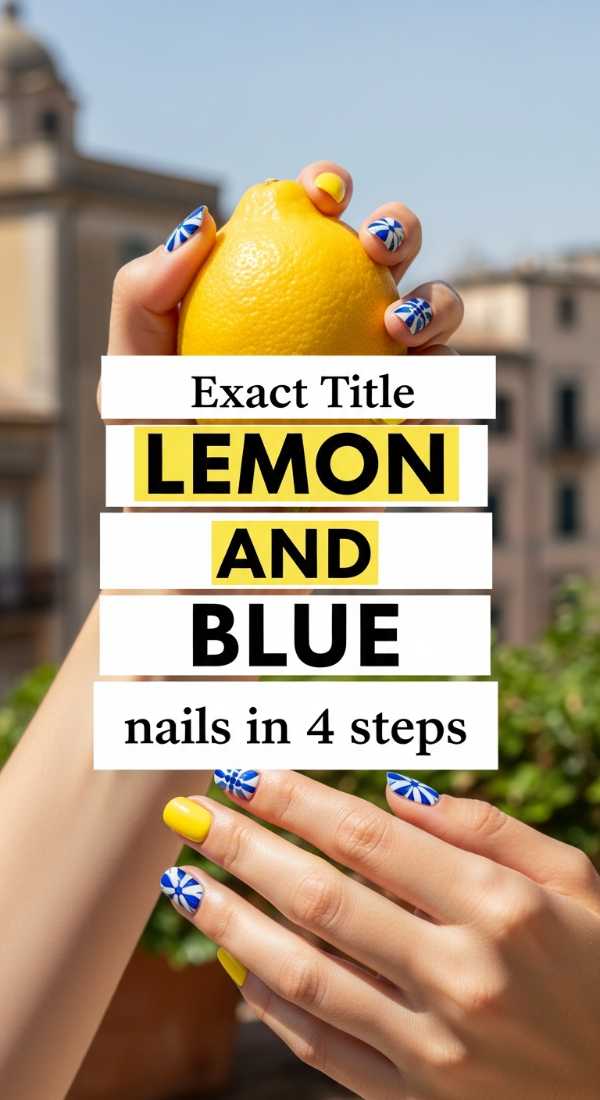
Paint Lemon and Blue Nails in 4 Steps
Why to love this Design:
If I could bottle up the feeling of a summer afternoon on the Amalfi Coast, it would look exactly like this. The contrast between a crisp, cobalt blue and a zesty lemon yellow is so refreshing—it’s like a cold glass of lemonade for your eyes! It’s vibrant, energetic, and perfectly playful for those long weekend beach trips.
Essential Elements:
- Cobalt blue polish
- White base for the lemon accent
- Yellow detail liner
- Fine-tipped nail art brush
How to Prepare:
- Paint all nails except your ring finger with two coats of cobalt blue.
- Paint your ring finger white and let it dry to create a bright canvas.
- Using your yellow liner, paint two small teardrop shapes to form the lemons.
- Add a tiny green leaf or a blue dot detail to tie the whole Mediterranean look together.
Budget Range
- Holo Taco ‘Blue Freezie’ ($14)
- Olive & June ‘Lemonade’ ($9)
- Detail Brush Set ($7)
6 Simple Ways to Style College Graduation Nails

Why to love this Design:
Oh, my darling graduates, you have worked so hard! This design is all about quiet confidence and timeless elegance. We want something that looks stunning in those diploma photos but feels personal to your journey. It’s a sophisticated blend of ‘clean girl’ aesthetics with just a hint of celebratory sparkle to honor your big achievement.
Essential Elements:
- Sheer milky white polish
- Fine gold leaf or gold glitter
- Nail tweezers
- Matte or glossy top coat (your preference!)
How to Prepare:
- Start with clean, buffed nails for a professional finish.
- Apply two coats of sheer milky white to create a soft, clean base.
- While the second coat is tacky, use tweezers to place tiny flecks of gold leaf at the cuticle.
- Focus the gold on just one or two ‘accent’ nails for a refined look.
- Press the gold down gently with a silicone tool or finger.
- Apply top coat to seal your success!
Budget Range
- Gelish ‘Arctic Freeze’ ($13)
- Sally Hansen Gold Leaf Flakes ($8)
- Nail Tweezers ($5)
3 Ways to Achieve Summer Goth Nails

Why to love this Design:
Who says the dark side doesn’t love the sun? Summer goth is all about ‘moody but airy.’ We’re using sheer blacks and deep plums but keeping them lightweight and glossy so they don’t feel too heavy in the heat. It’s for my loves who find beauty in the shadows even when the sun is at its brightest.
Essential Elements:
- Sheer ‘jelly’ black polish
- Silver chrome powder
- Non-wipe top coat
How to Prepare:
- Apply two coats of black jelly polish to get a ‘smoked glass’ effect.
- Apply a non-wipe top coat and cure/dry.
- Rub silver chrome powder onto the tips for a ‘molten metal’ French effect or leave them sheer and moody.
Budget Range
- Cirque Colors ‘RRR’ Jelly ($12)
- Mooncat ‘Silver’ Chrome ($15)
- LED Lamp for Gel ($25)
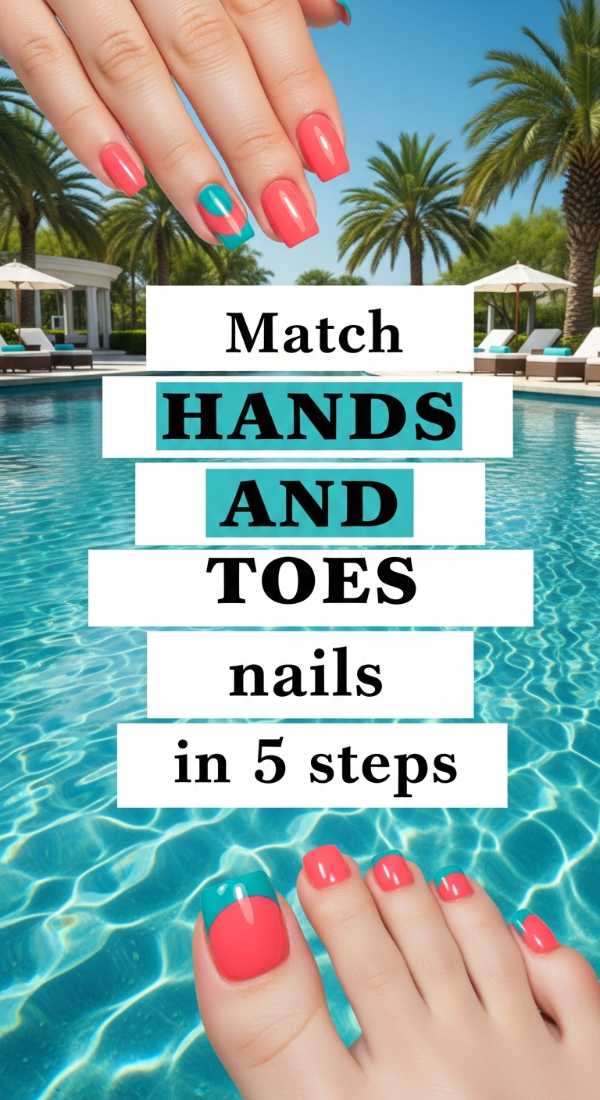
Match Hands and Toes Nails in 5 Steps
Why to love this Design:
There is a specific kind of peace that comes from being perfectly coordinated, isn’t there? This isn’t about being ‘matchy-matchy’ in a boring way, but rather creating a cohesive color story that flows from your fingertips to your toes. It makes every outfit feel intentional and every step feel like a stroll on the runway.
Essential Elements:
- A ‘hero’ color (like coral or seafoam)
- Matching toe separators
- Consistent top coat
- Conditioning cuticle oil
How to Prepare:
- Prep both hands and feet at the same time to ensure even texture.
- Apply your base coat to all twenty nails first.
- Apply two thin layers of your hero color, starting with toes then moving to fingers.
- Ensure the thickness of the polish is consistent across both for color depth.
- Finish with a high-gloss top coat and oil your cuticles for that ‘just left the spa’ shine.
Budget Range
- Zoya Summer Collection ($12 each)
- Orly Bonder Base Coat ($10)
- Cuccio Cuticle Oil ($7)
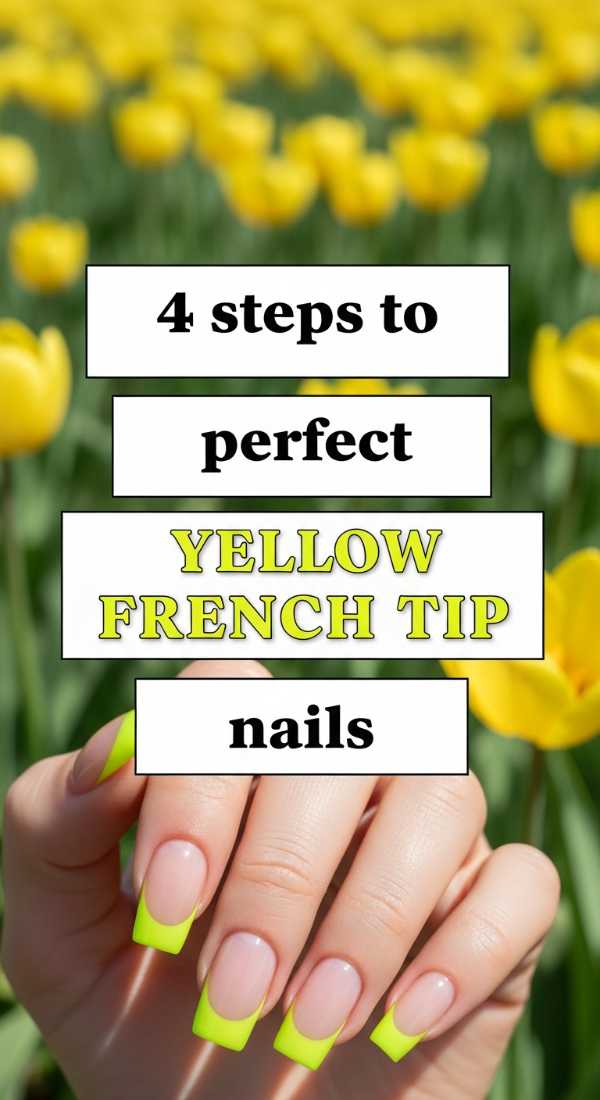
4 Steps to Perfect Yellow French Tip Nails
Why to love this Design:
The classic French manicure gets a 2026 makeover with a burst of sunshine! Switching out the white for a bright canary yellow is such a simple way to modernize your look. It’s cheerful, chic, and looks absolutely incredible against a summer tan. It’s like wearing a little bit of happiness on your hands.
Essential Elements:
- Nude or pale pink base polish
- Vibrant yellow polish
- French tip guides or a steady hand
- Clean-up brush
How to Prepare:
- Apply your nude base and let it dry completely (this is crucial!).
- Place your tip guides slightly below the free edge of your nail.
- Swipe the yellow polish across the tips in a smooth motion.
- Carefully peel the guides back while the polish is still slightly damp for a crisp line.
Budget Range
- Lights Lacquer ‘Paper Snow’ ($13)
- Londontown ‘Cheerio’ ($16)
- French Tip Vinyls ($5)
Design Your May Birthday Nails in 3 Minutes

Why to love this Design:
For my May darlings, your month is all about blooming and growth. This design uses rapid-dry technology and floral decals to give you a celebration-ready look in the time it takes to boil a kettle. It’s lush, emerald-inspired, and full of life—just like you!
Essential Elements:
- Deep emerald green polish
- Floral nail stickers (peonies or lilies)
- Fast-dry top coat
How to Prepare:
- Apply one thick coat of emerald green to all nails.
- While the polish is setting, press a floral sticker onto your ring and thumb nails.
- Swipe on a fast-dry top coat to lock everything in before you head to your party!
Budget Range
- ILNP ‘停 (Stop)’ Emerald ($10)
- Manucurist Floral Stickers ($12)
- Seche Vite Fast Dry Top Coat ($9)
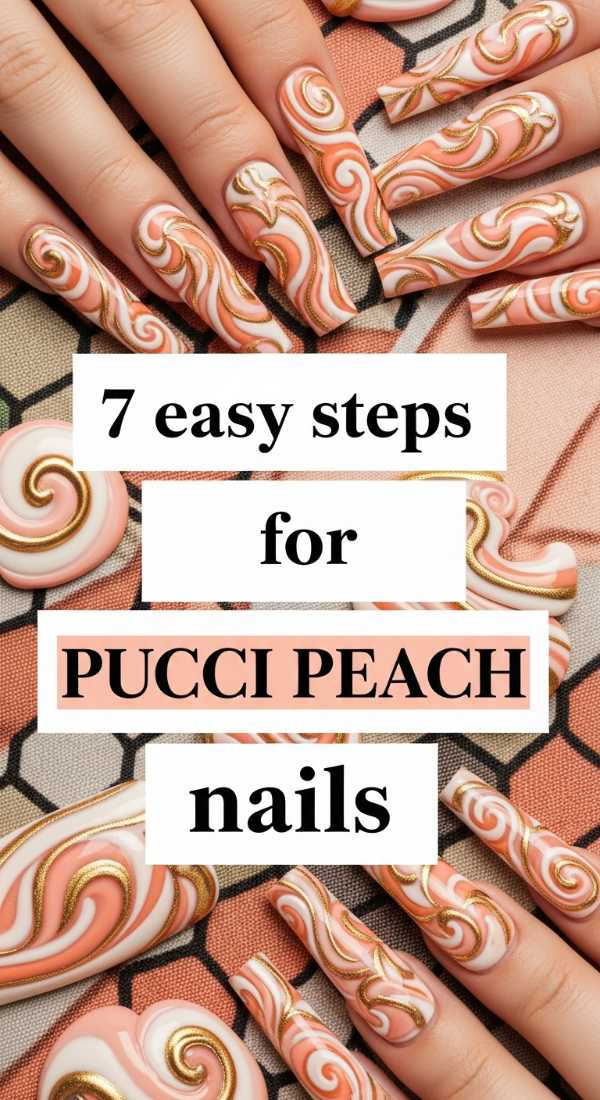
7 Easy Steps for Pucci Peach Nails
Why to love this Design:
We are going full retro-glam! Inspired by the iconic Pucci prints, this look uses swirling shades of peach, cream, and mint to create a psychedelic summer vibe. It feels high-fashion but is actually very forgiving to create because the swirls are meant to be organic and free-flowing.
Essential Elements:
- Peach, Cream, and Mint polishes
- Toothpick or marbling tool
- White base coat
How to Prepare:
- Apply white base coat to make the colors pop.
- Place random dots of peach, cream, and mint onto the wet nail.
- Use your toothpick to gently swirl the colors together in an ‘S’ shape.
- Don’t over-mix, or it will turn muddy!
- Clean the edges with a brush dipped in remover.
- Let dry for longer than usual due to the polish thickness.
- Seal with a smoothing top coat.
Budget Range
- Deborah Lippmann Peach ($20)
- Butter London Mint ($18)
- Dotting Tool Set ($6)
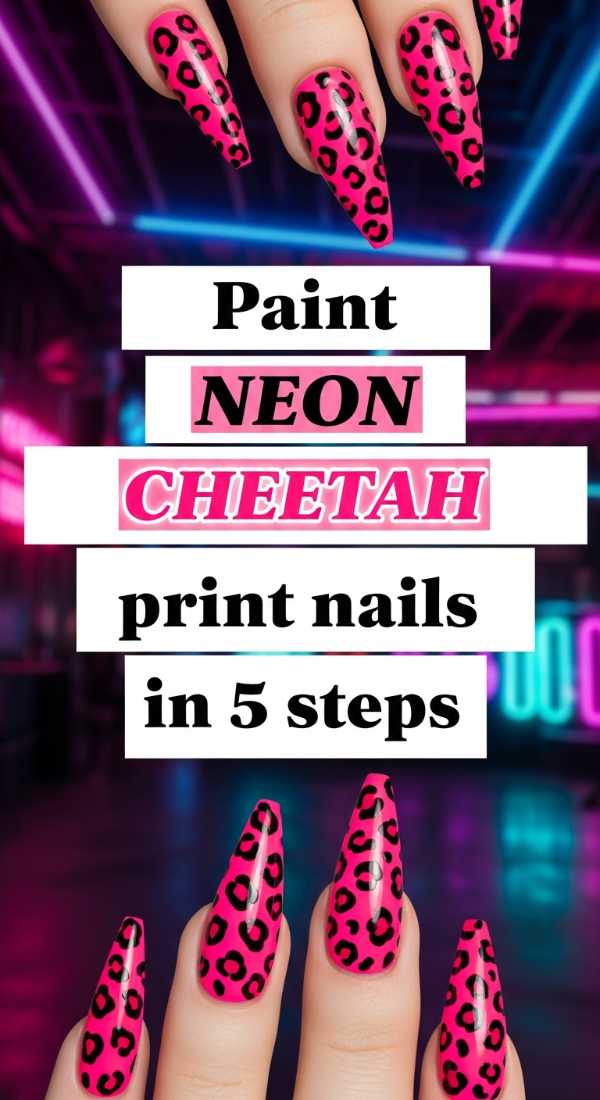
Paint Neon Cheetah Print Nails in 5 Steps
Why to love this Design:
Sometimes, we just need to let our wild side out! Neon cheetah is for the days when you’re feeling bold, loud, and completely unapologetic. By using neon pinks or oranges as the base, we take a classic animal print and turn it into a futuristic summer statement that glows under blacklight.
Essential Elements:
- Neon pink polish
- Black nail art pen
- Gold metallic polish
How to Prepare:
- Apply two coats of neon pink.
- Add random ‘blobs’ of gold polish across the nail.
- Use the black pen to draw two ‘C’ shapes or brackets around the gold blobs.
- Add a few stray black dots in the empty spaces to fill the pattern.
- Top coat to protect your masterpiece.
Budget Range
- Color Club Neons ($8)
- Kiara Sky Black Liner ($12)
- Metallic Gold Sharpie (Nail Safe) ($5)
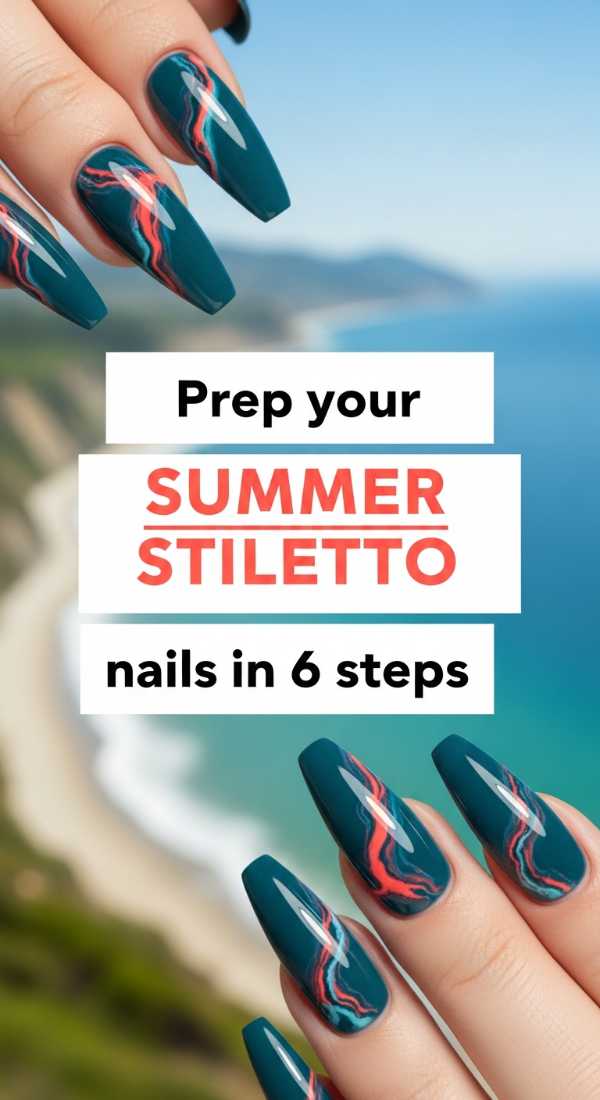
Prep Your Summer Stiletto Nails in 6 Steps
Why to love this Design:
The stiletto shape is the ultimate power move. It elongates the fingers and gives you a fierce, sophisticated silhouette. This summer, we are focusing on the ‘natural stiletto’—shaping your own nails (or extensions) to be sharp but elegant, prepared with a glass-like finish that reflects the sun.
Essential Elements:
- Heavy-duty nail file
- Glass nail file for finishing
- Nail strengthener
- Buffing block
How to Prepare:
- Mark the center point of your nail tip with a tiny dot of polish.
- File from the side walls toward that center point at an angle.
- Repeat on the other side until you have a sharp point.
- Use the glass file to smooth the edges so they don’t snag on your summer sundresses.
- Buff the surface to a high shine.
- Apply two coats of strengthener to prevent snapping.
Budget Range
- Flowery Professional Files ($4)
- CND RescueRXx ($20)
- Mont Bleu Glass File ($12)
Conclusion: Your Summer, Your Canvas
As we wrap up this little journey through the trends of 2026, I want you to remember that there are no rules in beauty—only feelings. Whether you choose the quiet elegance of graduation gold or the wild energy of neon cheetah, the most important thing is that you feel like the most authentic version of yourself. Your nails are just a small extension of the beautiful soul you already are. So go ahead, darlings, take some time for yourself this weekend. Put on that polish, let it dry, and step out into the sunshine with your head held high. I can’t wait to see what you create!
Frequently Asked Questions
Q: How can I make my summer manicure last longer in the pool?
A: Chlorine can be tough on polish! Always apply a fresh top coat every 2-3 days and try to rinse your hands with fresh water after getting out of the pool to remove chemicals.
Q: Are stiletto nails practical for gardening or beach sports?
A: They are definitely more for ‘glam’ than ‘grit’! If you’re very active, I recommend a shorter ‘almond’ shape which gives a similar look but is much sturdier for outdoor summer fun.
Q: What is the best way to remove neon polish without staining?
A: Neons are notorious for staining! Always use a high-quality base coat first. When removing, soak a cotton ball in acetone, let it sit on the nail for 30 seconds, and then swipe away in one motion rather than rubbing.